Last updated: 2026-03-31
Oracle Database Discovery on Windows and \*nix Targets
Note: Available only for new signups after the 31 March, 2026 release. If you signed up earlier, refer to the existing ITAM documentation.
Oracle database discovery detects and catalogs database instances running on Windows and \*nix targets. The process returns instance details, connection information, and schema data.
In addition to standalone instances, the discovery engine supports Oracle RAC clustered environments. It retrieves data about the RAC configuration, associated databases, and the physical server nodes running the RAC software.
Prerequisites
You need the following before the installation:
Supported Oracle database versions
The following Oracle versions are supported on Windows and \*nix:
Device42 also supports discovery for Oracle RAC clustered database environments on Windows and \*nix targets. Discovery returns data about the RAC configuration, the RAC database, and the nodes (physical servers) running the RAC software. You can run discovery against one or more nodes in the Oracle RAC to return information about all connected nodes.
Freshservice requires the use of sudo for Oracle discoveries to mitigate the risk of lockout.
Database-level permissions
The discovery account requires read or view permissions for the following system views:
To get information about pluggable databases (PDBs) within an Oracle container database (CDB), the following permission configurations are required for non-DBA users:
ALTER USER c##<username>
SET
CONTAINER\_DATA = ALL
CONTAINER = CURRENT;
System-level permissions
Ensure the discovery engine has shell access to run necessary OS level commands. The discovery process requires shell access to perform the following tasks:
/usr/bin/cat: /dbprog/oracle/product/19.3.0.0.26/network/admin/tnsnames.ora
oracle -c 'lsnrctl status'
\# Basic Oracle Discovery Commands
Cmnd\_Alias DEVICE42\_ORACLE = \
/usr/bin/ps -ef, \
/usr/bin/pwdx \*, \
/usr/bin/su - oracle -c lsnrctl status, \
/usr/bin/su - oracle -c echo "select \* from product\_component\_version;" \| sqlplus -L -S -M "HTML ON" / as sysdba, \
/usr/bin/cat /etc/oratab, \
/usr/bin/su - oracle -c /u01/app/19.1.0.0/grid/bin/lsnrctl status, \
/usr/bin/su - oracle -c echo "select \* from product\_component\_version;" \| /u01/app/19.1.0.0/grid/bin/sqlplus -L -S -M "HTML ON" / as sysdba
\# Oracle RAC Additional Commands
Cmnd\_Alias DEVICE42\_ORACLE\_RAC = \
/usr/bin/su - oracle -c /u01/app/19.1.0.0/grid/bin/olsnodes -c, \
/usr/bin/su - oracle -c /u01/app/19.1.0.0/grid/bin/olsnodes -n -i -s, \
/usr/bin/su - oracle -c /u01/app/19.1.0.0/grid/bin/olsnodes -l -n -i -s, \
/usr/bin/su - oracle -c /u01/app/19.1.0.0/grid/bin/srvctl config scan\_listener, \
/usr/bin/su - oracle -c /u01/app/19.1.0.0/grid/bin/srvctl config scan, \
/usr/bin/su - oracle -c /u01/app/19.1.0.0/grid/bin/crsctl stat res -t \| grep \*, \
/usr/bin/su - oracle -c srvctl config database -d \*
\# Grant these permissions to your Device42 discovery user:
\# username ALL=(ALL) NOPASSWD: DEVICE42\_ORACLE, DEVICE42\_ORACLE\_RAC
Set up an Oracle discovery job
Create a discovery job to authenticate to both the host server and the Oracle database.
1. Go to Admin > Asset Management > Scan and discover and click the Discovery Jobs tab.
2. Select Hypervisors/\*nix/win Autodiscovery from the list of discovery jobs and click Add new.
3. Select a Windows or \*nix job type based on your target platform.
4. Enable the Collect database server information toggle.
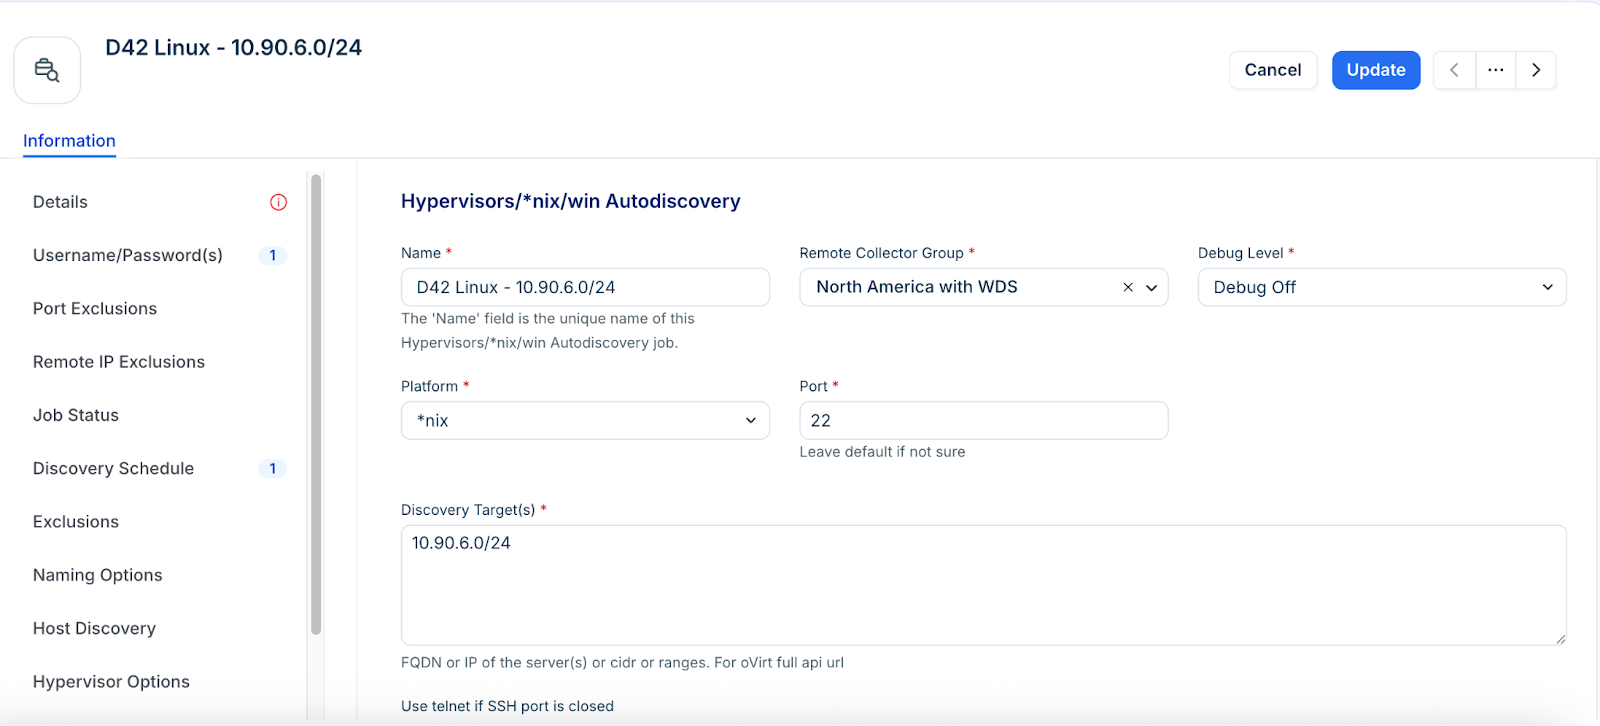
5. Fill out both sets of credentials:
- Database Username / Password(s): Credentials to authenticate to the Oracle database.
- Discovery Target(s) Credential(s): Credentials to authenticate to the host server.
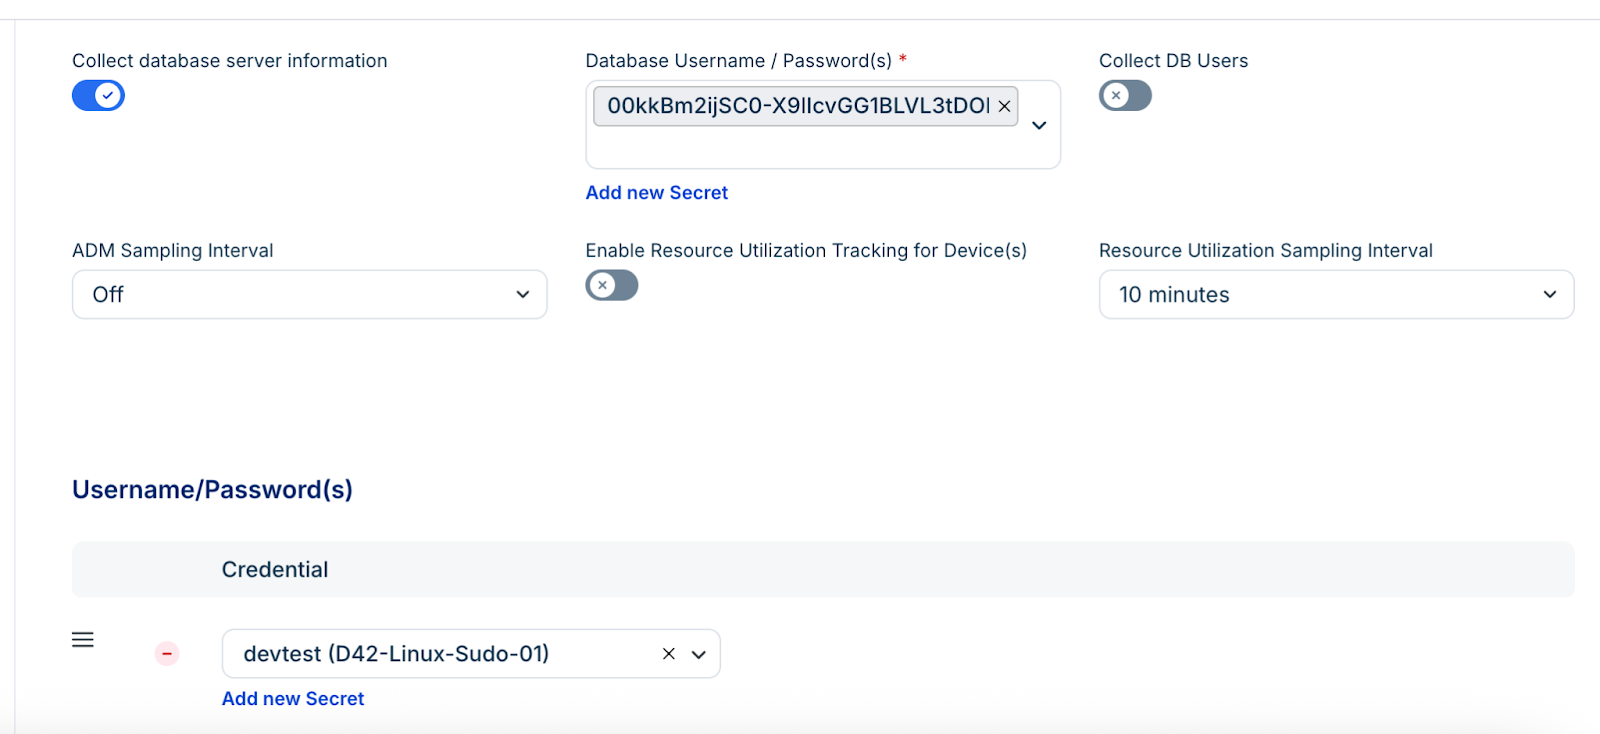
Note: You can enter multiple credentials in a preferred order. The job tries each credential in order and stops at the first successful authentication. Subsequent runs start with the last successful credential.
6. Click Save.
7. Click Run Now on the job details page to test the connection.
View discovery results
Locate and analyze the details of your discovered Oracle instances through the application components or device records.
Application components
View the high level service details and dependency maps for your Oracle environment.
1. Navigate to Applications > Application Components.
2. Search for Oracle to filter the list.
3. Click a database name to view its specific details. You can access Server Instances, Dependency Chart, Impact Chart, or Impact List.
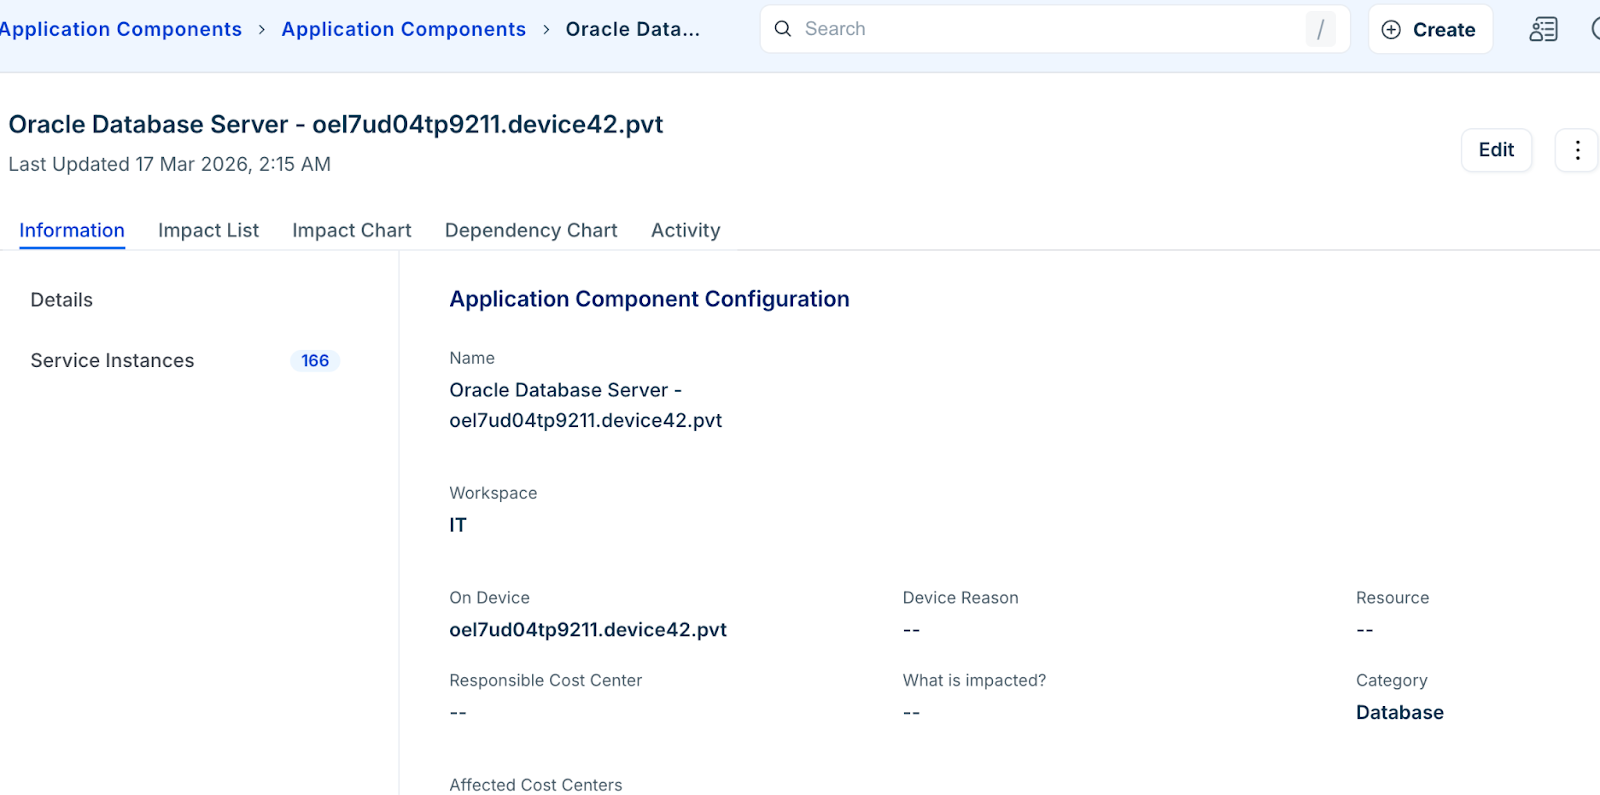
For example, you can view the Oracle database dependency chart. 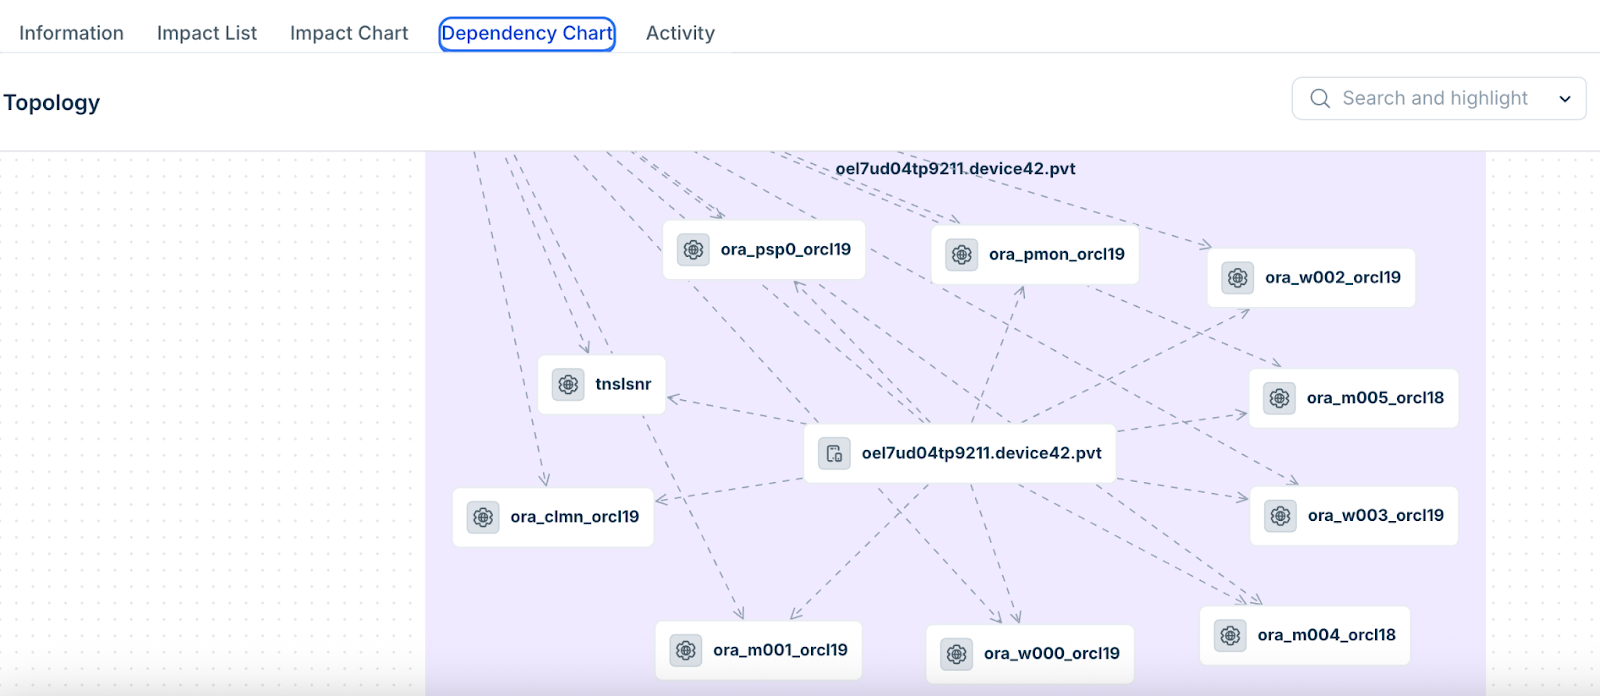
CDB and PDB matching process
An Oracle database instance is created for each Container Database (CDB) and Pluggable Database (PDB), even when multiple databases share the same listener endpoint.
During discovery, the system attempts to match incoming database resources (CDBs or PDBs) with existing records using their endpoint information.
- All associated child databases (PDBs) are retrieved.
- Each child database is evaluated for a name match with the incoming resource.
- If a match is found, the existing database instance is updated with the new data.
- The system attempts to match the resource with the root database (CDB).
- The resource is processed as a new database instance.
Special Cases
Oracle user and schema details
Review how user data is mapped within the inventory.
Oracle users that have at least one associated database object are discovered, ignoring empty user schemas. As a result, some Oracle database connections may not appear under specific user schemas. These database connections map to the main database instance instead of a specific Database/Schema resource. Key details like the user login and schema names are still preserved in the database instance details.
Oracle user and schema details
Review how user data is mapped within the inventory.