Last updated: 2025-11-20
The Freshservice Integration with Workday enables organizations to connect their HR system of record with their IT service management platform for seamless employee lifecycle automation. This integration ensures that updates to employee information in Workday are instantly reflected in Freshservice. Real-time synchronization automates critical employee workflows through Journeys, enabling organizations to deliver personalized experiences.
Understand the basics of Connector Apps
To set up and use the Workday integration effectively, review the following resources:
Workday Connector App Overview App
The overview describes the scope and installation prerequisites.
Scope of Workday Connector App
The Workday Connector App supports a defined set of use cases using the available triggers and actions in Freshservice. The following Workday Objects are under the scope:
| Recipe | Description |
| Freshservice User Sync | Keeps Freshservice requester data and Workday worker data in sync automatically. |
| Workday to Freshservice Journey Request Onboarding - Creation & Updation | Automates employee onboarding in Freshservice based on new hire information from Workday. |
| Workday to Freshservice Journey Request Offboarding \- Creation & Updation | Automates employee offboarding in Freshservice based on employee data from Workday. |
| Freshservice Journey Request Onboarding to Workday\`\- Creation & Updation | Automates employee onboarding in Workday based on new or updated journey requests in Freshservice. |
| Freshservice Journey Request Offboarding to Workday\`\- Creation & Updation | Automates employee offboarding in Workday based on new or updated journey requests in Freshservice. |
| Workday Widget (non-editable) | Retrieves real-time employee information from Workday and displays it directly in Freshservice. |
Prerequisites to install the app
Ensure you have the following for integration:
- Account Admin role across the account - IT Agent role across workspaces
- Oauth Authentication type - Tenant ID - WSDl URL - Client ID - Client secret - Refresh token - Authorization URL - Token URL
Note: To generate the Workday credentials, refer to How to authenticate and connect Workday app with Freshservice.
Required Pr
Understand Workday Connector
The Workday Connector enables Freshservice to communicate with Workday through predefined triggers and actions.
Trigger
A trigger determines the event that initiates a recipe. The triggers covered under the scope of the integration are:
Use the trigger New or Updated journey requests that is designed to fetch any newly created or updated journey requests from Freshservice based on the journey's configuration.
New/updated business object (Business Object - Workers/Contingent Workers)
Use this trigger to initiate a recipe in real time whenever a new employee is created or an existing employee record is updated in Workday. This is recommended for workflows that require immediate synchronization, such as onboarding, off-boarding, or updating employee details in Freshservice.
Grant required permissions
To fetch employee data, the Integration System User (ISU) and API client in Workday must have the necessary permissions.Ensure the following access is granted in Workday:
These permissions must be included in the Domain Policy Security Group. To fetch additional information (for example, organizational data), update the corresponding domain policies in Workday.
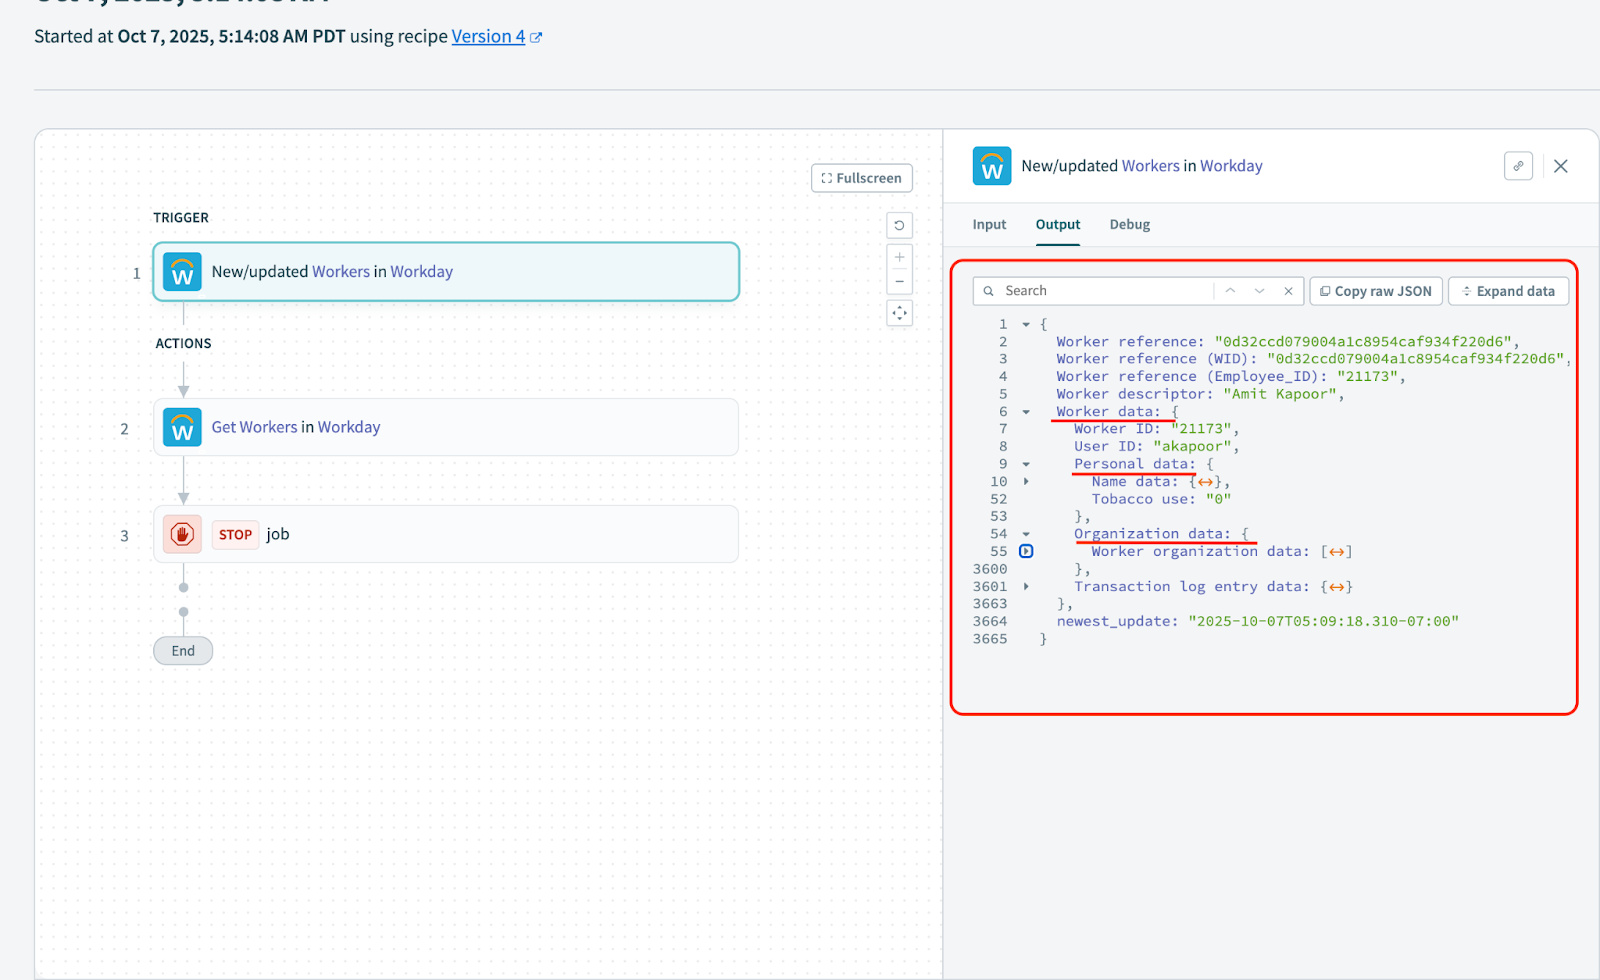
Set up the Trigger
Once the trigger is selected, the set up of the trigger needs to be completed.
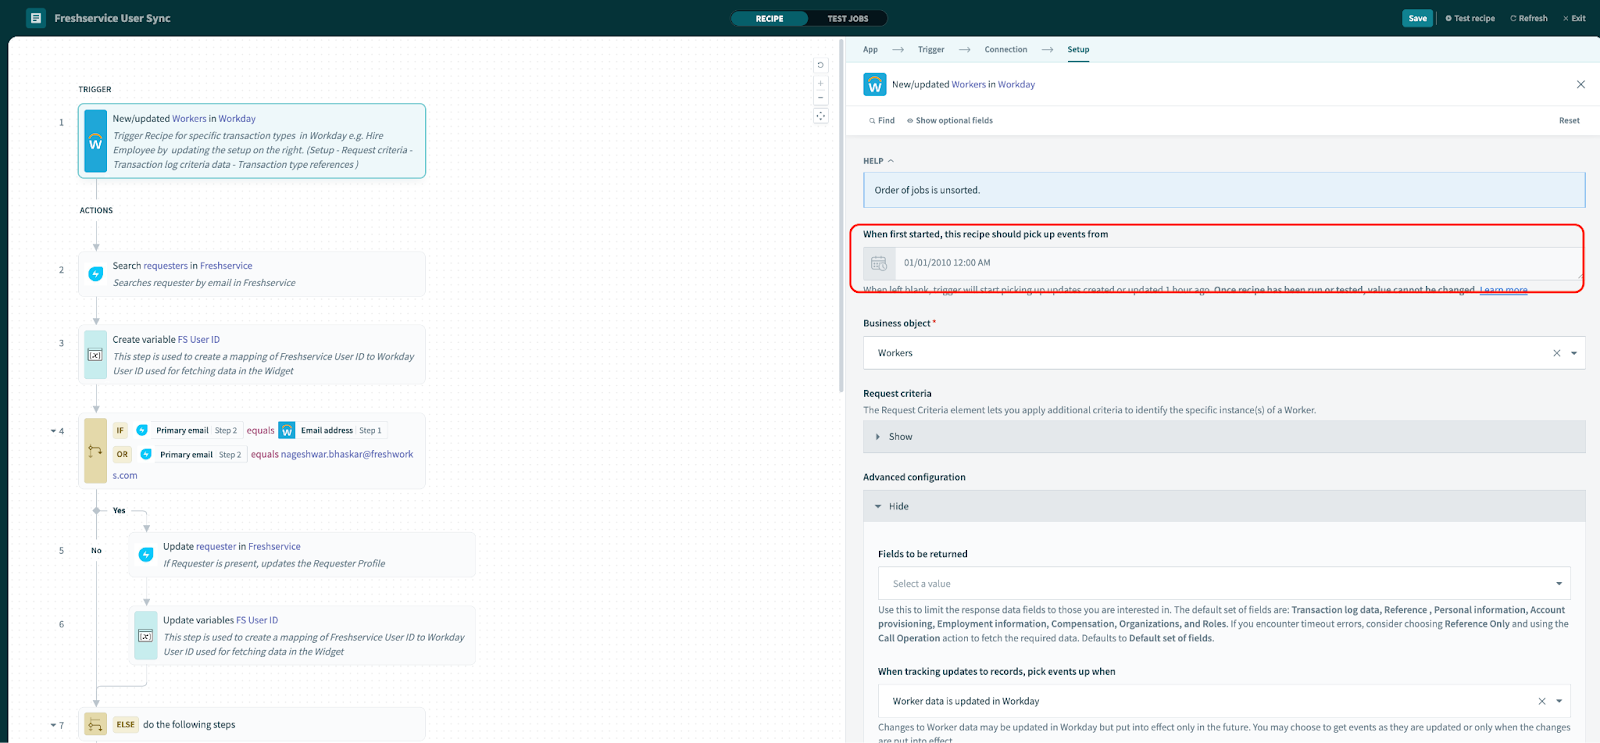
1. Select the Time Period
- Leave blank to sync only future updates.
- Enter a timestamp to pull historical data from Workday. 2. Define Request Criteria
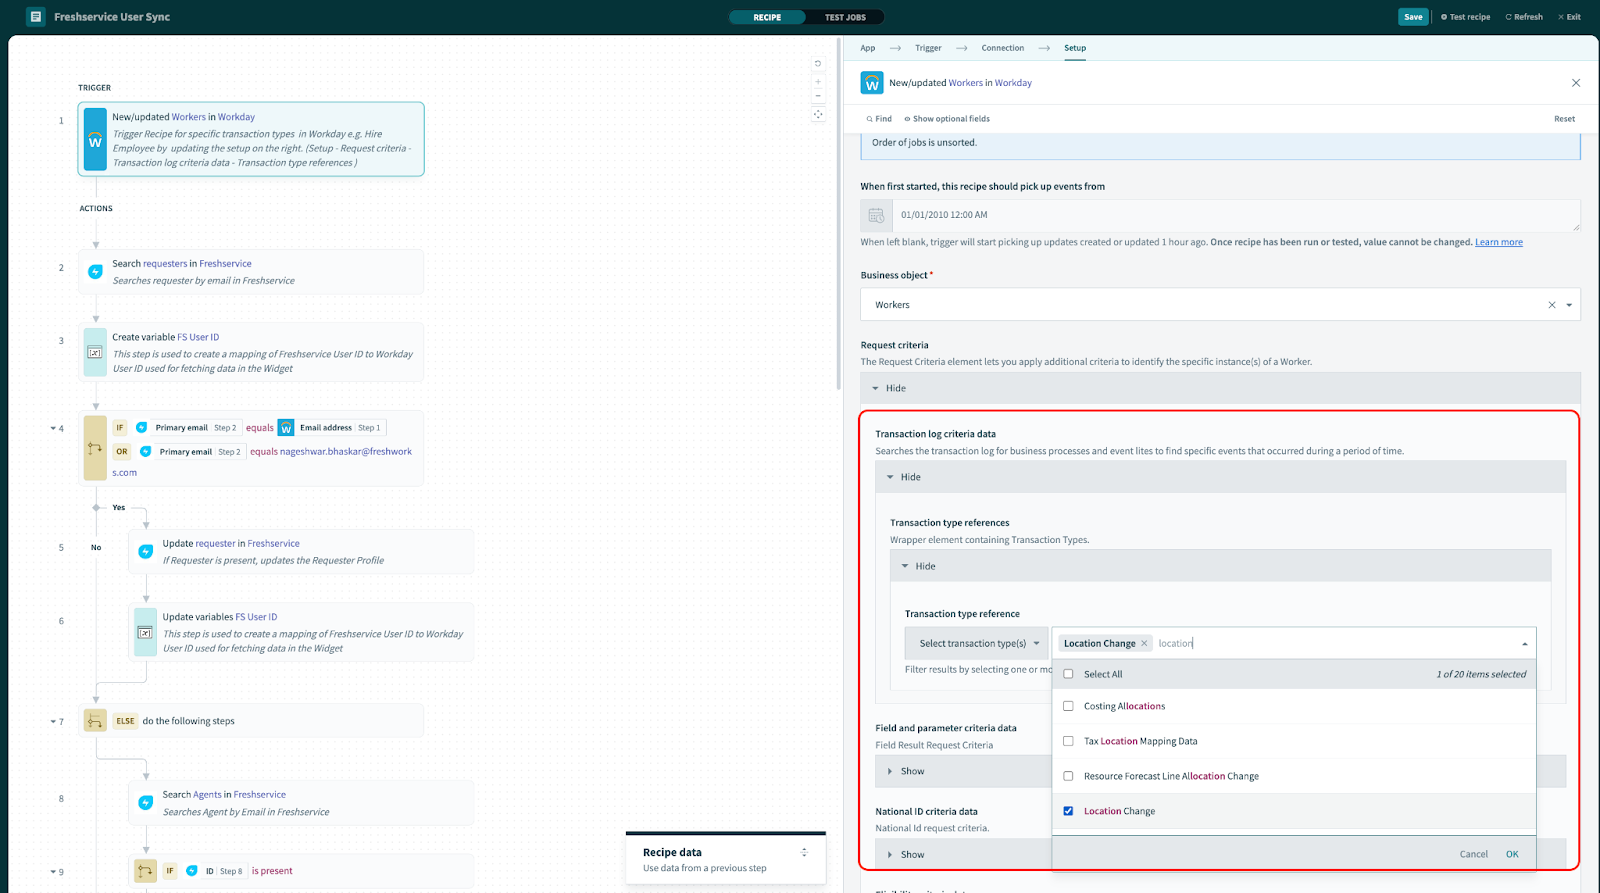
- Go to Request Criteria → Transaction Log Reference → Transaction Type Reference.
- Select the transaction types (Workday events) that should initiate the recipe.
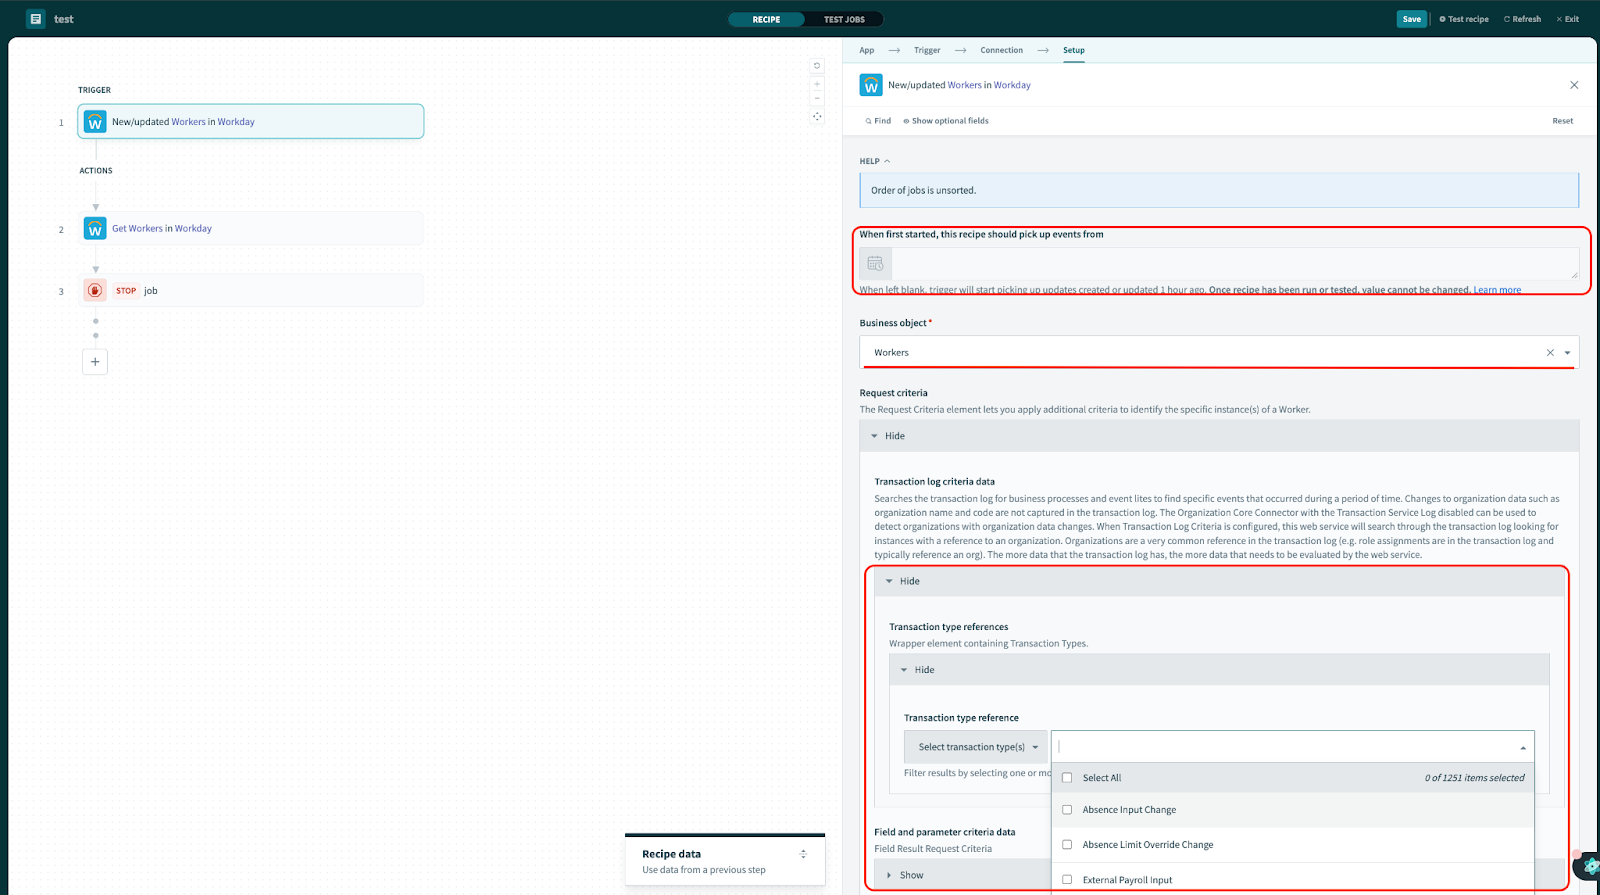
- If Transaction Type Reference is not visible, expand Optional Fields and enable it.
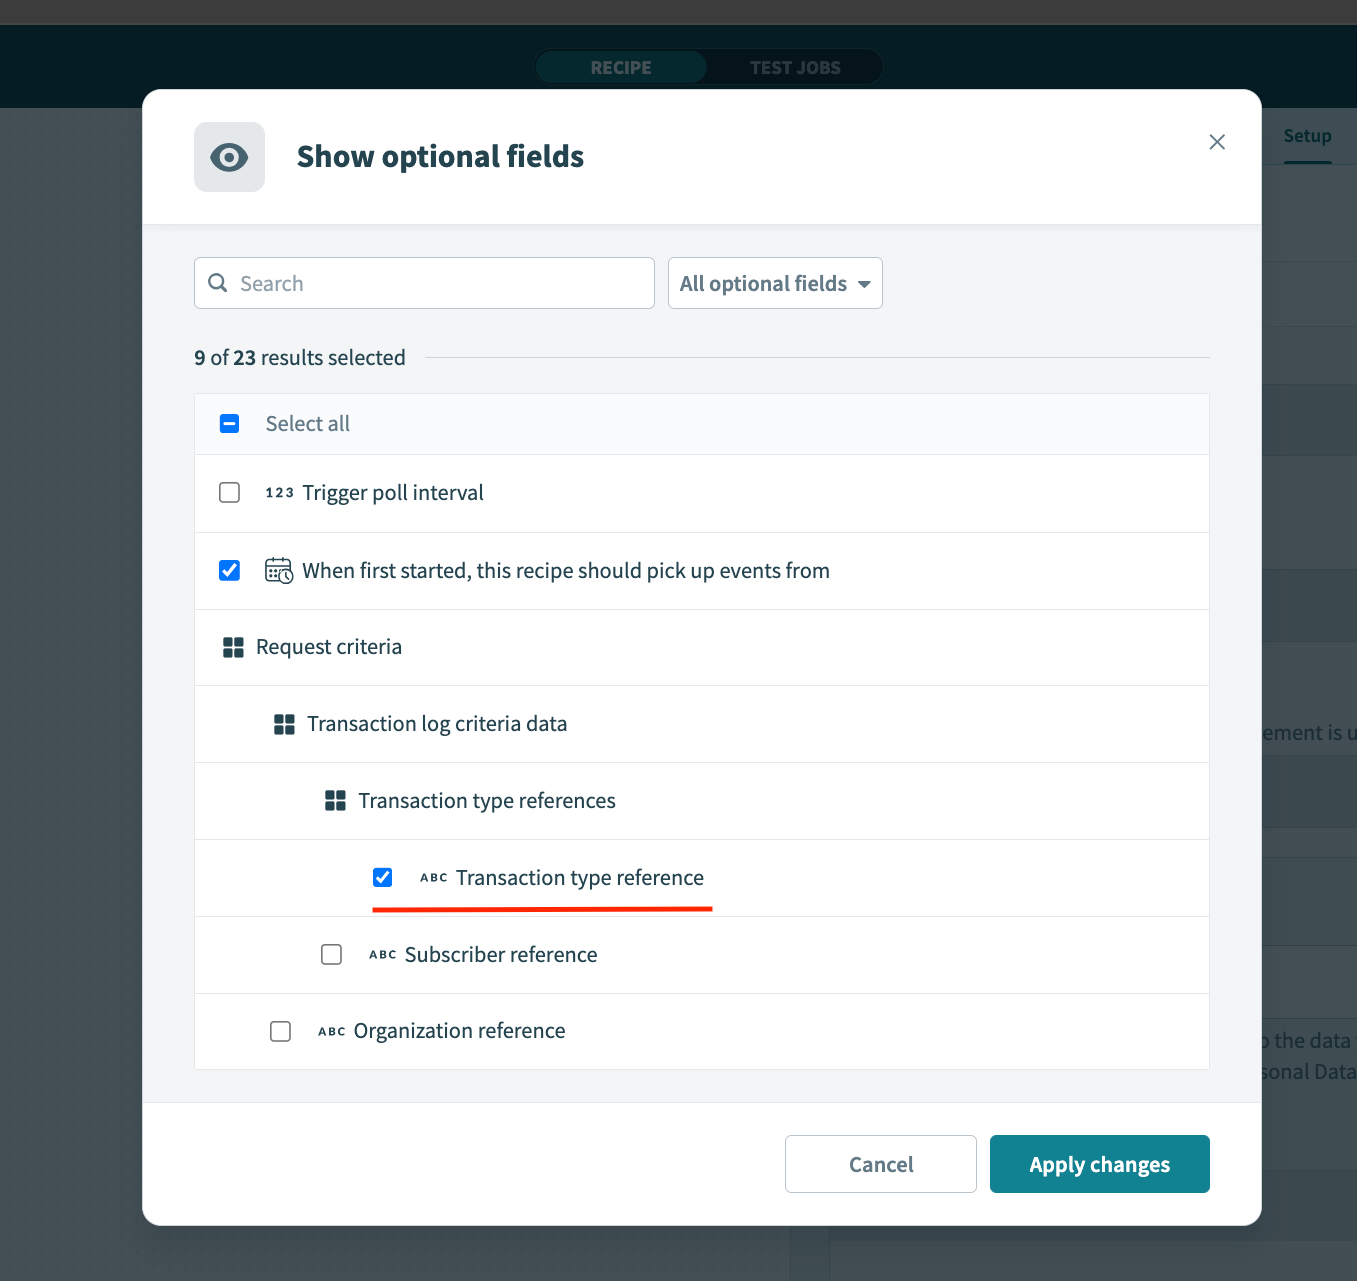 3. Include Additional Data (Optional)
- Add Additional Data Options such as Organization Reference to include more data fields in the recipe. 4. Filter by Employee Status
- Add a condition to process the recipe only for active employees.
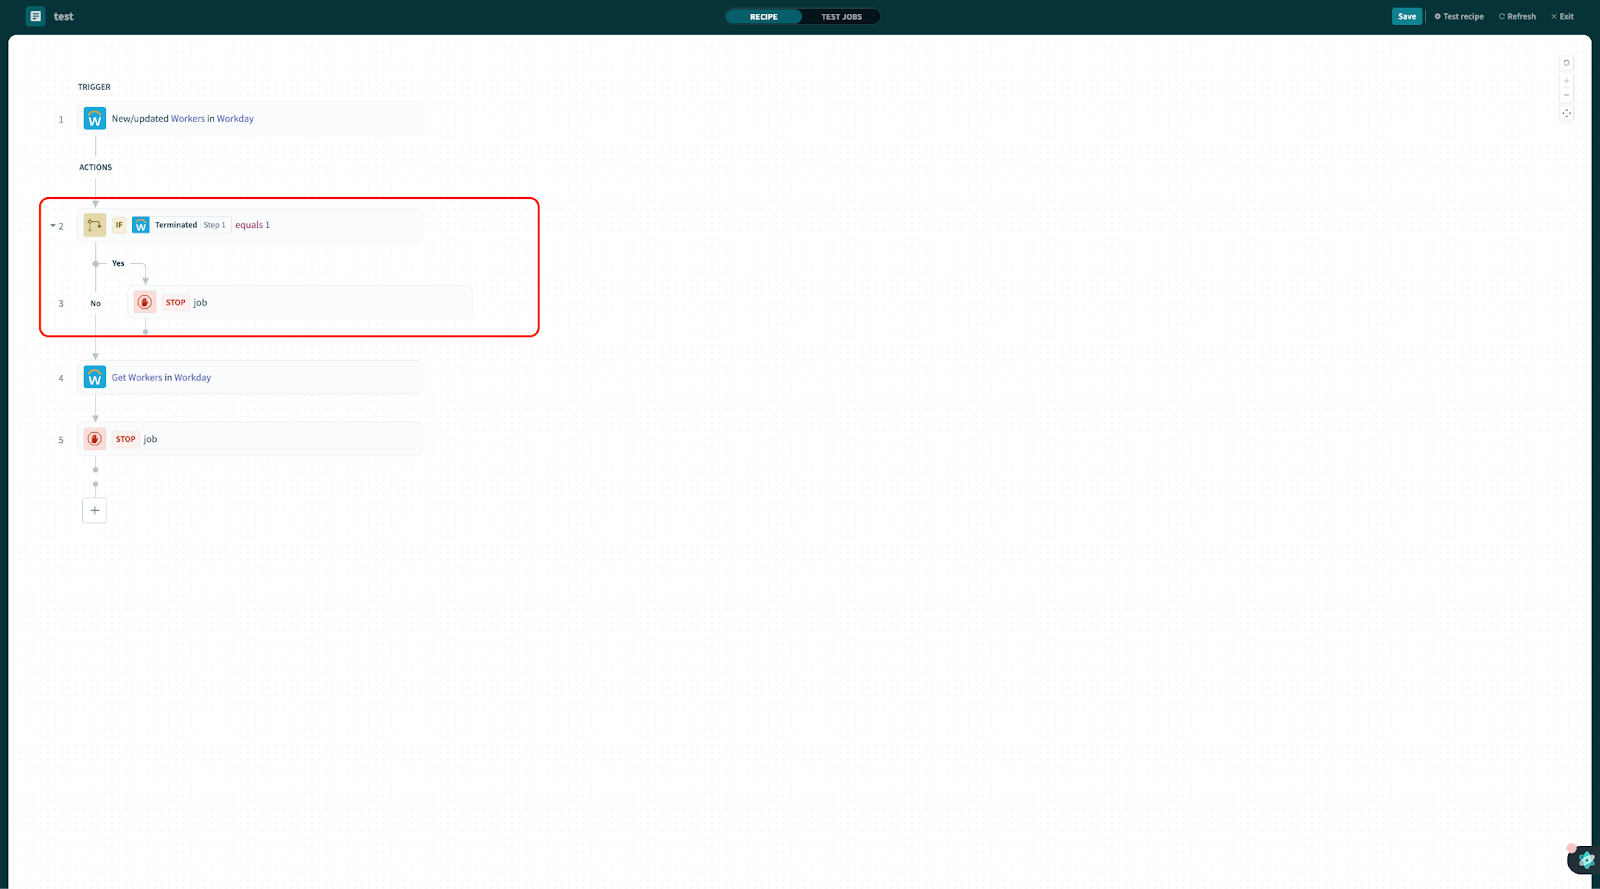 5. Trigger on Specific Events
- To limit triggers to onboarding or offboarding, select the relevant transaction types configured in your Workday instance.
- Your Workday Administrator can provide the exact transaction names.
Set Up the Scheduled Report Fetch Trigger
Use the Scheduled Report Fetch (batch) trigger in the following scenarios:
Additional information
You can refer to the following Workato documentation for more information:
How to install and configure Workday Connector App
You can manage the following actions in the Workday Connector App.
Install the app
To install the app:
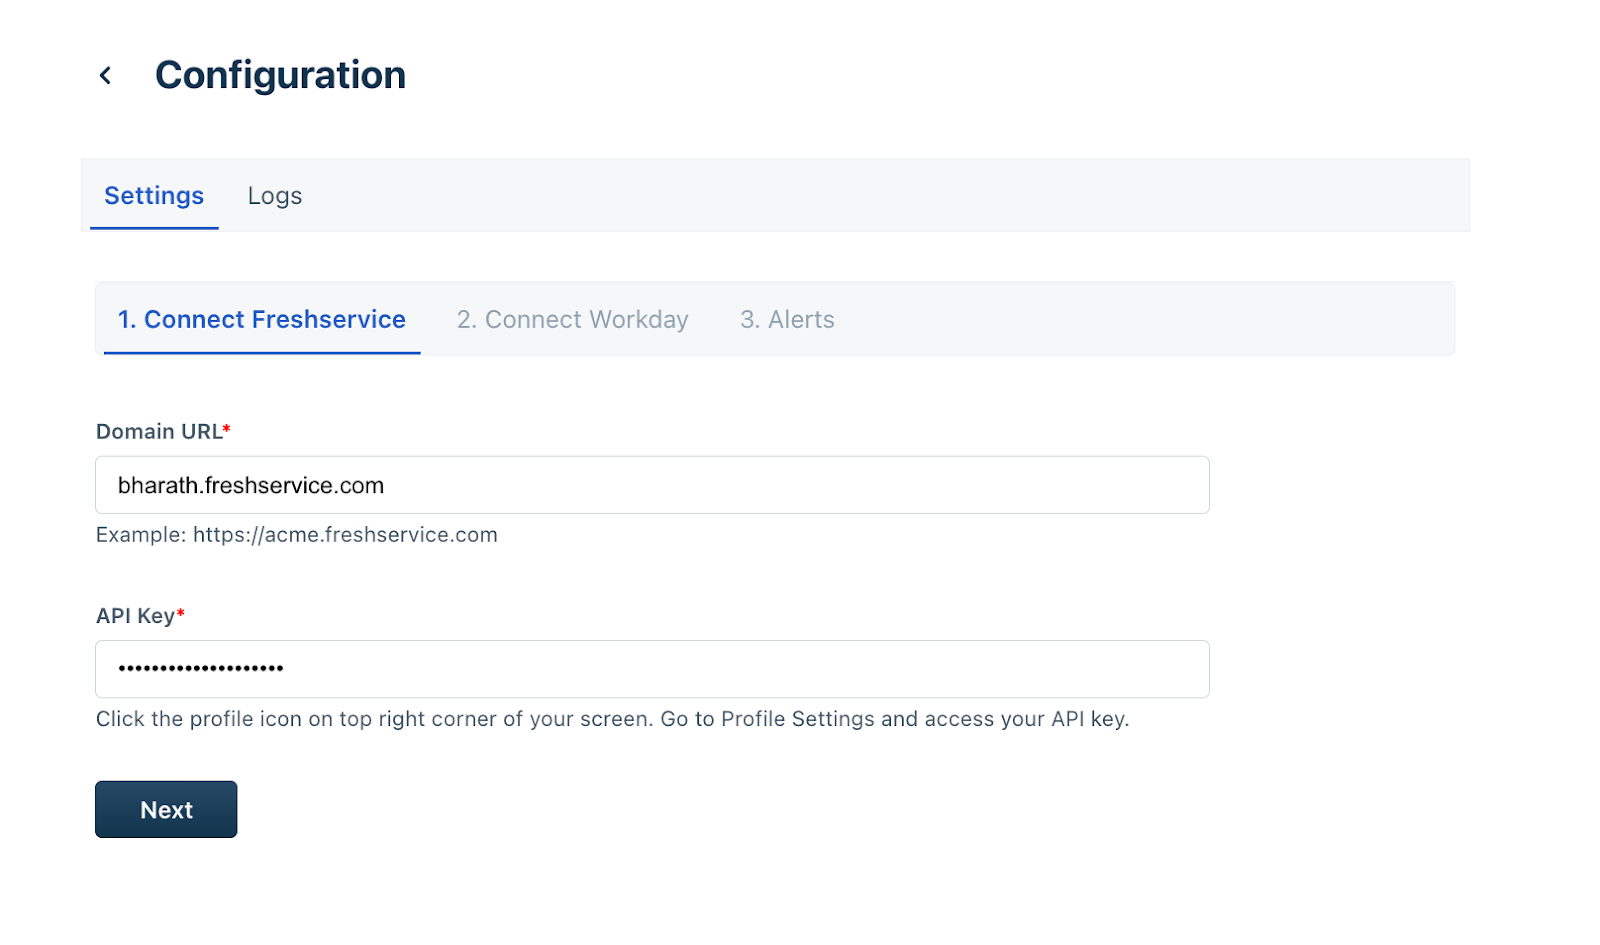
1. Go to Admin \> Automation & Productivity \> Extensibility \> Connector Apps. 2. Select Workday Connector App from the Connector Apps list. 3. Click Install. The Configuration page opens. 4. Ensure that your Freshservice API Key is enabled before initiating the installation. Click Next.
Note:The Domain URL and API Key fields are auto-populated.
5. Enter the relevant Workday connection details in the Authentication type, Tenant ID, WSDL URL, Client ID, Client secret, Refresh token, Authorization endpoint, Token endpoint, Workday tenant timezone, Advanced XML payload for multiple ID values (under Advanced settings), and Workday web services version fields.
Then, click Connect.
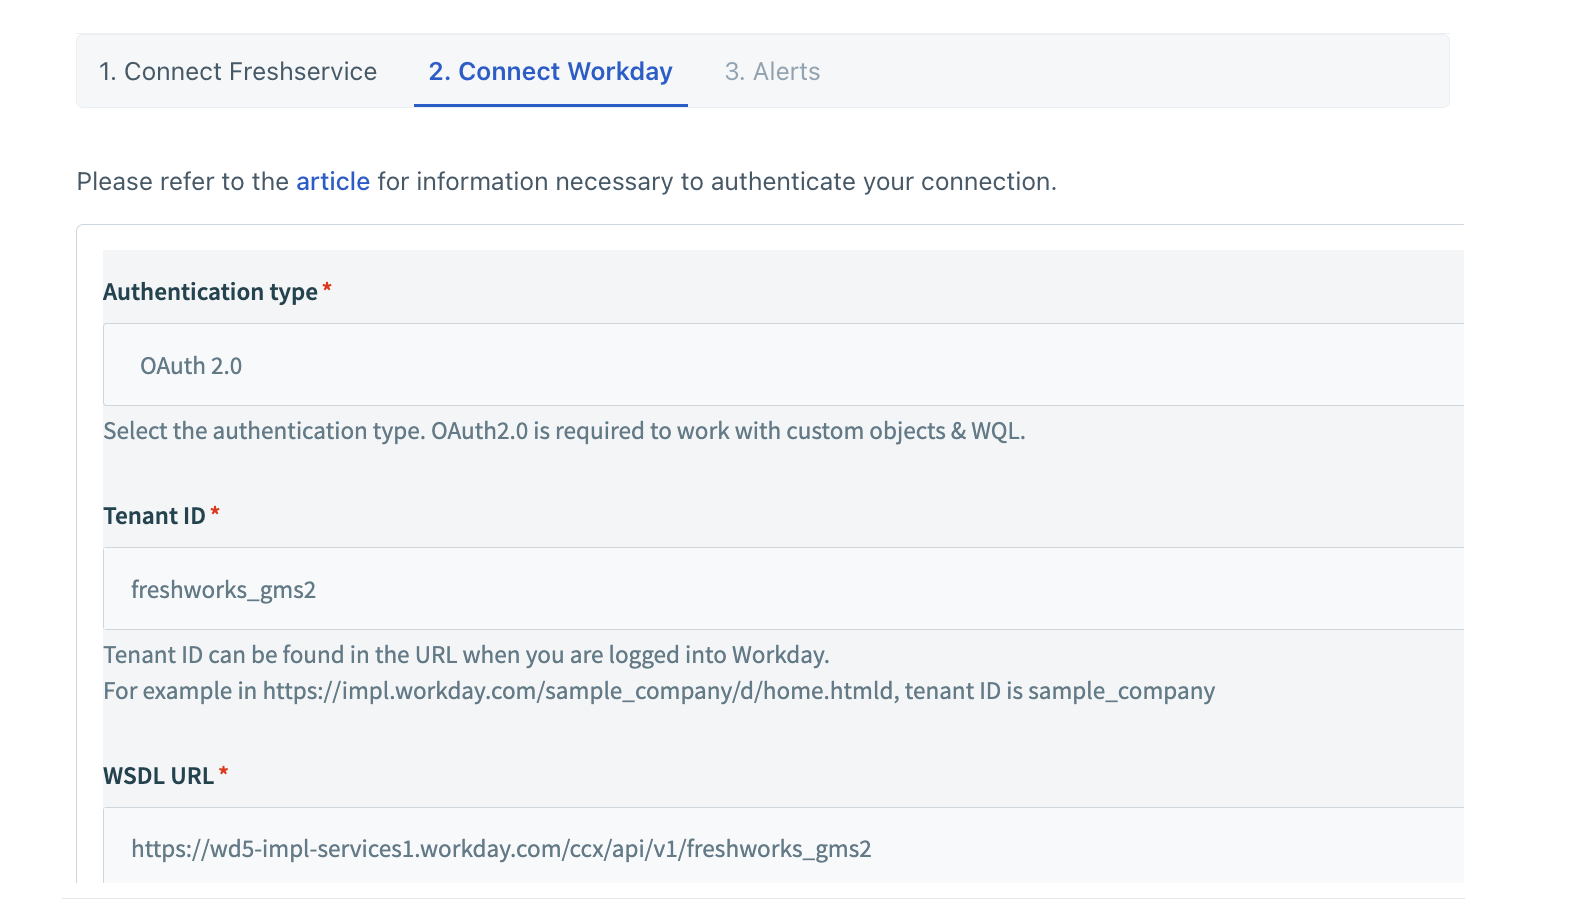
6. (After the connection is established successfully) Click Next on the Connect Workday tab.
7. Enable the Alerts toggle, if you want to receive email notifications on any errors that are detected within the configured recipes.
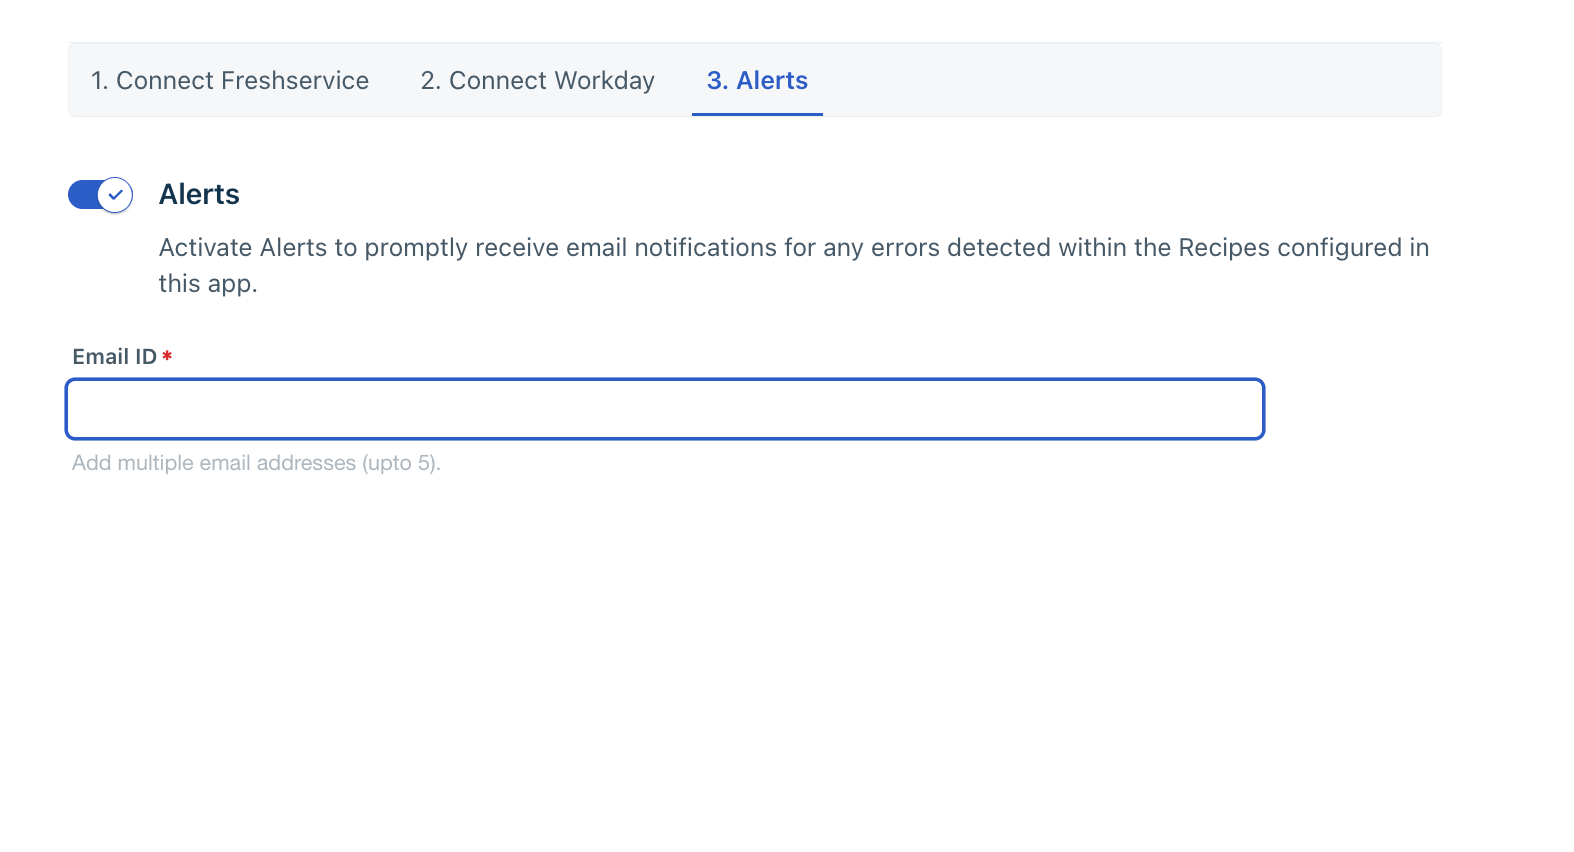
8. Enter the recipient email id(s) in the Email ID field.
9. Click Install.
View dashboard
The Overview page of a connector app includes the Dashboard and Dependency graph tabs.
The Dashboard helps you understand the total number of tasks you've consumed (this is the basis for your app usage billing), and also provides a consolidated graph view of the number of recipes, successful jobs, and failed jobs for all recipes.
To view the dashboard and dependency graph:
1. Go to Admin > Automation & Productivity > Extensibility > Connector Apps.
2. Click Configure on the Workday Connector App tile. The Overview page opens.
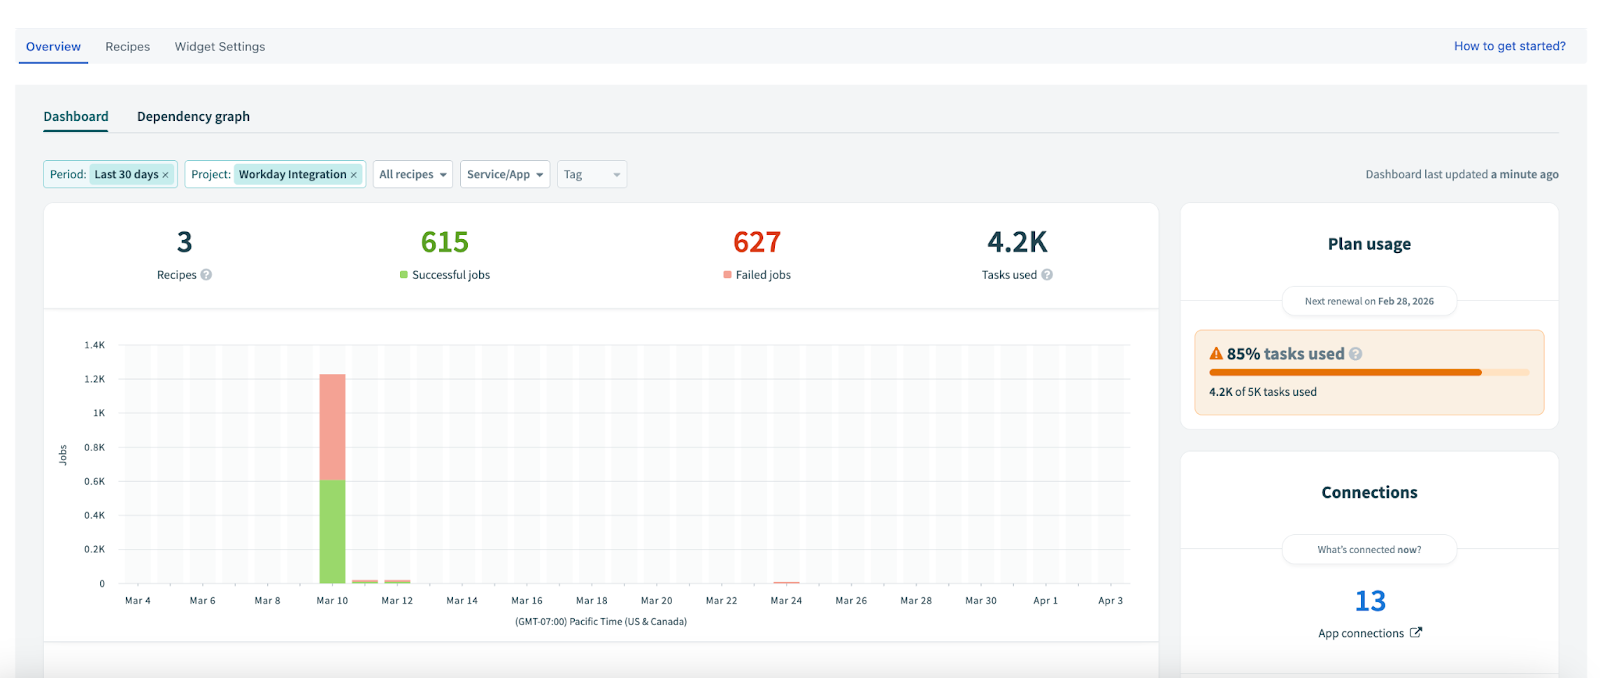
Note: Use the Period, Project, All recipes, Service/App, and Tag filters to modify the graph view. You can also sort and view the required data in a tabular format (below the graph), and view your plan usage and connection details on the Dashboard tab.
3. Go to the Dependency graph tab to view the dependencies in a grid layout.
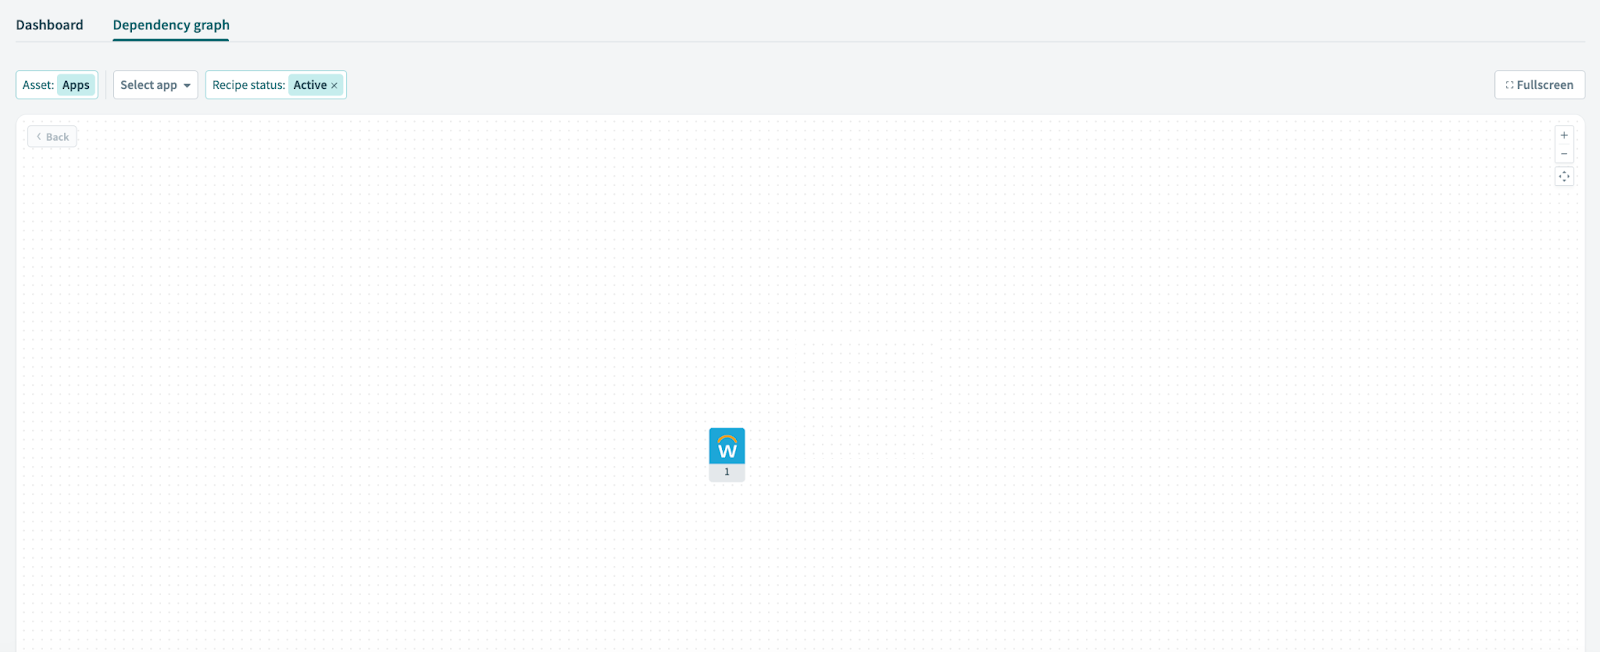
4. Click the Workday icon to view all dependencies, such as Connection, Recipe, API Endpoint, and so on.
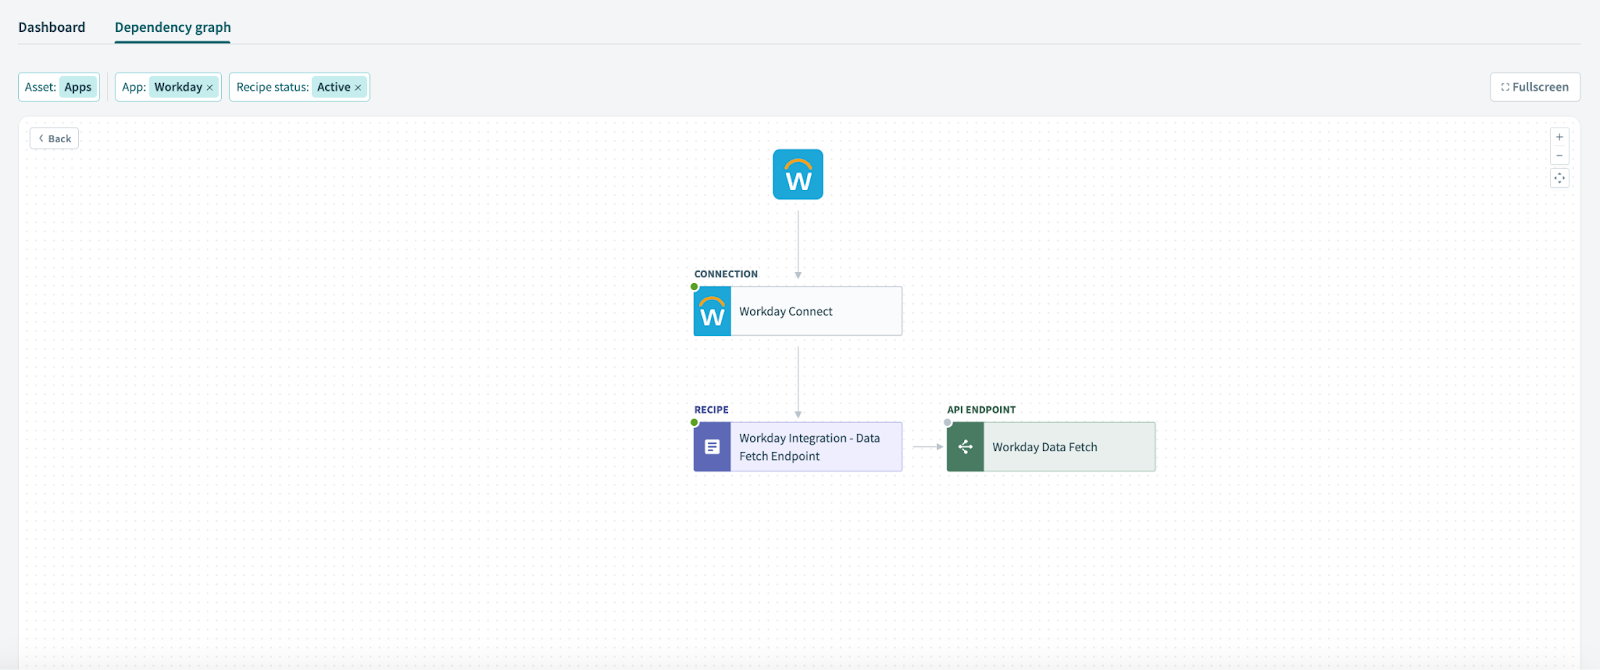
Note: Use the Asset, App, and Recipe status filters to modify the grid view.
Set up available recipes
To set up the available recipes:
1. Go to Admin > Automation & Productivity > Extensibility > Connector Apps.
2. Click Workday Connector App. The Overview page opens.
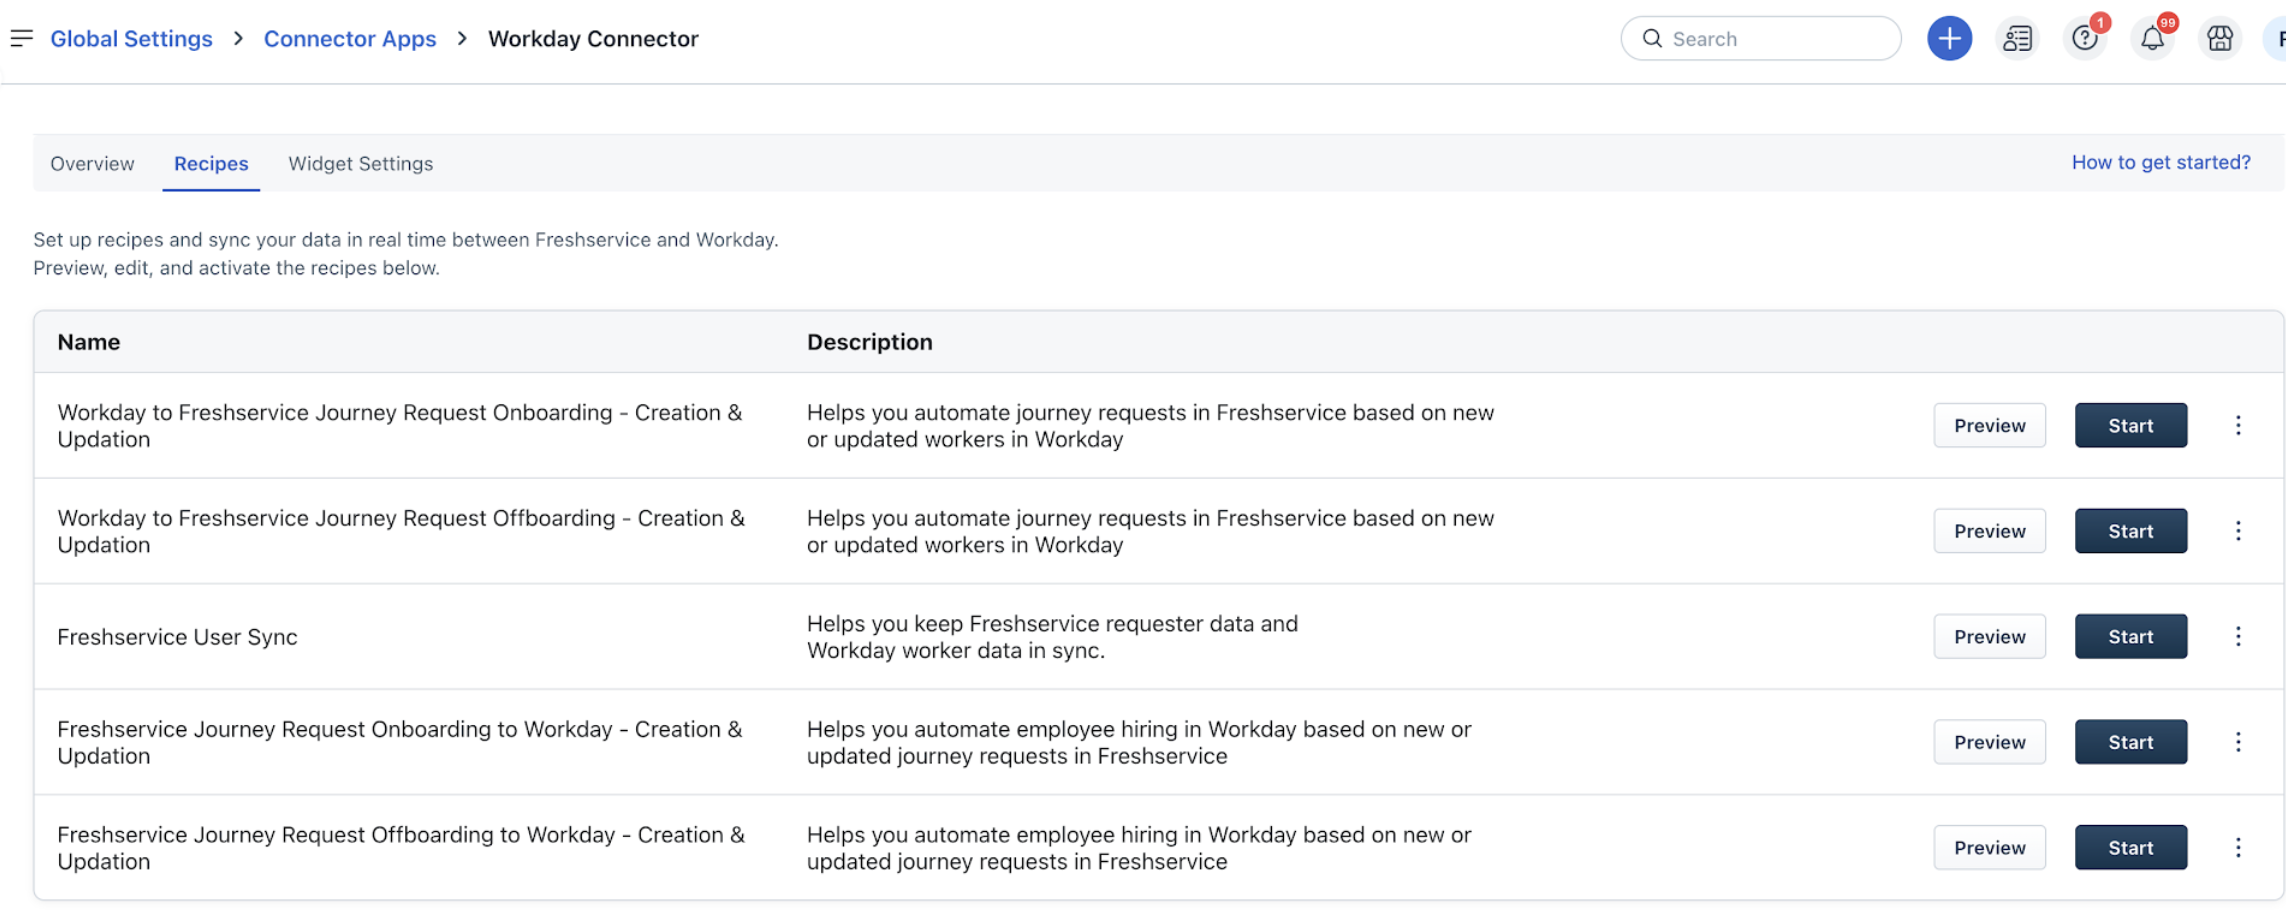
3. Click Recipes. The Recipes page shows you the list of available recipes for the Workday Connector App.
Manage available recipes
You can preview, edit, start, test, or stop the available recipes.
Preview recipe
1. On the Recipes page, click Preview next to the recipe you want to view. The selected recipe’s preview page opens.
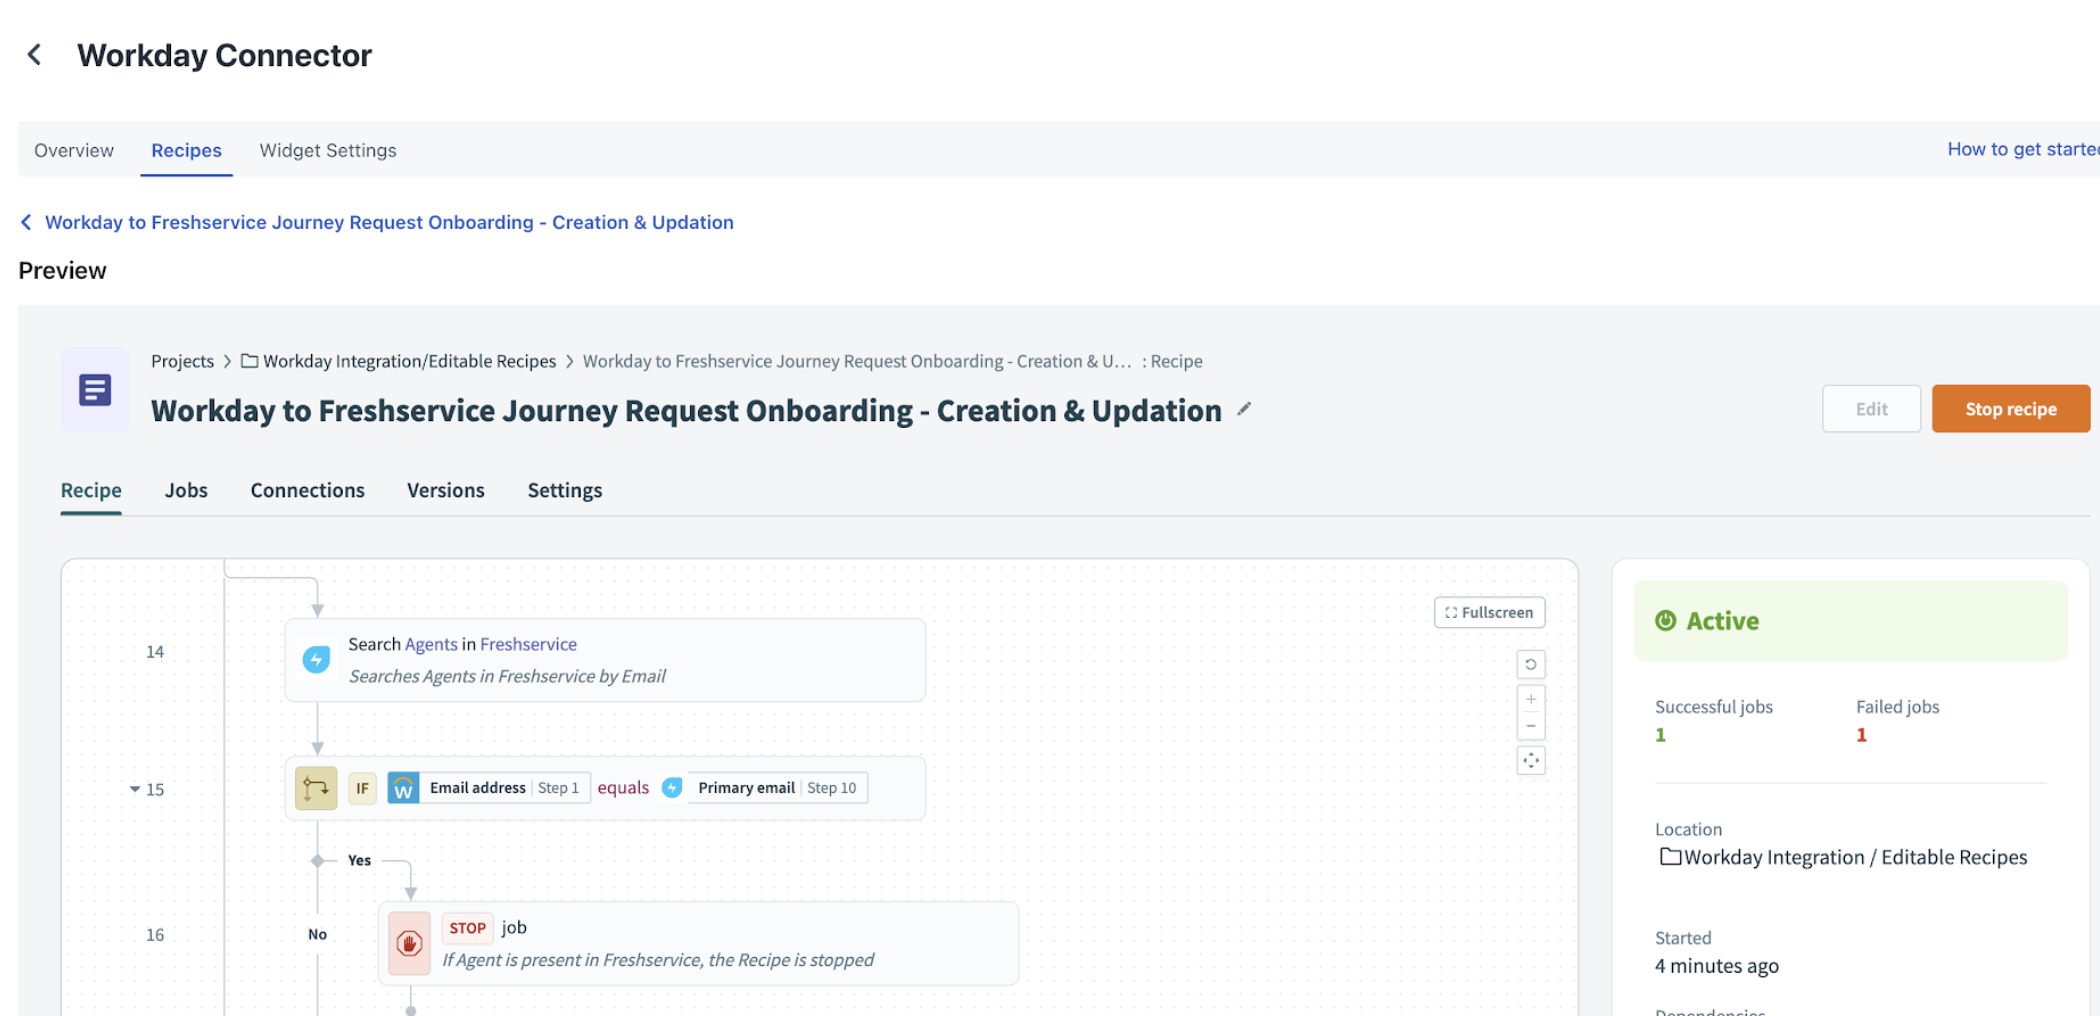
The Preview page includes the Recipe, Jobs, Connections, Versions, and Settings tabs.
2. On the Recipe tab, you can view various steps with pre-configured triggers, actions, and conditions.
3. Go to the Jobs tab to view all the jobs associated with this recipe.
Note: Use the Repeat job, Cancel job, Search jobs, All statuses, All types, and Period filters to modify or update the Jobs list.
4. Go to the Connections tab to view all the associated connections.
5. Go to the Versions tab to view all the associated versions.
Note: Use the Compare versions, Search version comments, All periods, All change types, and All collaborators filters to modify or update the Versions list.
6. Go to the Settings tab to view the usage metrics, dependencies, and concurrency associated with this recipe.
Start recipe
To start any recipe:
1. On the Recipes page, click Start next to the recipe you want to start.
2. Or, click Preview next to the recipe you want to start. Within the recipe preview page, you will find an option to start the recipe.
Edit recipe
To edit any recipe:
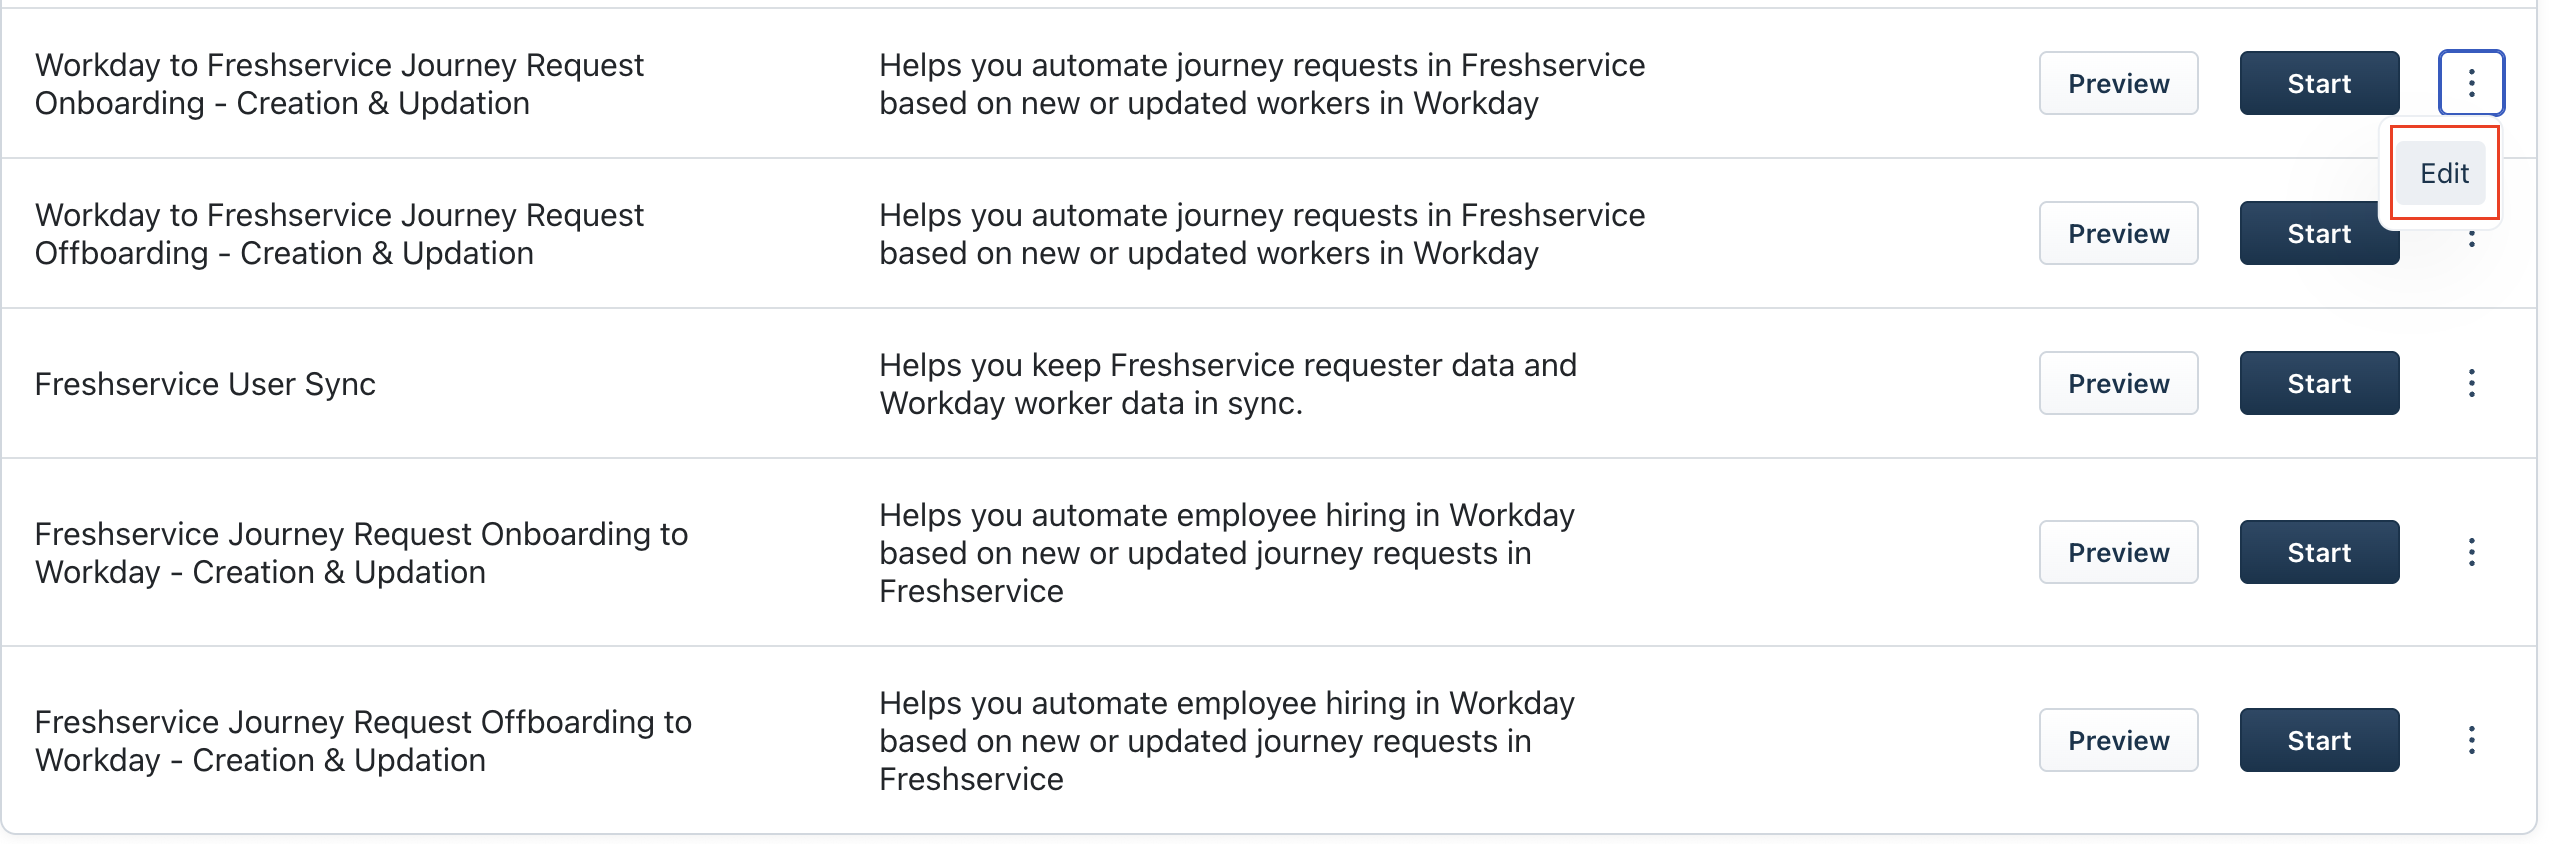
1. Click Preview next to the recipe you want to edit. The selected recipe’s preview page opens. If the recipe is active, click Stop. Then, click Edit.
2. Or, click the ellipsis icon next to a recipe on the Recipes page. Then, click Edit.
Stop recipe
To stop any recipe:
1. On the Recipes page, click Stop next to the recipe you want to stop.
2. Or, click Preview next to the recipe you want to stop. Within the recipe preview page, you will find an option to stop the recipe.
Test recipe
To test any recipe:
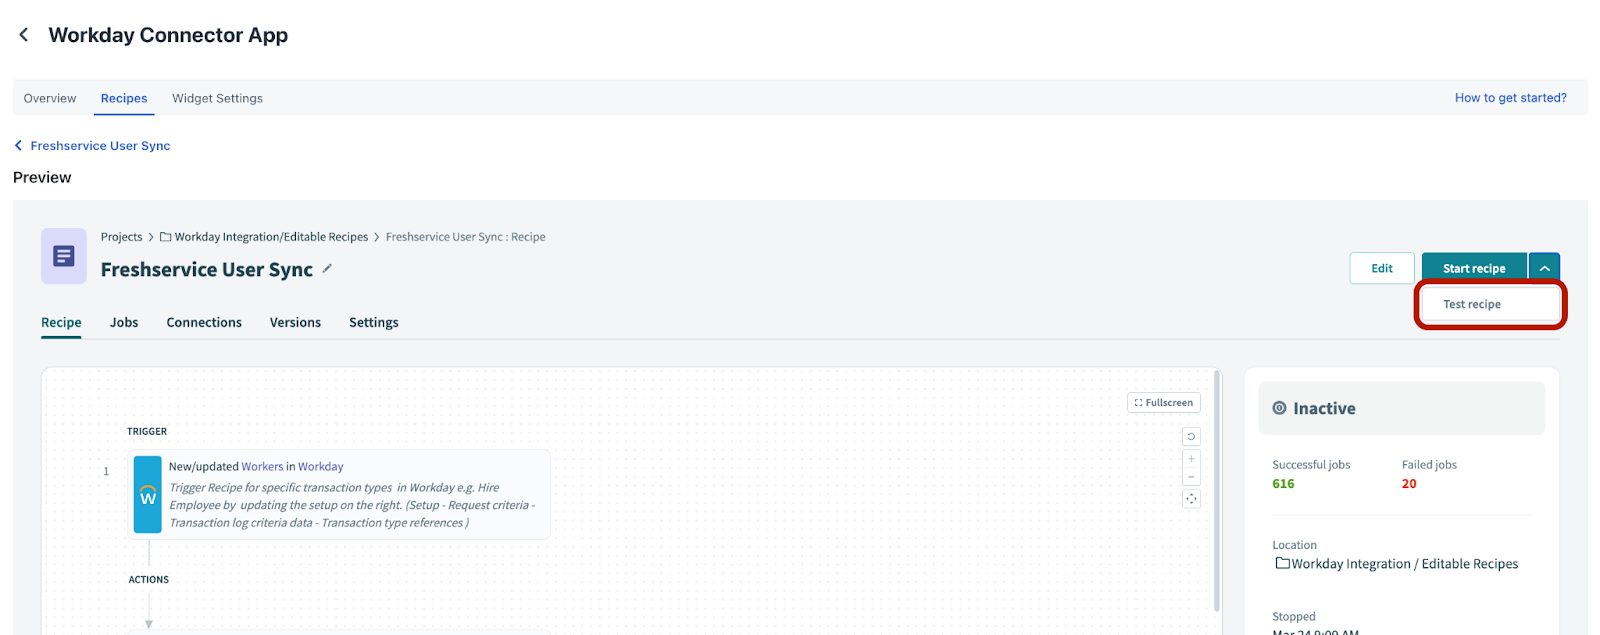
1. On the Recipes page, click Preview next to the recipe you want to test. The selected recipe’s preview page opens. If the recipe is active, click Stop.
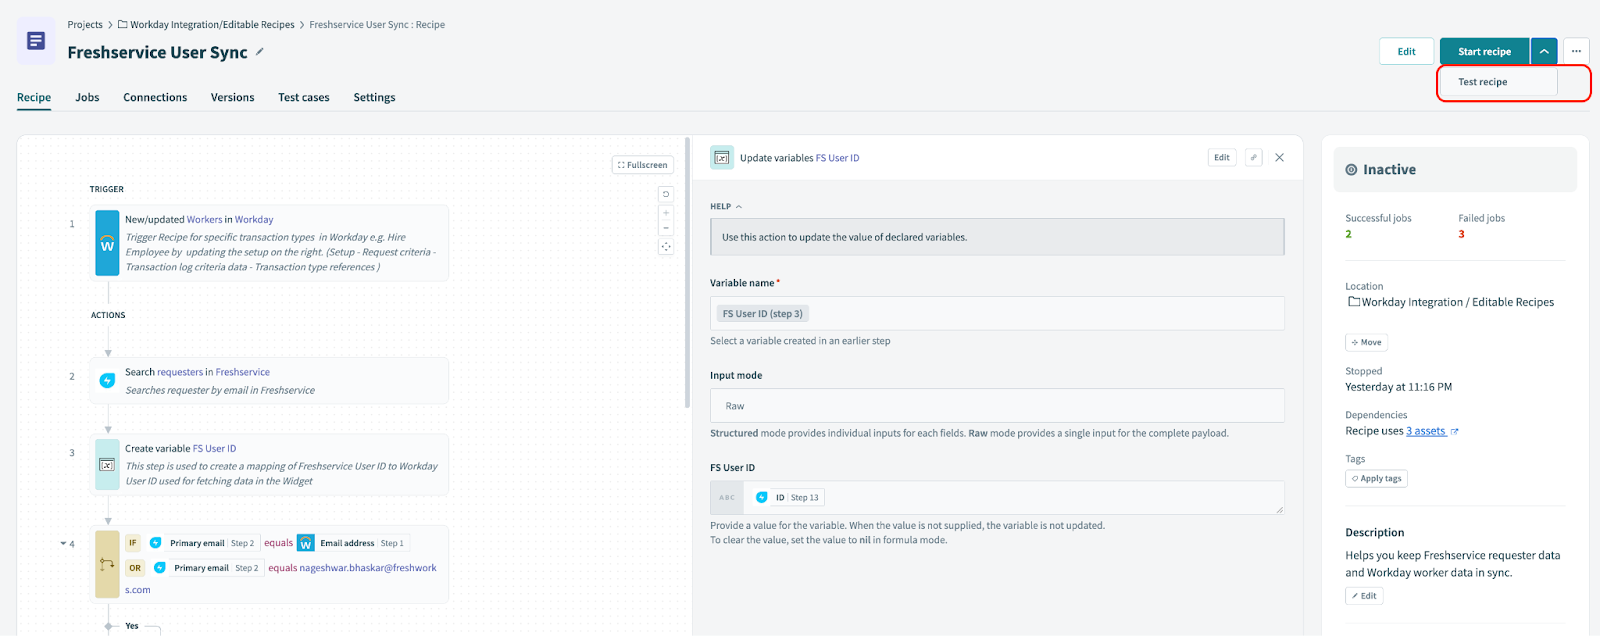
2. Then, select Test recipe from the Start recipe dropdown.
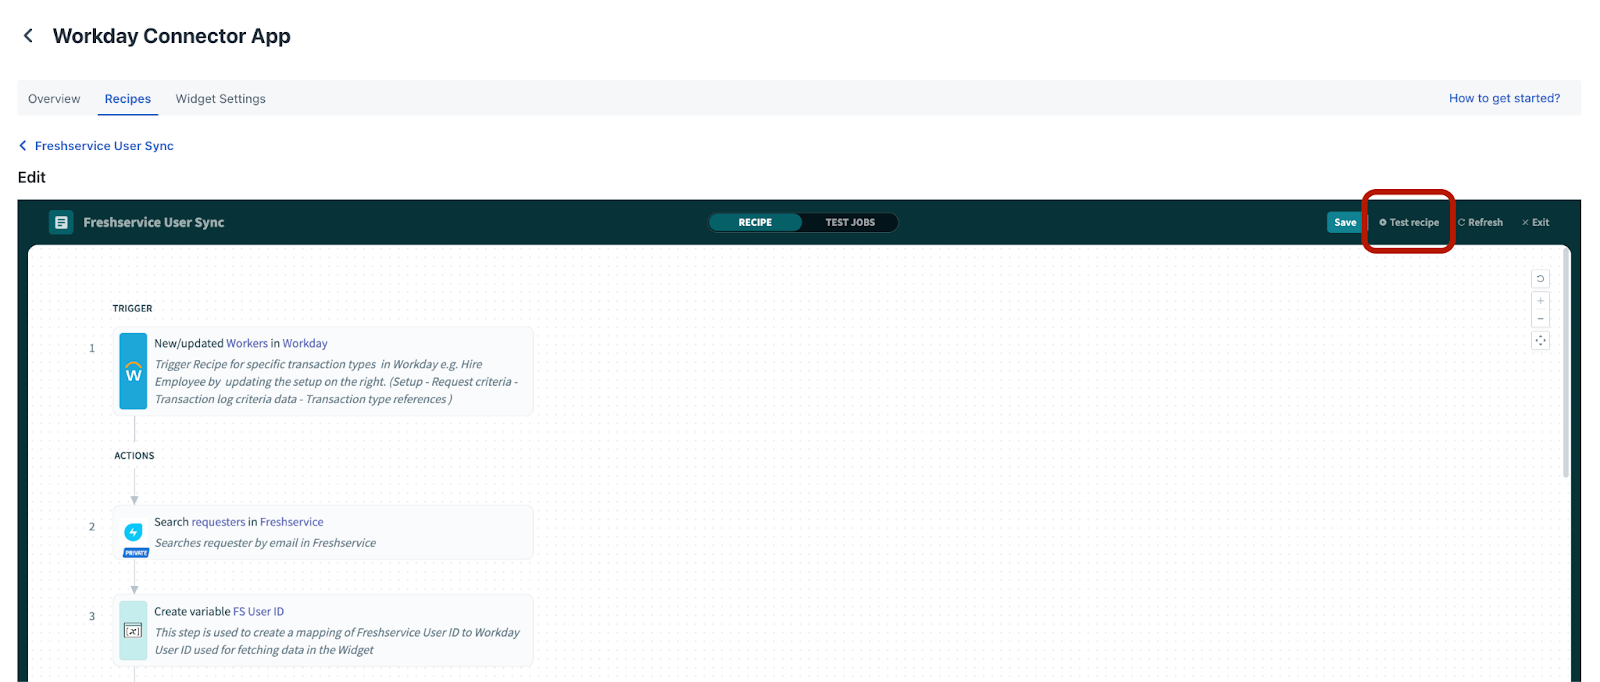
3. Or, click the ellipsis icon next to a recipe on the Recipes page, and click Edit. The selected recipe page opens.
4. Click Test recipe.
Customize recipe
Each recipe has the following components: Trigger, Actions, and Conditions. You can customize any recipe depending on your specific requirements.
Let’s take a default recipe as an example to customize it further.
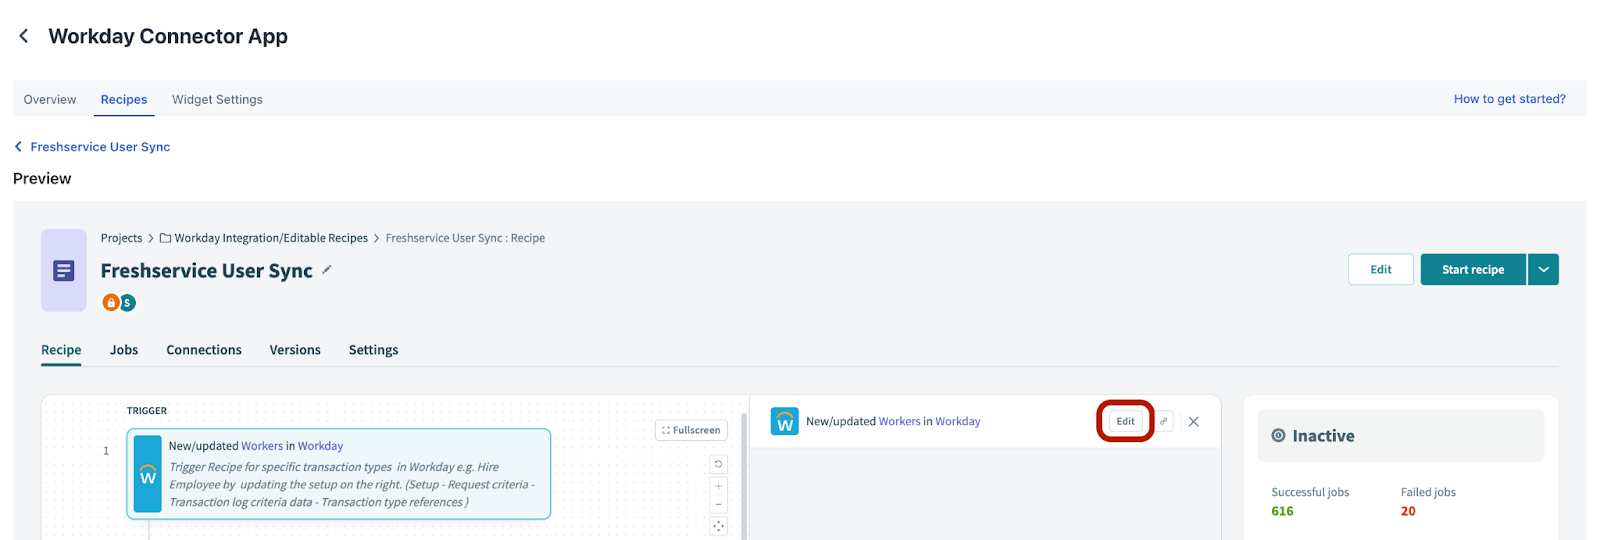
Default recipe: Freshservice User Sync
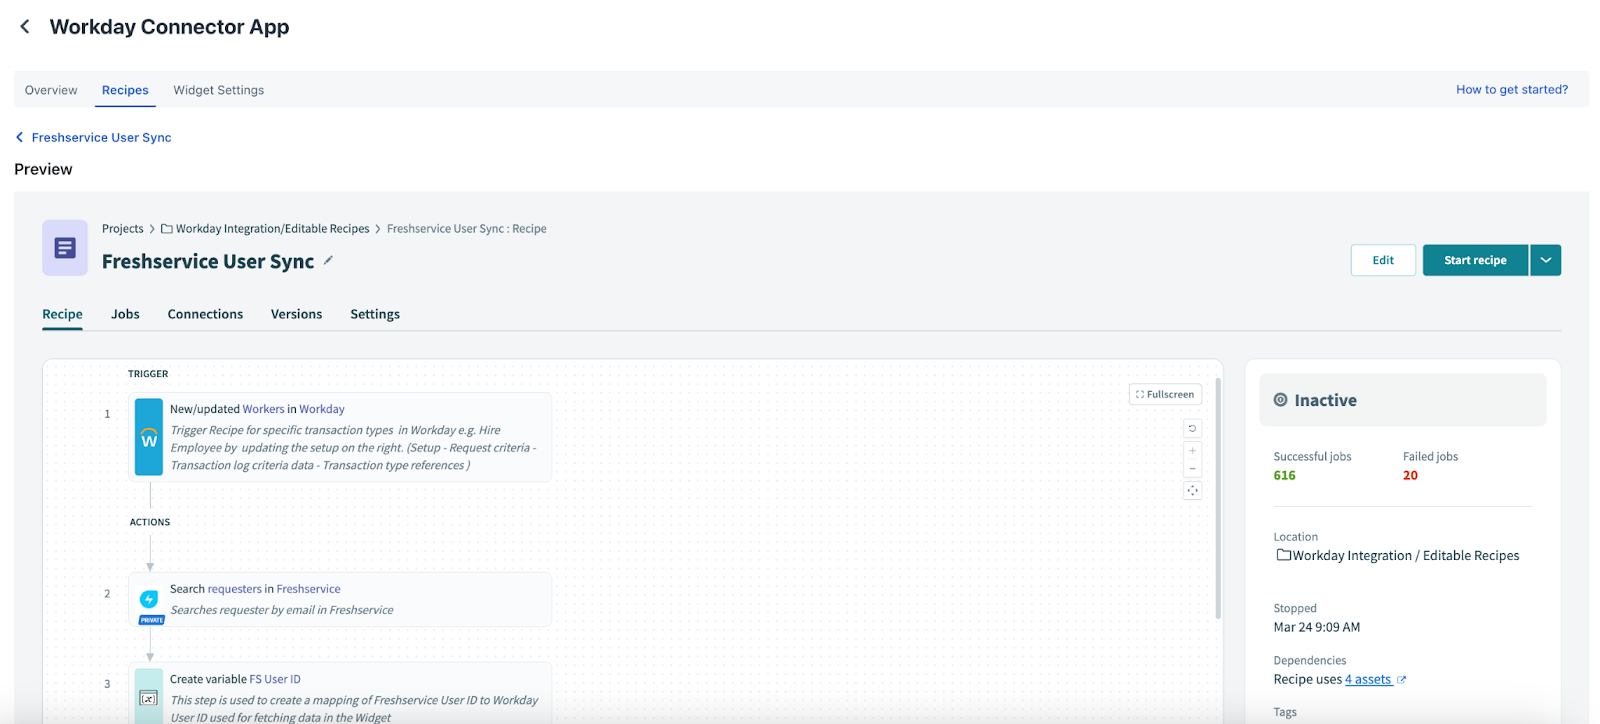
You can click any component, and use the Edit option associated with the component to customize. For example, the Trigger component (as shown in the following figure).
Action
The recipe performs a specific set of actions based on the conditions met. For example, the recipe creates or updates an employee record in Freshservice for a new or existing employee record in Workday.
You can customize the following parts of the action:
After customizing a recipe, you can save or test it to ensure it's working correctly.
Check failed recipe or jobs
To view and troubleshoot failed jobs under a recipe, follow these steps:
1. Click Preview next to a specific recipe on the Recipes page.
2. Go to Jobs.
3. View a list of all the jobs executed under a particular recipe.
4. Filter the failed jobs using the All statuses filter.
5. Click a failed job to view the error details and identify the cause of failure.
6. Resubmit the job after your review to fix the issue.
Configure widget settings
After you activate recipes as per your requirement, you can configure widget settings.
1. Go to Admin > Automation & Productivity > Extensibility > Connector Apps.
2. Click Workday Connector App. The Overview page opens.
3. Click Widget Settings. This page shows you a list of fields you can select to display in the Workday widget on any ticket details page across different workspaces.
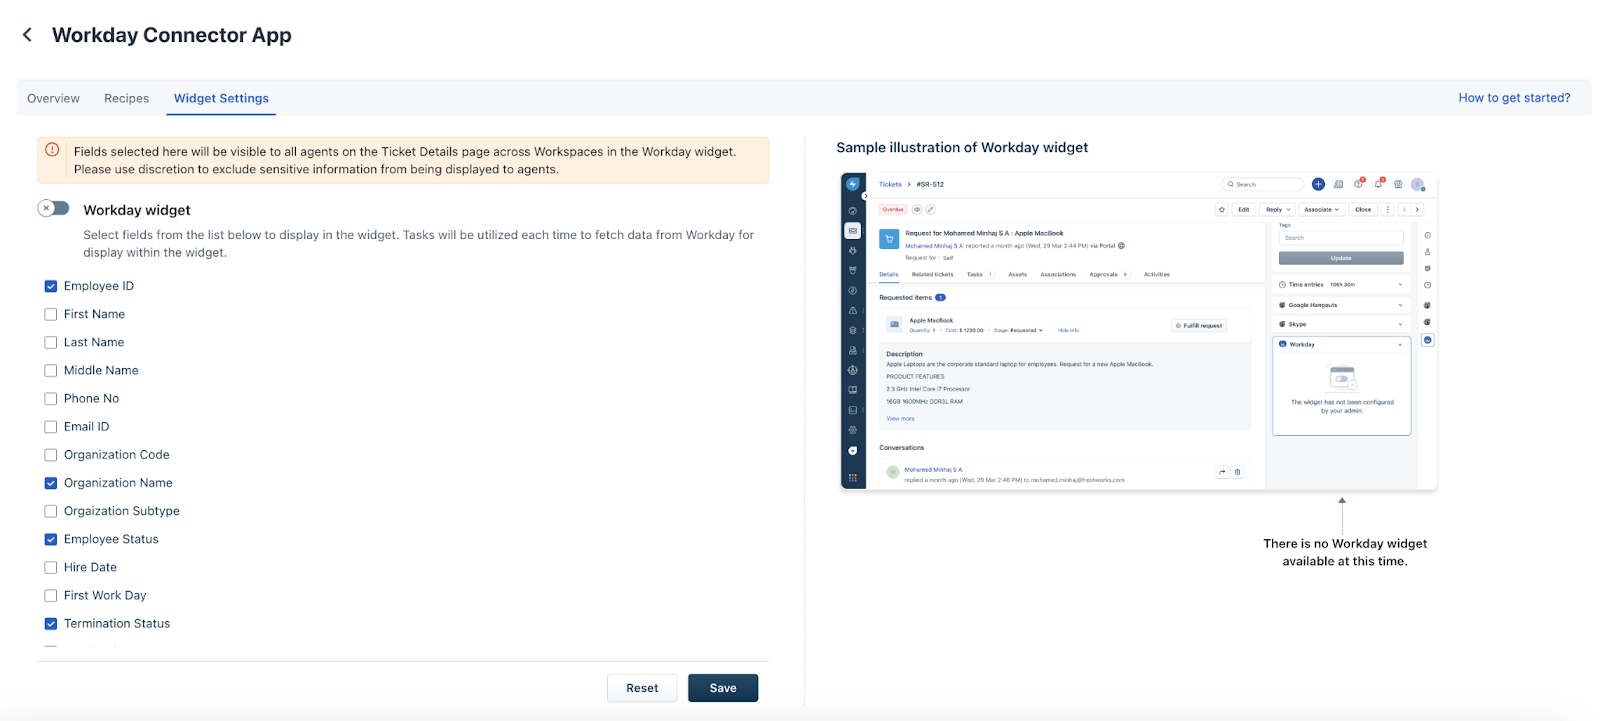
4. Enable the Workday widget toggle.
5. Select the fields you want to display in the Workday widget on the ticket details page.
Note: A sample illustration is shown on the right-side section for your reference.
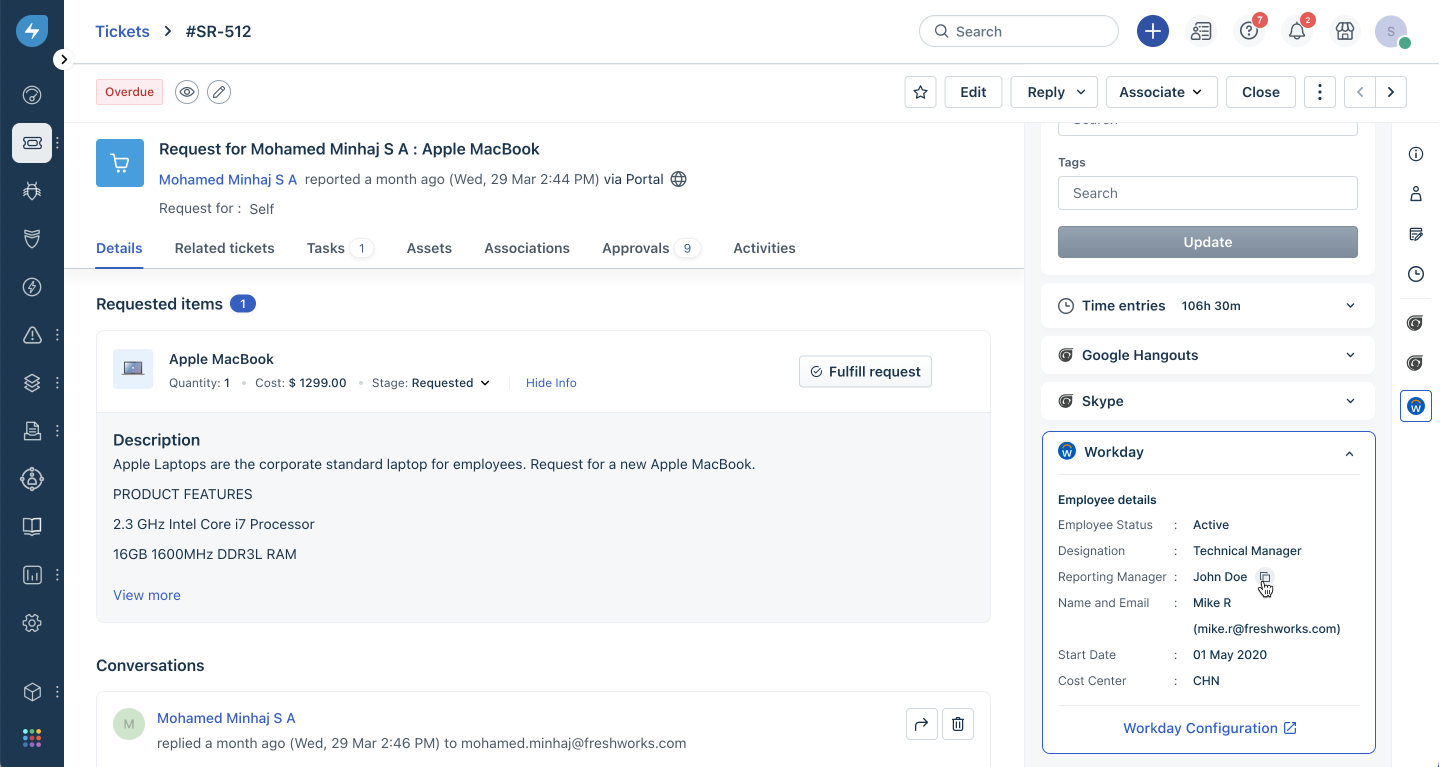
6. Click Save.
The widget will now be active and available to use within Freshservice tickets (as shown in the following figure).
Verify setup with recipe checklists
Use the following checklists to confirm that your Workday–Freshservice recipes are correctly configured before activating automation.
Checklist to start User sync recipe
1\. Time stamp is selected for the recipe to pick up events.
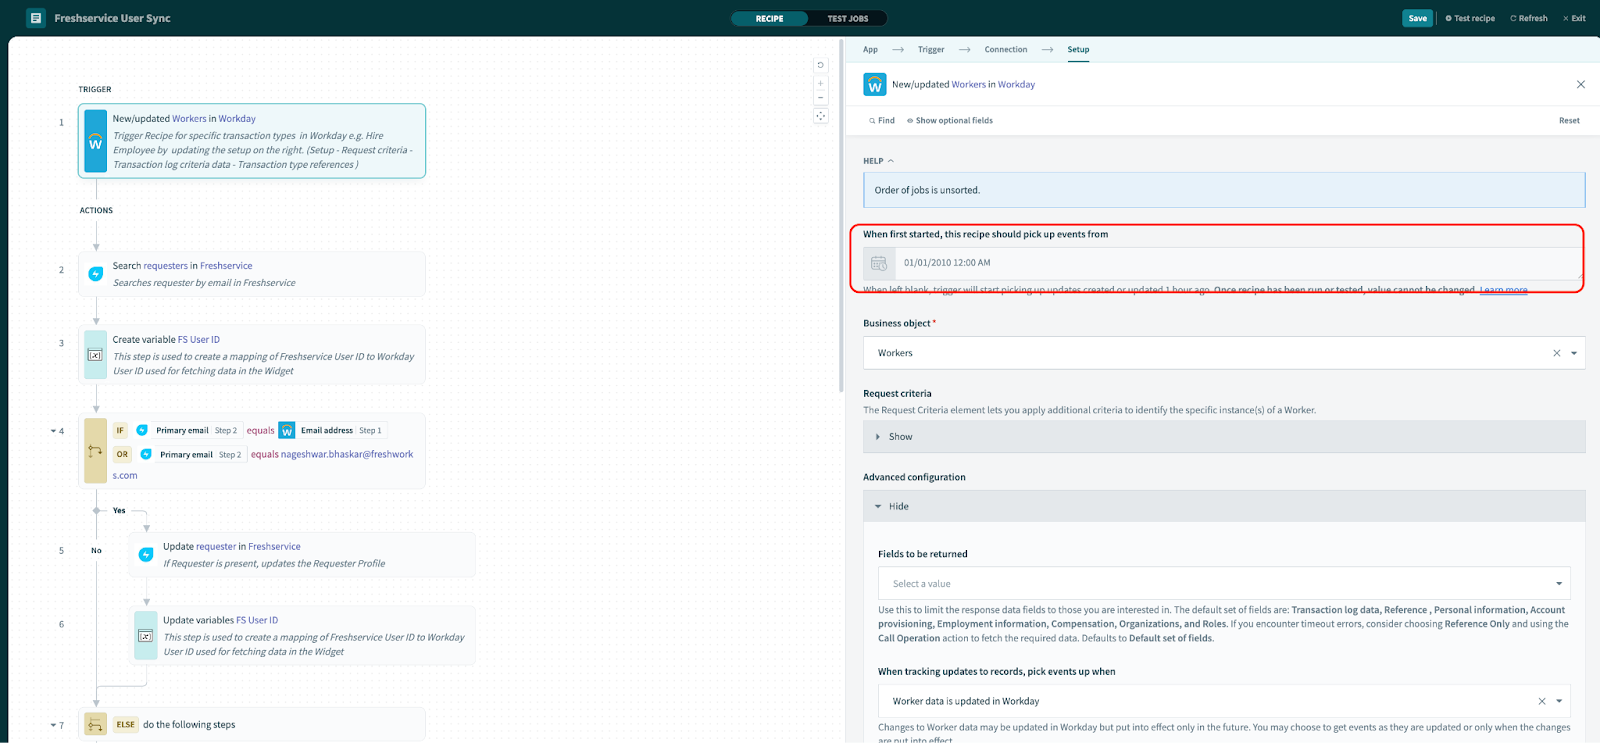
2\. If only specific updates (e.g., Location or Department change) need to be synced, select the corresponding Transaction Type under Request Criteria_._
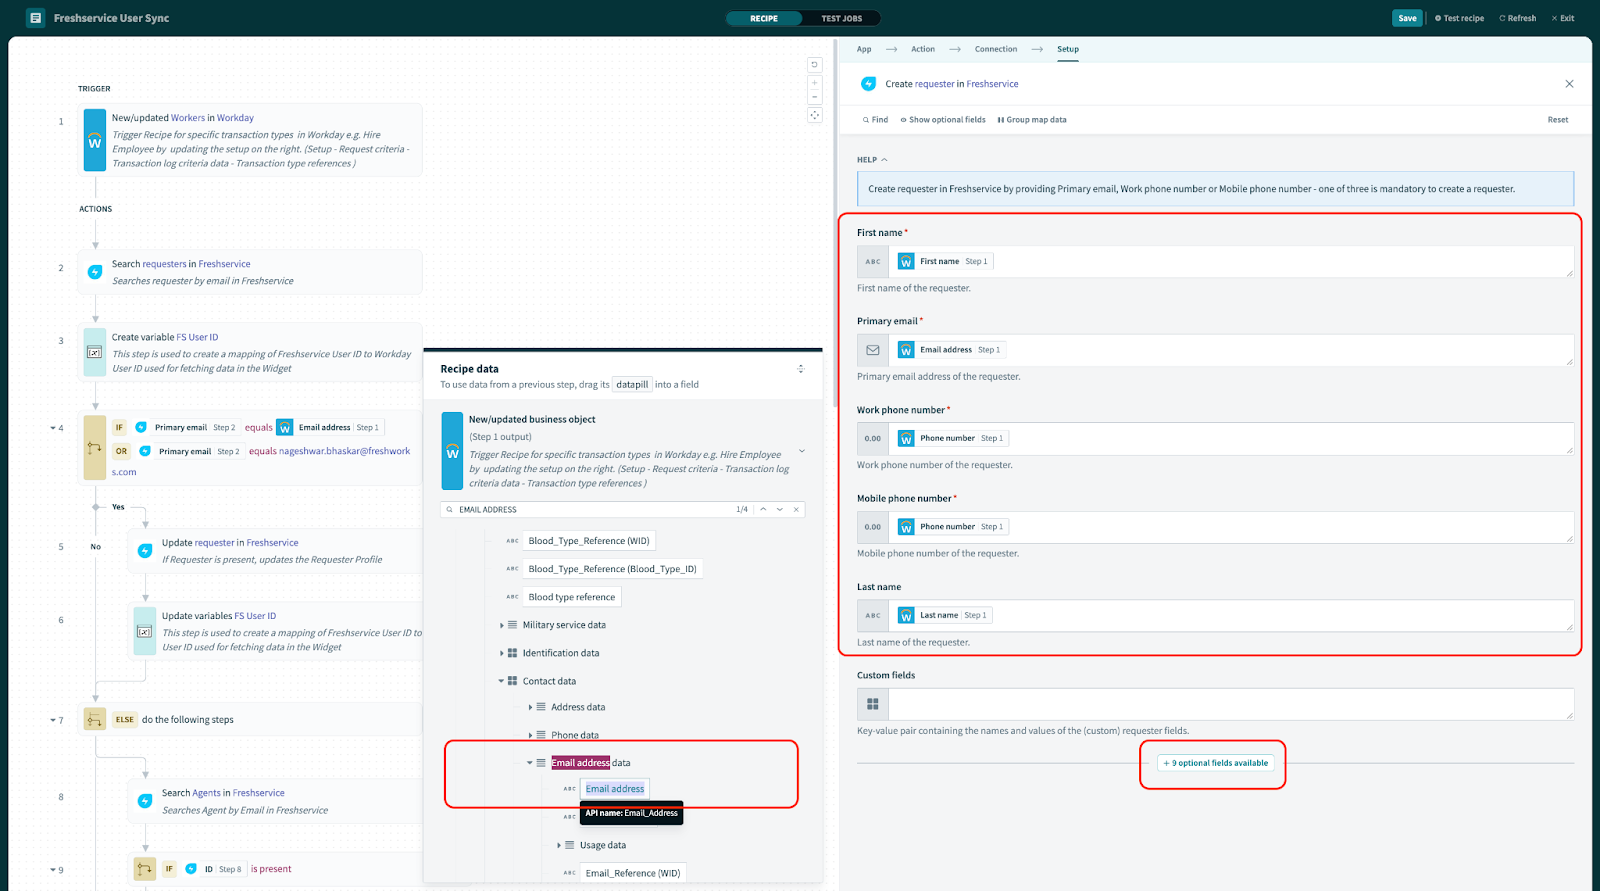
3\. Configure Create Requester action - Review field mappings and update as needed. For additional fields, click Optional Fields at the bottom. To modify mappings, use Data Pills in the recipe data.
4\. Test the recipe - Use the Test Recipe option to verify if triggers work as expected and data updates correctly in Freshservice.
5\. Estimate task usage - Calculate the expected monthly and yearly task consumption based on test runs.
6\. Steps 3 to 5 remains same if report option is used to trigger the recipe.
You are all set to start the recipe.
Checklist to start Onboarding automation Recipe
1. Time stamp is selected for the recipe to pick up events, i.e. future sync - keep timestamp empty, for historical & future - select timestamp accordingly
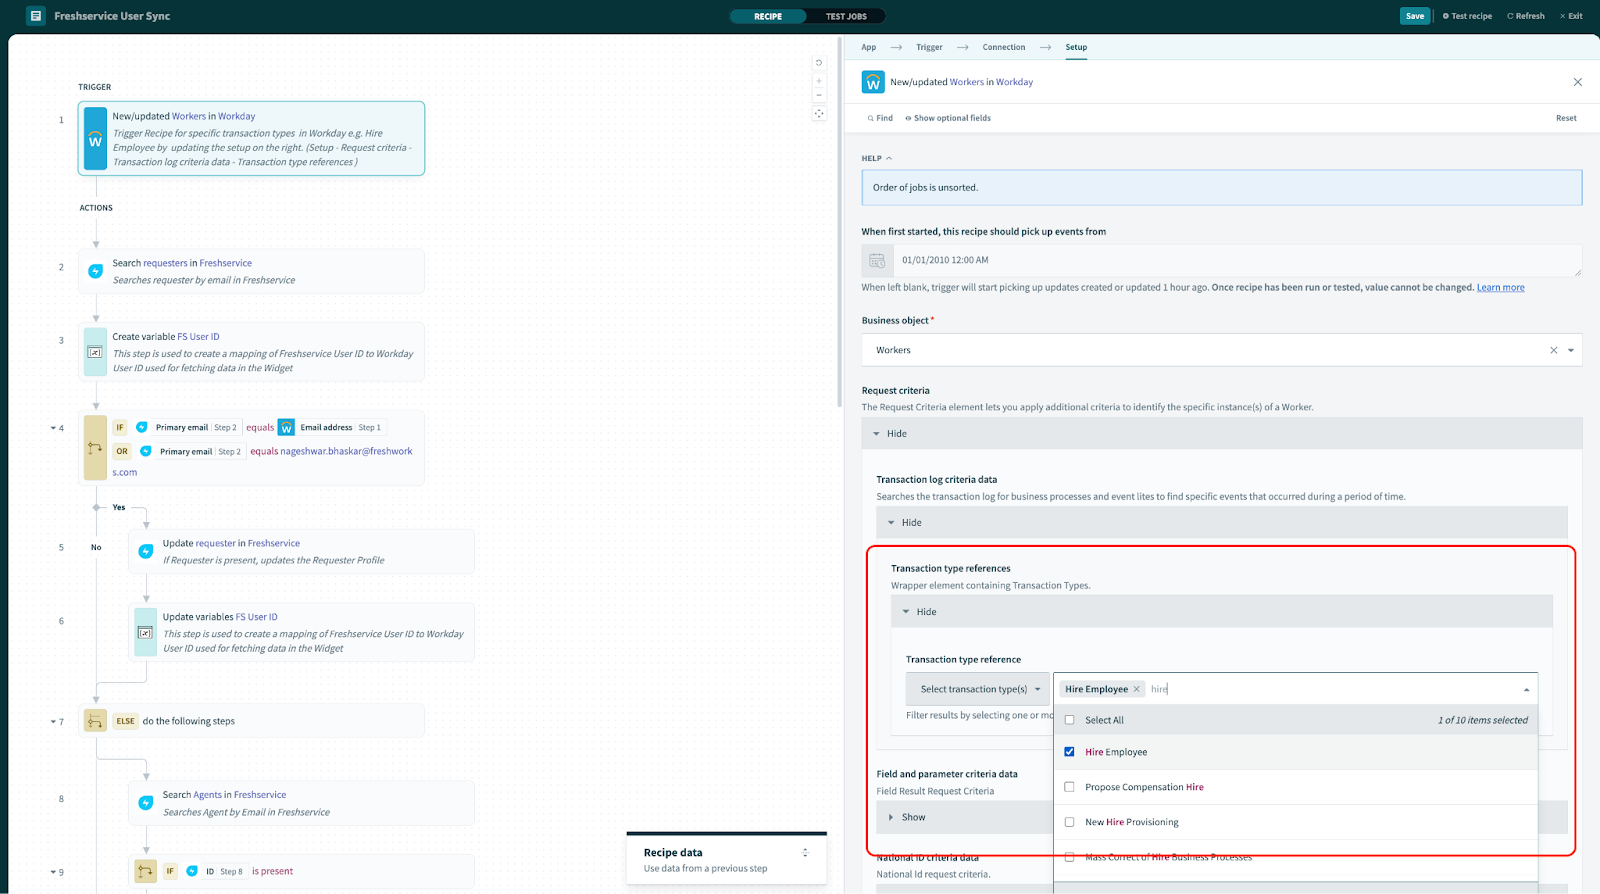
2. If only specific updates needs to be updated e.g.Hire employee, New Hire provisioning respective Transaction type under request criteria.
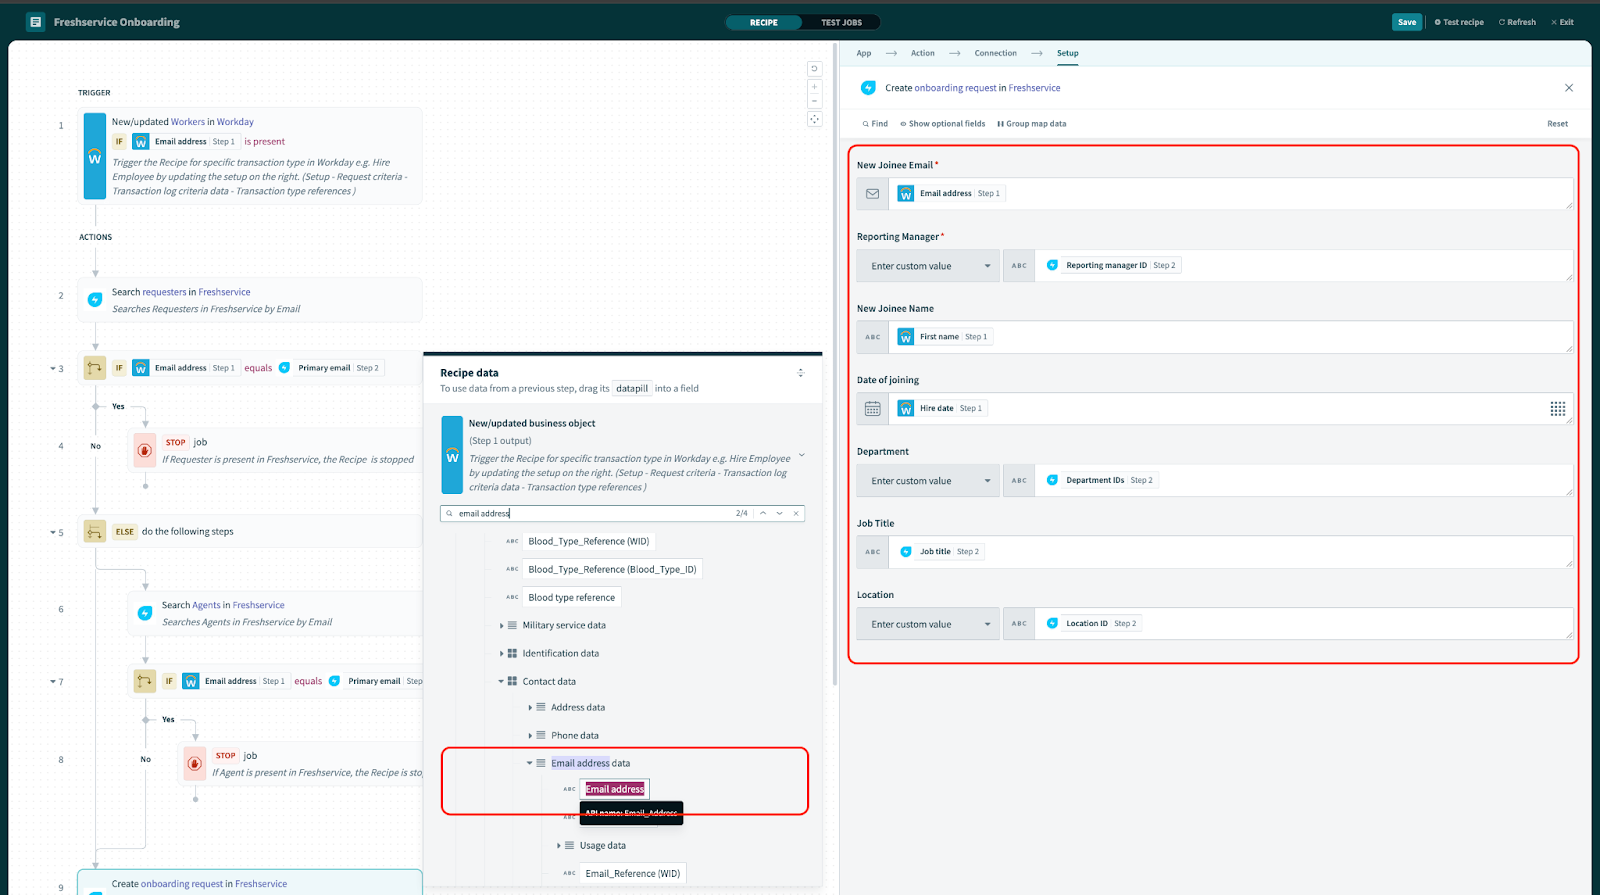
3. Create Onboarding Request action - check field mappings and update based on the requirement. For additional fields click on optional fields at the bottom. To change the field mapping use Data pills in the Recipe data.
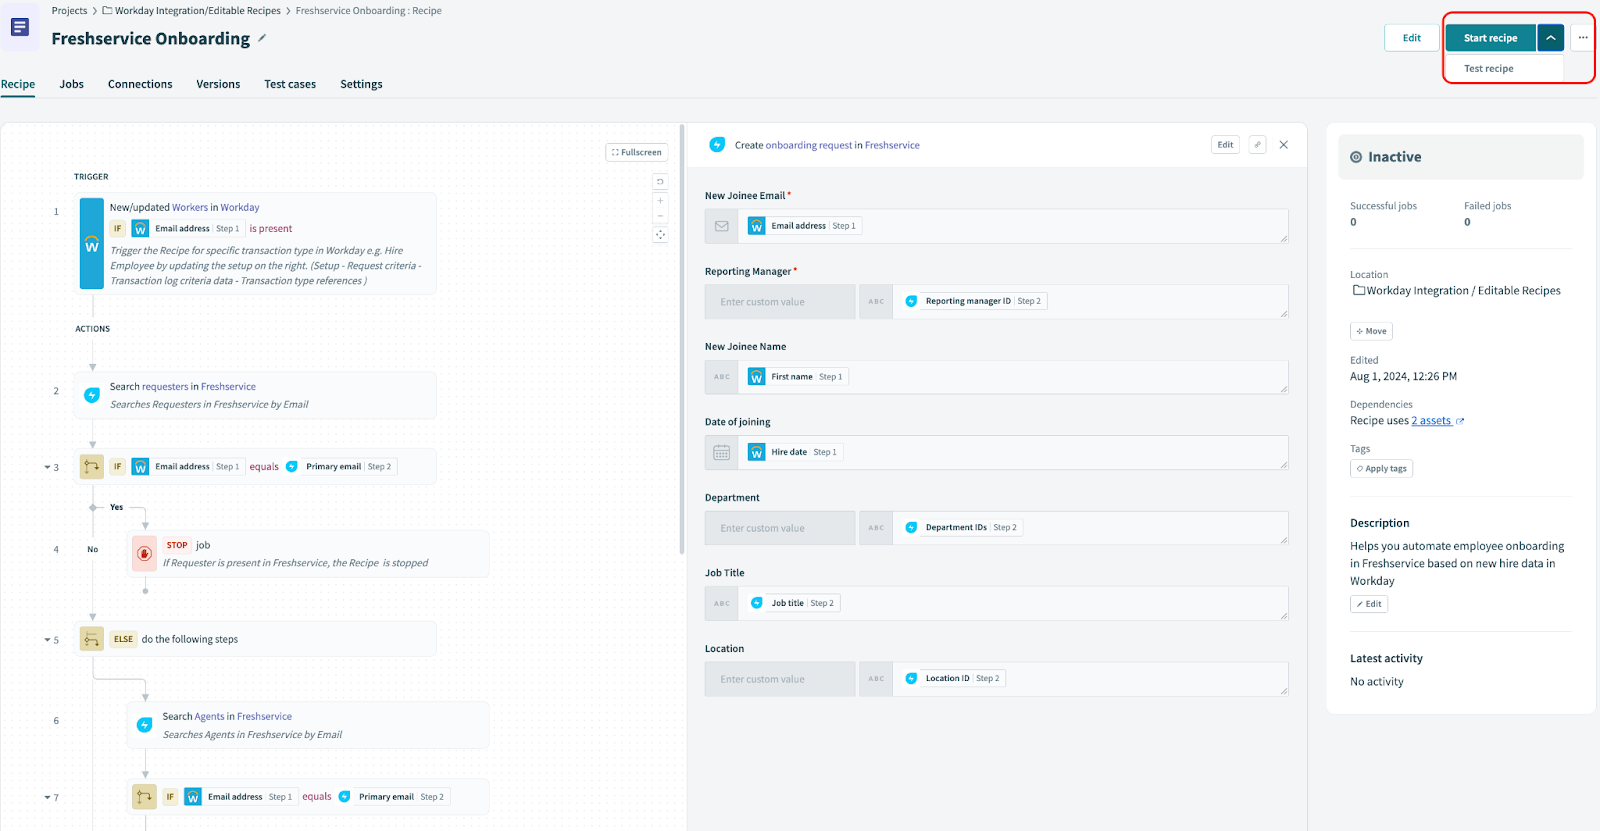
4. Use test recipe option to verify if the Recipe is triggered in accordance with the expected triggers and data is updated in Freshservice correctly
5. Estimate the tasks required monthly and yearly based on the test run
6. Steps 3 to 5 remains same if report option is used to trigger the recipe
7. You are all set to start the recipe!
Checklist to start Offboarding automation recipe
1. Time stamp is selected for the recipe to pick up events, i.e. future sync - keep timestamp empty, for historical & future - select timestamp accordingly
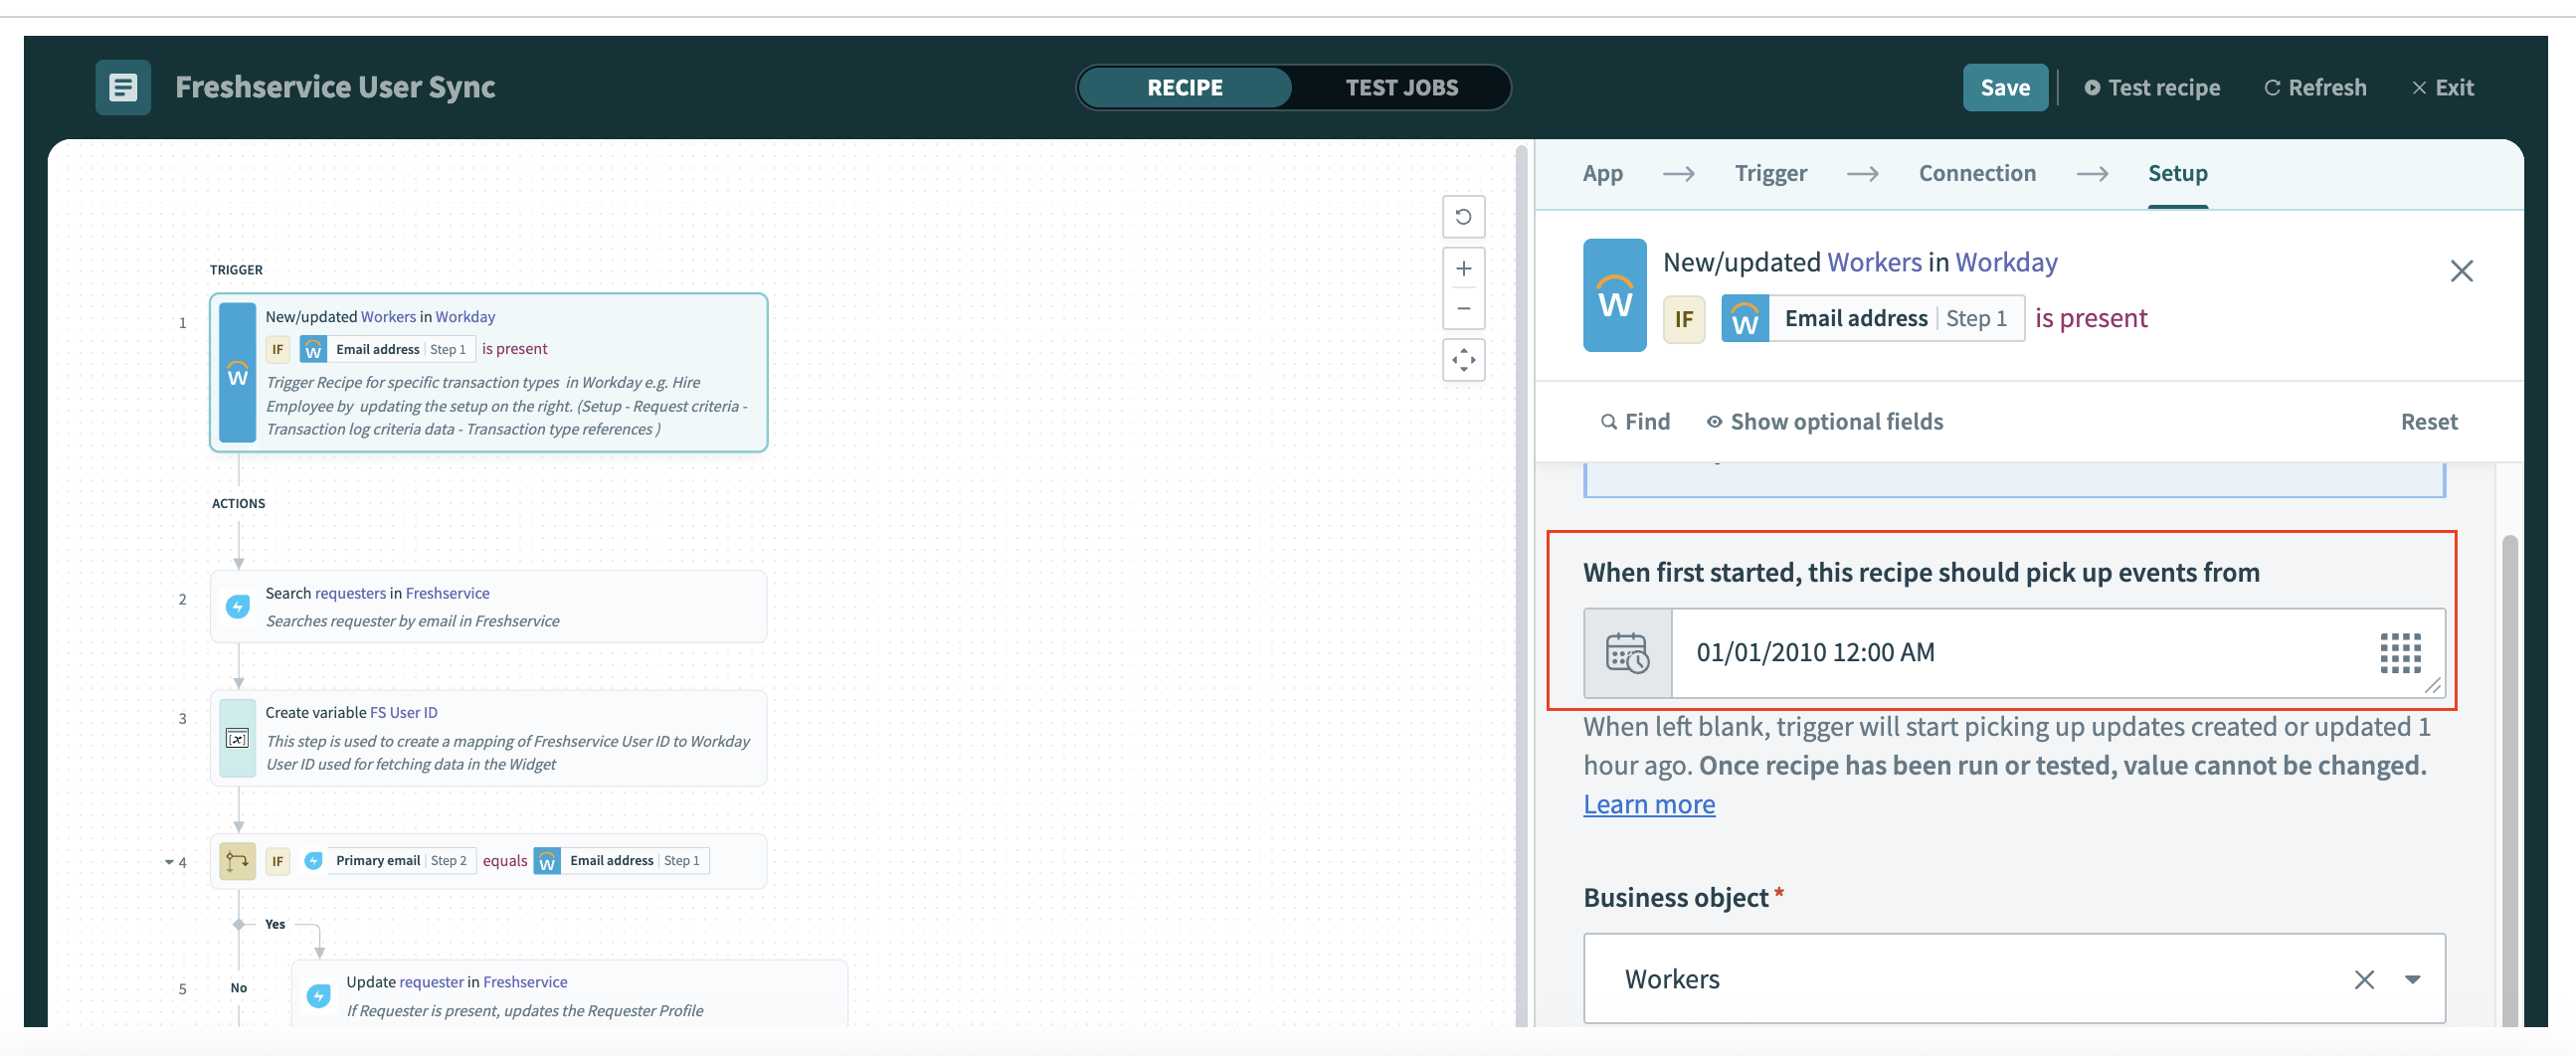
2. If only specific updates needs to be updated e.g.Terminate employee select respective Transaction type under request criteria.

3. Create Offboarding Request action - check field mappings and update based on the requirement. For additional fields click on optional fields at the bottom. To change the field mapping use Data pills in the Recipe data.
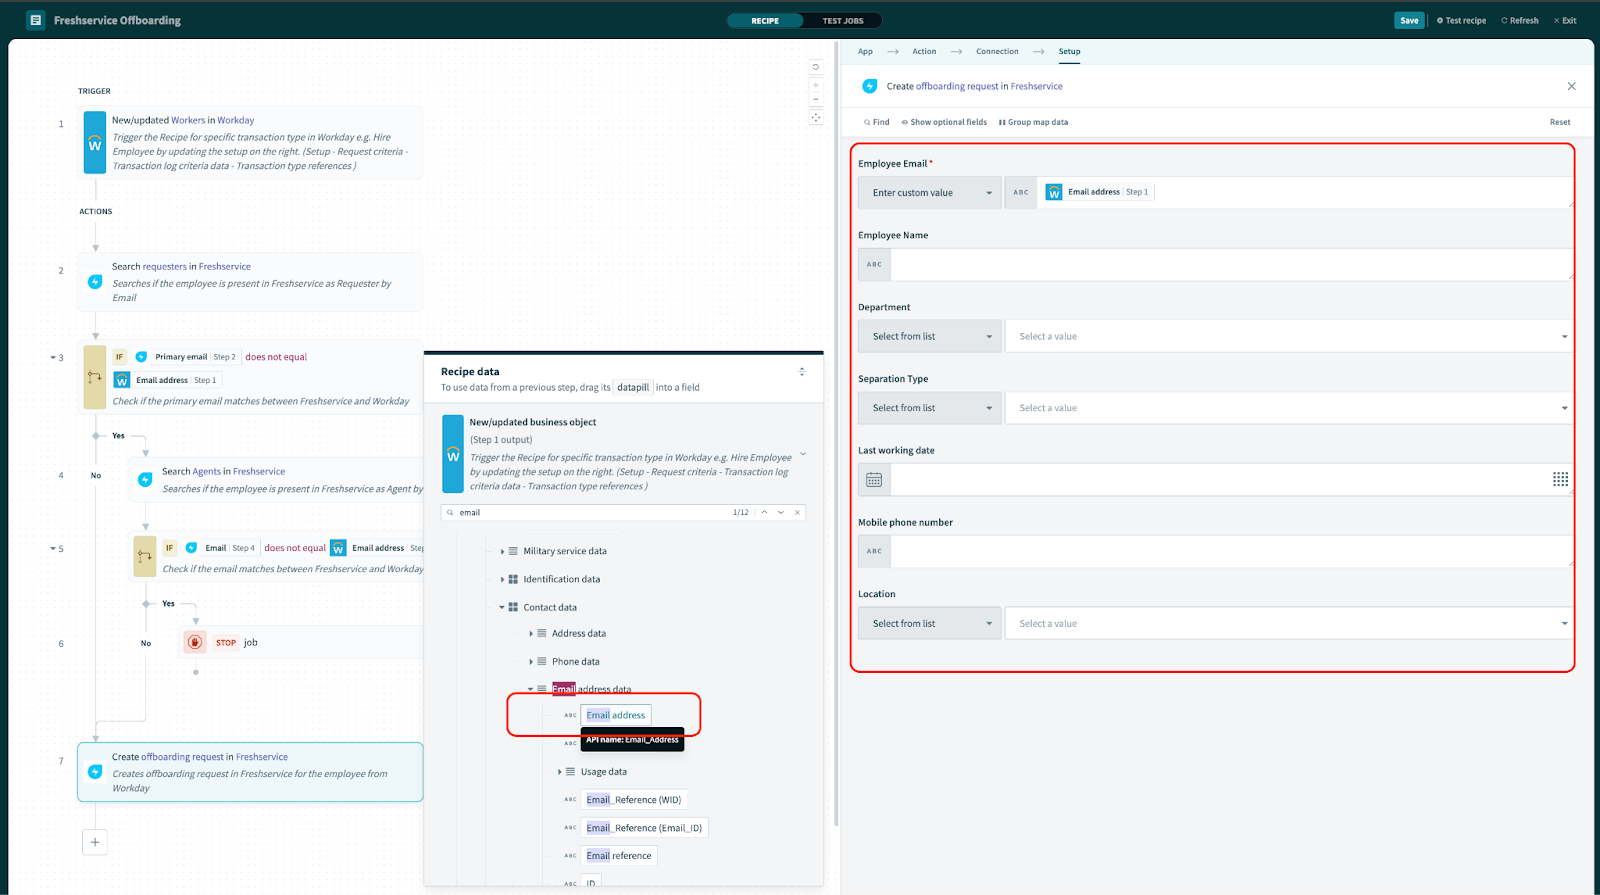
4. Use test recipe option to verify if the Recipe is triggered in accordance with the expected triggers and data is updated in Freshservice correctly.
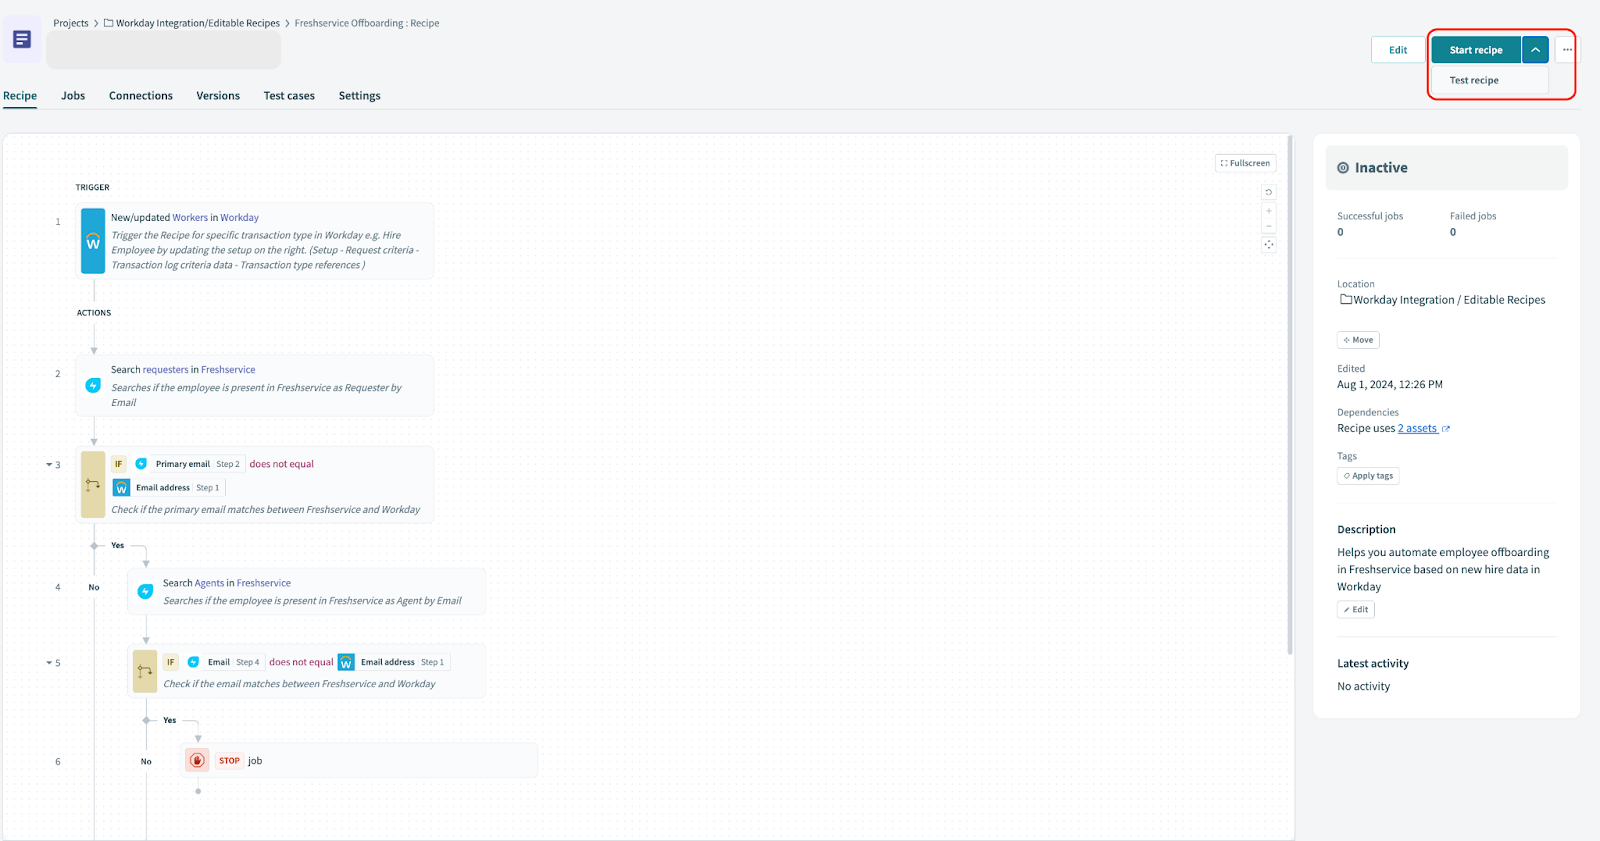
5. Estimate the tasks required monthly and yearly based on the test run.
6. Steps 3 to 5 remains same if report option is used to trigger the recipe.
You are all set to start the recipe.
Checklist to start Workday Widget
1. Widget helps to fetch data from Workday, which are required to process tickets and information is not available in Freshservice
2. Enable Widget only if there is a scenario of Requester information not stored in Freshservice and is required to be fetched from Workday to process tickets
3. Enabling Widget consumes tasks.
1. When the widget is enabled a one time mapping is created for all employees between Freshservice ID and Workday ID
2. This is required as Workday does not allow to fetch worker information using email id
3. Based on your employee size this one time sync consumes tasks i.e. No of employees \* 3 tasks
4. Post that when an agent open the Workday widget in the ticket details page, information is fetched from Workday
5. This consumes 3 tasks for each instance of requester check 4. Select the fields to be displayed in Widget, and Save to enable the widget.
