Last updated: 2026-03-31
``` Note: Available only for new signups after the 31 March, 2026 release. If you signed up earlier, refer to the existing ITAM documentation. ```
Switch port management allows you to track physical and logical network interfaces across your infrastructure. By documenting port statuses, VLAN associations, and remote connections, you gain full visibility into your network fabric.
This article provides an overview of managing switch ports. It explains how to use autodiscovery, manual entries, and switch templates to document network connectivity and port properties efficiently.
Prerequisites
You need the following before managing switch ports:
View and add switch ports
You can access port information through the global list or from specific device records. To manage ports, follow these steps:
1. Go to IT Asset Management > Inventory > Ports.
2. On the Ports page, perform one of the following:
Notes:
- To learn more about the specific fields on the switch port details page, refer to the Understand switch port properties section later in this article.
- You can also view ports directly by navigating to a device’s details page and going to its Ports section.
Understand switch port properties
The following table describes the properties available for switch ports. You can configure these fields manually or populate them through autodiscovery.
| Property/Field | Description |
| Port | The name of the switch port as identified during autodiscovery or defined by the user. |
| HW Address | Displays the MAC addresses, connected devices, and their associated VLANs. |
| Port Type | The classification of the port, such as Physical, Logical, or Split Physical. |
| Name | The display name of the port, which is either automatically discovered or user-generated. |
| Description | The description of the port as found during autodiscovery or defined by the user. |
| Type | Any custom port type. Click Add new Port Type to create a new custom classification. |
| Speed | The transmission speed associated with the switch port. |
| Primary Device | The primary device associated with the port. |
| Primary VLAN | The primary VLAN to which this port belongs. |
| VLANs | All VLANs associated with this port. |
| Module | If this port is part of a module in a chassis-based switch, the module association can be made here. |
| Asset | If the port is part of FEX or a similar asset connected to the switch, that association can be made here. You can either assign it to a module or asset. |
| Parent Part | The hardware part associated with the switch port. |
| Secondary Device | The secondary device associated with the switch port. |
| HWAddress 2nd | The secondary MAC addresses, connected devices, and their associated VLANs. |
| Up | Indicates the current operational status of the port. |
| Up admin | Indicates whether the port is administratively enabled. |
| Count | The numeric count of the port within the device. |
| Discovered type | A read-only field showing the port type found during autodiscovery. This value can be used to mark ports as uncounted, delete ports, or ignore certain port types in future discoveries. |
| Tags | A comma-separated list of keywords for filtering and categorization. |
Perform bulk operations on switch port records
To modify multiple switch ports records simultaneously, go to the Ports page and select the checkboxes next to the switch ports you want to manage. Use the buttons that appear on the toolbar at the top of the list or click the More options (three vertical dots) icon to access additional options.
The following table describes the actions available for managing switch ports:
| Action | Description |
| Delete | Permanently remove the selected switch ports records |
| Export selected items | Downloads the selected switch ports data into a CSV file. |
| Add tags to selected items | Update tags in bulk to improve searchability and reporting. |
| Remove tags from selected items | Remove tags from the selected switch ports in bulk. |
| Count selected Switchports | Marks the selected ports to be included in the total port count for the device. |
| Don't Count selected Switchports | Excludes the selected ports from the total port count for the device. |
| Associate selected ports to 2nd network device, module or FEX | Links the selected ports to a secondary network device, a specific hardware module, or a Fabric Extender (FEX) asset. |
| Set Custom Field Value | Assigns a specific value to a custom field for all selected port records. |
View a list of active switch ports
To view only the active switch ports, follow these steps:
1. Go to the Ports page and click the Filter icon.
2. Select Yes from the Up filter dropdown menu.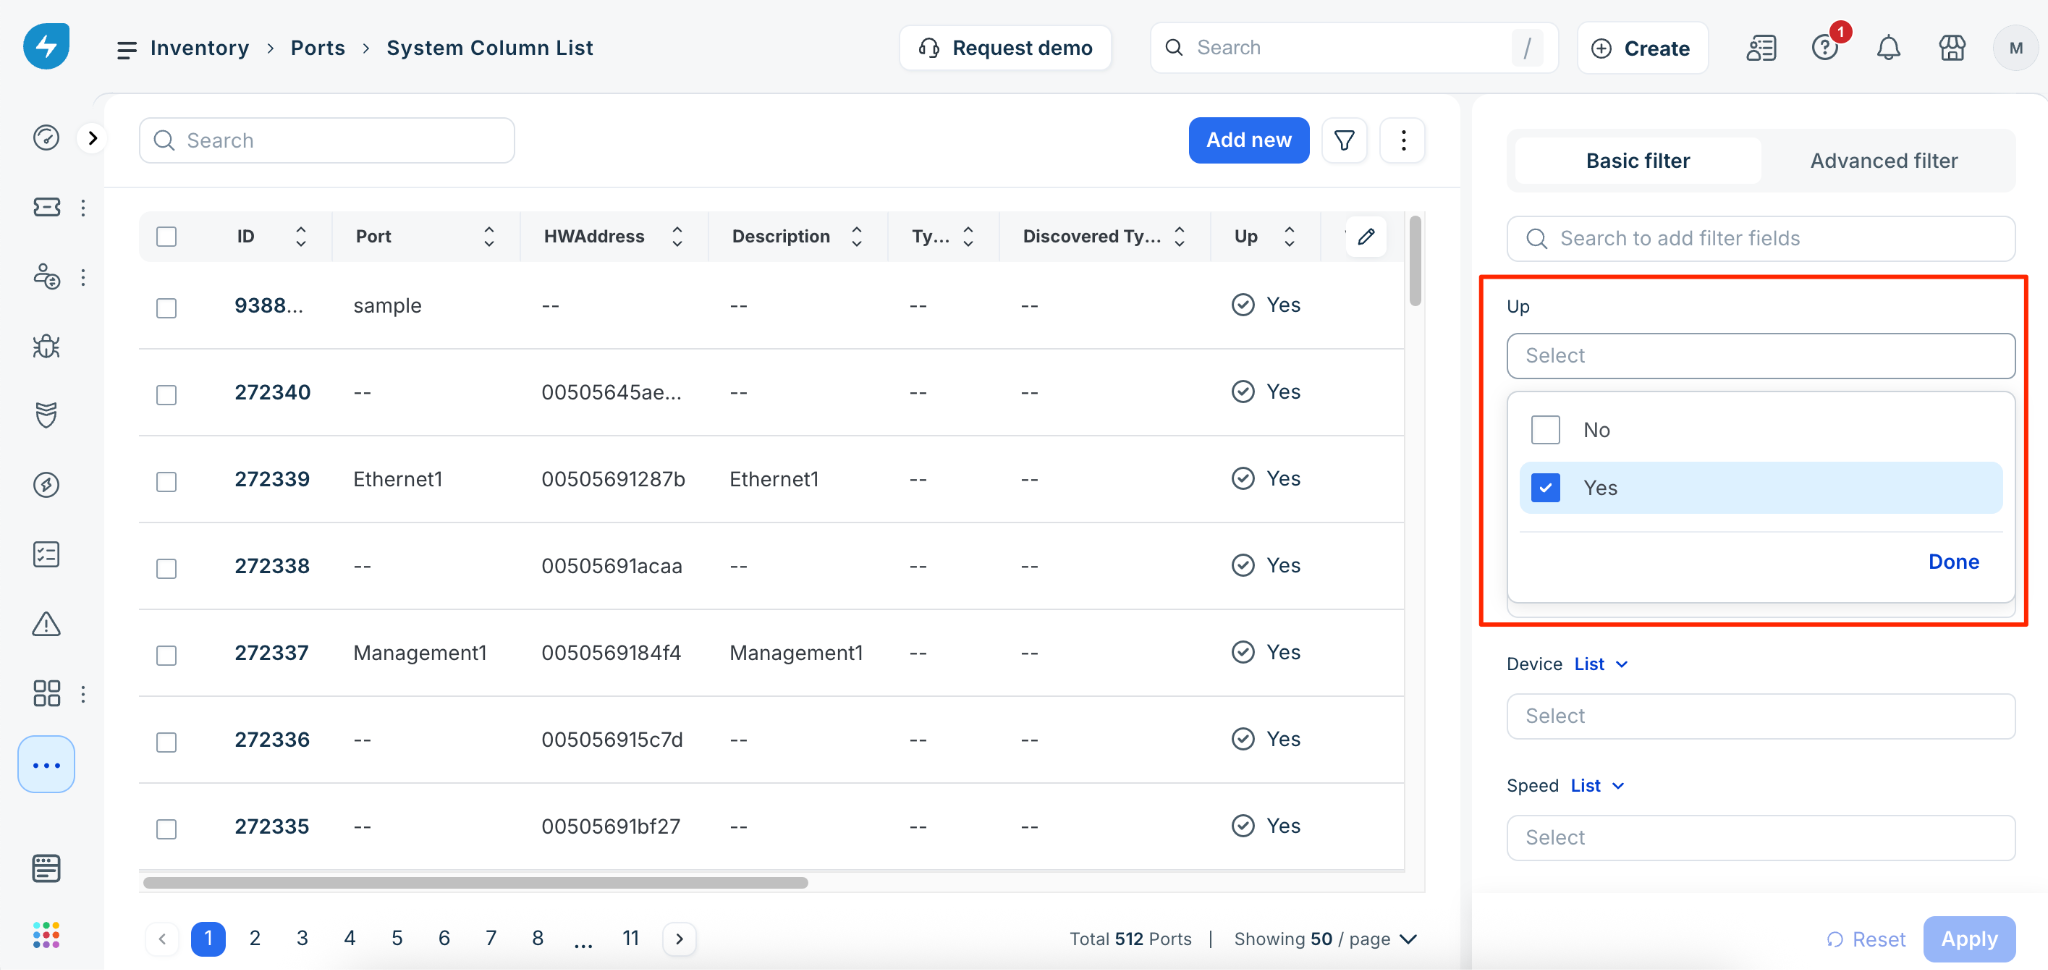
3. Click Apply.
The list updates to show only the ports that are currently operational.
Configure stacked switches
All switches, whether stacked or independent, are represented based on their underlying hardware model. Stacked switches are configured by first defining the hardware model and then creating instances of that model. To do so, follow these steps:
1. Go to IT Asset Management > Inventory > Hardware Models and click Add new.
2. Enter the name for the device in the Name field and select physical subtype from the Physical Subtype dropdown menu
3. Enable the Network Device checkbox and click Save.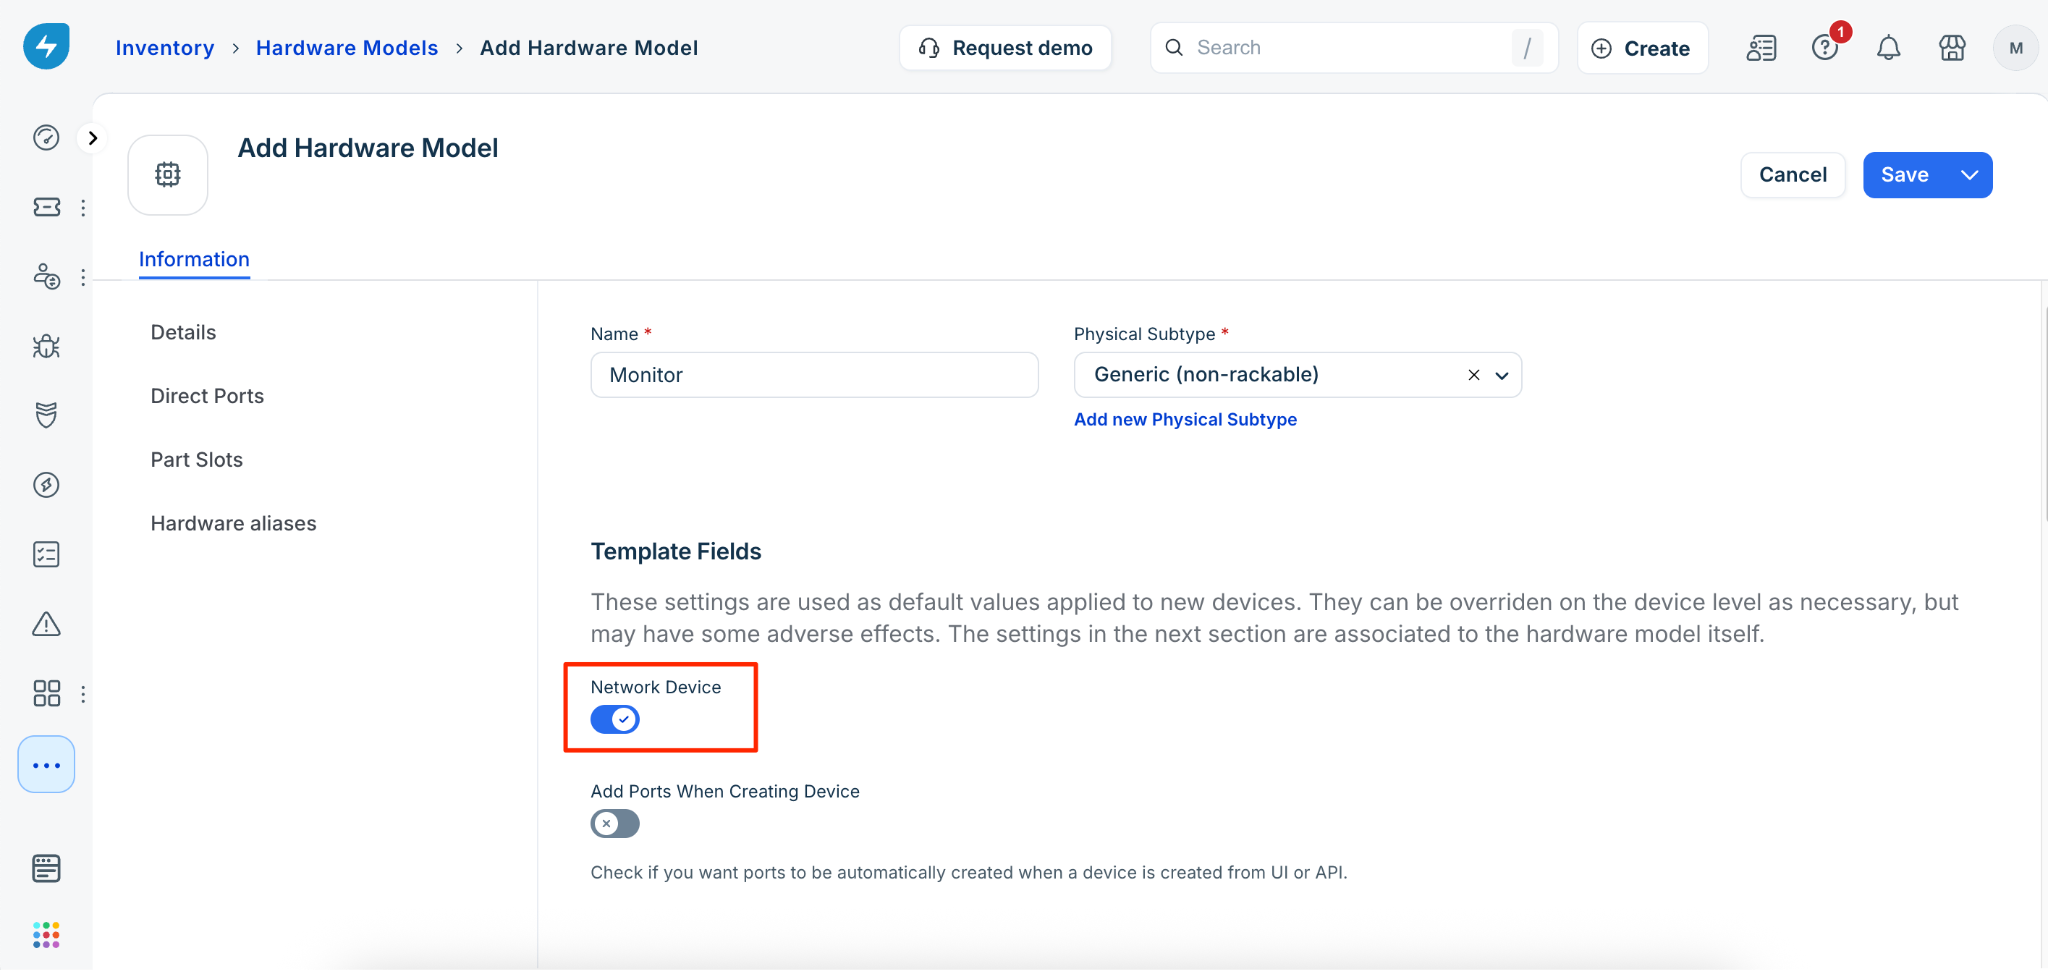
Configure FEX modules
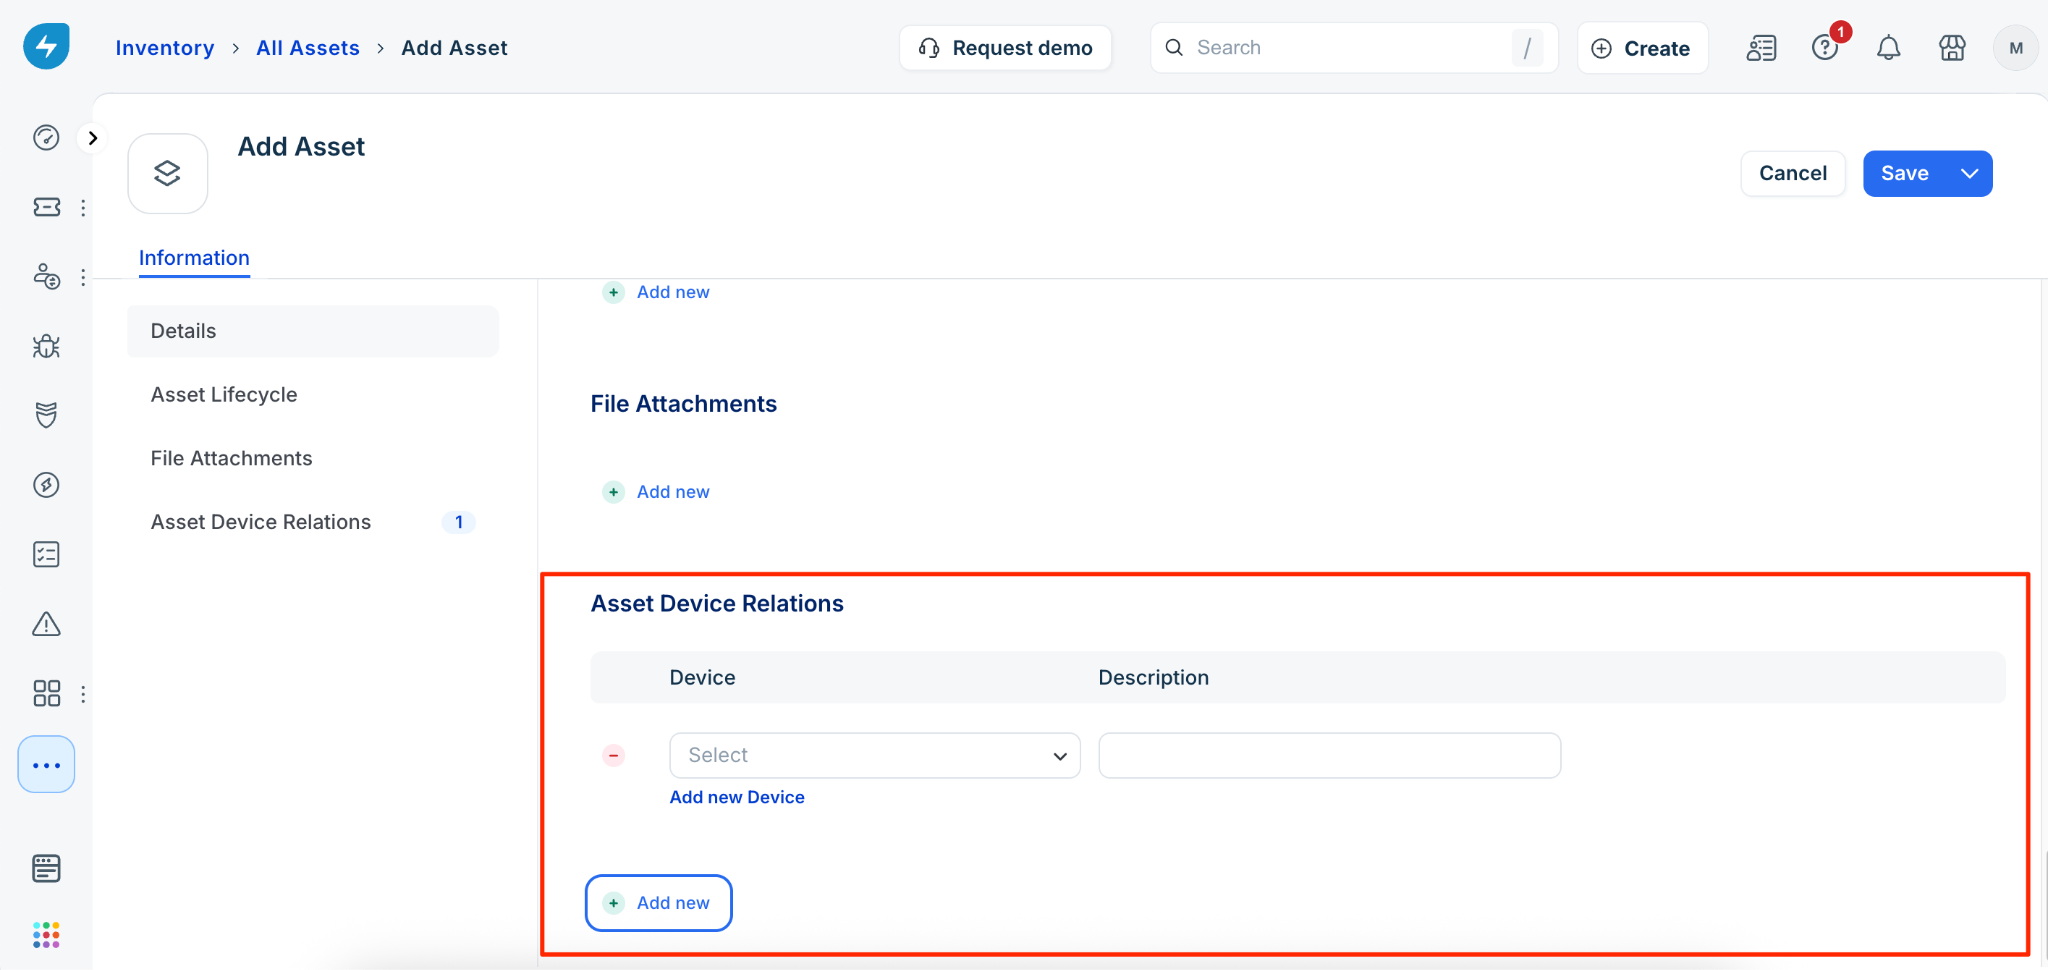
Fabric Extender (FEX) modules can be added as assets and then linked to a switch using asset device relations.
To manually add and associate a FEX module:
1. Go to IT Asset Management > Inventory > All Assets and click Add new.
2. Name the asset and set the Type to Fabric Extender.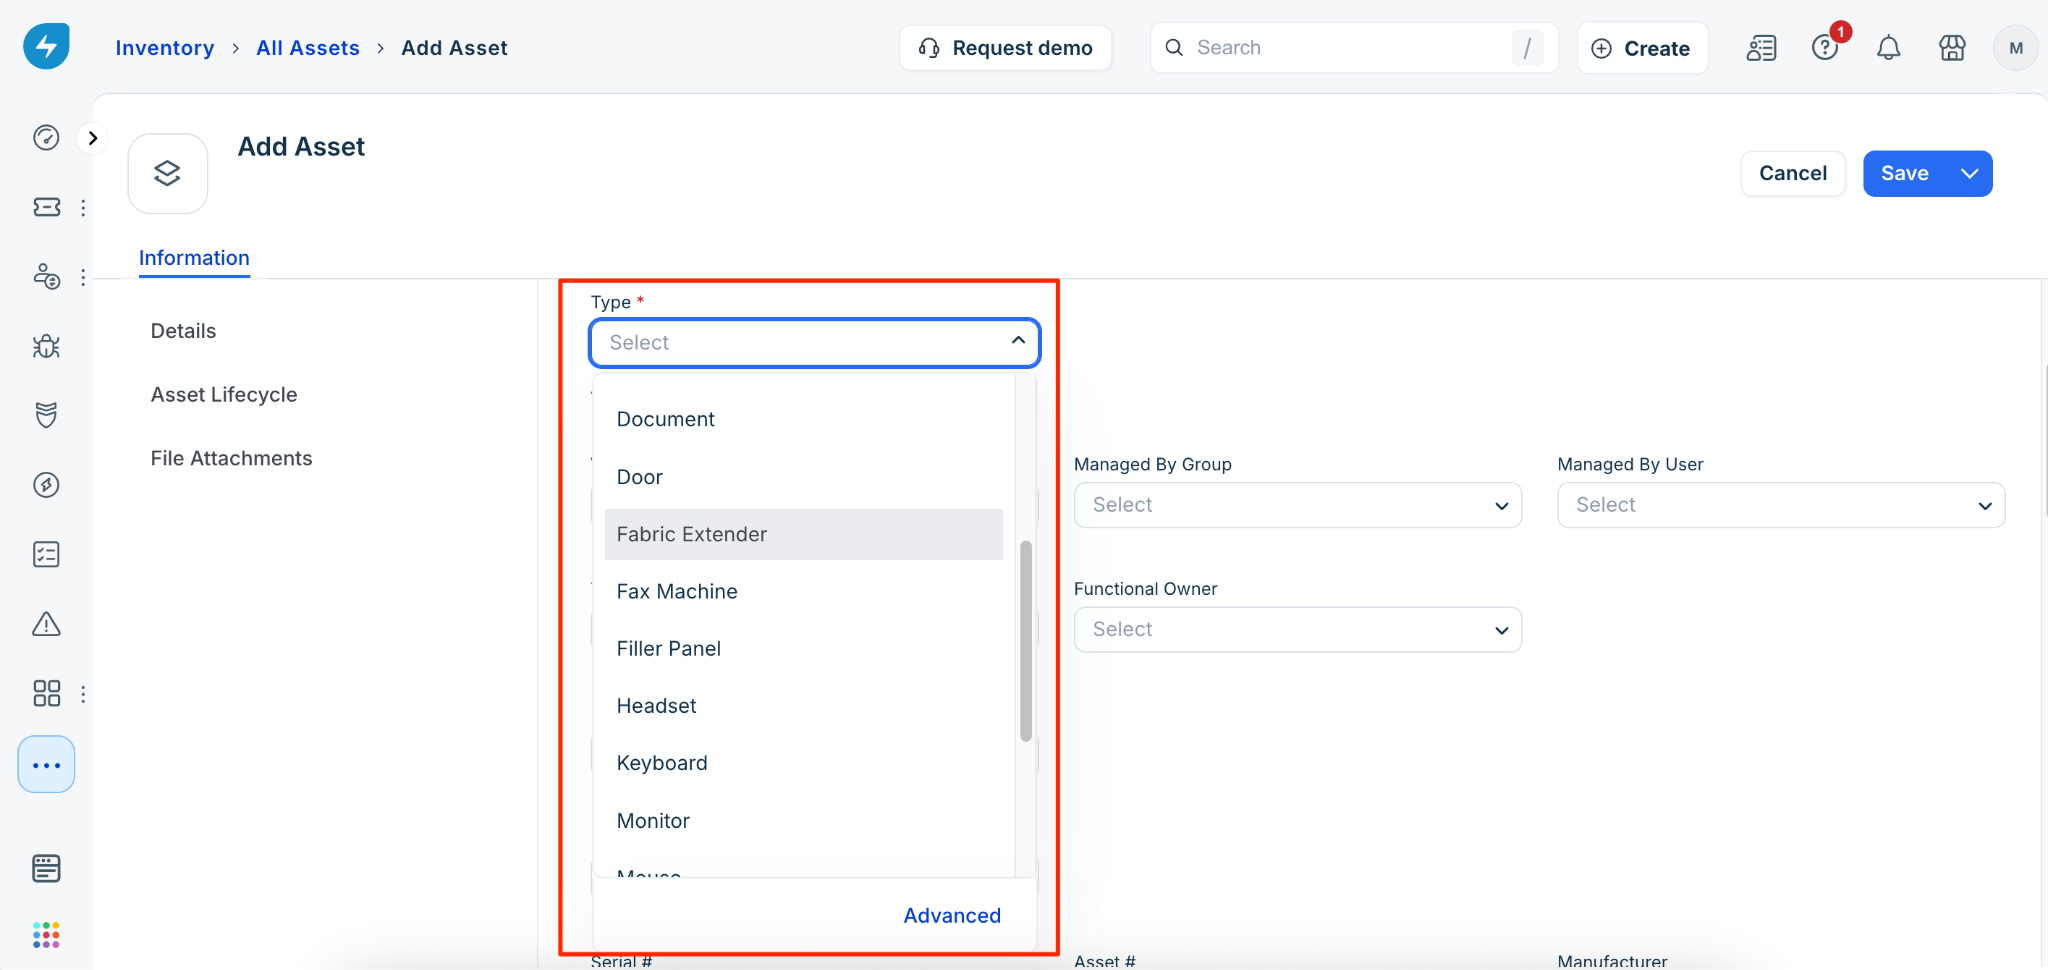
3. Under the Asset Device Relation section, associate the asset with the parent switch.