Last updated: 2026-05-13
The Workflow Builder is a no-code interface that enables Admins to create Agentic Workflows for AI Agents without writing a single line of code. Each Workflow is built using modular blocks that define how the AI Agent should:
Here’s a breakdown of the six key blocks available in the builder:
Trigger Block
What it does:
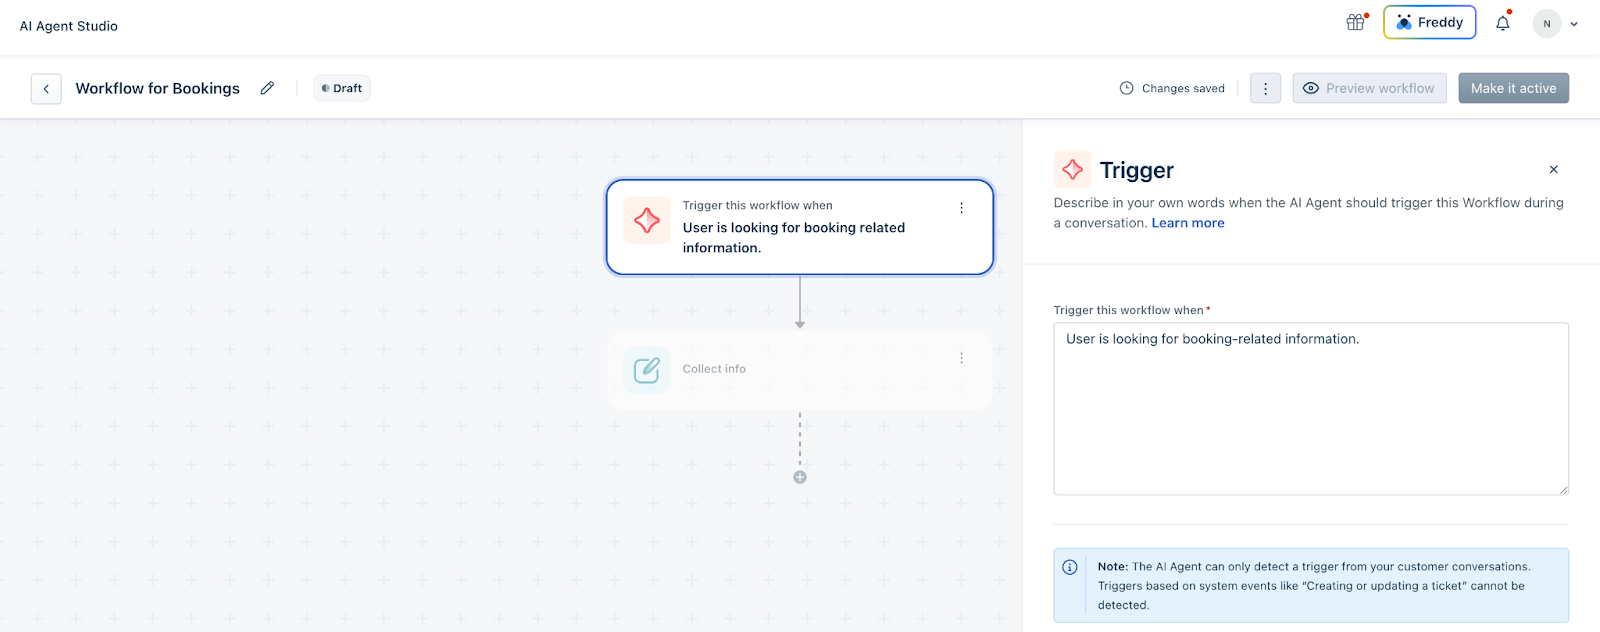
This is the starting point of any Workflow. It defines when the AI Agent should initiate a Workflow, based on user input.
How to use:
Click the Trigger block to open a configuration panel where you can enter natural language instructions. This is where you define phrases or expressions employees might use to trigger the Workflow.
You can optionally include real-world examples and business-specific terms to make the AI Agent more effective. For instance, in an IT Service Management domain, employees may use terms like:
Providing these domain-specific examples helps the AI better recognize employee intent and respond accurately—especially for industries with nuanced workflows or unique vocabulary.
Best Practice: Use varied, natural-sounding examples that your employees actually say.
``` Note: A common misconception is that the Trigger block can act on system events (like conversation initiation or positive/negative feedback) or detect sentiment. It cannot. The Trigger block only responds to employee queries. ```
Collect Info Block
The collect info block allows you to gather specific information from the employee during an AI Agent conversation. The collected inputs can then be used to trigger API actions, evaluate conditions, update properties, or send personalized responses within the workflow.
For example, you can collect details such as an IT asset tag, employee ID, ticket number, or any other relevant identifier required to complete a service request.
You can collect and map the following types of input parameters:
For each input collected, you can additionally define the data type, add a description, and decide if the input is mandatory or not.
``` Note: Collecting user identifiers such as email and employee ID may have security implications. ```
Secure data handling
When building workflows in Agent Studio, it’s important to handle requester identification correctly—especially for service request lookups, asset assignments, or employee-specific actions.
Existing mapped requester properties or session data can be used directly in workflows. When available, the AI Agent skips re-collecting these details, providing a faster, friction-free experience for users.
If details are not passed through the widget, the Admin must ensure the workflow collects and verifies required identifiers before sharing sensitive information.
For example, in a check service request status use case, the workflow should:
1. Collect the Ticket ID
2. Collect an Employee Identifier (e.g., employee ID or email)
3. Cross-verify both before displaying service request details
This prevents unauthorized data exposure and ensures compliance with security best practices.
Tip: Always prefer passing verified user properties via the widget script to reduce friction and improve workflow reliability.
Collect input parameter
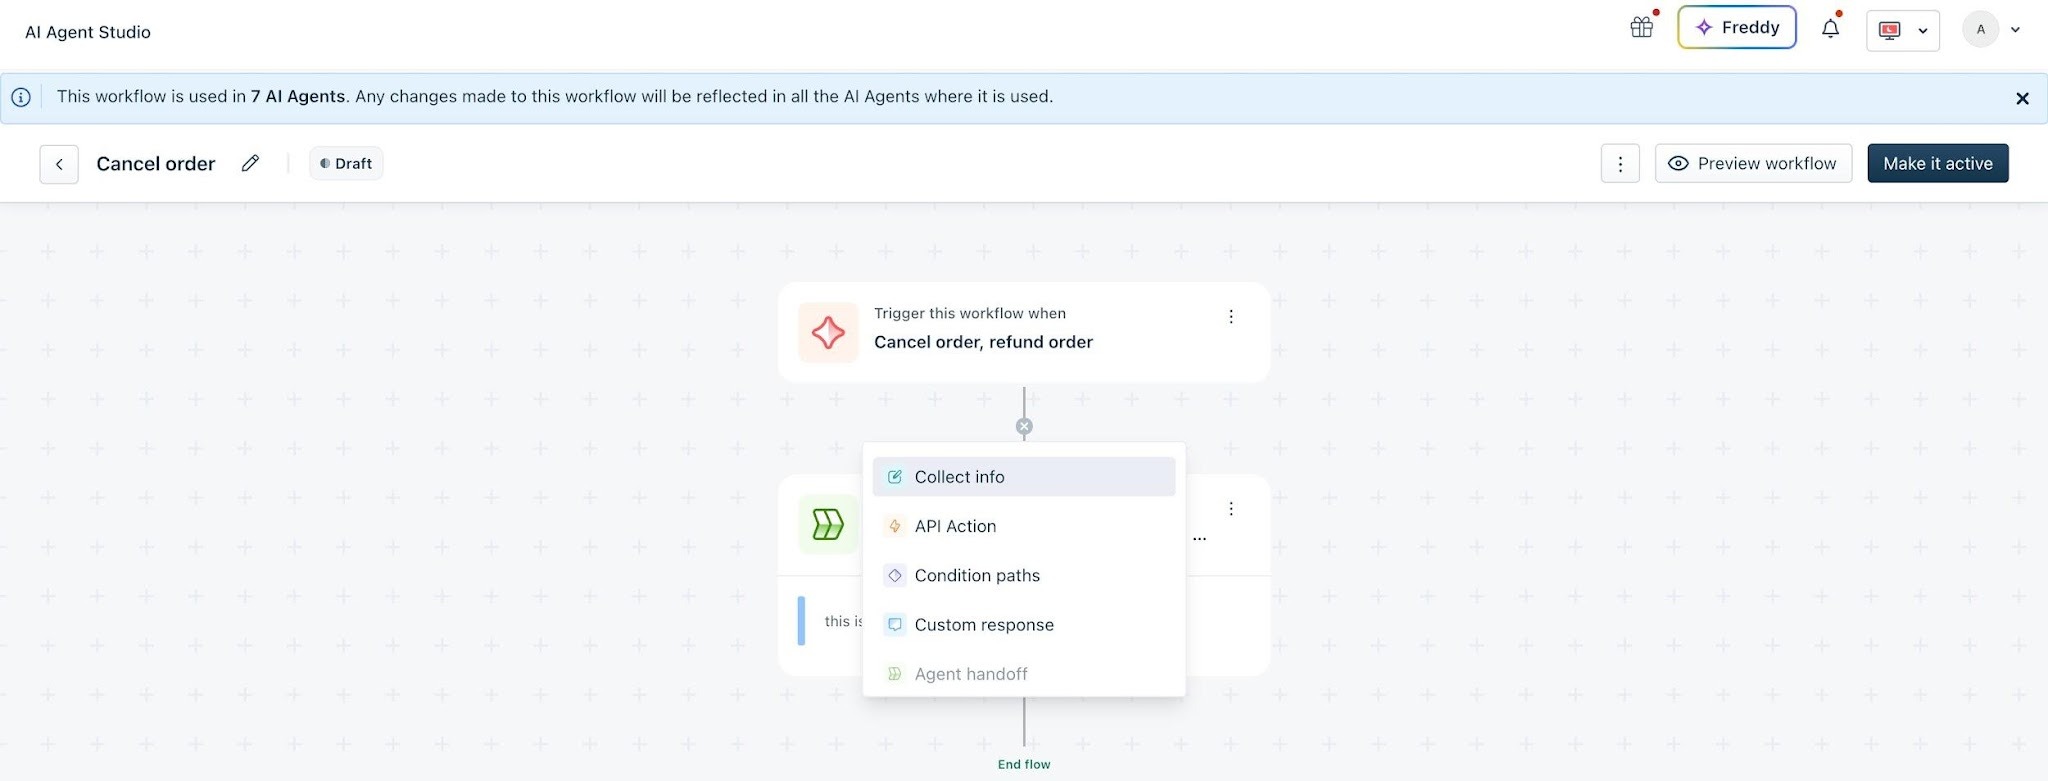
1. In the workflow editor, click Add block > Collect info.
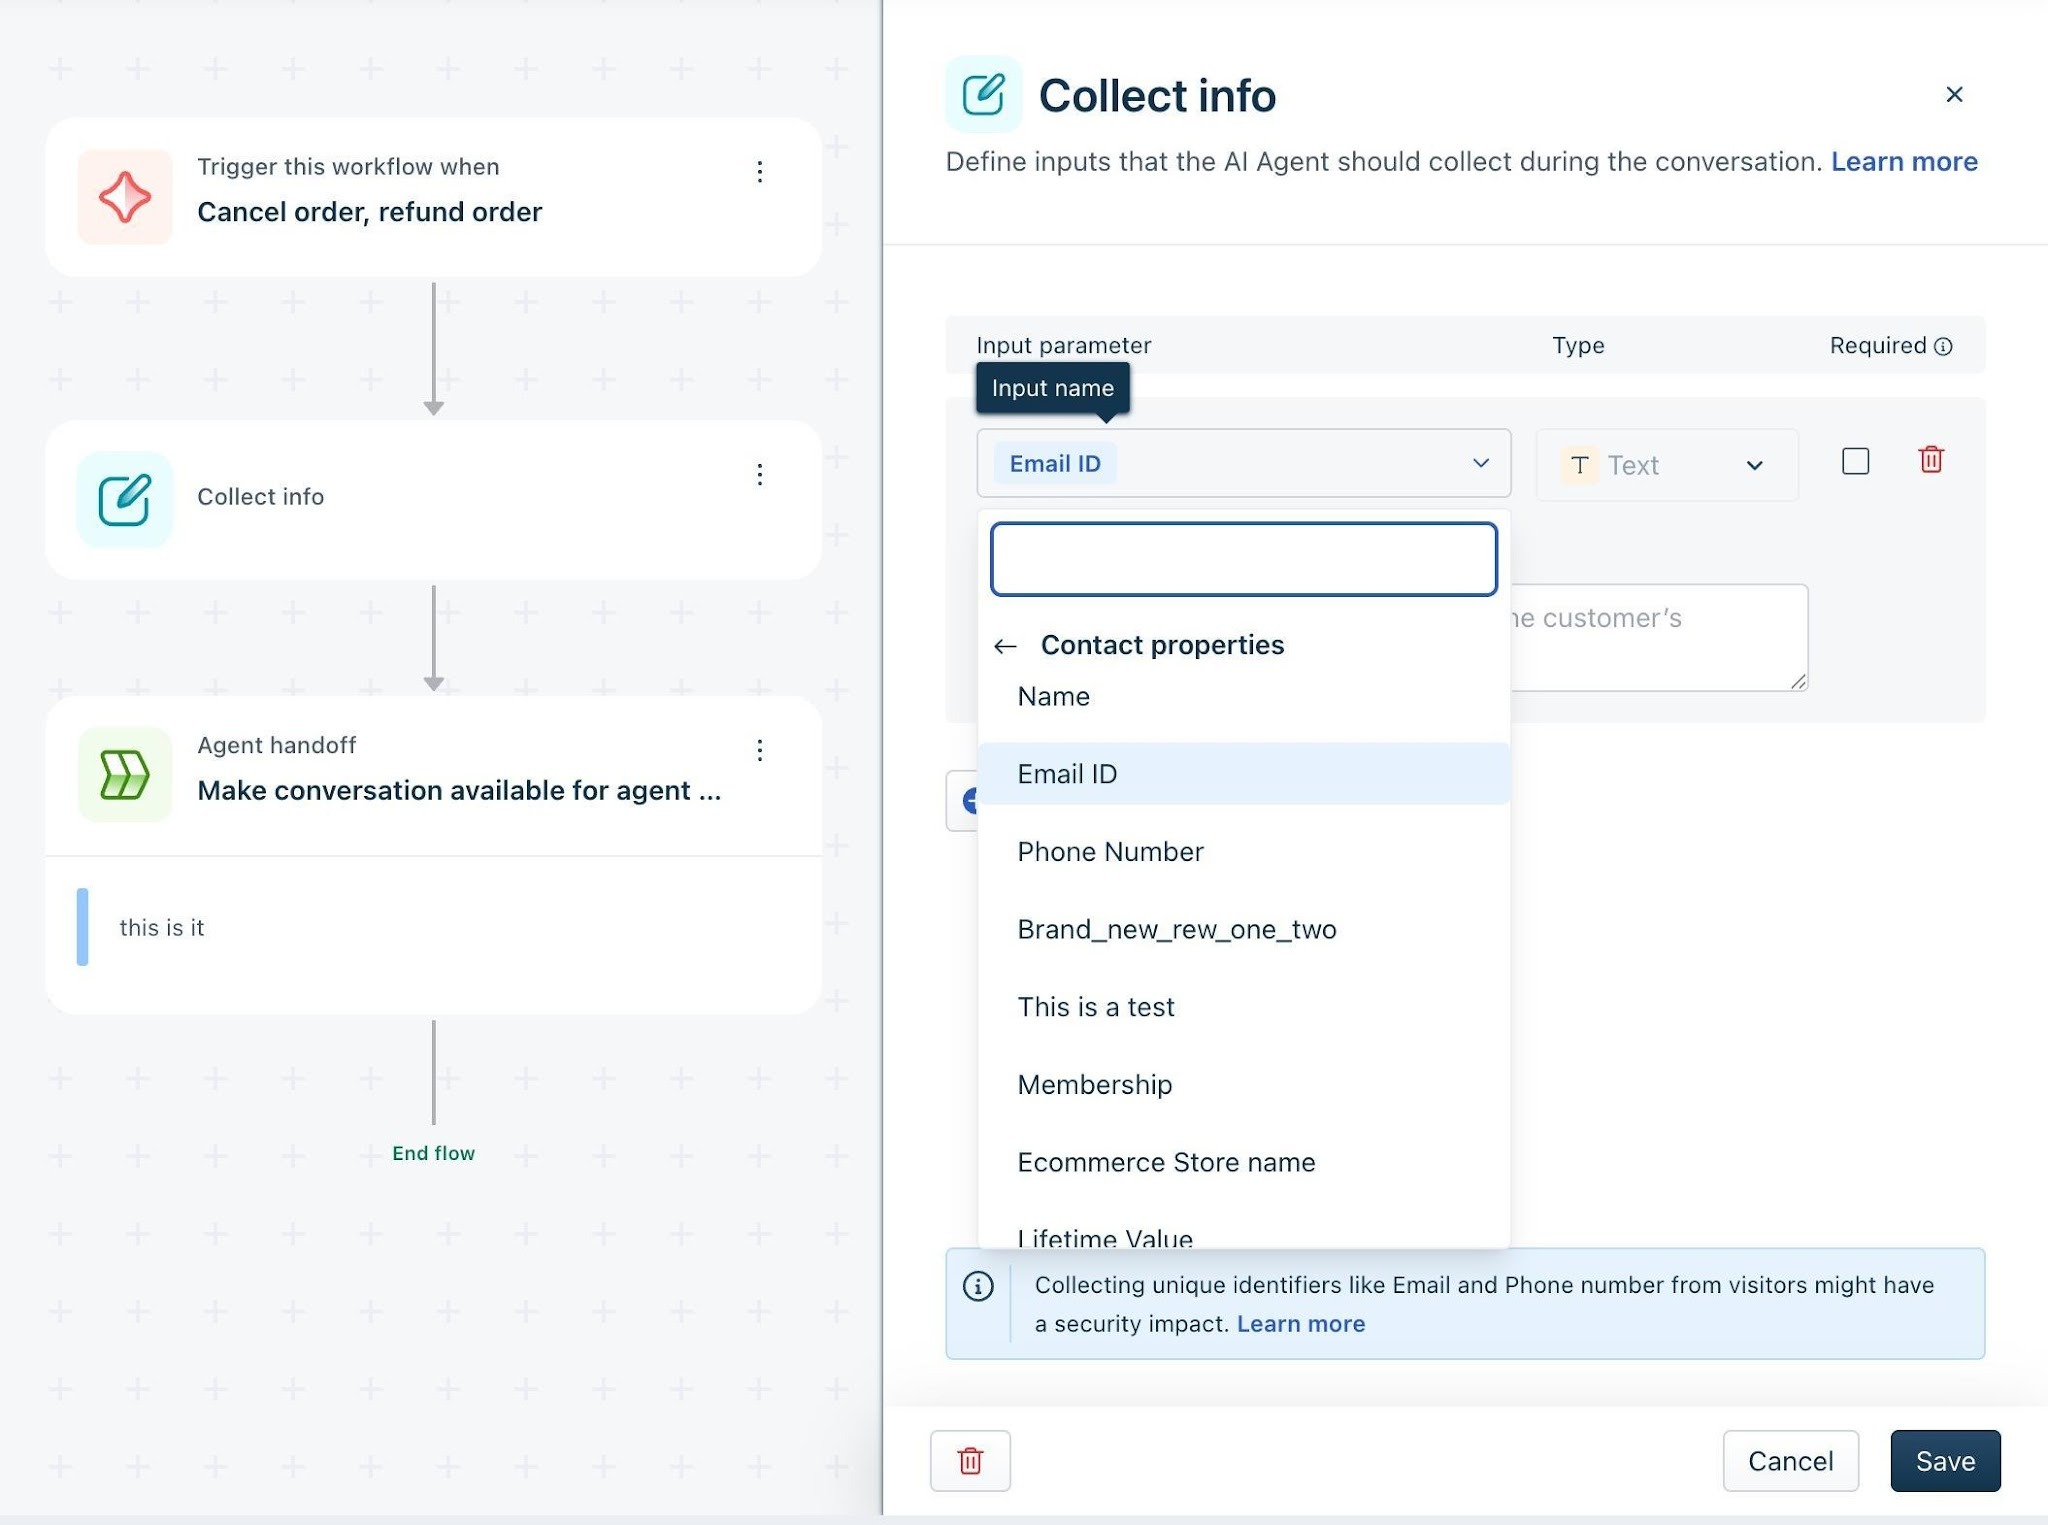
2. Click Input parameter and select the required type (contact, ticket, or custom).
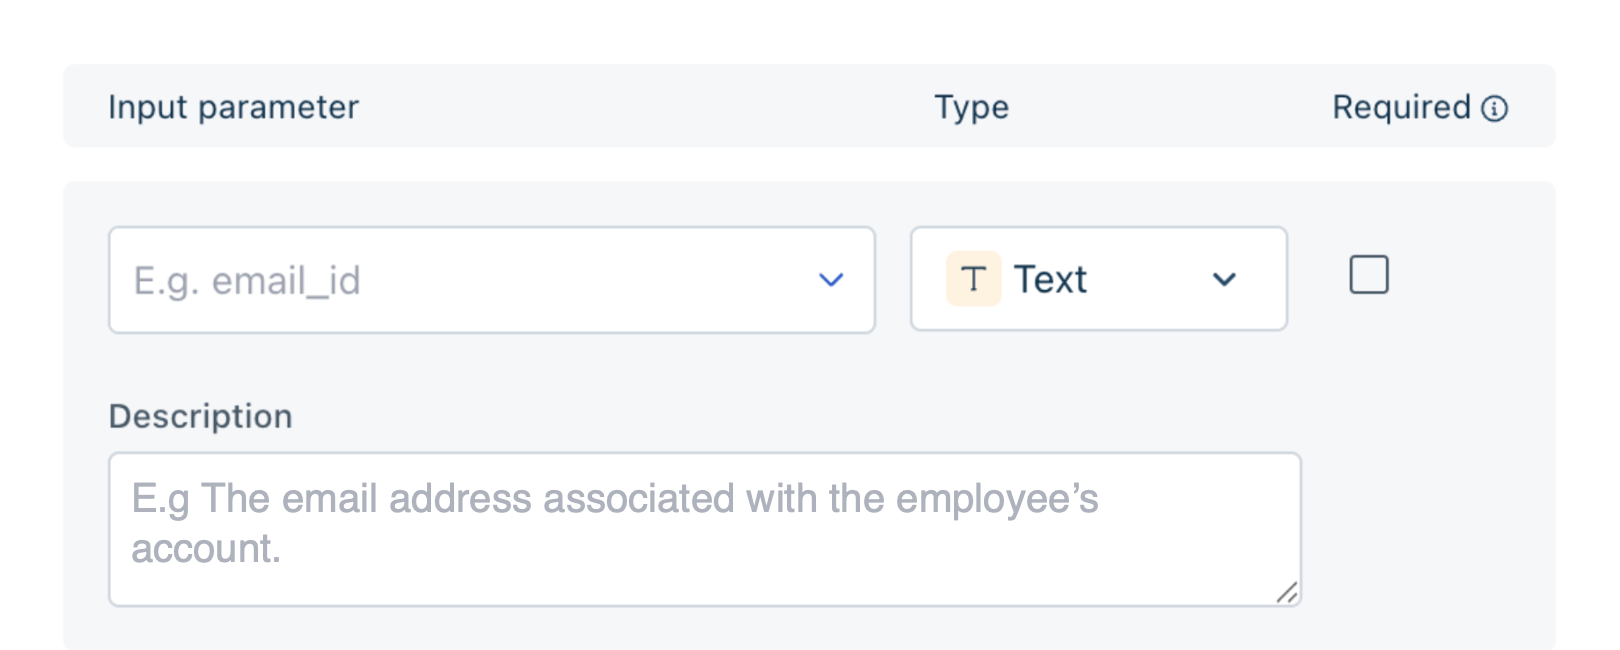
3. In the Description field, provide details on the input required.
For example, if you collect an employee's email ID and the description states “Email ID associated with the access request”, the AI Agent will prompt the employee to provide the ID linked to their request.
4. From the Type drop-down, map the appropriate data type for the input:
- Text: Collects free-form input such as names, addresses, or asset tags/ticket IDs.
- Number: Collects numeric values such as quantities, PIN codes, or ticket numbers.
- List: If you define items in the description, the AI Agent will treat the response as text input. The description guides the user’s response but does not display selectable options.
- Boolean: Collects a true/false response. This is rendered as plain text and not as a radio button or toggle. 5. Select the Required field to mark the input as mandatory or optional.
- When set as mandatory, the AI Agent continues prompting the employee until the required information is provided.
- When set to optional, the Agent attempts to collect the information but continues the workflow even if the employee does not respond. 6. Click Save.
Once configured, the collected inputs can be used in subsequent blocks within the workflow to personalise responses, update records, or trigger actions.
Best Practice:
API Action Block
The API Action Block enables your AI agent to securely interact with external systems in real time. Instead of only responding with static information, your AI can retrieve live data, trigger backend operations, and make decisions based on external responses — all within a single Workflow.
This allows you to build operational, end-to-end automation flows such as asset management, provisioning access, or incident & request management.
The API Action Block connects your Workflow to an external API endpoint. When triggered, it:
1. Sends a request to an external system
2. Receives the response
3. Extracts defined outputs
4. Makes those outputs available within the same Workflow
This enables dynamic and context-aware automation.
Multi-step API orchestration within a Workflow
You can use outputs from a previous API call in a subsequent API call within the same Workflow. This makes it possible to chain actions intelligently without re-collecting data from the user.
Example: Fetch Service Request Status → Update Service Request
Step 1: Collect Ticket ID/Request ID from the employee.
Step 2: Call Fetch Service Request Details API.
Step 3: Capture outputs such as:
Step 4: Use those outputs in a second API call to:
Because outputs are reusable across blocks, your Workflow remains clean, efficient, and logically structured.
Configure the API Action Block
Setting up the block involves two primary steps:
1. Choose or create an API action
2. Map Workflow variables to API parameters
1\. Choose or Create API Action
1. Select an existing API action from the dropdown
2. Or, click Create new API action to configure a new one from scratch.
To create a new API:
2\. Map collected inputs to API parameters
After selecting an API action, map Workflow variables to API parameters.
Example:
| Workflow variable | API parameter |
| {{ticket\_id}} | ticketId |
| {{email}} | employeeEmail |
This ensures the correct data is passed when the API is executed.
For high-impact actions, enable Ask for confirmation under Advanced preferences. When enabled, the AI will confirm with the employee before executing actions such as:
This prevents accidental or unintended changes.
Use MCP servers with API actions
Freshservice supports integration with the Model Context Protocol (MCP) server, which provides a secure, standardized layer for AI-to-system communication.
Instead of directly exposing raw APIs, MCP:
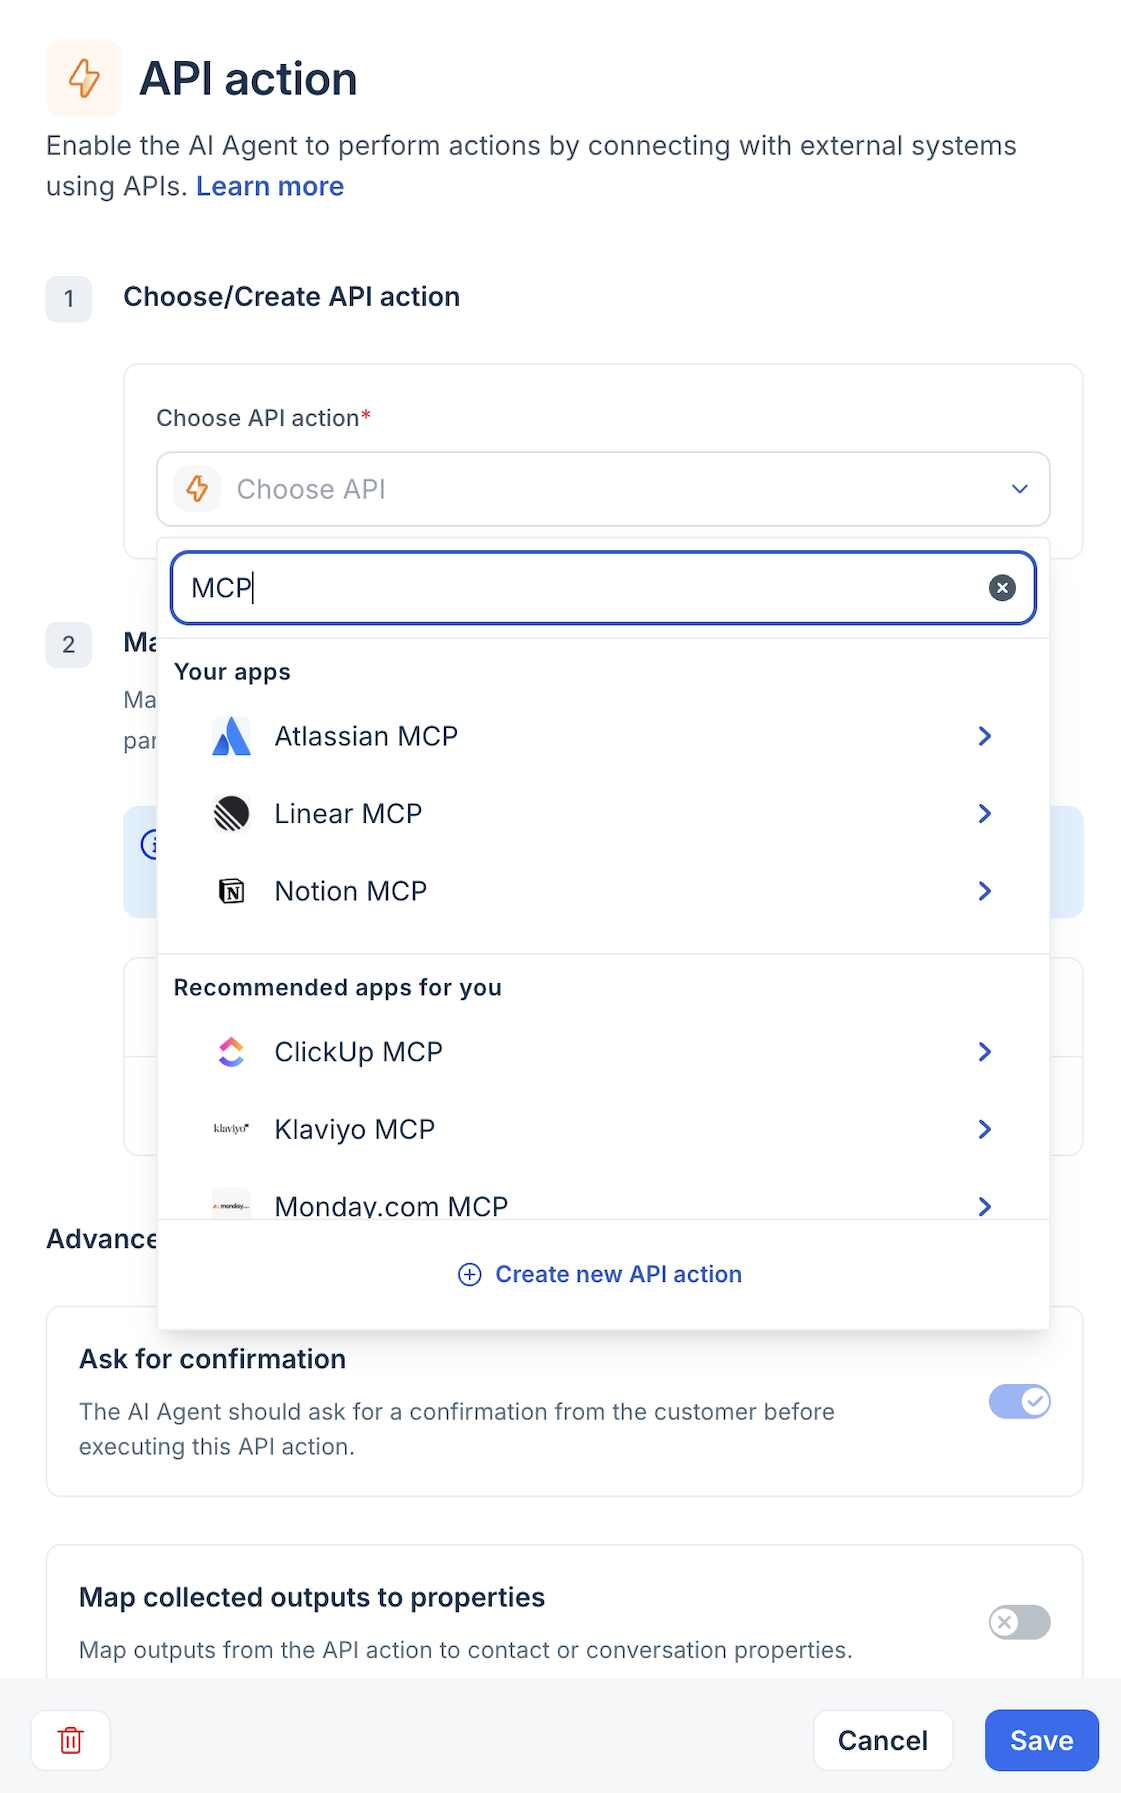
Unlike traditional integrations that simply move data between systems, MCP enables AI agents to discover available tools and act contextually within defined security boundaries.
Learn how to configure and connect the Freshservice MCP server.
Condition Path Block
The condition path block allows you to branch the workflow based on information collected earlier in the conversation or retrieved from an API. It evaluates defined criteria and routes the conversation through different logic paths.
You can use the block to define the following details in the workflow:
For example, after retrieving service request details, you can check whether the request type is 'Service Request'. Based on the evaluation, the workflow can proceed with the appropriate next step.
Define condition rules
To define a conditional path, you must clearly define the condition type, the operator, and the value. Together, these elements determine how the workflow evaluates data and decides which path to follow.
Condition types
You can configure conditions using the following properties:
List of operators
It specifies the comparison logic applied between the selected property or variable and the defined value. After selecting the condition type and operator, specify the value to complete the rule.
Example:
If Business Hours is Active, the workflow can route the conversation to a live agent. If the condition is not met, the workflow can proceed with an after-hours response.
Note: The available operators vary based on the selected condition type. For example, Business Hours supports only Is and Is not, while text-based properties support additional comparison operators.
| Operator | Description |
| Is | Evaluates whether the property exactly matches the specified value. |
| Is not | Evaluates whether the property does not match the specified value. |
| Is any | Checks whether the property matches any one of multiple specified values. |
| Is none | Checks whether the property matches none of the specified values. |
| Contains | Checks whether the value includes the specified text or substring. |
| Does not contain | Checks whether the value does not include the specified text. |
| Contains in | Checks whether the property value exists within a predefined list of values. |
| Does not contain in | Checks whether the property value does not exist within a predefined list. |
| Contains any of | Checks whether the value includes at least one item from a defined set. |
| Does not contain any of | Checks whether the value includes none of the specified items. |
To add a conditional path:
1. In the workflow editor, click Add block >Conditional path.
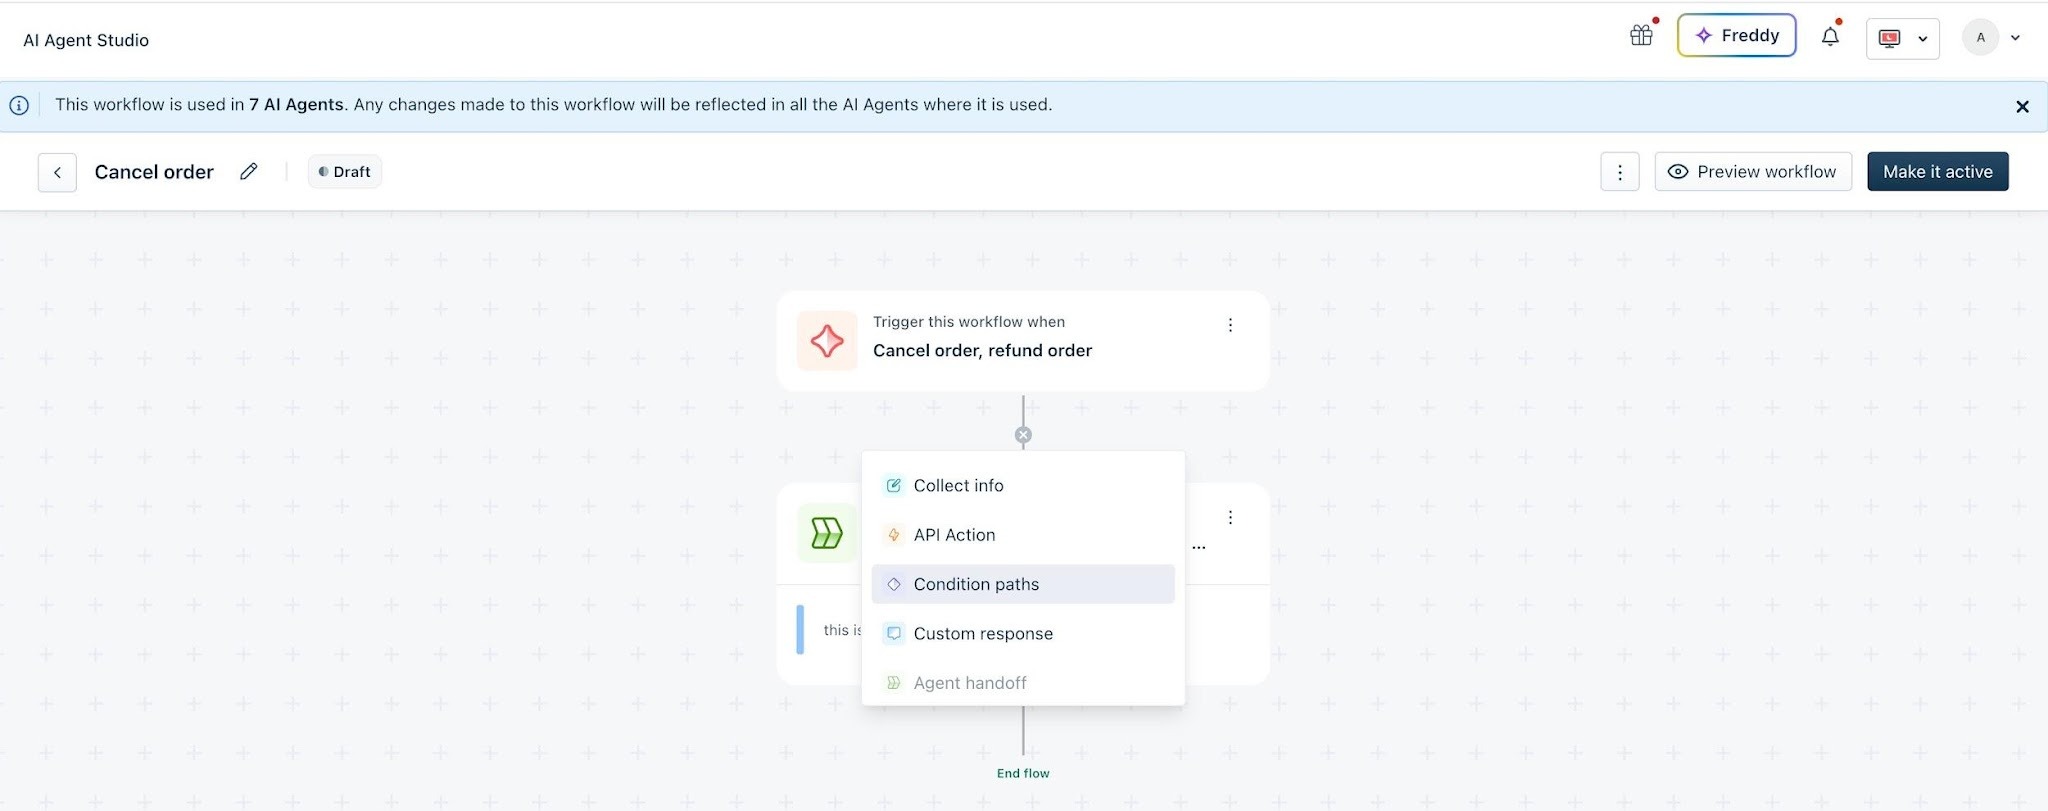
2. Select the condition/property type and corresponding property. For example, contact Account properties > Business Hours.
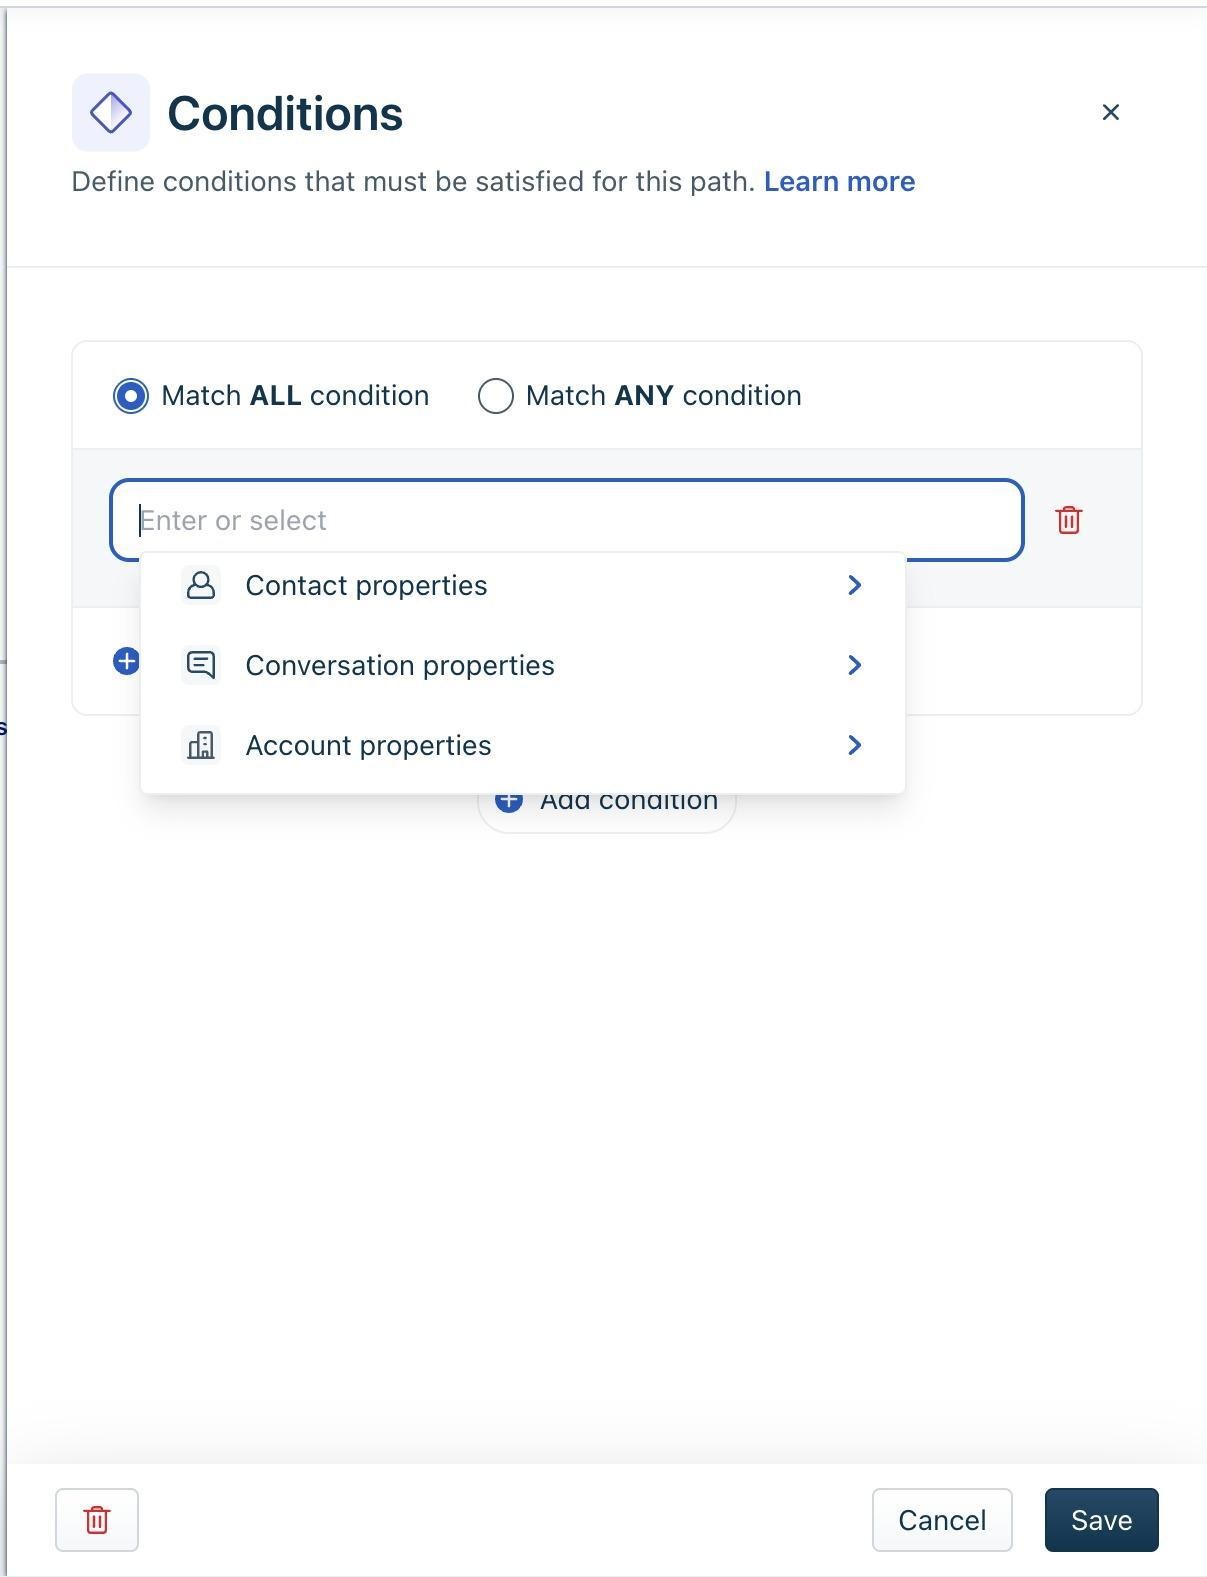
3. Choose the appropriate operator and define the value.
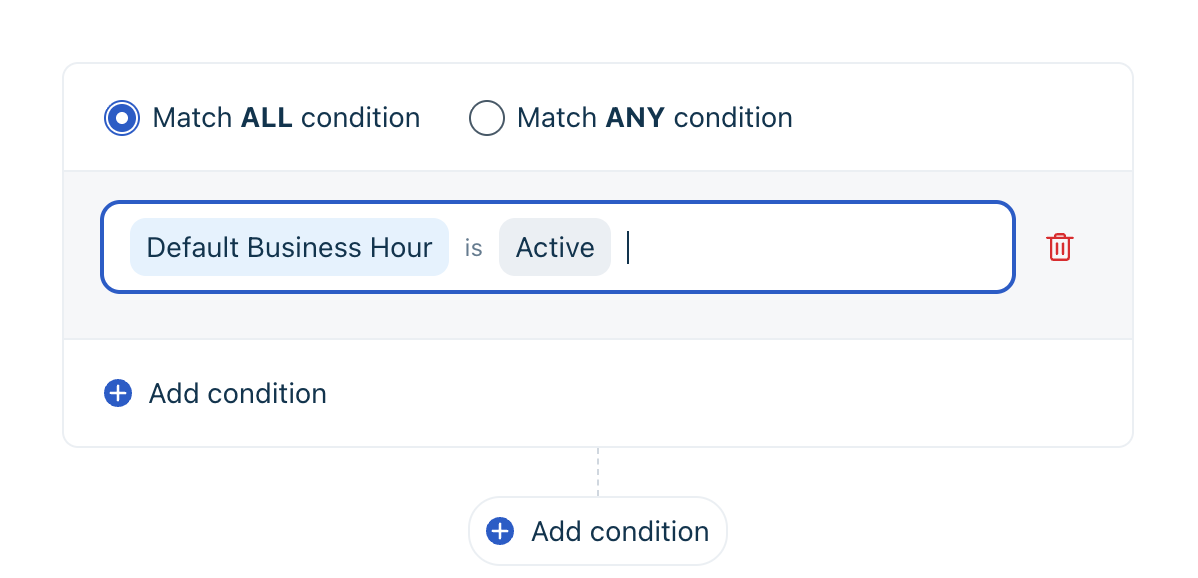
4. Add additional conditions if required, and choose whether to meet all or any of the defined conditions.
5. Click Save.
Best Practice:
Custom Response Block
What it does:
This block allows you to manually define how the AI should respond to the employee.
You have two options to set up your responses:
Best Practice:
Use Custom Responses when tone, brand voice, or exact phrasing matters.
Agent Handoff Block
What it does:
This block transfers the conversation to a live human agent when needed.
This is useful in:
Best Practice:
Use this block at points of failure or uncertainty. Also, set expectations with a message like:
“I’m connecting you with a human agent who can help further.”
Workflows Versioning
Workflows versioning helps you make changes to existing Workflows quickly without having to disrupt or delete the active or live Workflow.
To make changes to an existing workflow,
1. On the Workflows list page, under the Created Workflows tab, click on a Workflow you want to make changes to.
2. Click Edit Workflow on the top right.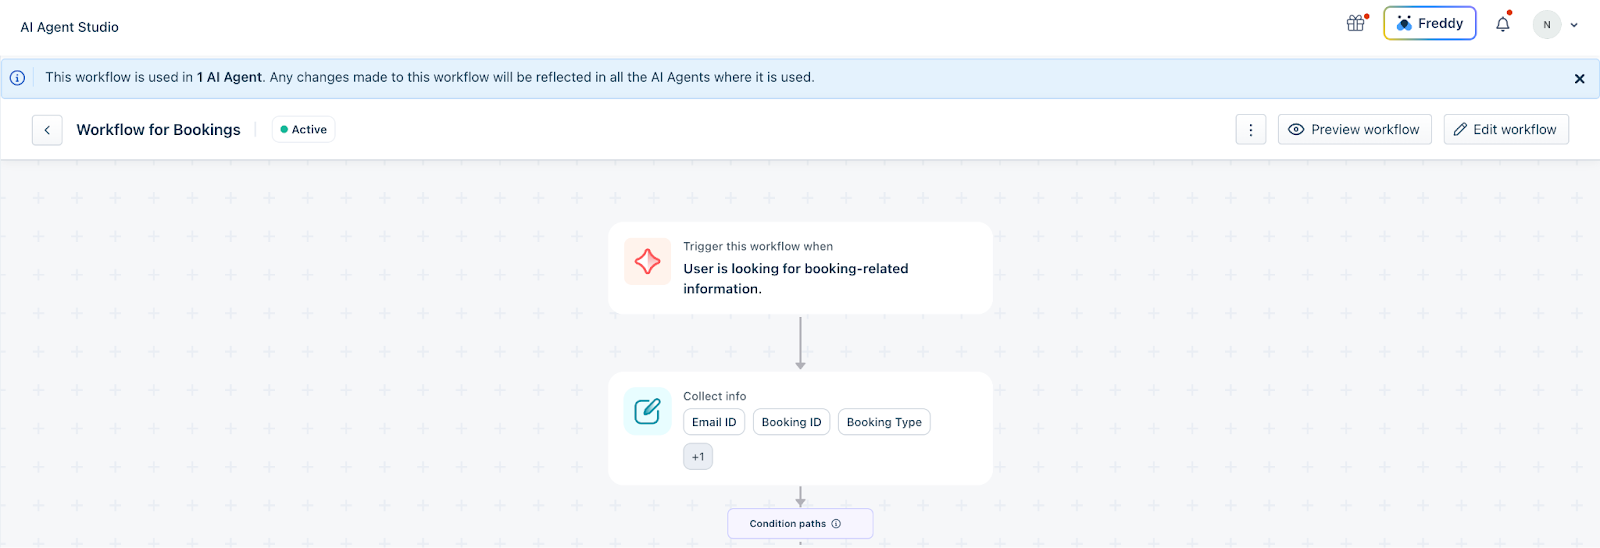
3. In the confirmation pop-up that discusses which AI Agents are using the Workflow, click 'Yes' and proceed to edit.
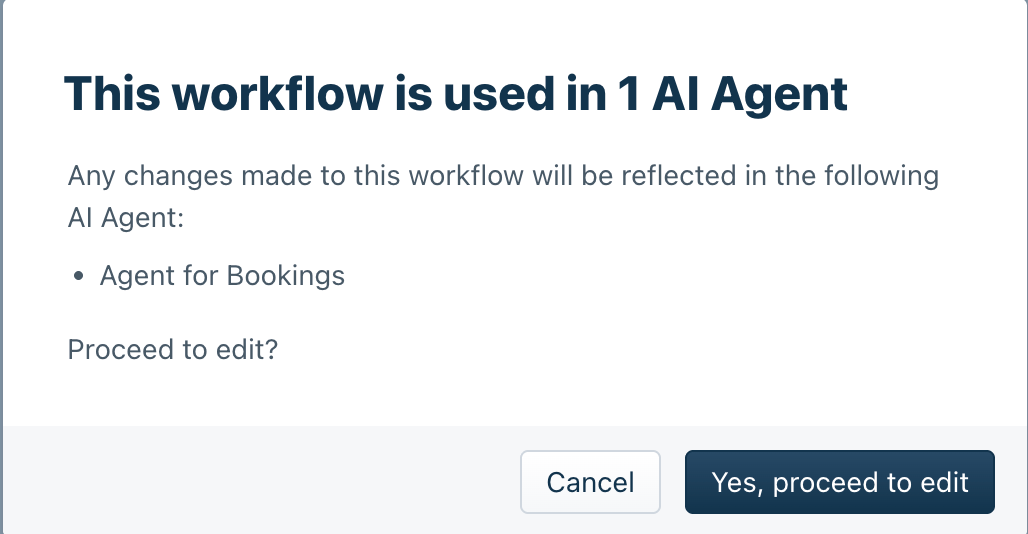
4. A draft of the active Workflow will be created, where you can make the changes required (for example: Changing a condition), ensuring the current active Workflow remains as-is
5. You can preview the changes you have made by clicking Preview Workflow at the top. Here you can test the Workflow to check if the changes you have made are now reflected. 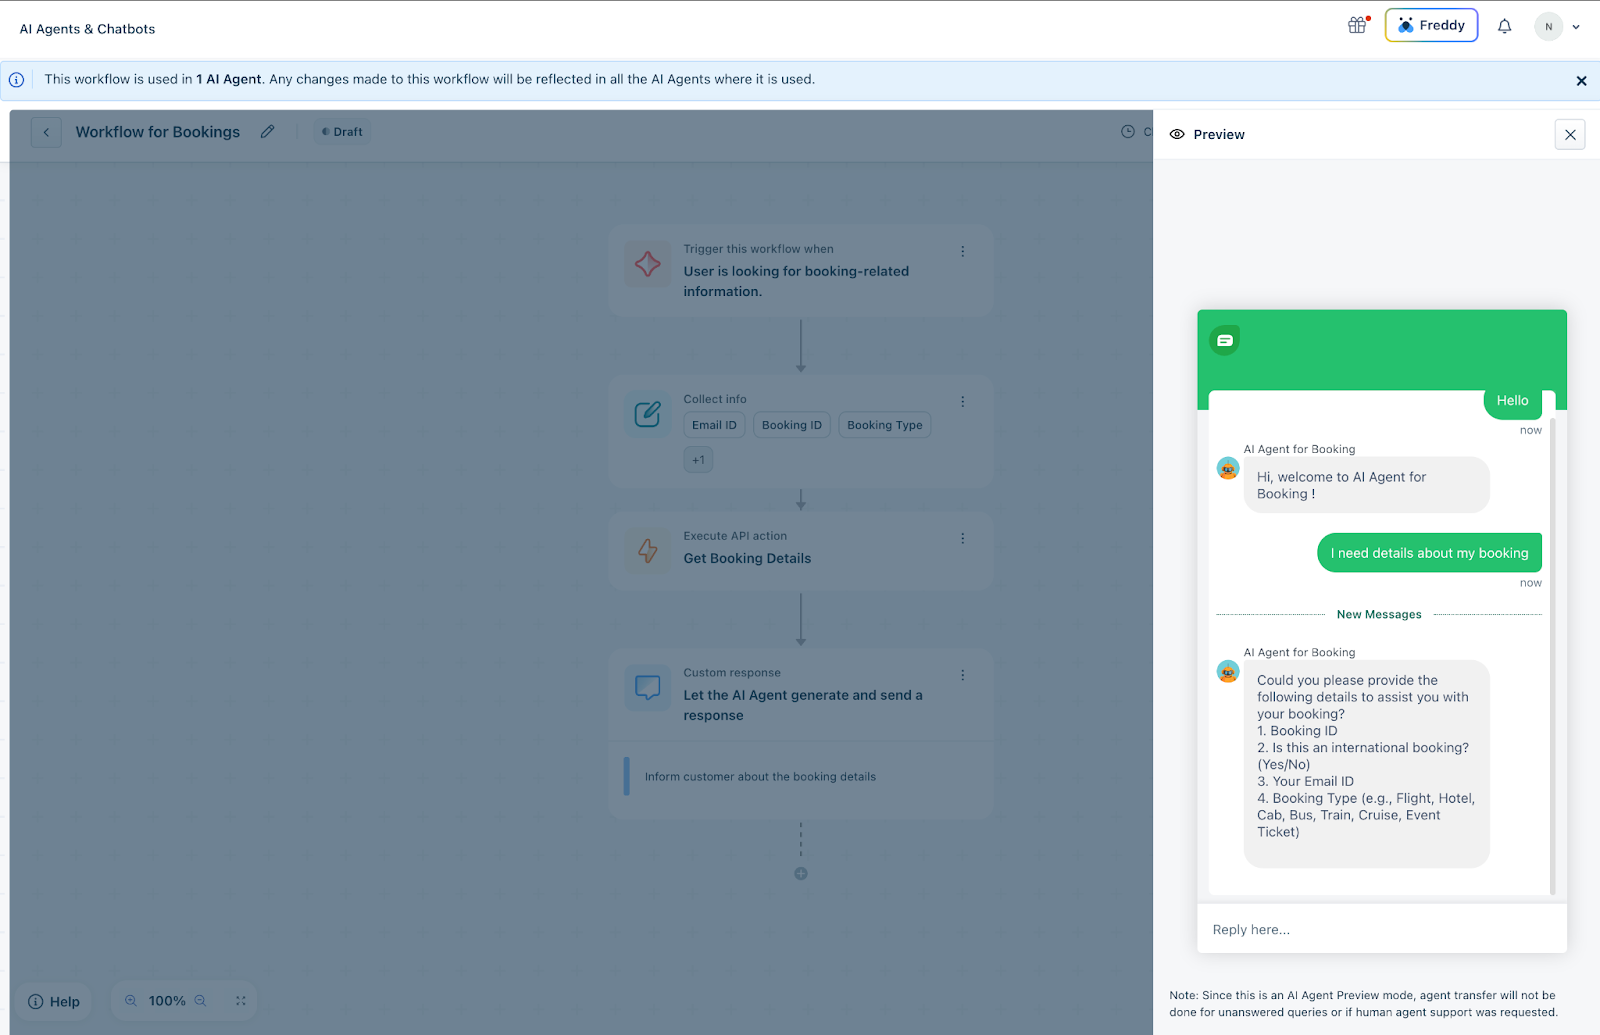
6. Once the changes are made, click Make it active
7. In the confirmation pop-up that appears, click Yes, Make it active. 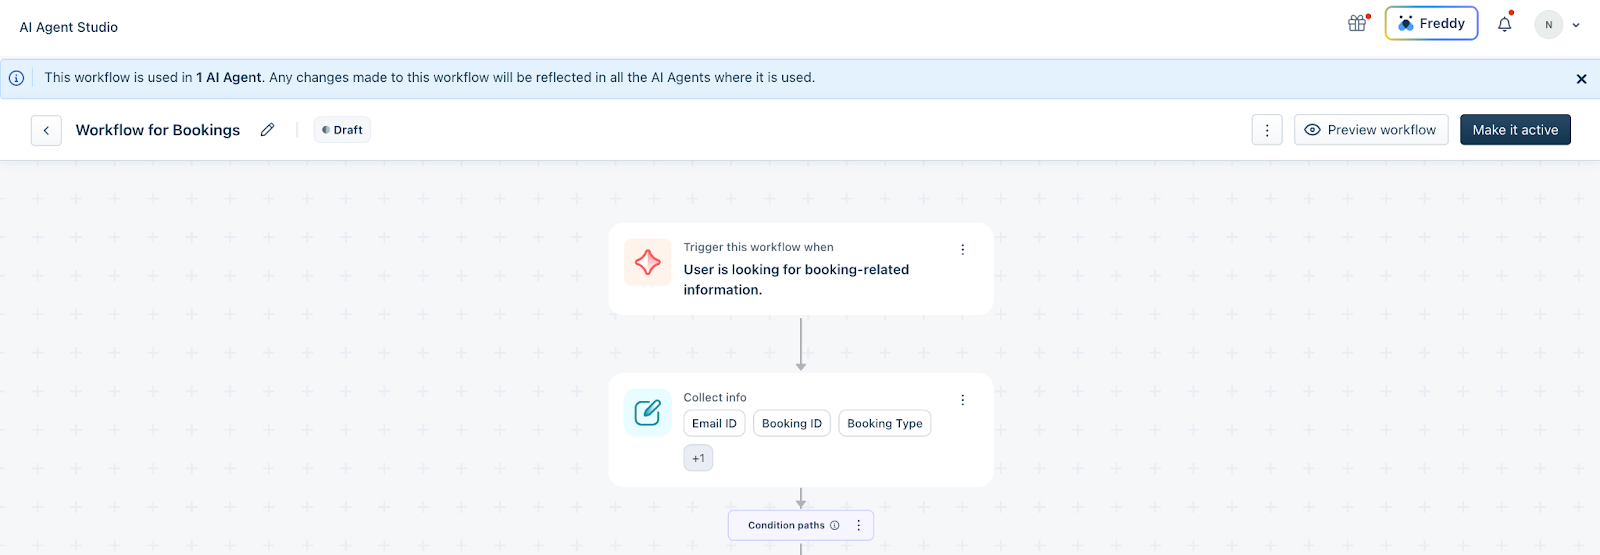
8. When you make a draft version active:
1. The draft version will replace the current active version in both the Workflows library and AI agents
2. The previous active version will be removed 9. If you have a draft version that you haven’t made active yet. You will see the active and draft versions in the Workflows list view.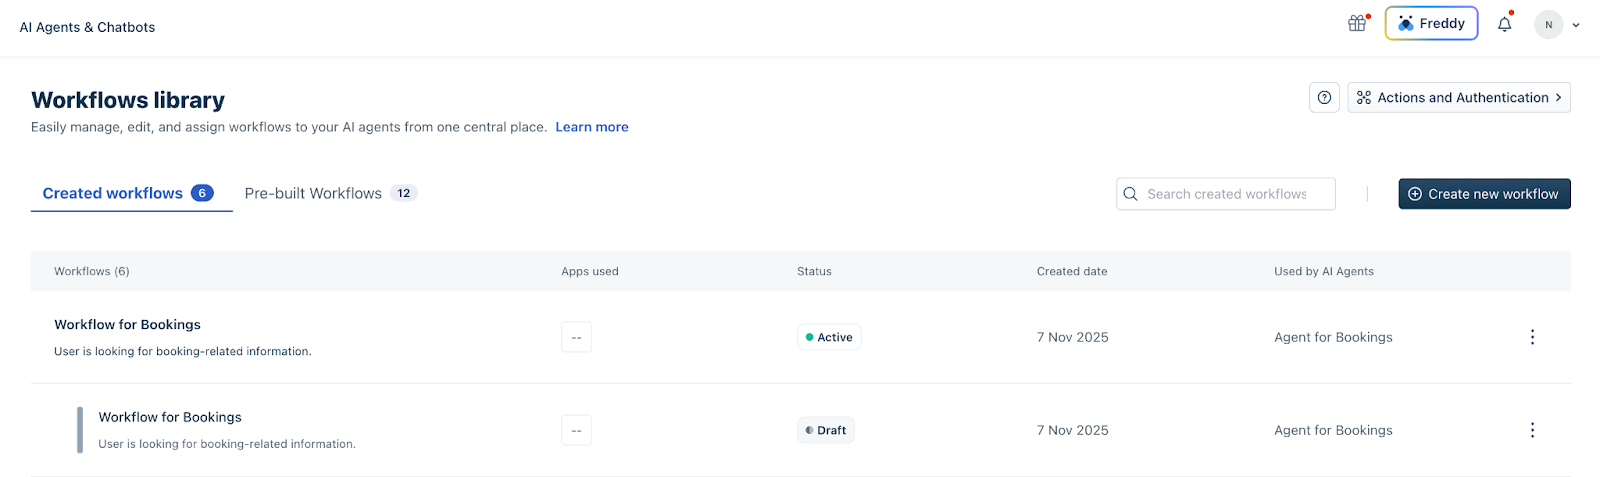
Note:
1) Workflow versioning is applicable only to custom Workflows.
2) Once the draft version is made active, all AI agents using the Workflow will use the new active version.