Last updated: 2026-03-12
Overview
Freshservice integrates with Adobe Acrobat Sign through marketplace apps to manage e-signatures. If a third-party provider is not configured, then the system uses the native e-signer tool by default.
After the Adobe Acrobat Sign app is installed and selected as the e-signature option, you can manage recipients and document routing directly within the platform.
Note: Freshservice records all app management actions, including installation, disablement, and uninstallation, in the Audit Log for administrative tracking.
Prerequisites
To configure Adobe Acrobat Sign as an e-signature provider, ensure you have:
Install Adobe Acrobat Sign
To install the Adobe Acrobat Sign app, perform the following steps:
1. Go to Admin > Global Settings > Automation & Productivity > Apps.
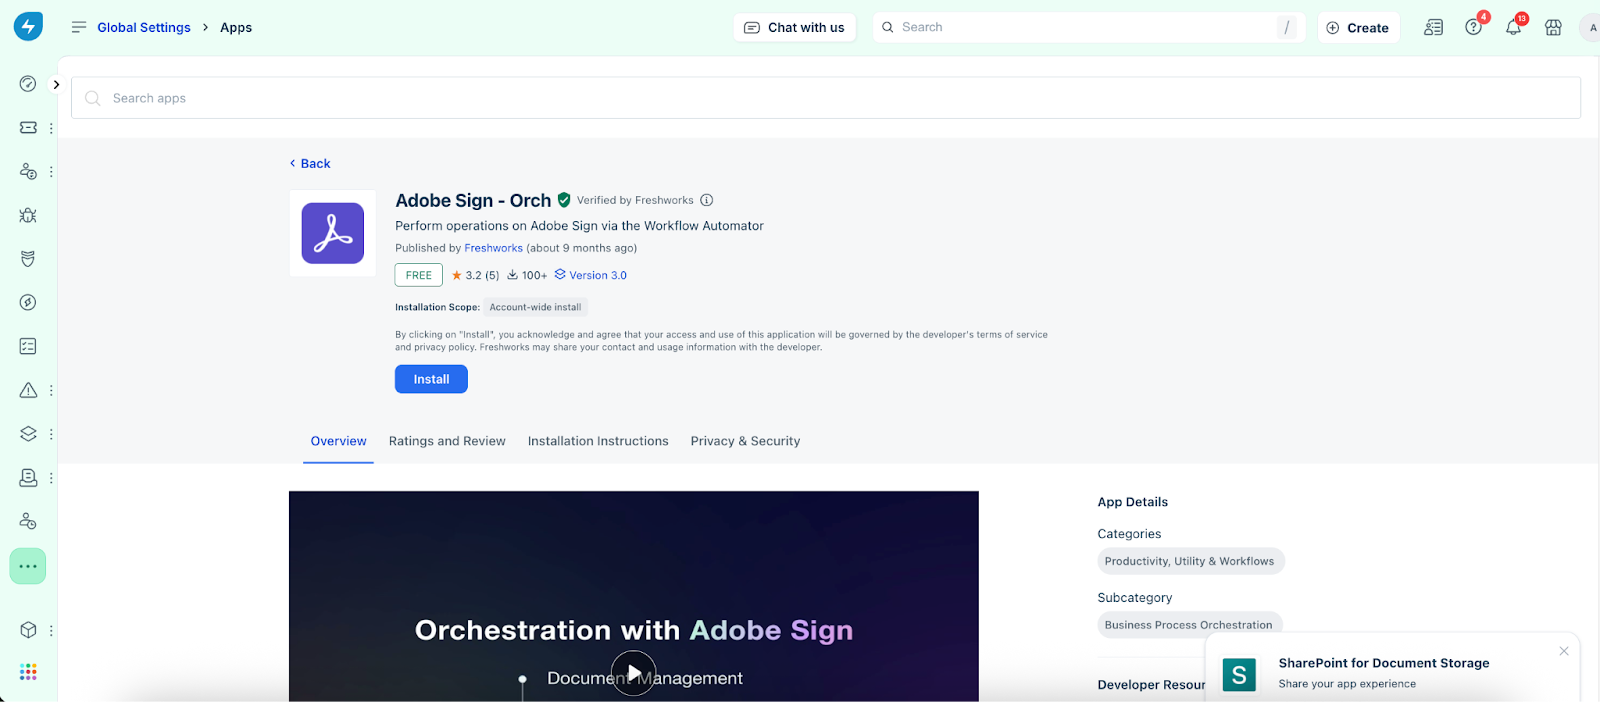
2. Search for and select the Adobe Acrobat Sign app.
3. Click Install to open the app configuration page.
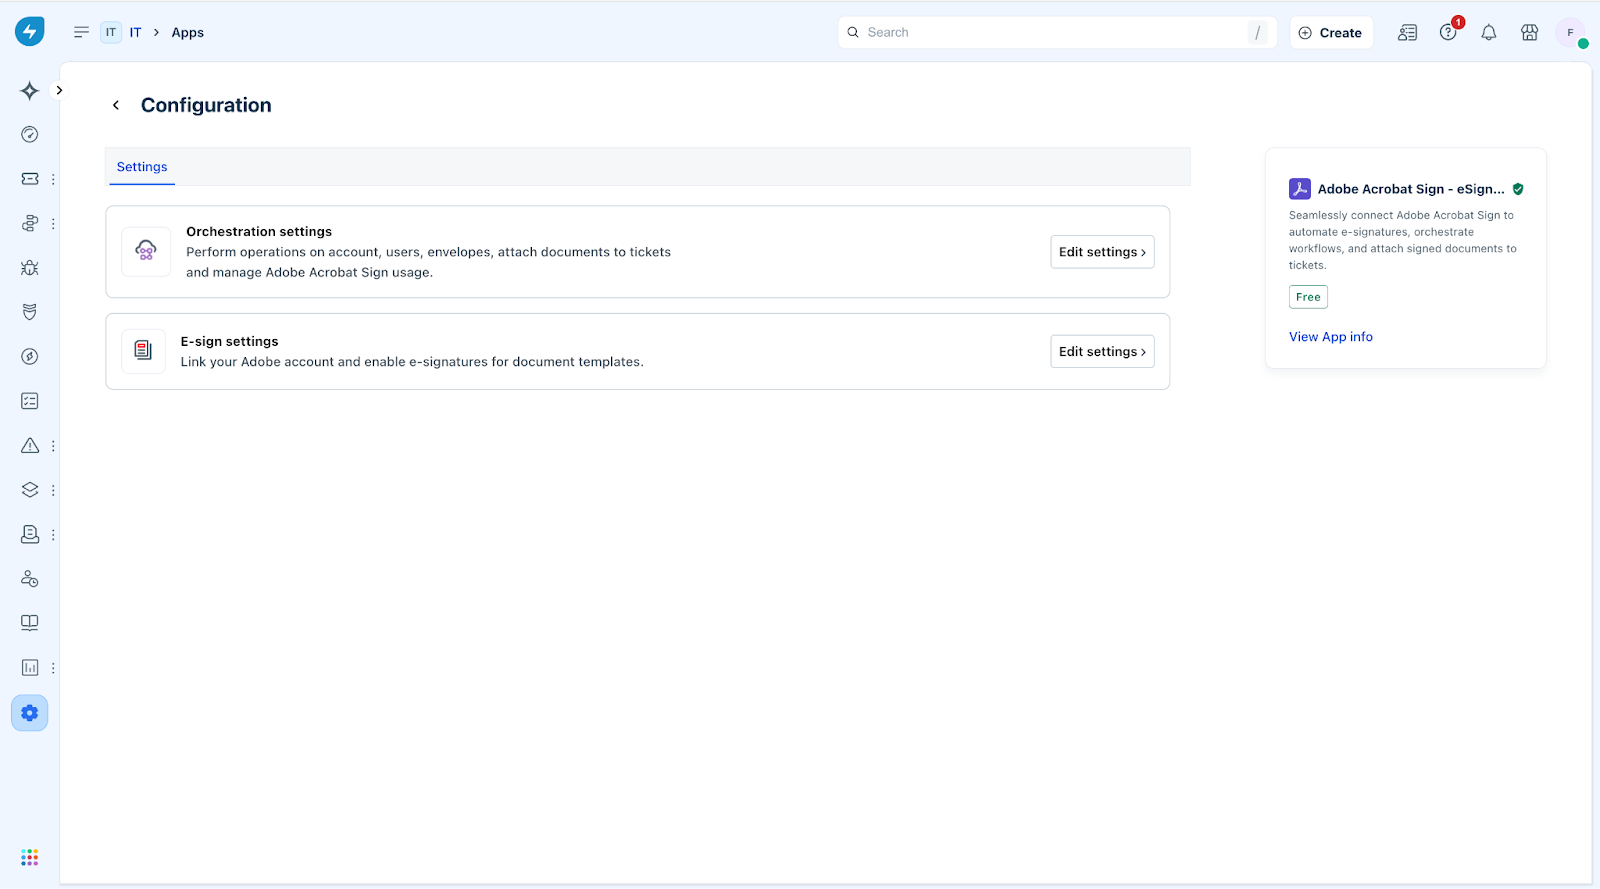
4. On the Configuration page, in the E-sign settings section, select Edit settings.
5. In the new screen, turn on the E-sign toggle to enable the configuration.
6. Enter the required parameters from your Adobe and Freshservice accounts:
Note: For more details on obtaining these parameters, see the Adobe Acrobat Sign orchestration app installation guide.
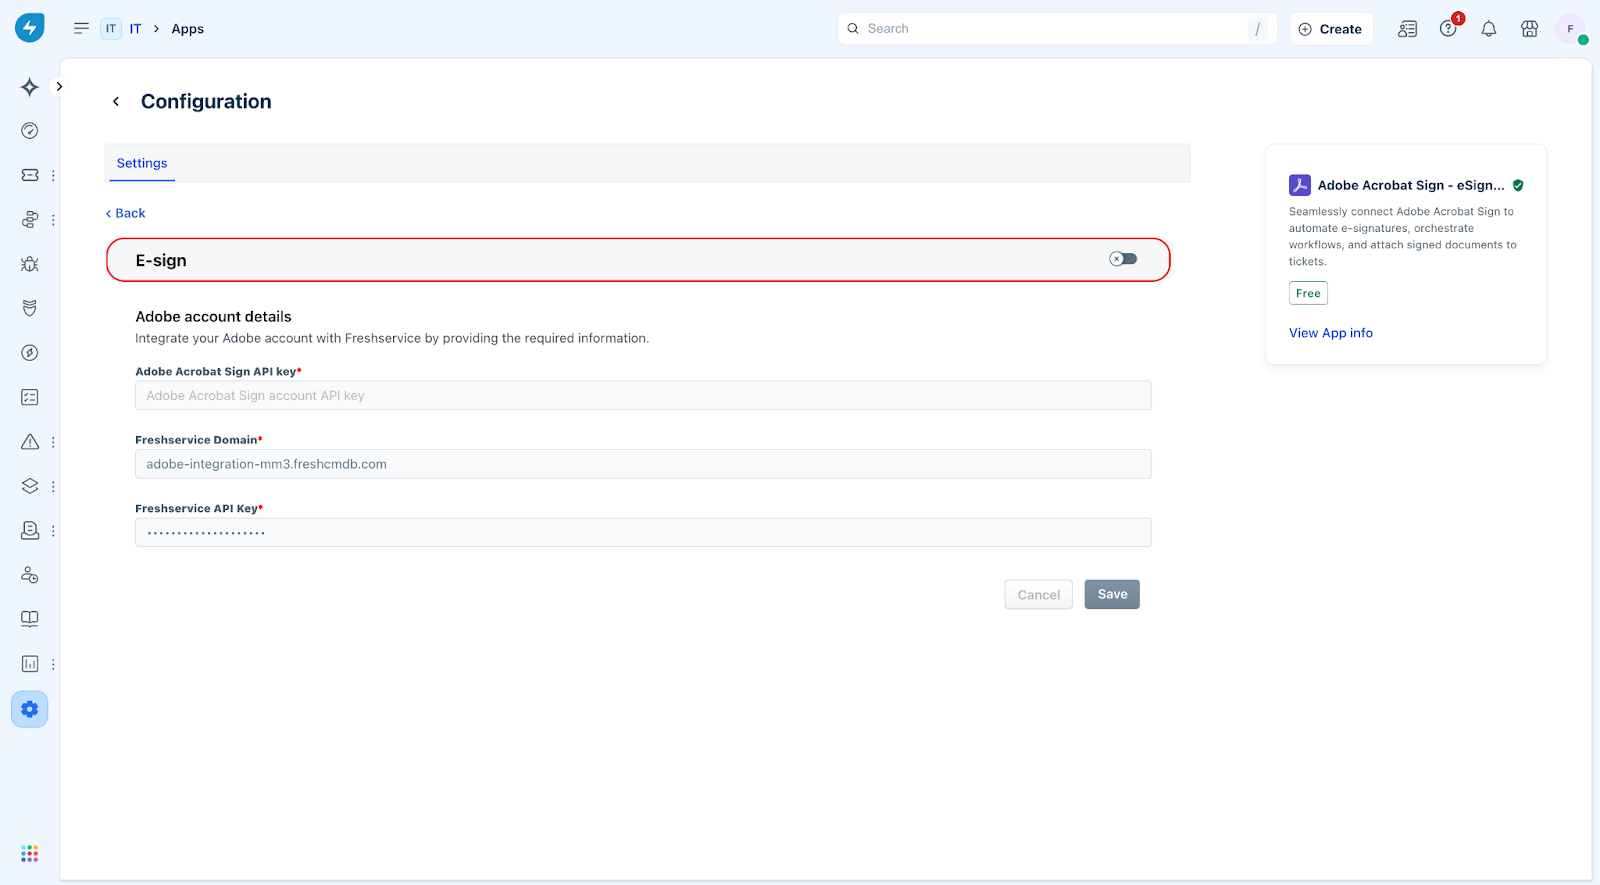
7. Select Save.
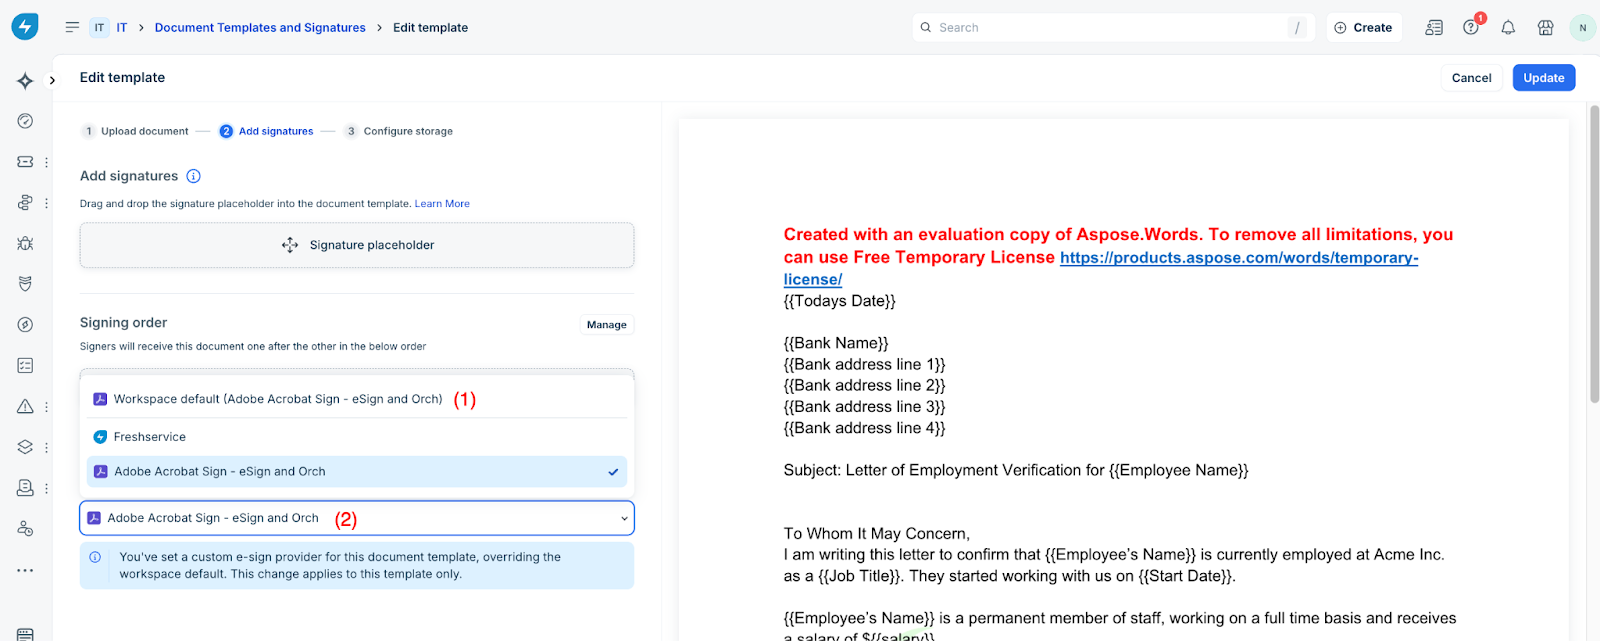
Configure Adobe Acrobat Sign as the e-sign provider for a document template
Regardless of the default e-sign provider set at the workspace level, you can override it for a specific template. To configure Adobe e-signer for a document template, perform the following steps:
1. Go to Admin settings > Document Templates and Signatures.
2. Click the Edit buttonon the document template you want to update.
3. Go to the Add Signature tab.
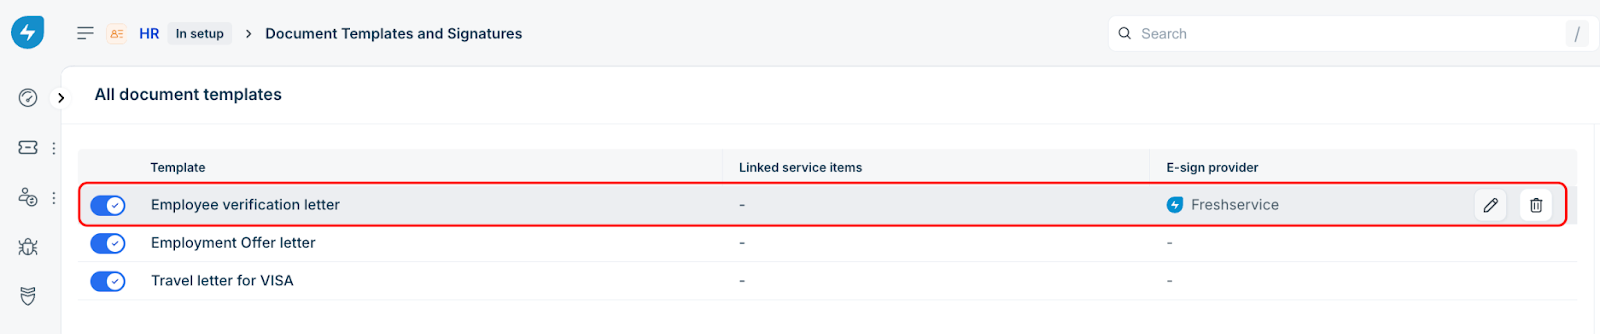
4. From the e-sign provider list, select Adobe Acrobat Sign - eSign and Orch.
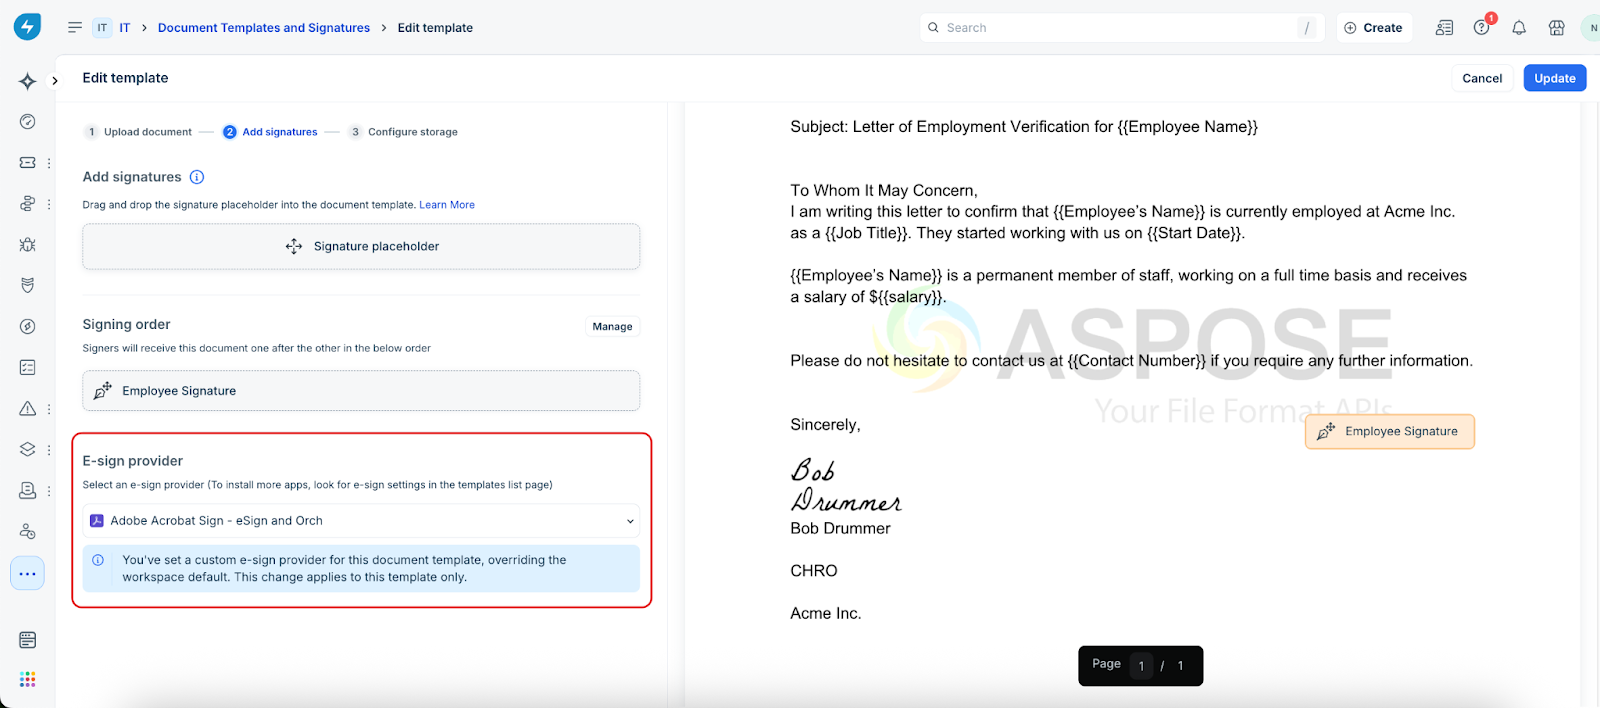
5. Click Update in the upper-right corner to save the e-sign provider.
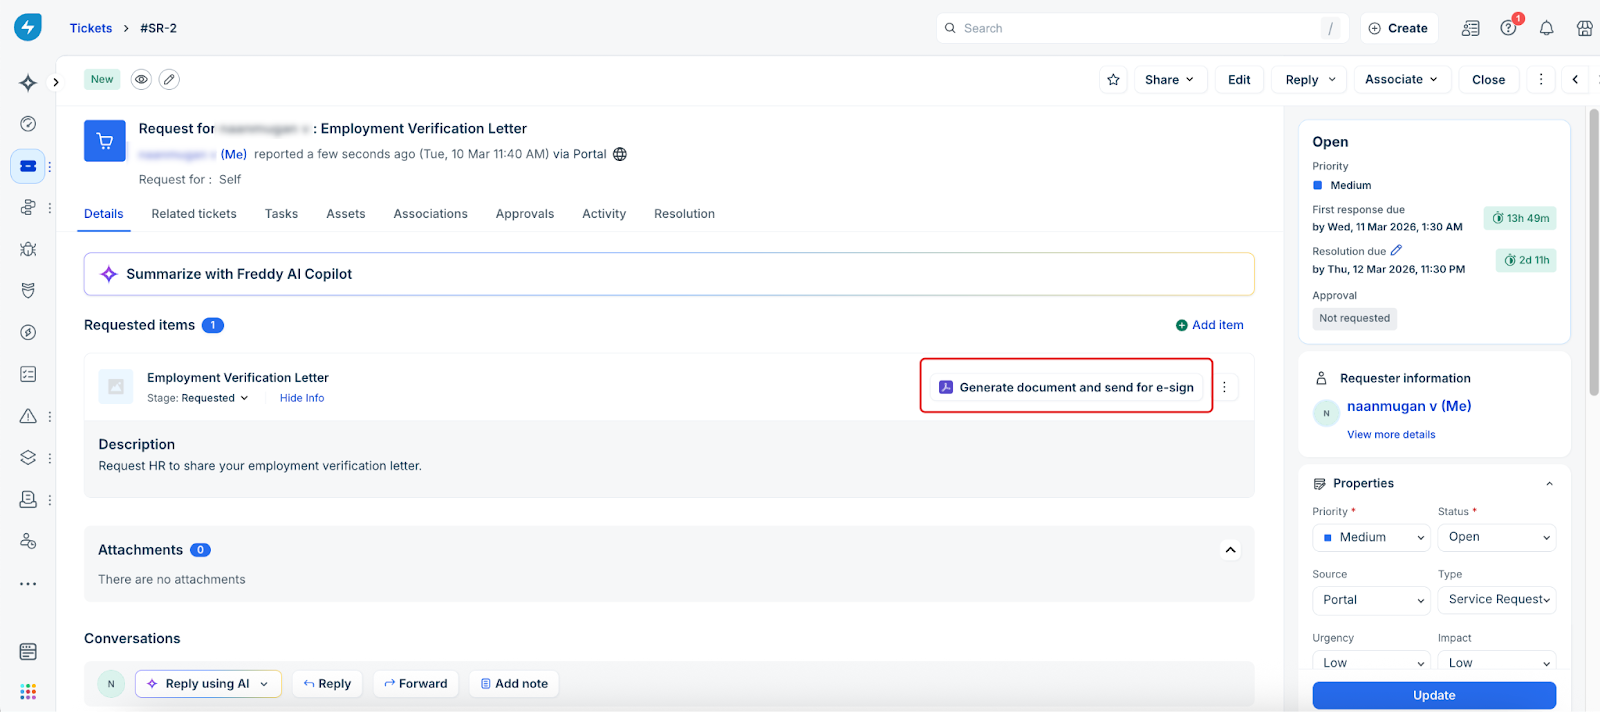
Send documents for e-signature
After selecting Adobe Acrobat Sign as the e-sign provider, generate the document and send it for e-signature directly from the ticket view, as shown below.
Configure Adobe Acrobat Sign as the default e-sign provider for a workspace
Configure Adobe Acrobat Sign as the default e-sign provider to make it the primary e-signer for all documents in the workspace.
1. Under Workspace Settings, click the desired workspace.
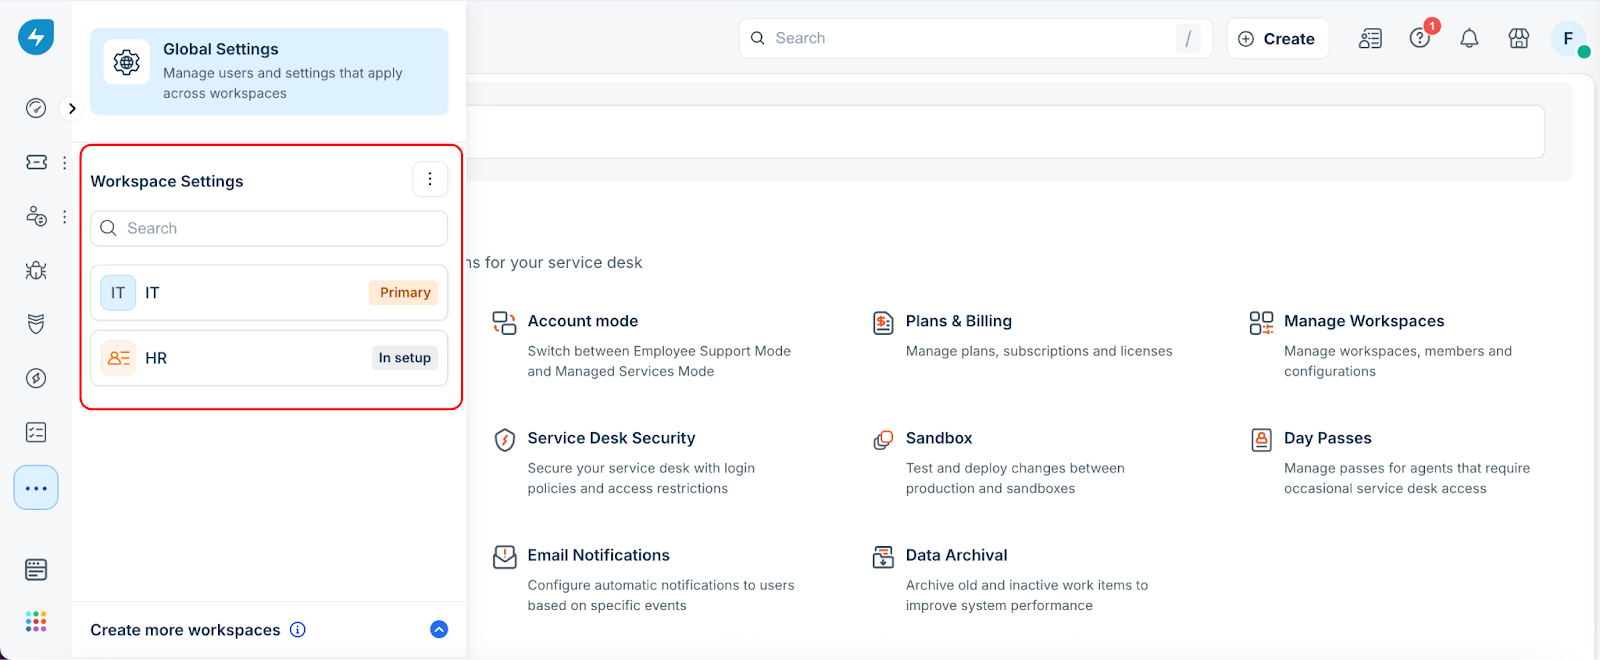
2. Go to Document Templates and Signatures > E-sign settings.
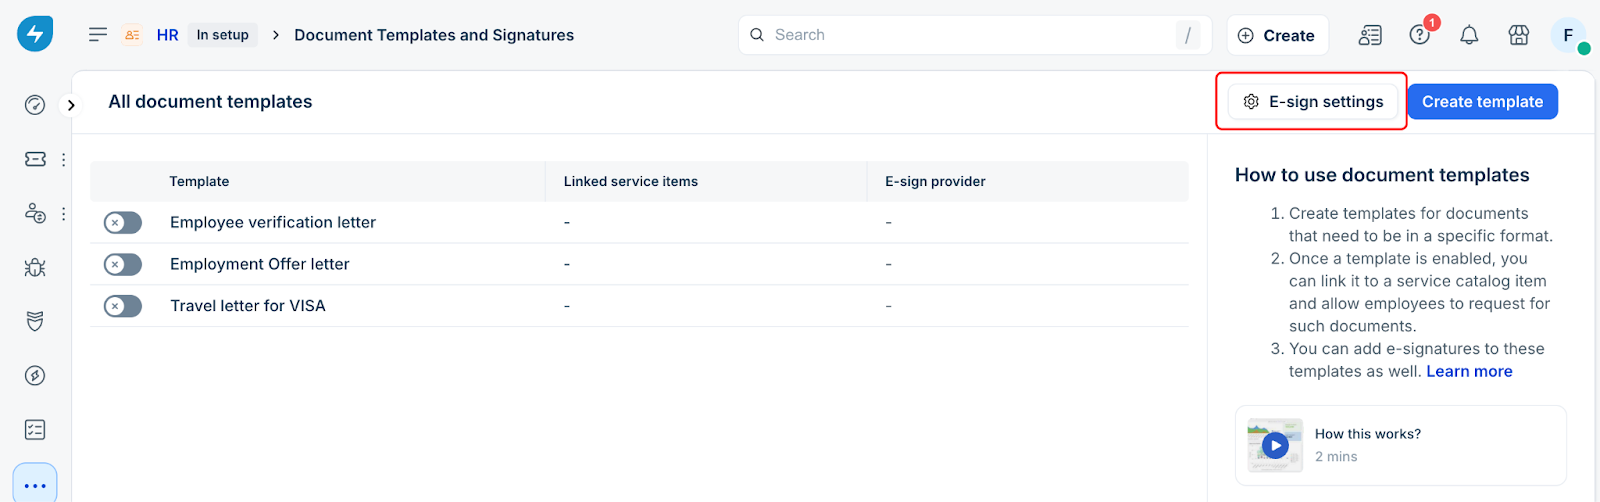
3. Under Default e-sign provider, choose Adobe Acrobat Sign - eSign and Orch from the drop-down list.
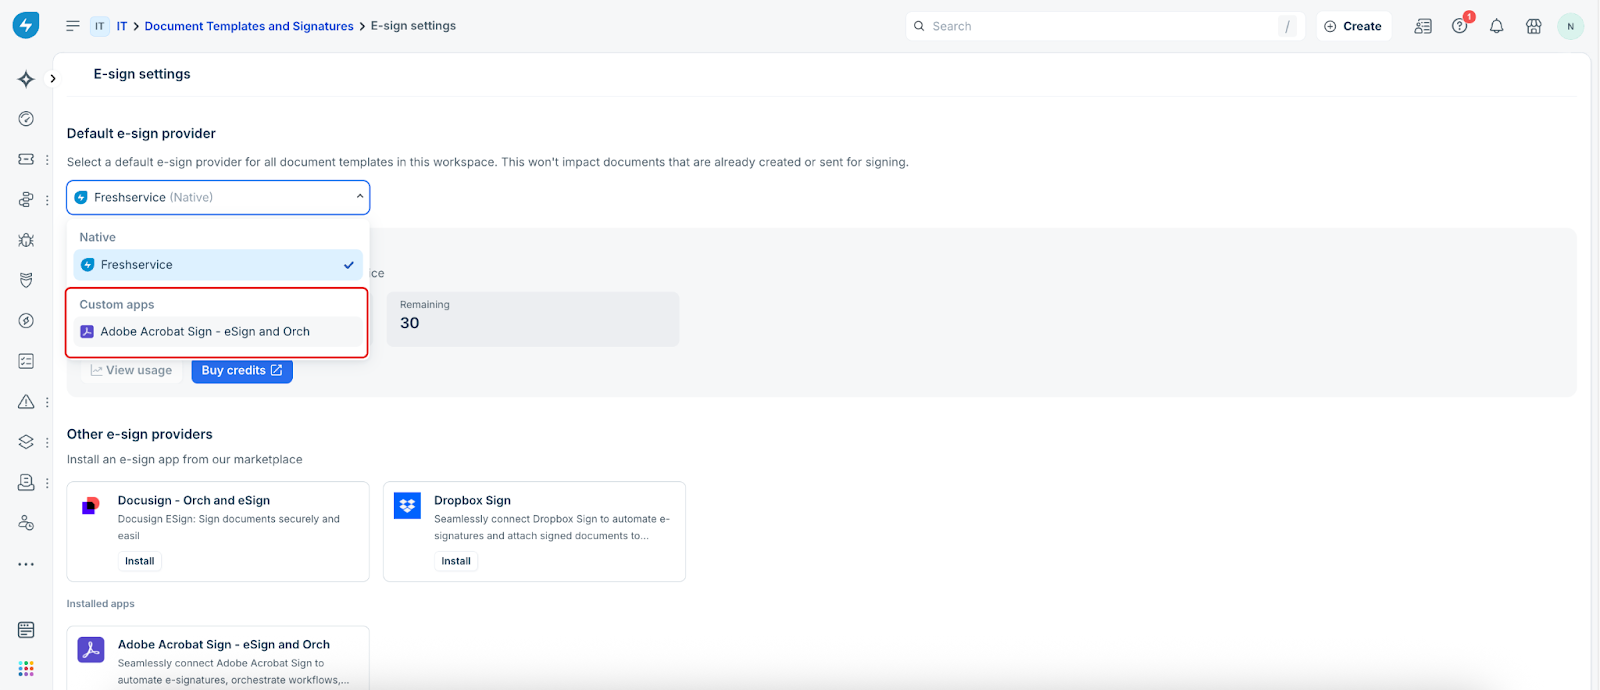
4. After you select the provider, a confirmation dialog appears. Select Update. After you update the setting, all new document templates in that workspace use Adobe Acrobat Sign to capture signatures.
Configure template provider settings
When editing a document template, choose one of the following options from the E-signature provider drop-down menu:
Additional Capabilities with Adobe Acrobat Sign
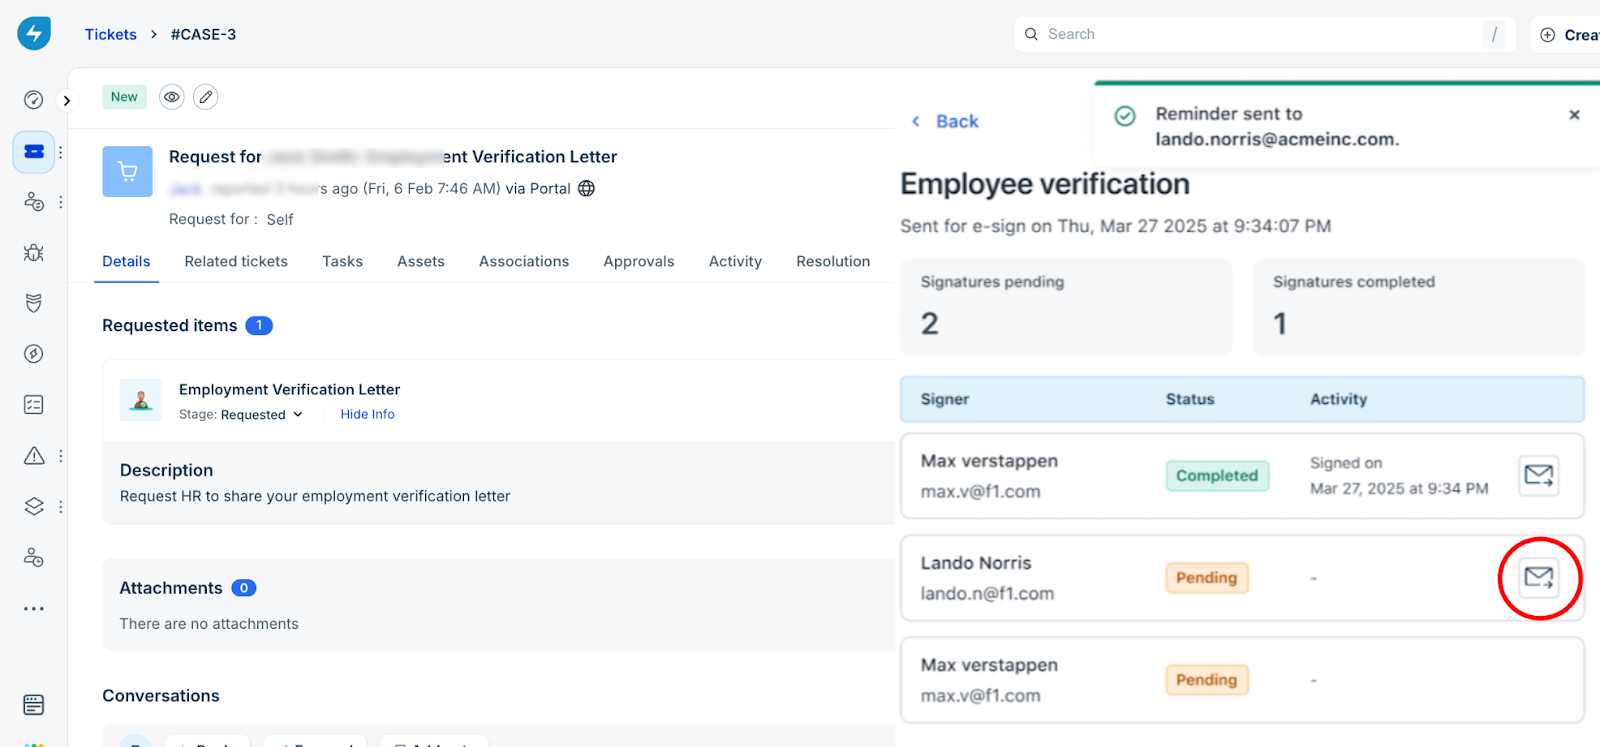
Beyond initiating signature requests, you can perform several actions to manage and track document progress directly from the ticket view.
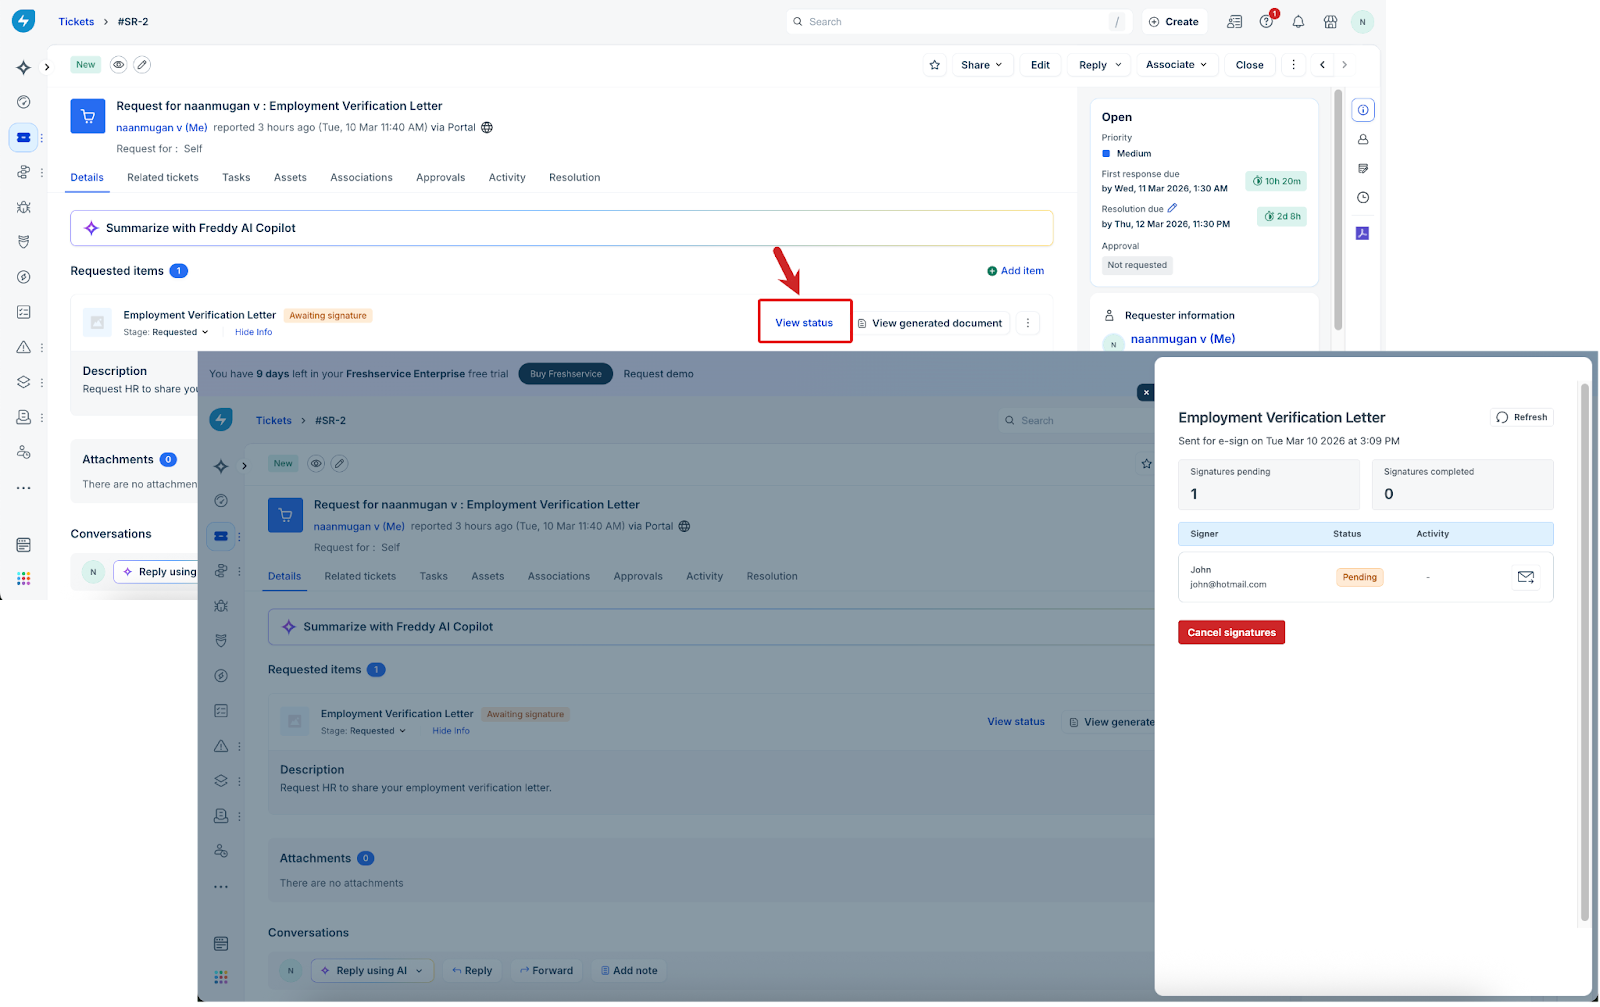
In such cases, to avoid confusion or legal issues, the agent cancels the request by clicking the Cancel signatures option, as shown in the image below.
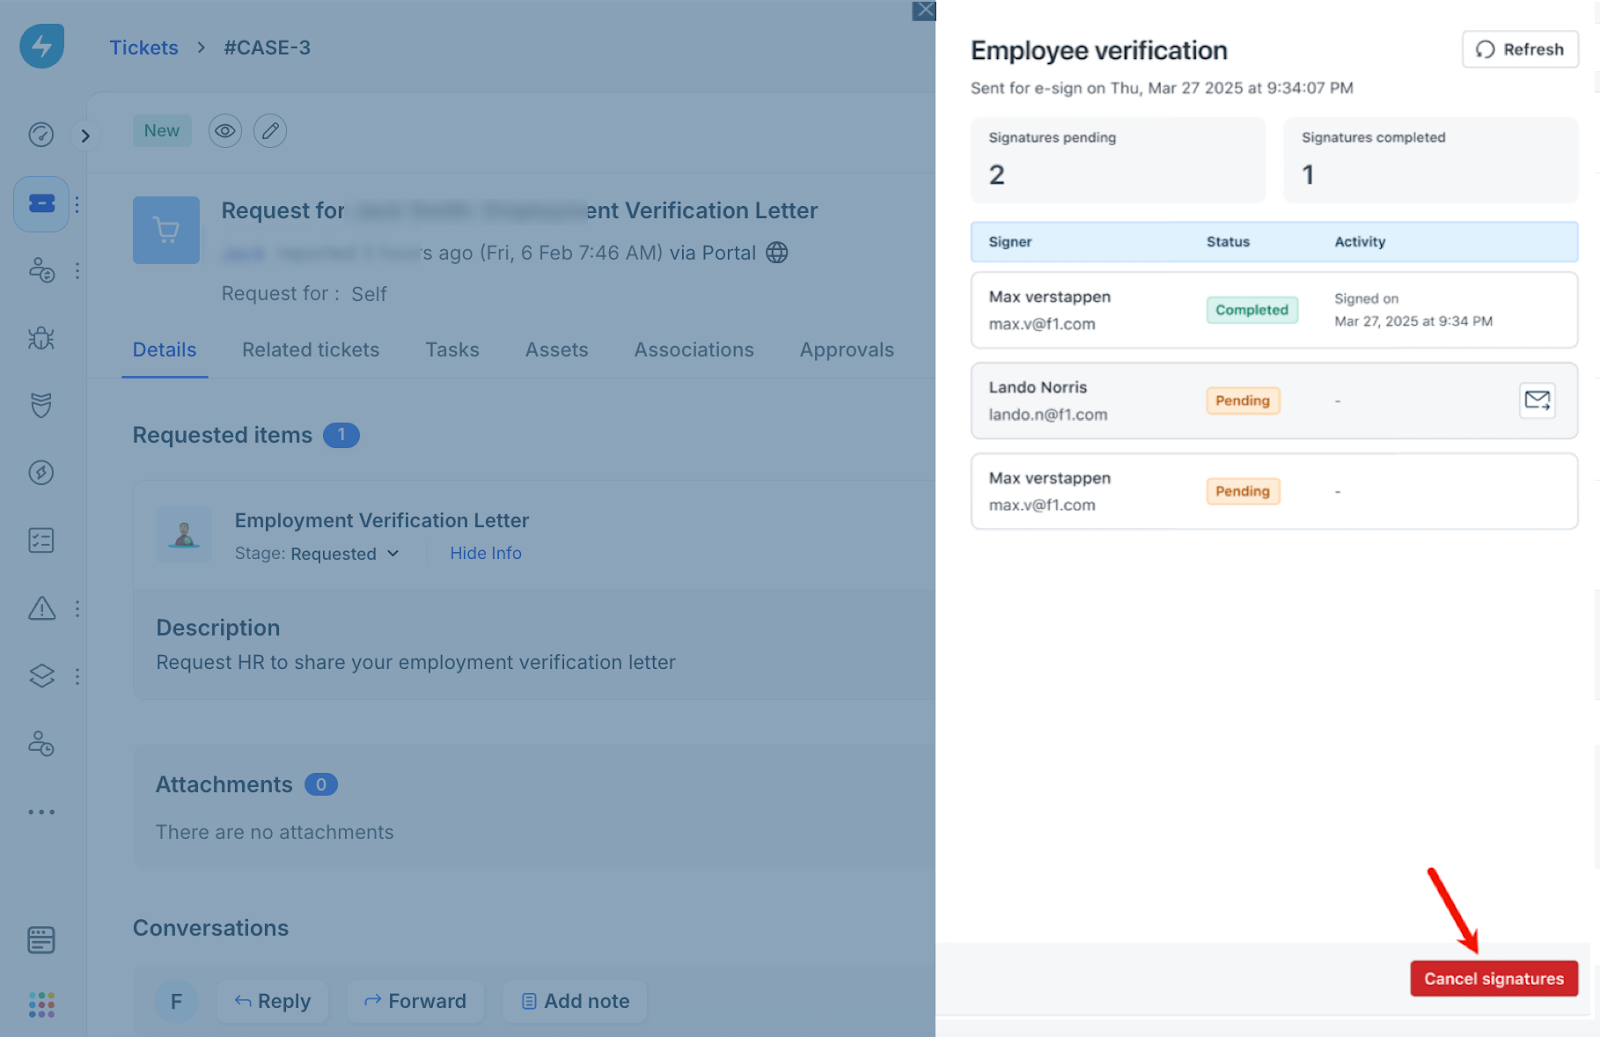
The document status changes to Canceled, and the signer can no longer access it.
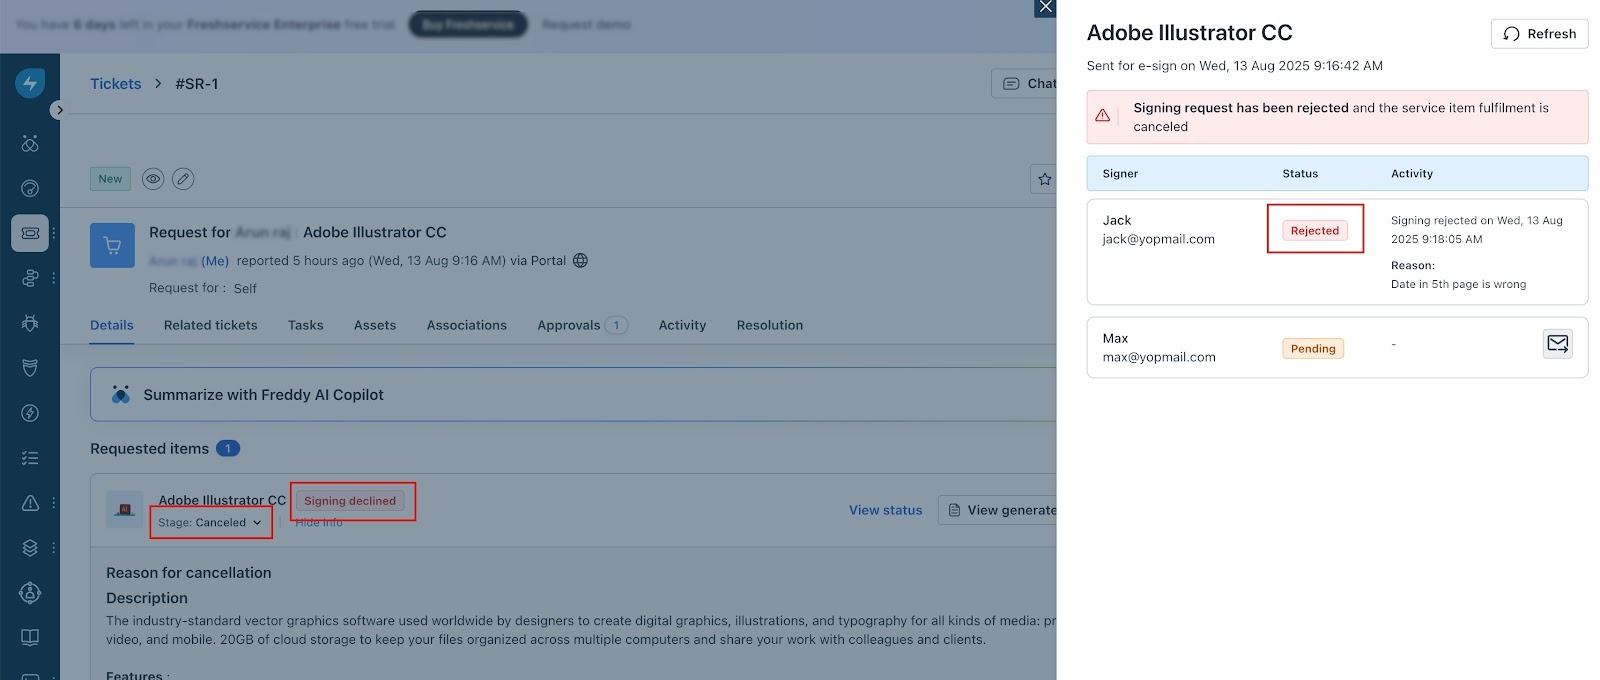
- Signing Declined – When a signer declines a signature request, the signature request status changes to Rejected, and the fulfillment status of the service item updates to Signing Declined. The stage status will update to Canceled, as shown in the image below. In the right panel, under Activity, you can view which signer declined the request along with their reason for rejection.
- Signature Request Expired – When a signer fails to complete the signature request within the defined expiration period, the signature request status changes to Expired, and the fulfillment status of the service item updates to Signature request expired. The stage status will update to Canceled.
Note: In any of the above scenarios, you can regenerate documents for the same ticket if required.
Uninstall Adobe Acrobat Sign
Before you uninstall the Adobe Acrobat Sign app, ensure that Adobe Acrobat Sign is not set as the default e-signature provider for any workspace and is not assigned to any active document templates.
Note: If there are in-progress service requests using Adobe Acrobat Sign, Freshservice displays a warning before you proceed.
To uninstall the Adobe Acrobat Sign app, follow these steps:
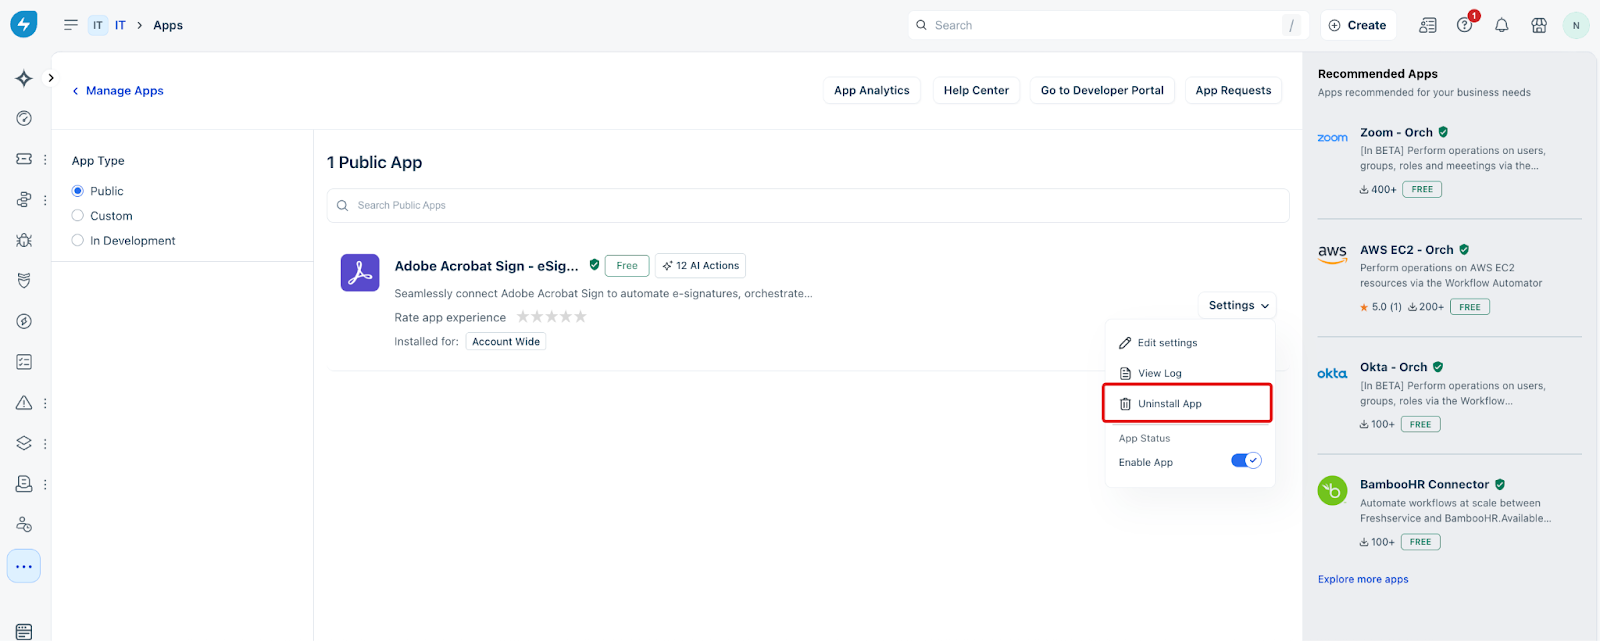
1. Go to Global Settings > Apps > Manage Apps.
2. Locate Adobe Acrobat Sign and select the Settings dropdown menu.
3. Select Uninstall App.
What happens after uninstall
After you uninstall the Adobe Acrobat Sign app, the following changes occur:
Disable Adobe Acrobat Sign
This section outlines the requirements, steps, and system impacts of temporarily deactivating the Adobe Acrobat Sign integration.
Before disabling the app
Before disabling the Adobe Acrobat Sign app, Freshservice validates the current configuration and applies the following checks:
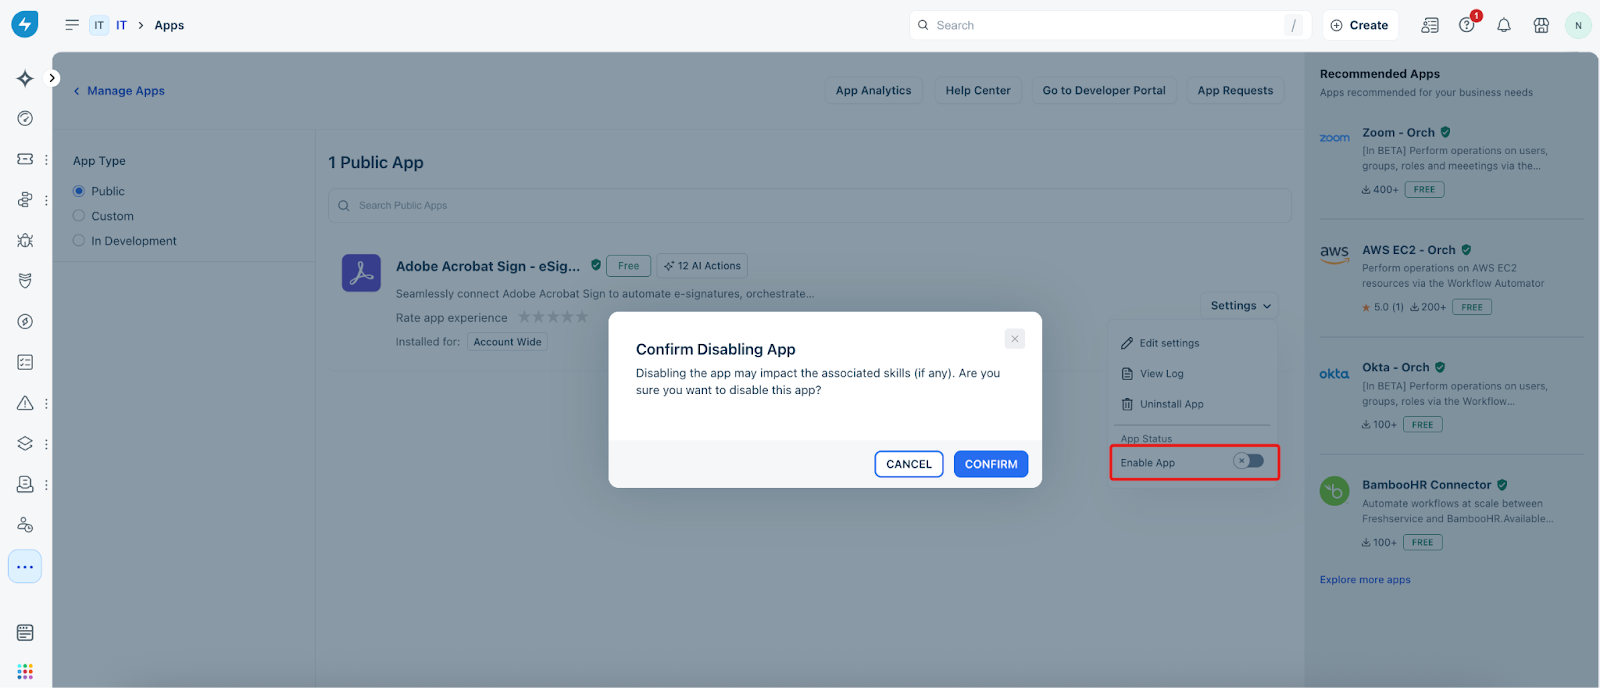
Disable Adobe Acrobat Sign
To temporarily stop using the app without removing it, go to the E-sign Settings on the Adobe Acrobat Sign app details screen and turn off the Enable App toggle.
What happens after disabling
After you disable the app, Freshservice applies the following changes to your workspace:
| Feature | Impact after disabling |
| New Requests | You cannot initiate new signature requests using Adobe Acrobat Sign. |
| Send for e-sign | The button is deactivated; a tooltip indicates the app is disabled. |
| Document Widget | The widget displays an empty state. |
| Ticket Data | Existing signing data and signed documents remain visible in tickets. |
| Admin View | A warning banner appears on the Document Templates page. |
| Active Requests | The View status button is hidden; requests are paused until re-enabled. |
Re-enable Adobe Acrobat Sign
If the Adobe Acrobat Sign app is disabled and later re-enabled, agents can resync the signature status from the ticket.
When an agent clicks Refresh, the system performs the following actions.
Audit logging and activity tracking
Freshservice automatically records all app management actions, including installation, disablement, and uninstallation, in the Audit Log for administrative tracking.
The following table describes the specific events tracked across the system:
| Event Category | Logged Actions |
| Provider Settings | Changes to the workspace default e-signature provider. |
| Template Config | Changes to e-signature provider assignments at the template level. |
| App Management | All installation, disablement, and uninstallation actions. |
| Ticket Activity | All signing events from the provider (recorded in the ticket's activity log). |
Frequently asked questions
1\. Can I use Adobe Acrobat Sign for some documents and another provider for others?
Yes. Each document template can be mapped to a specific e-signature provider.
2\. What happens to signed documents if the app is uninstalled?
Signed documents remain attached to service requests along with signatures. App-specific status updates and metadata are no longer available.
3\. Do agents need to manually select the e-signature provider?
No. The provider is selected automatically based on the document template configuration.