Last updated: 2026-02-19
Business Rules for Task Management
Overview
The Business Rules for Tasks feature optimises and improves task workflows, operational efficiency, and data consistency. With manual task management, agents can often bypass essential fields or misuse dropdown options, leading to fragmented data and a cluttered user experience. This feature empowers admins to enforce data integrity by making task fields mandatory, hidden, or disabled based on specific conditions.
Beyond field-level control, the feature introduces advanced governance by allowing admins to restrict task-related actions based on the status of parent records (Tickets, Changes, or Problems).
Therefore, Tasks business rules are applicable based on the following scenarios:
_Note:__Tickets, Changes, or Problems business rules are applicable to both agents and requesters._
_Note:_ _Tasks business rules are applicable only to agents._
Order of execution: Global business rules execute first followed by Workspace business rules, which means Workspace business rules will override Global business rules (if applicable).
_Note:__The Business Rules for Task Management feature is available on the Growth, Pro, and Enterprise plans, and it can be configured only at the global level._
Tickets, Changes, or Problems business rules: Tasks association
The Tickets, Changes, or Problems business rules that you create at the global or workspace level can be configured to control actions on the associated tasks.
For example, you can set up a business rule for tickets, wherein the ‘Add task’, ‘Edit task’, and ‘Delete task’ options are disabled in new and existing ticket forms with ‘Closed’ status for both agents and requesters.
_Note:__Similarly, you can set up business rules for changes or problems to control actions on the associated tasks._
Use case: Disabling Add/Edit/Delete task in new and existing closed tickets
1. Log in to the Freshservice application.
2. Go to Admin > Global Settings > Service Management > Service Desk Settings > Business Rules for Forms.
3. Click Create New Rule and select Ticket.
4. Enter a name and description for the business rule in the respective fields.
5. Select Agents and Requesters from the Applies to dropdown.
6. Select New Form and Edit Form from the Execute On dropdown.
7. In the Conditions section, select a relevant option (Match All or Match Any). Then, add a condition to set the ticket forms ‘Status’ as ‘Closed’.
8. In the Actions section, select Perform an Action. Then, add an action to disable ‘Add task’, ‘Edit task’, and ‘Delete task’.
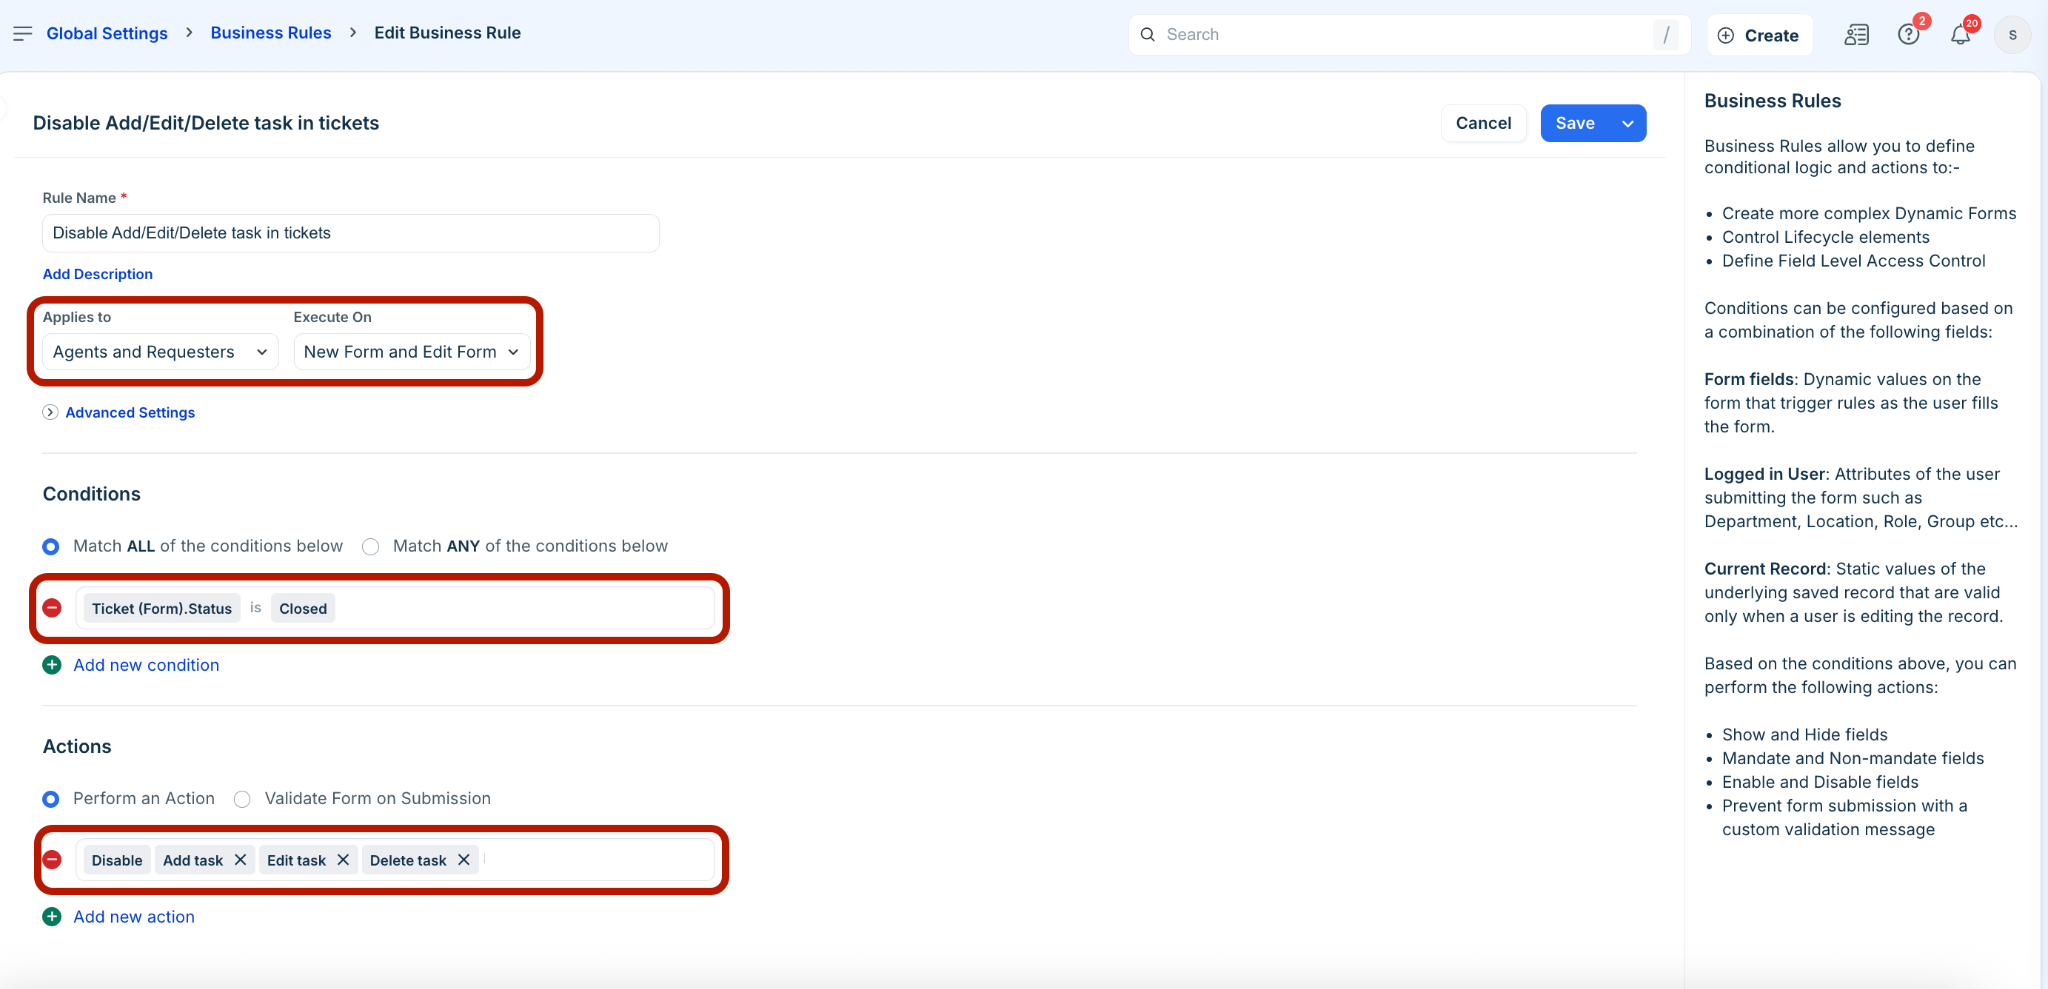
9. Click Save and Activate.
The new business rule for tickets is created and activated.
10. Now, go to Tickets > List.
11. Click any ticket with ‘Closed’ status to view the ticket details page.
The ‘Add task’, ‘Edit task’, and ‘Delete task’ options will be disabled based on the set business rule.
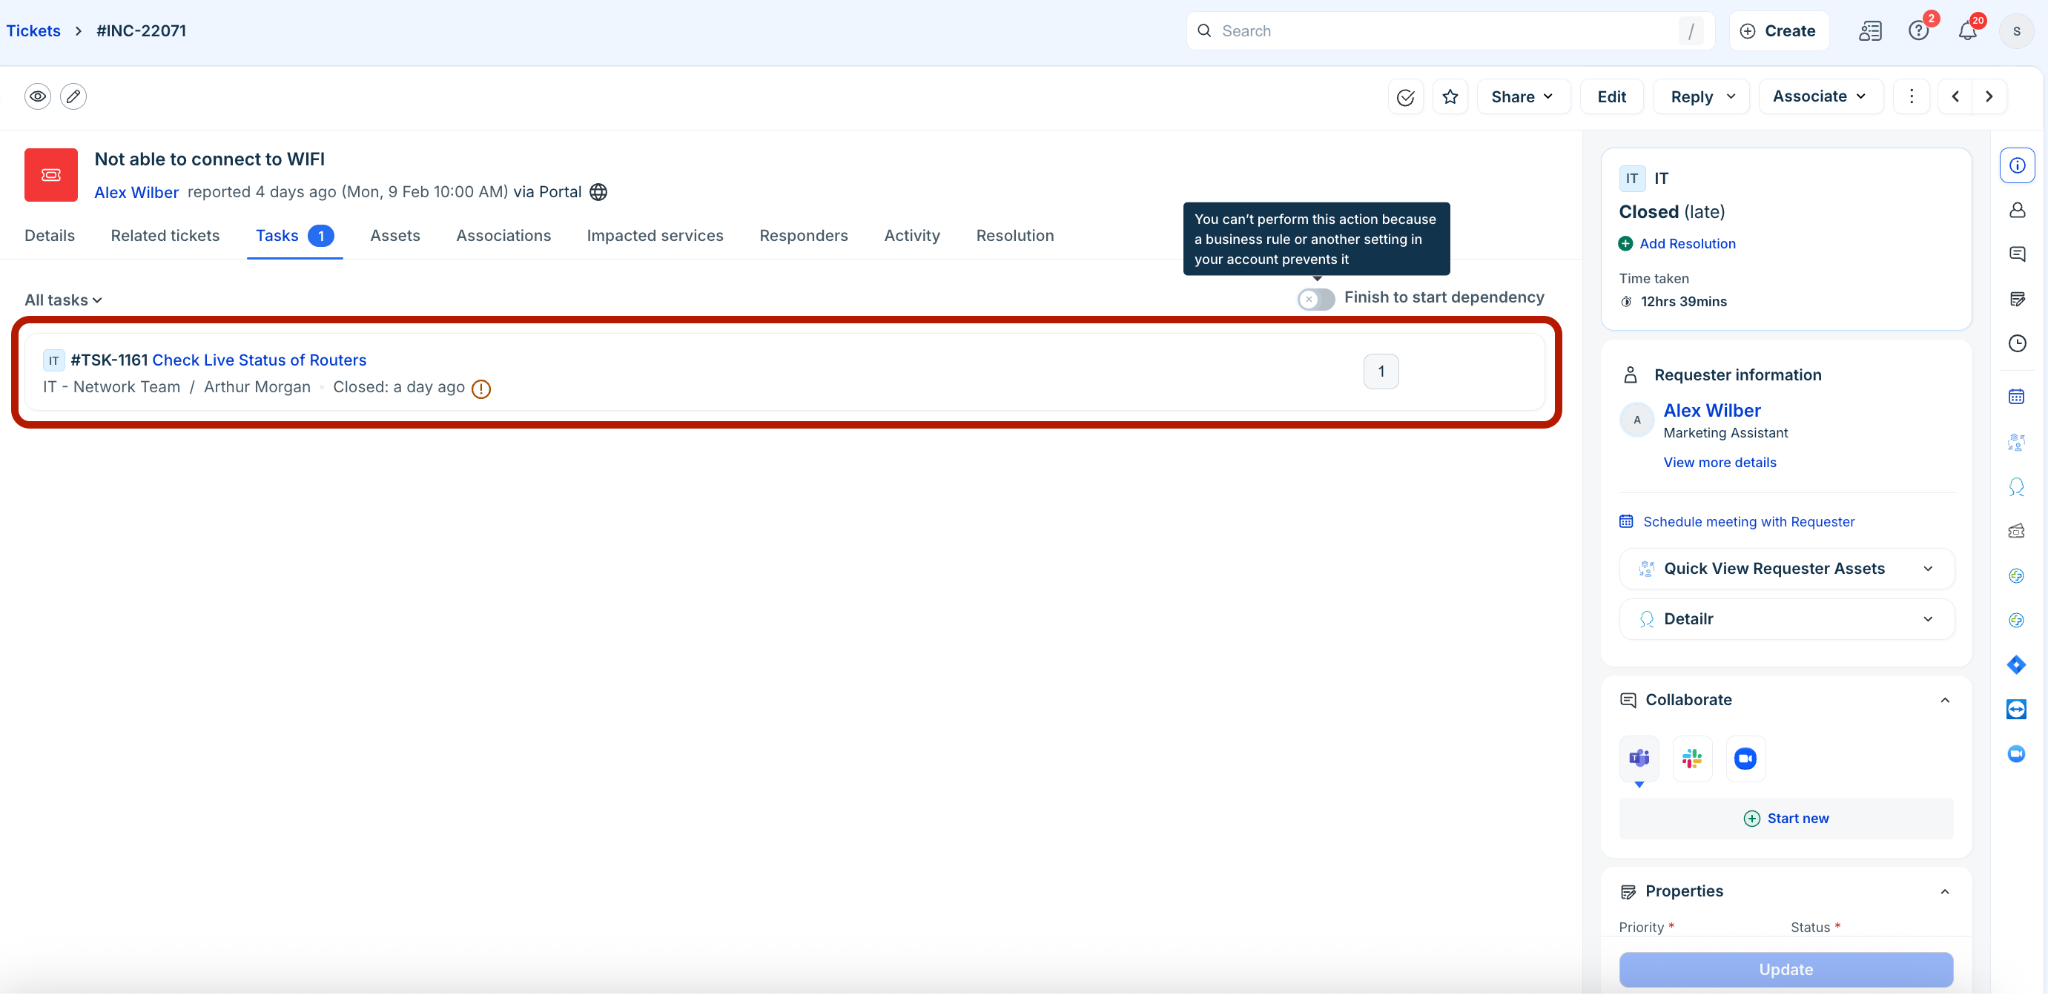
For more information on business rules for Tickets, Changes, or Problems, refer to the following:
Benefits of parent business rules (tickets, changes, problems) on tasks
Some of the benefits of parent business rules (Tickets, Changes, or Problems) on tasks are as follows:
Tasks business rules (Ticket tasks, Change tasks, Problem tasks)
The Tasks business rules that you create at the global level can be configured and managed for Ticket tasks, Change tasks, or Problem tasks.
Create tasks business rules
To create tasks business rules:
1. Log in to the Freshservice application.
2. Go to Admin > Global Settings > Service Management > Service Desk Settings > Business Rules for Forms.
3. Click Create New Rule, and select Task.
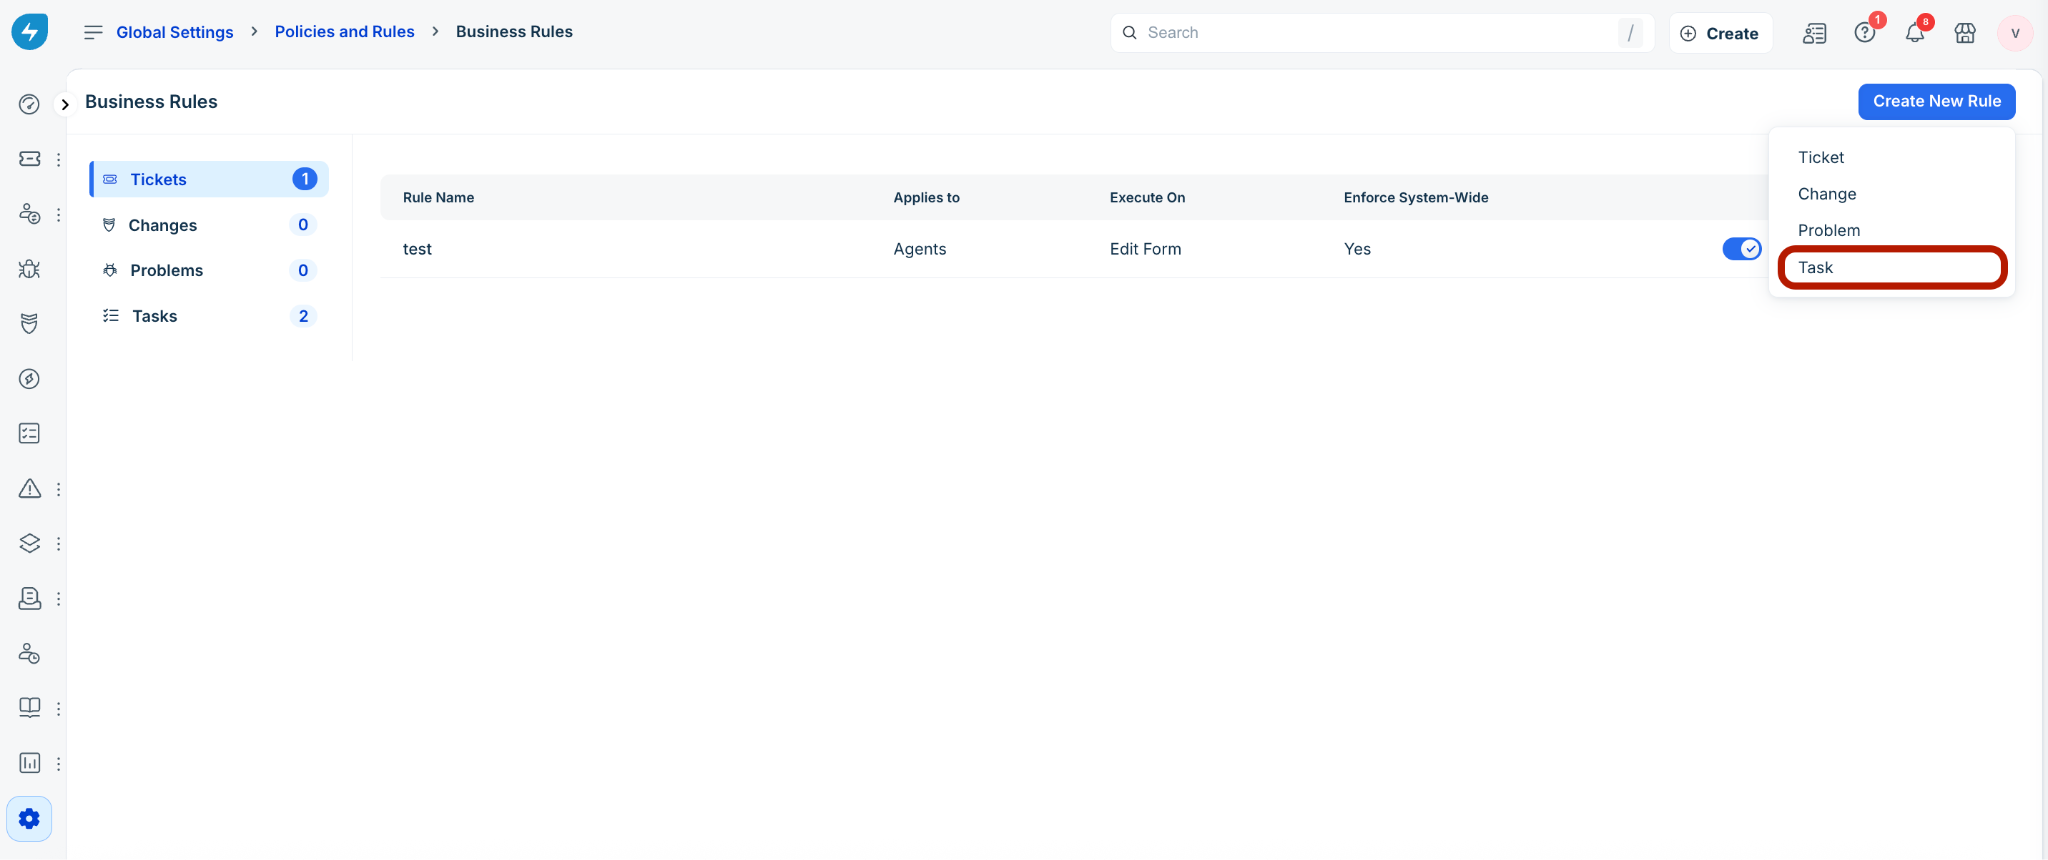
4. In the Select task type dialog, select a relevant option from the Apply this rule to dropdown (for example, Ticket tasks).
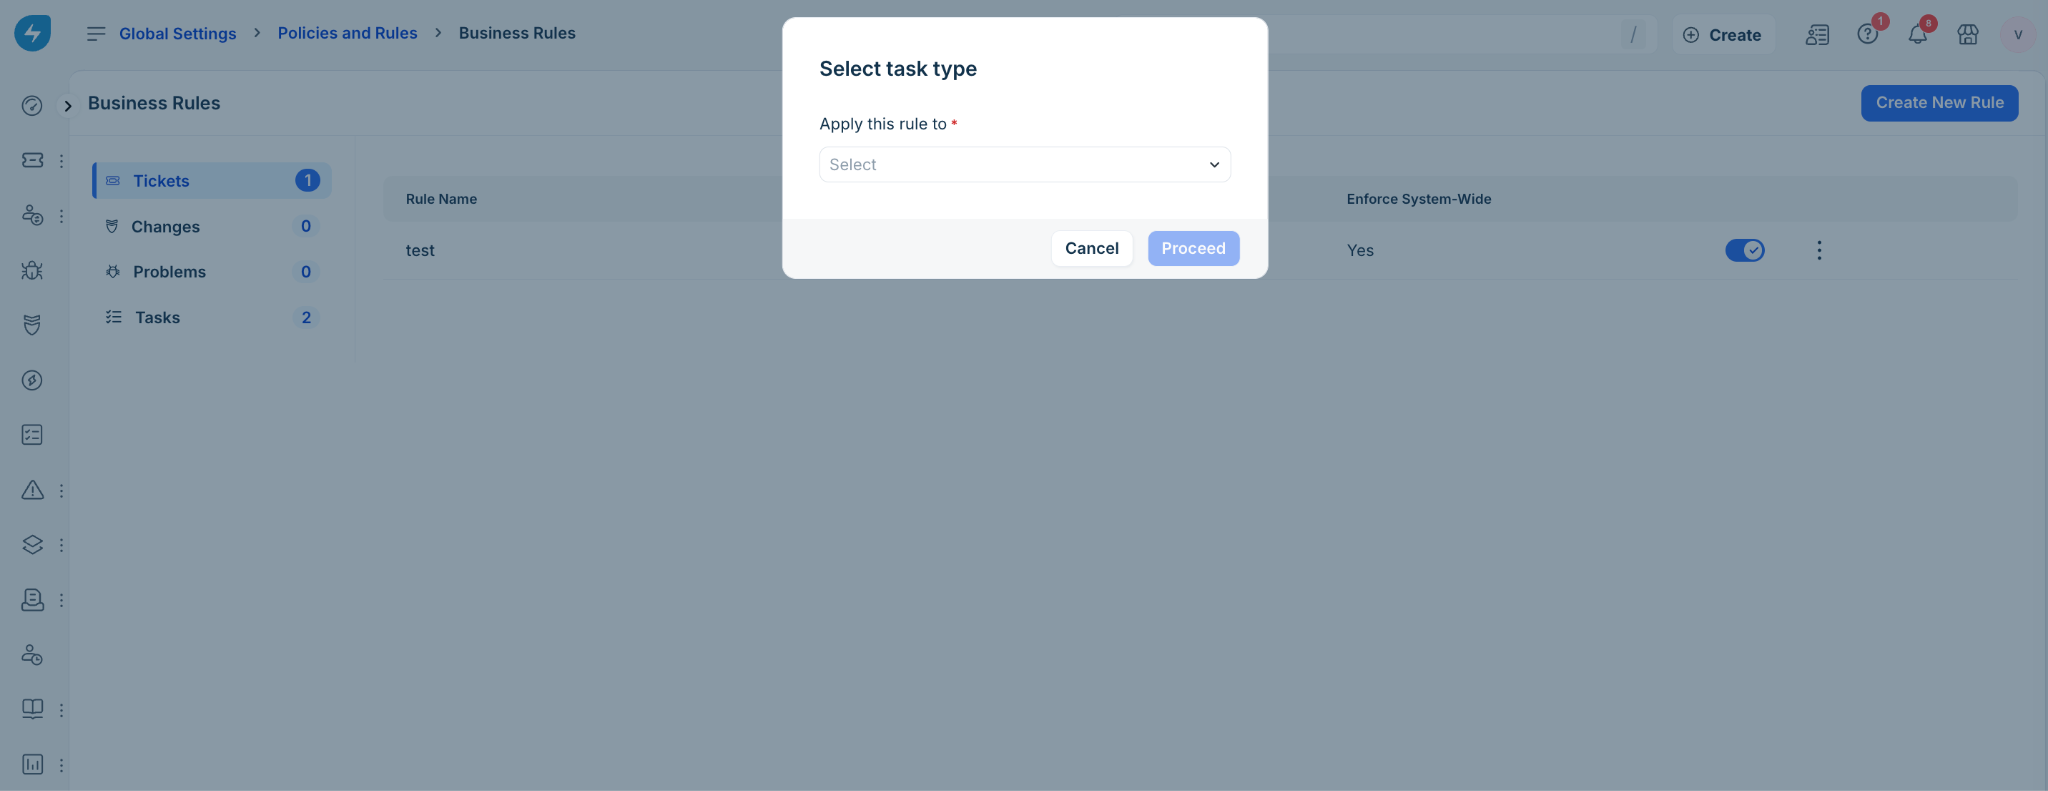
5. Click Proceed.
6. On the New Business Rule for <Ticket/Problem/Change Tasks> page, enter a name and description for the business rule in the respective fields.
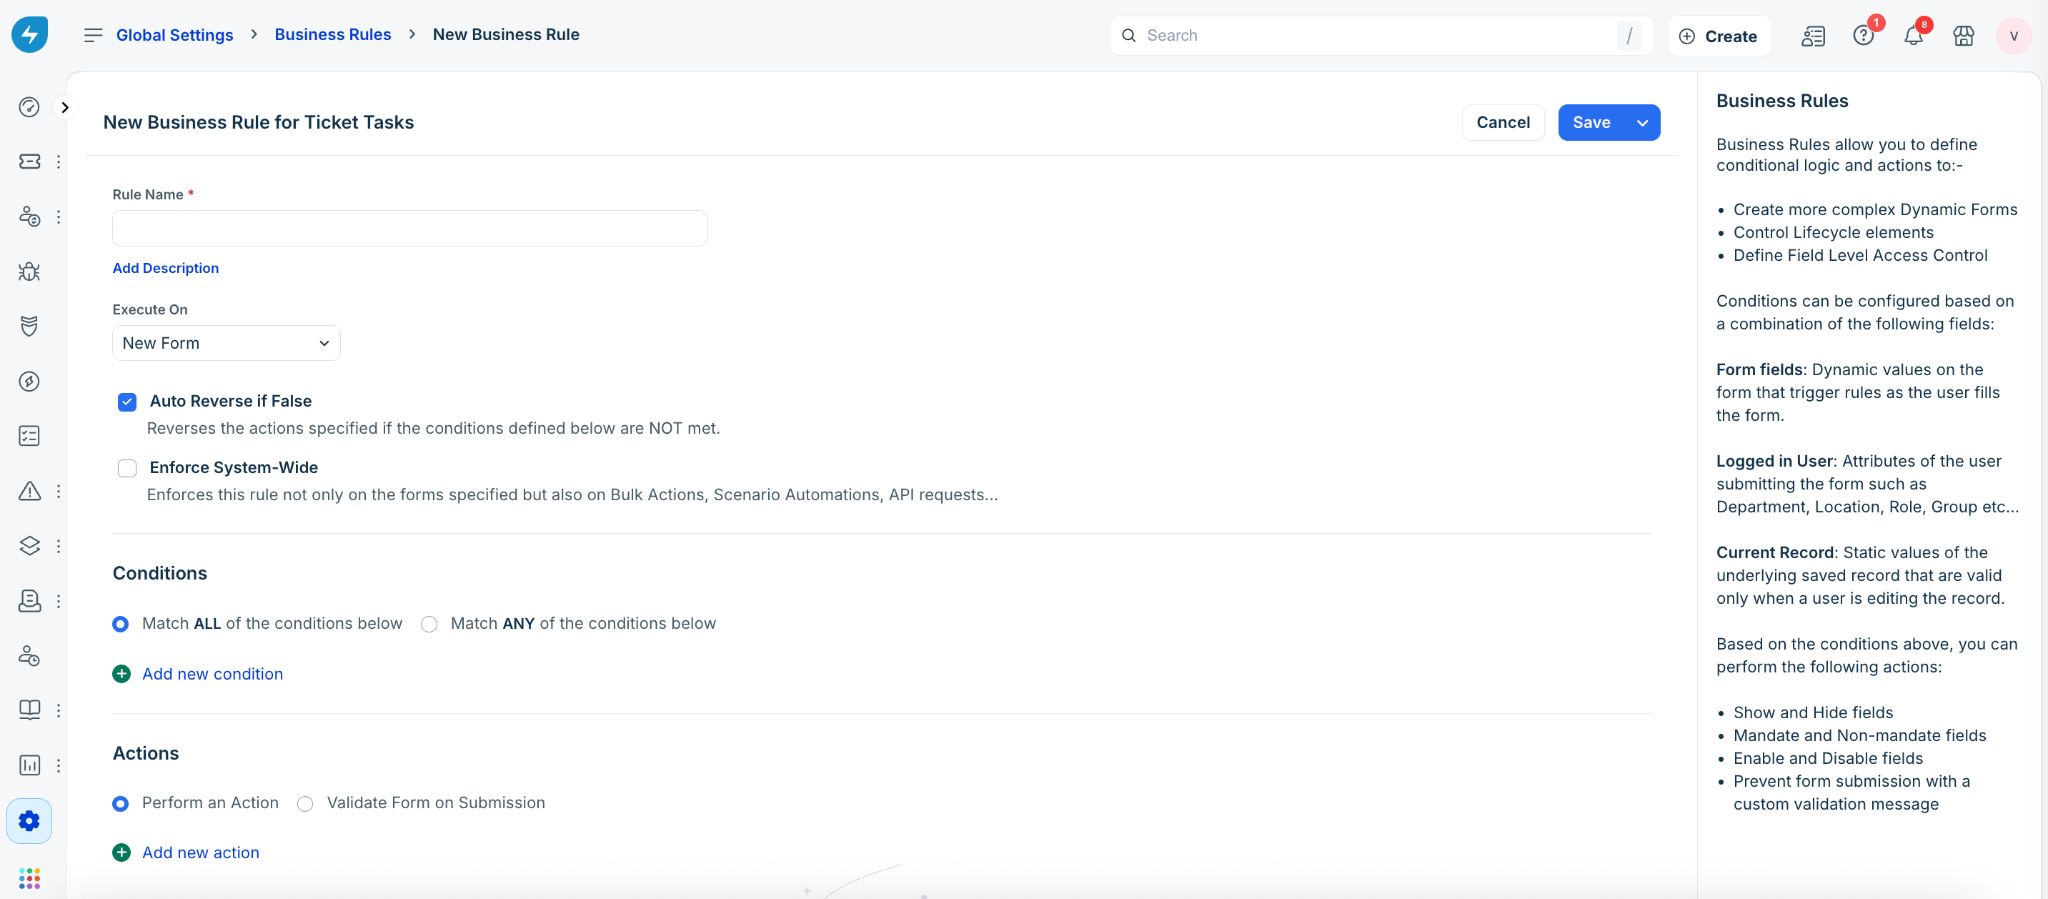
7. Select a relevant option from the Execute On dropdown (New Form, Edit Form, or New Form and Edit Form).
8. Enable or disable the Auto Reverse if False and Enforce System-Wide options, as required.
_Note:_ _For more information on auto reverse and system-wide rule enforcement, see Create No-Code Dynamic Forms with Business Rules__._
9. In the Conditions section, select a relevant option (Match All or Match Any). Then, click Add new condition to add a condition.
_Note:__You can add multiple conditions._
10. In the Actions section, select a relevant option (Perform an Action or Validate Form on Submission). Then, click Add new action to add an action.
_Note:_
11. Click Save or Save and Activate.
The new business rule for ticket/problem/change tasks is created.
Manage tasks business rules
To manage tasks business rules:
1. Log in to the Freshservice application.
2. Go to Admin > Global Settings > Service Management > Service Desk Settings > Business Rules for Forms.
3. Click Tasks on the left pane.
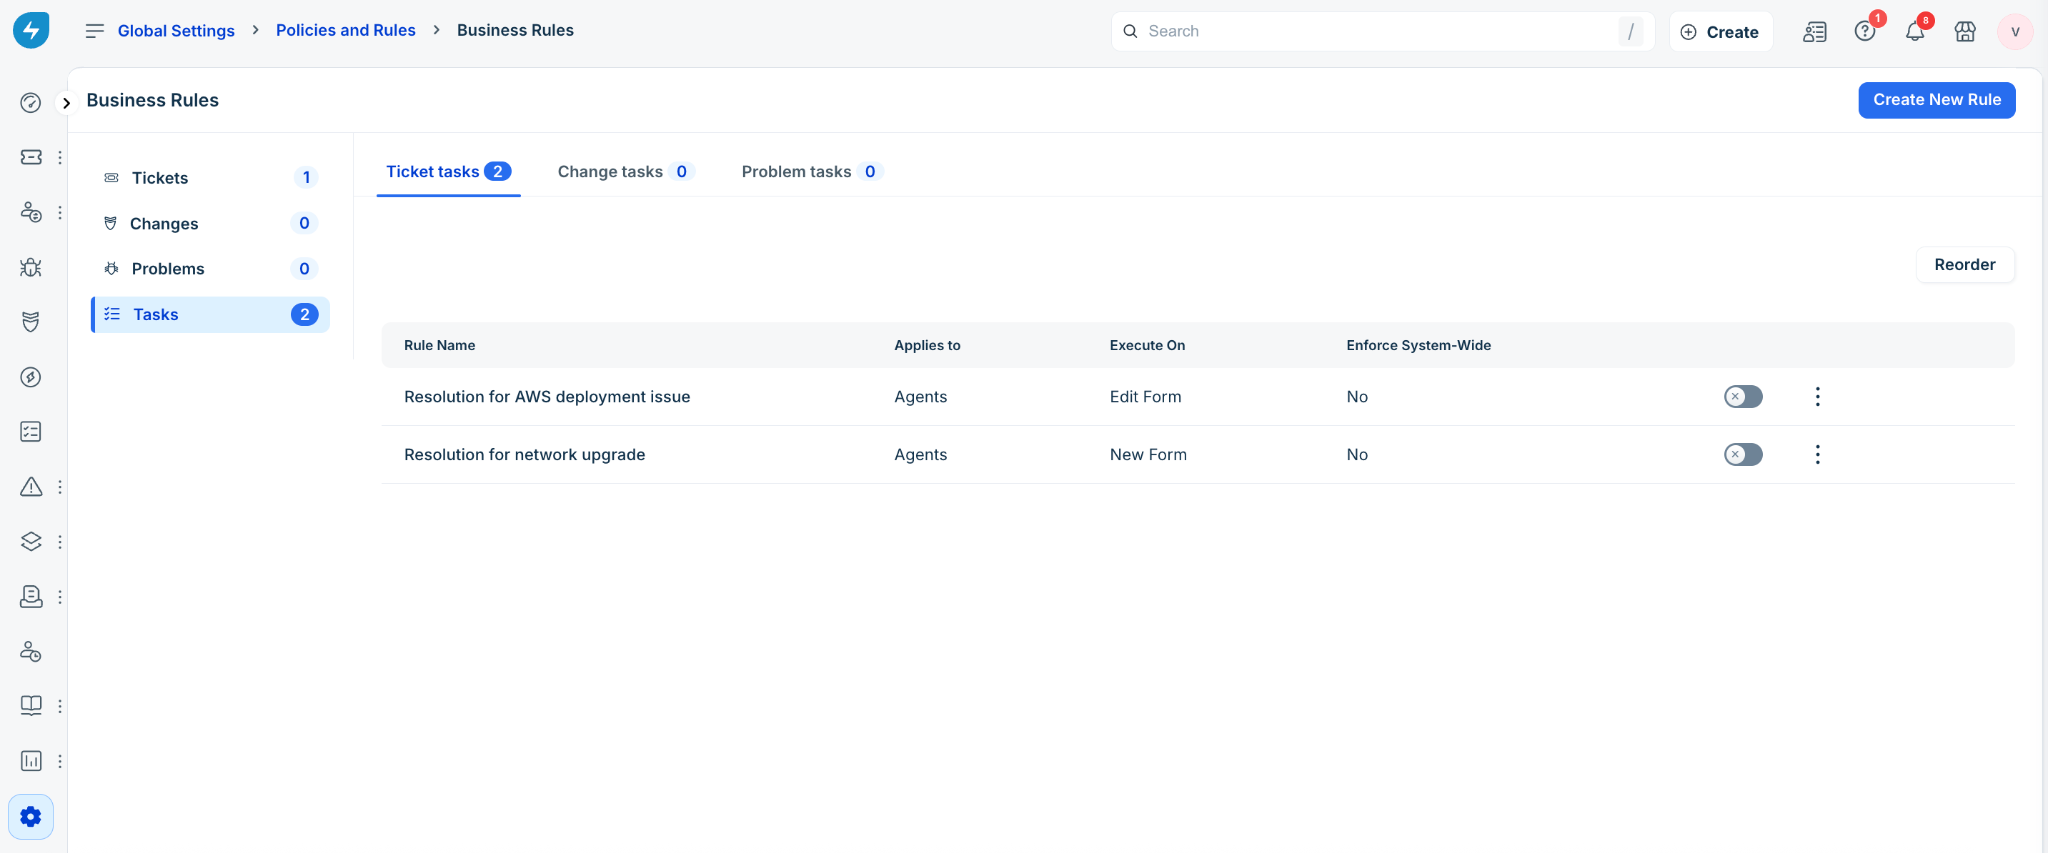
4. (To edit a business rule) Click any business rule name in a specific tab (Tickettasks, Changetasks, or Problemtasks).
5. Make the necessary changes, and click Save or Save and Activate.
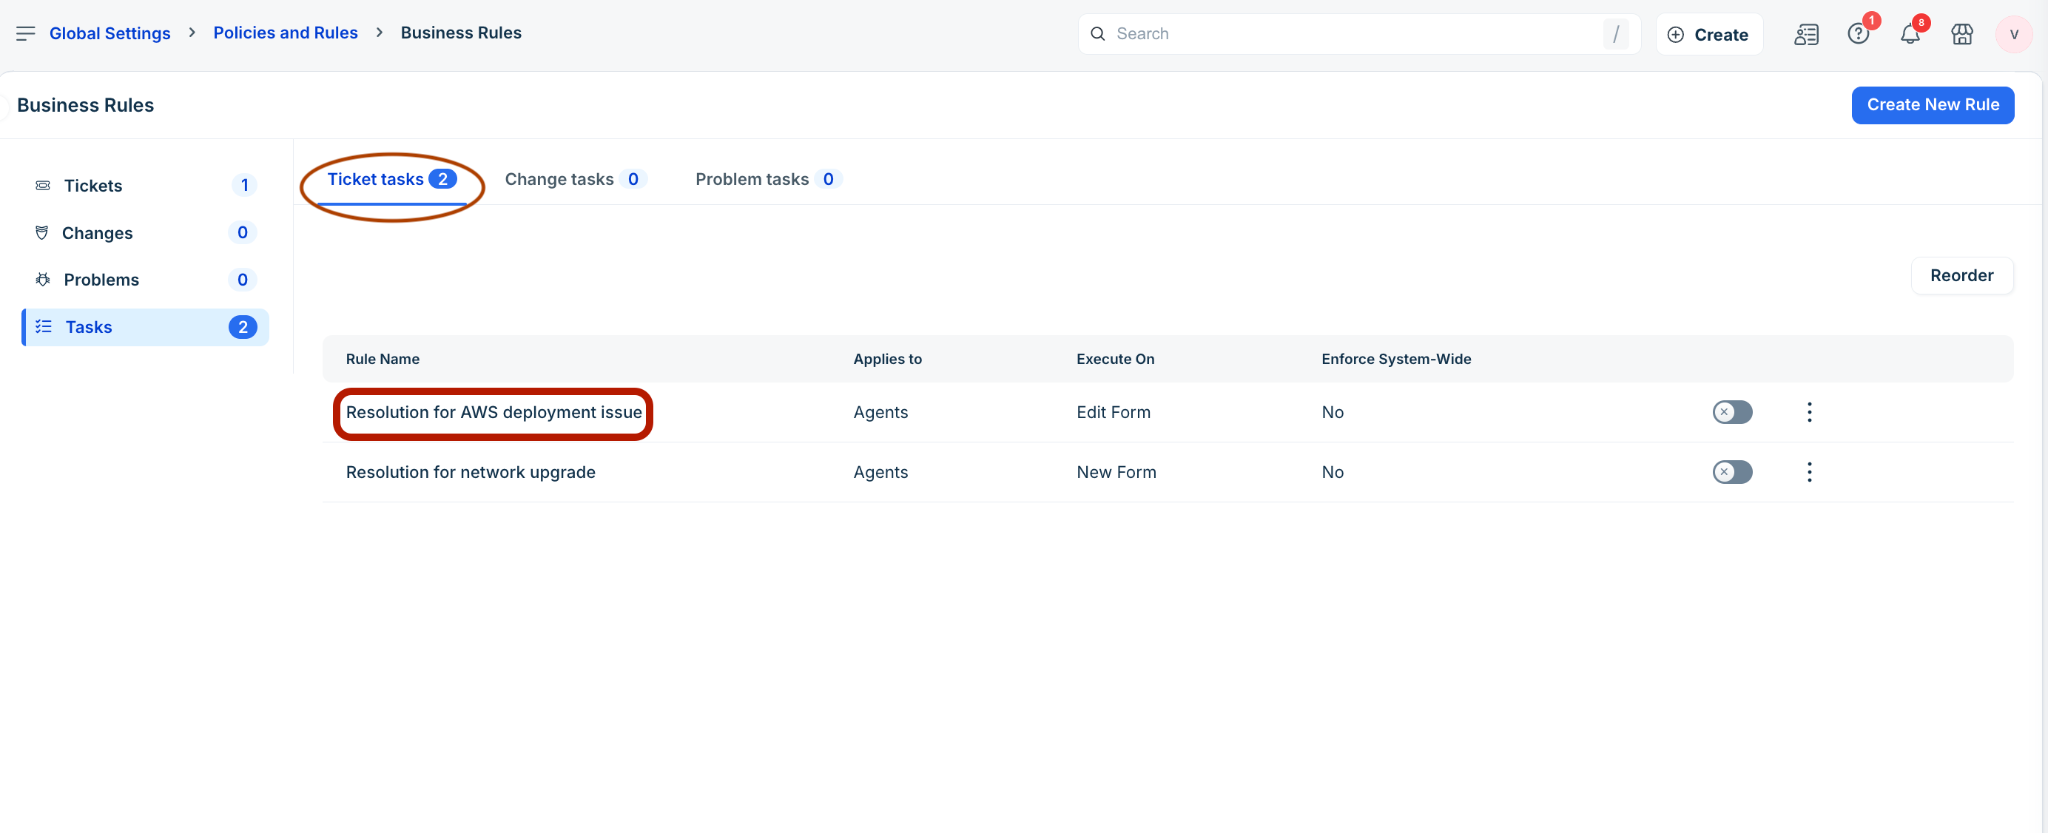
6. (To enable or disable a rule) Use the toggle button.
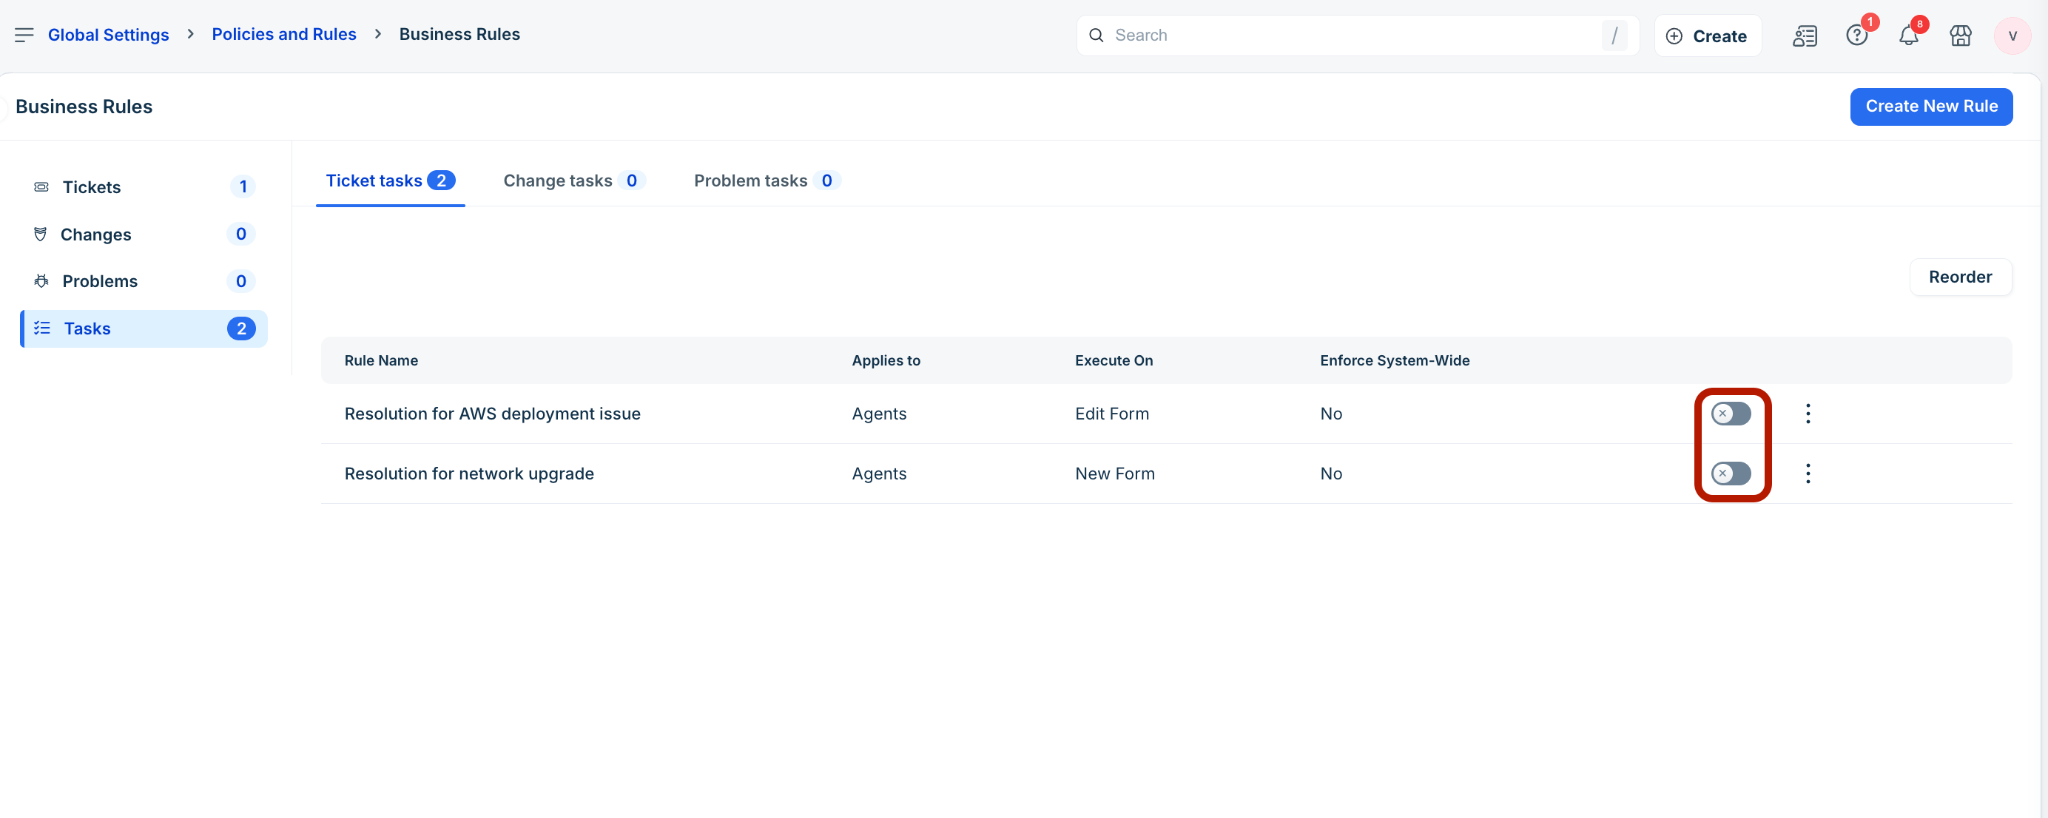
7. (To clone or delete a rule) Click the ellipses icon next to a rule.
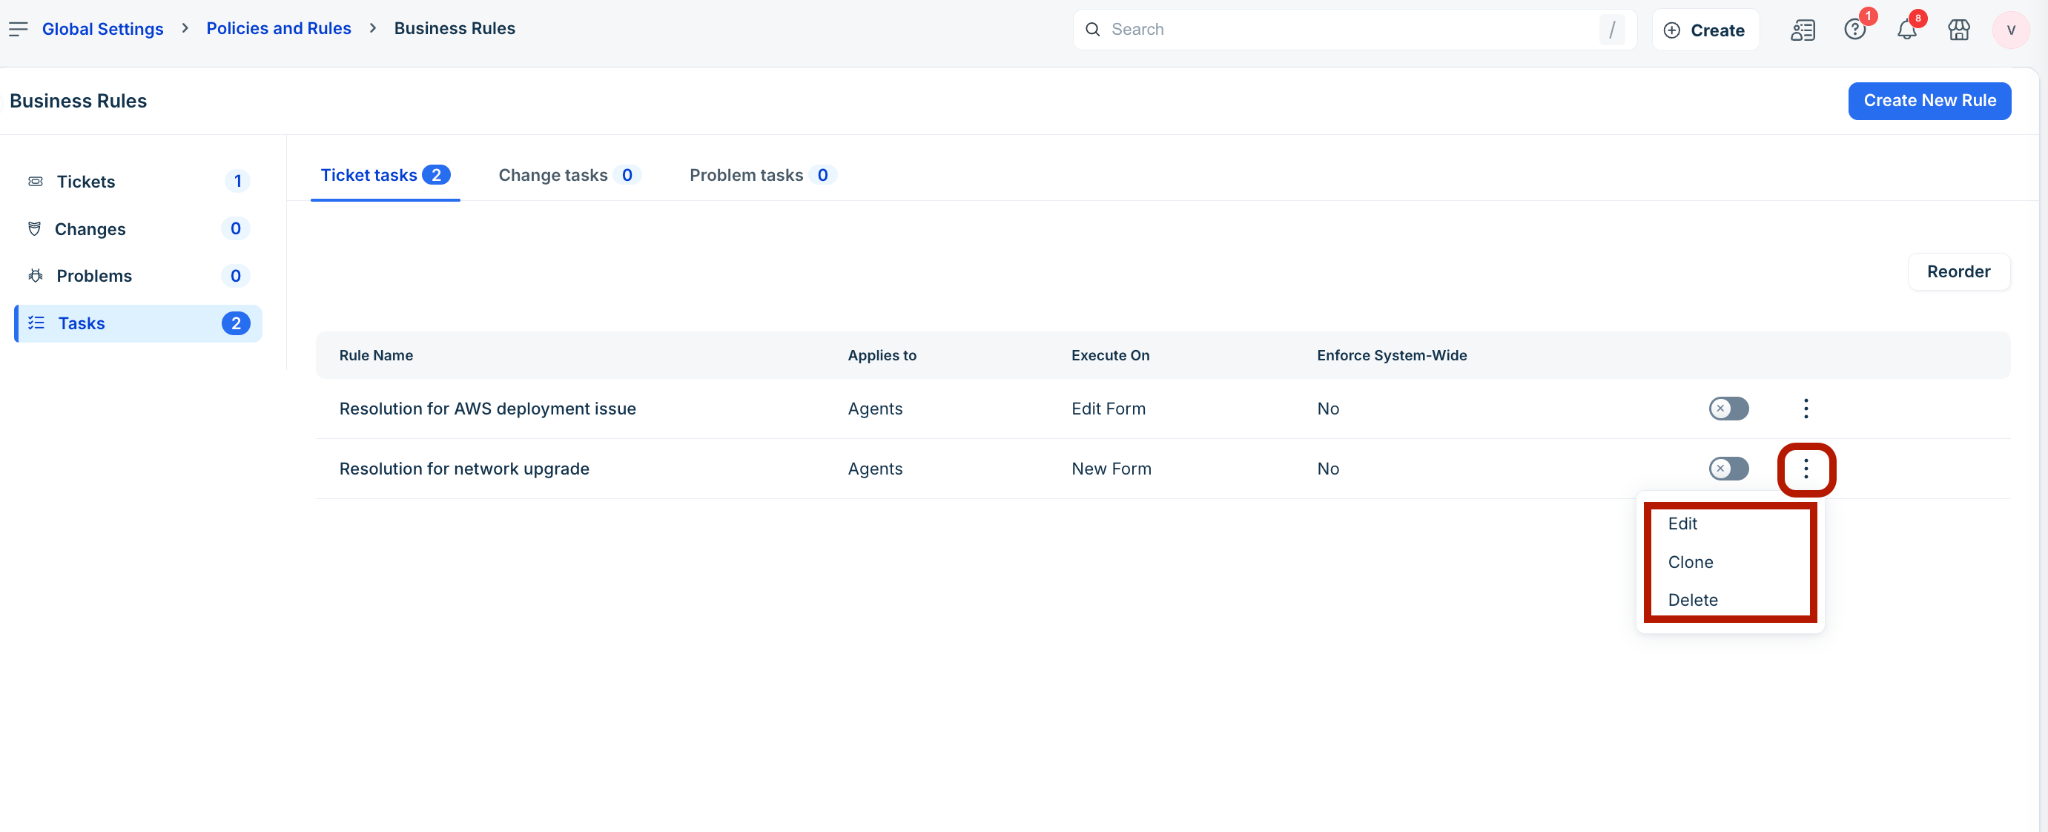
8. Then, select the required action.
_Note:_ _You can also edit a business rule using the Edit__option._
9. (To change the order in which rules must execute) Click Reorder.
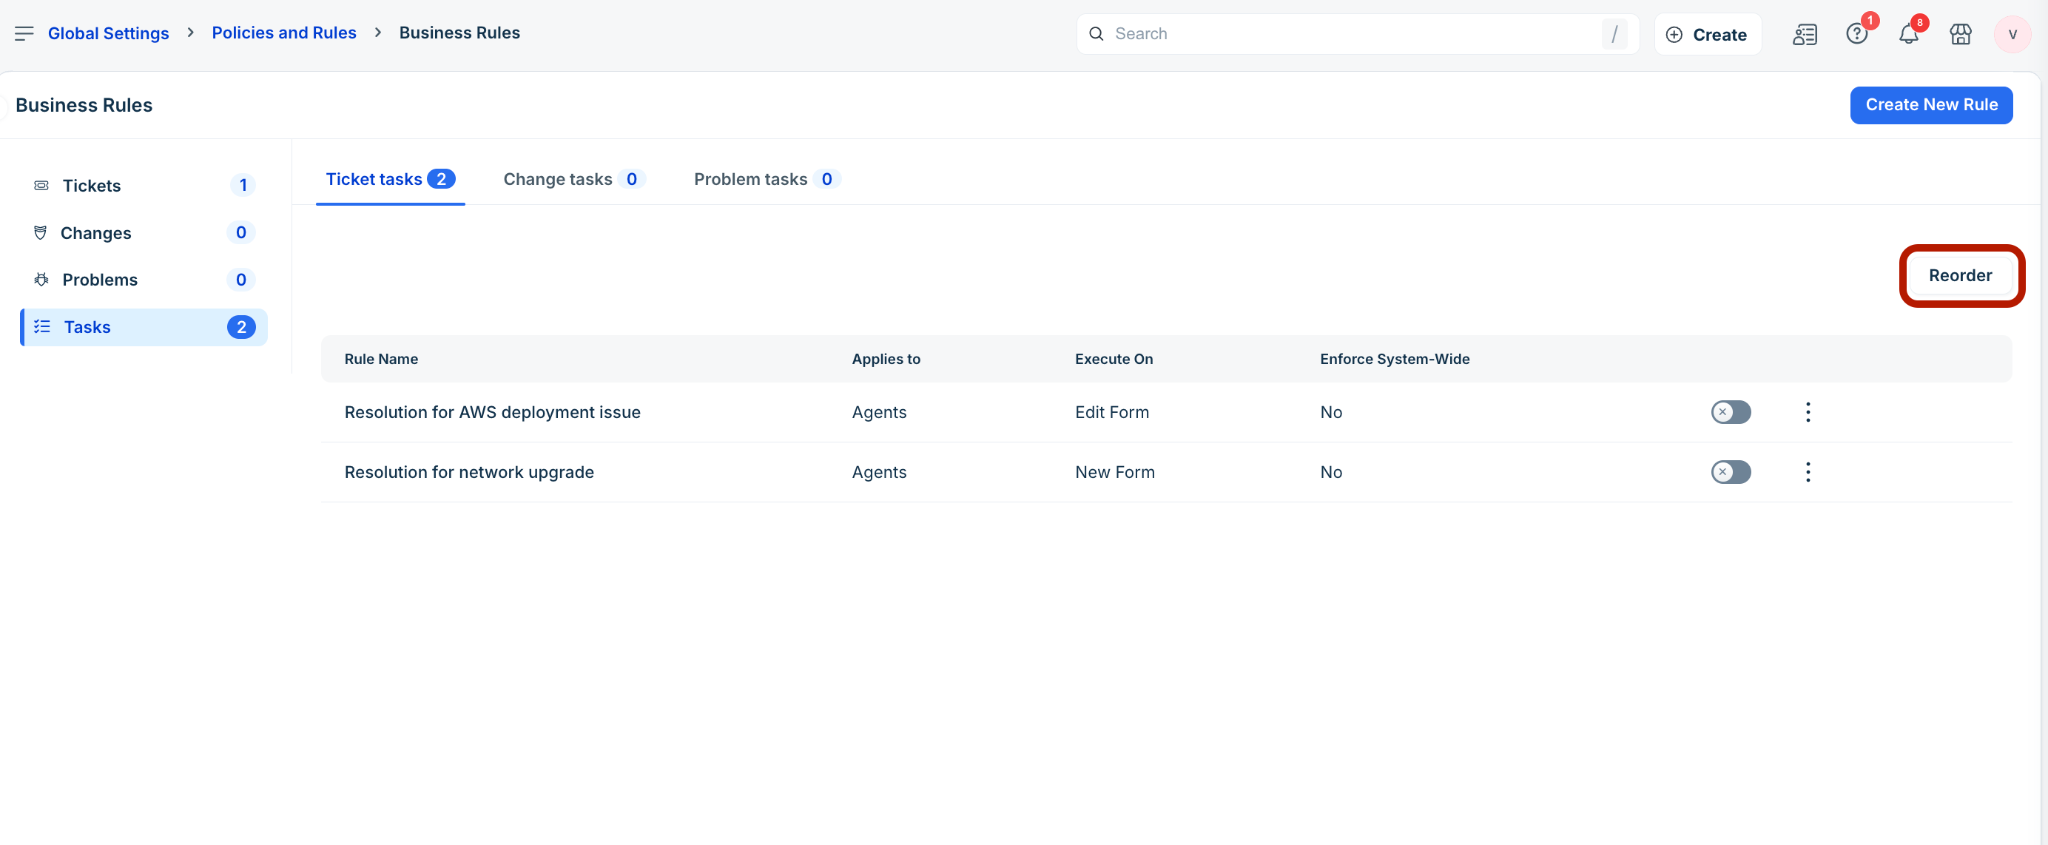
10. Drag and drop the rules based on the required order of execution.
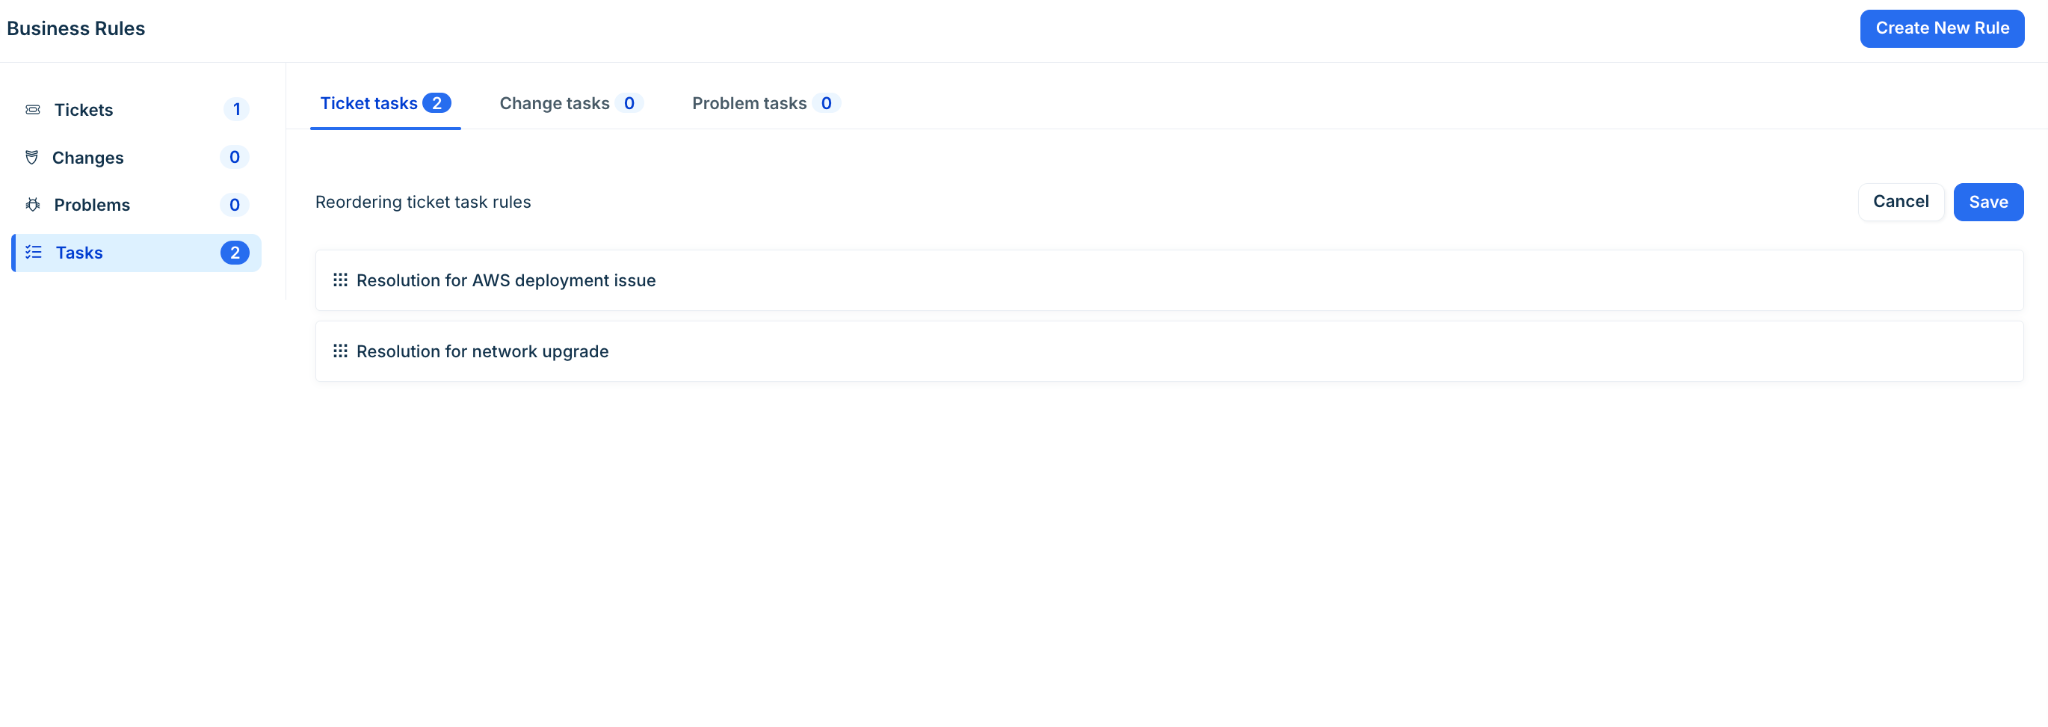
11. Then, click Save.
_Note:_ _You must have more than one rule created for the Reorder__option to be available._
Use case: Mandating Note if task form status is In-progress
The following use case details setting up a business rule for ticket tasks, wherein the ‘Note’ field should be mandated in new and existing tickets when the task ‘Status’ in tickets is ‘In Progress.’
1. Log in to the Freshservice application.
2. Go to Admin > Global Settings > Service Management > Service Desk Settings > Business Rules for Forms.
3. Click Create New Rule and select Task.
4. In the Select task type dialog, select Ticket tasks from the Apply this rule to dropdown. Then, click Proceed.
5. Enter a name and description for the business rule in the respective fields.
6. Select New Form and Edit Form from the Execute On dropdown.
7. In the Conditions section, select a relevant option (Match All or Match Any). Then, add a condition to set the task forms ‘Status’ as ‘In Progress’.
8. In the Actions section, select Perform an Action. Then, add an action to mandate the ‘Note’ field.
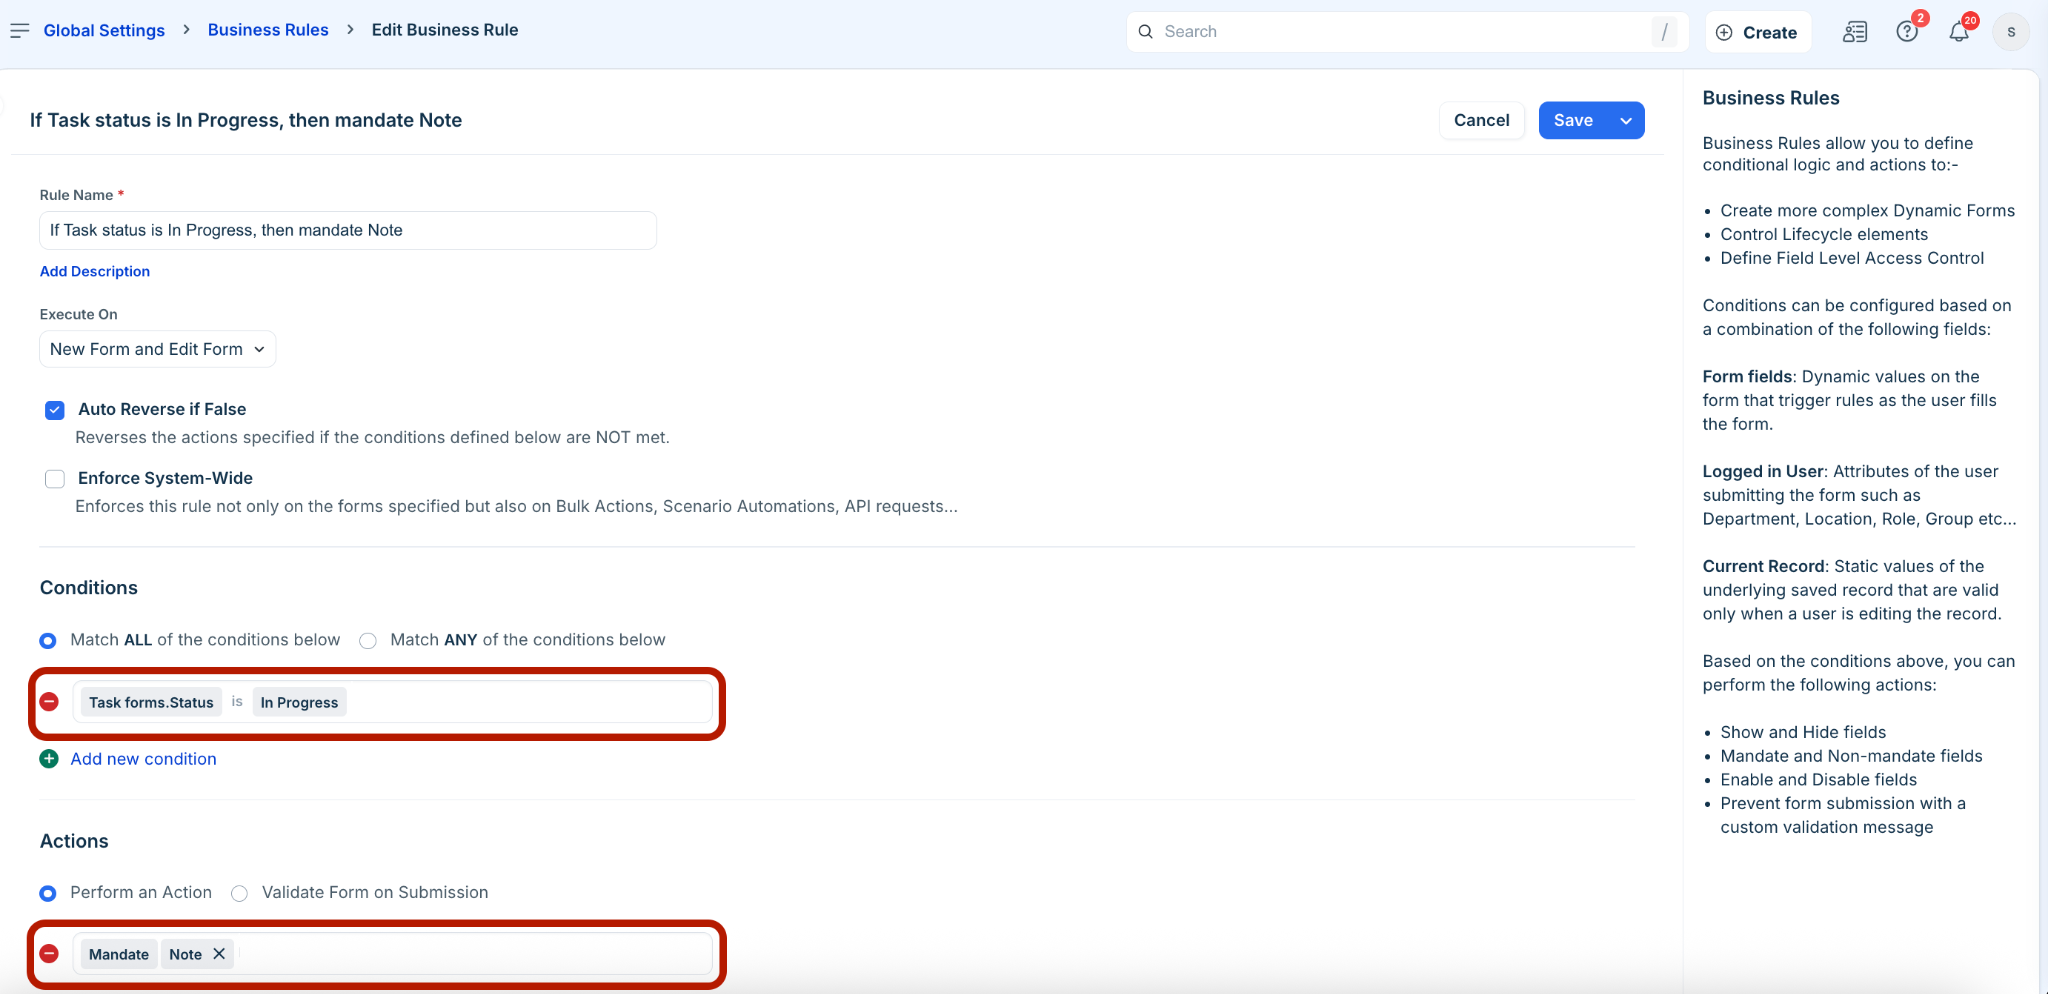
9. Click Save and Activate.
The new business rule for ticket tasks is created and activated.
10. Now, go to Tickets > List.
11. Click any ticket with ‘In Progress’ status to view the ticket details page.
12. Then, go to the Tasks tab and click Add task.
13. In the Add task slider that opens on the right pane, the ‘Note’ field is not mandated when the task status is ‘Open’.
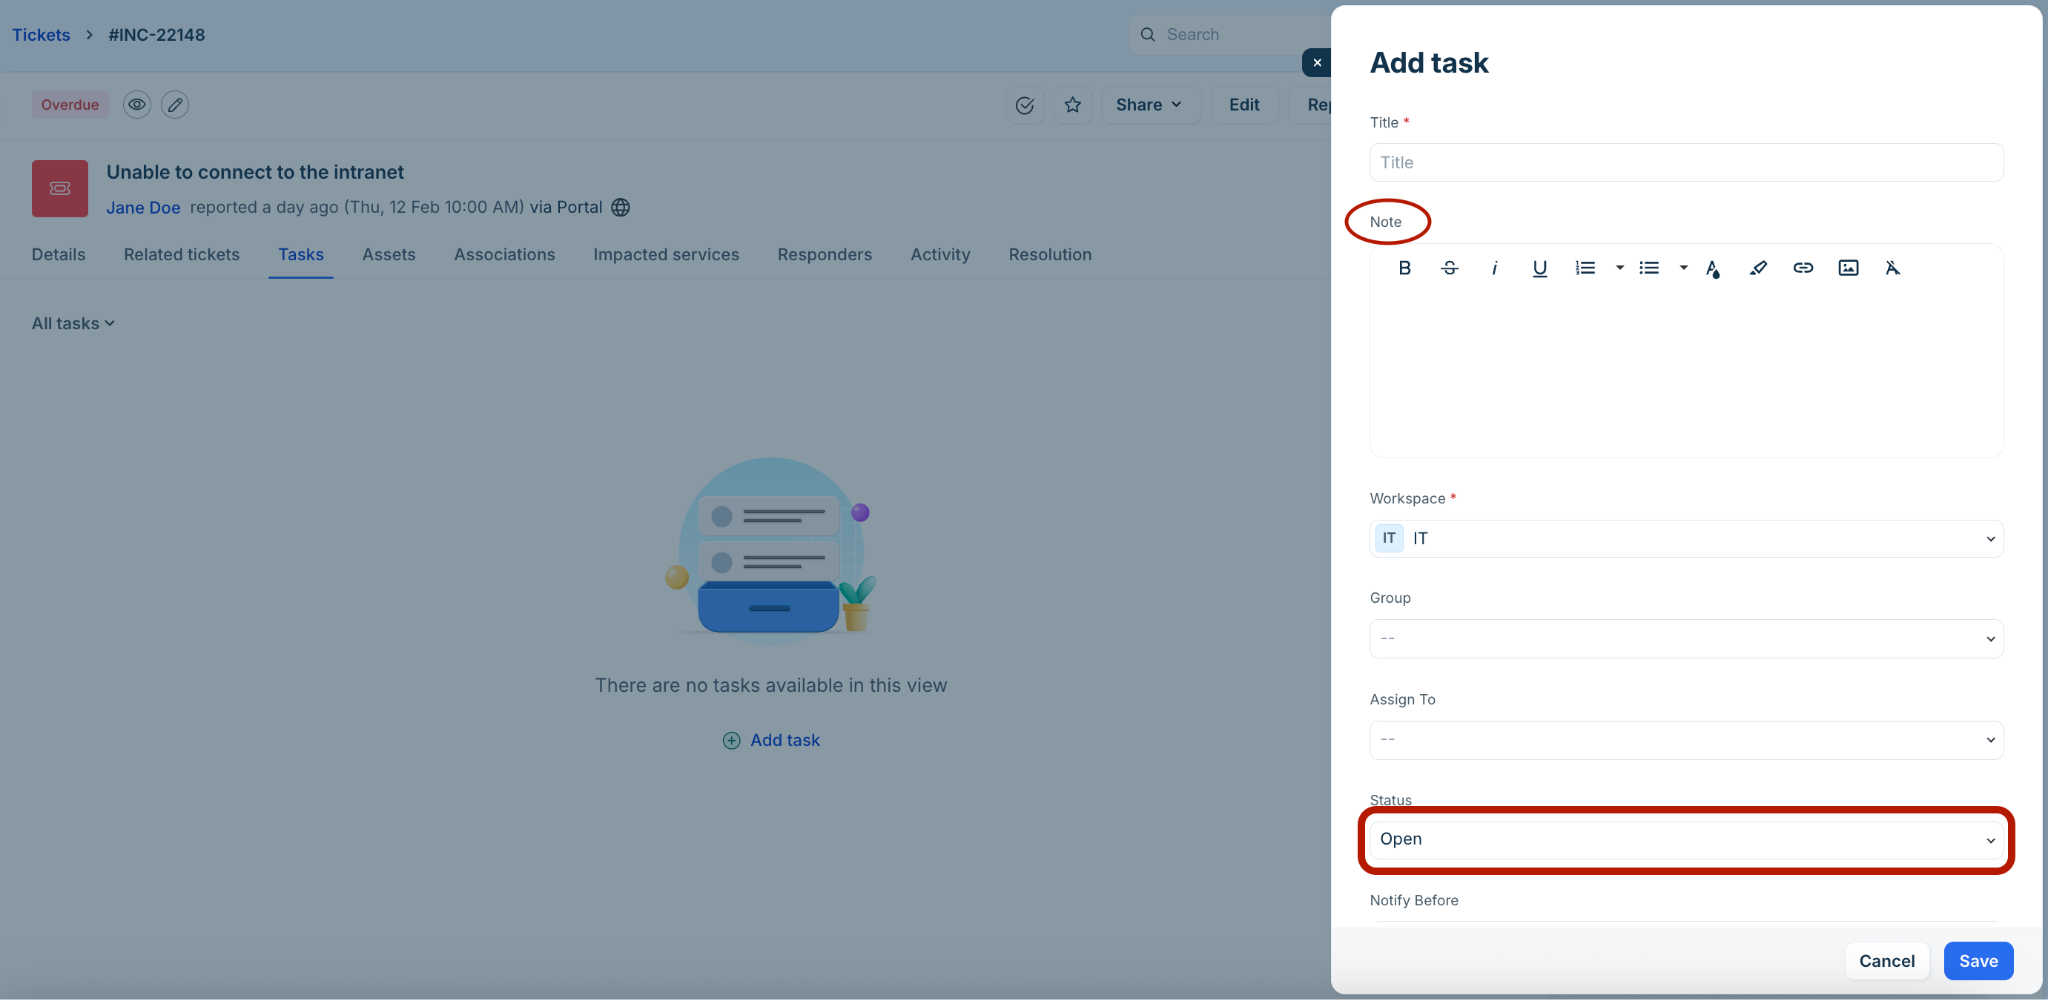
14. Change the status from ‘Open’ to ‘In Progress’.
The ‘Note’ field is mandated when the task status is ‘n Progress’.
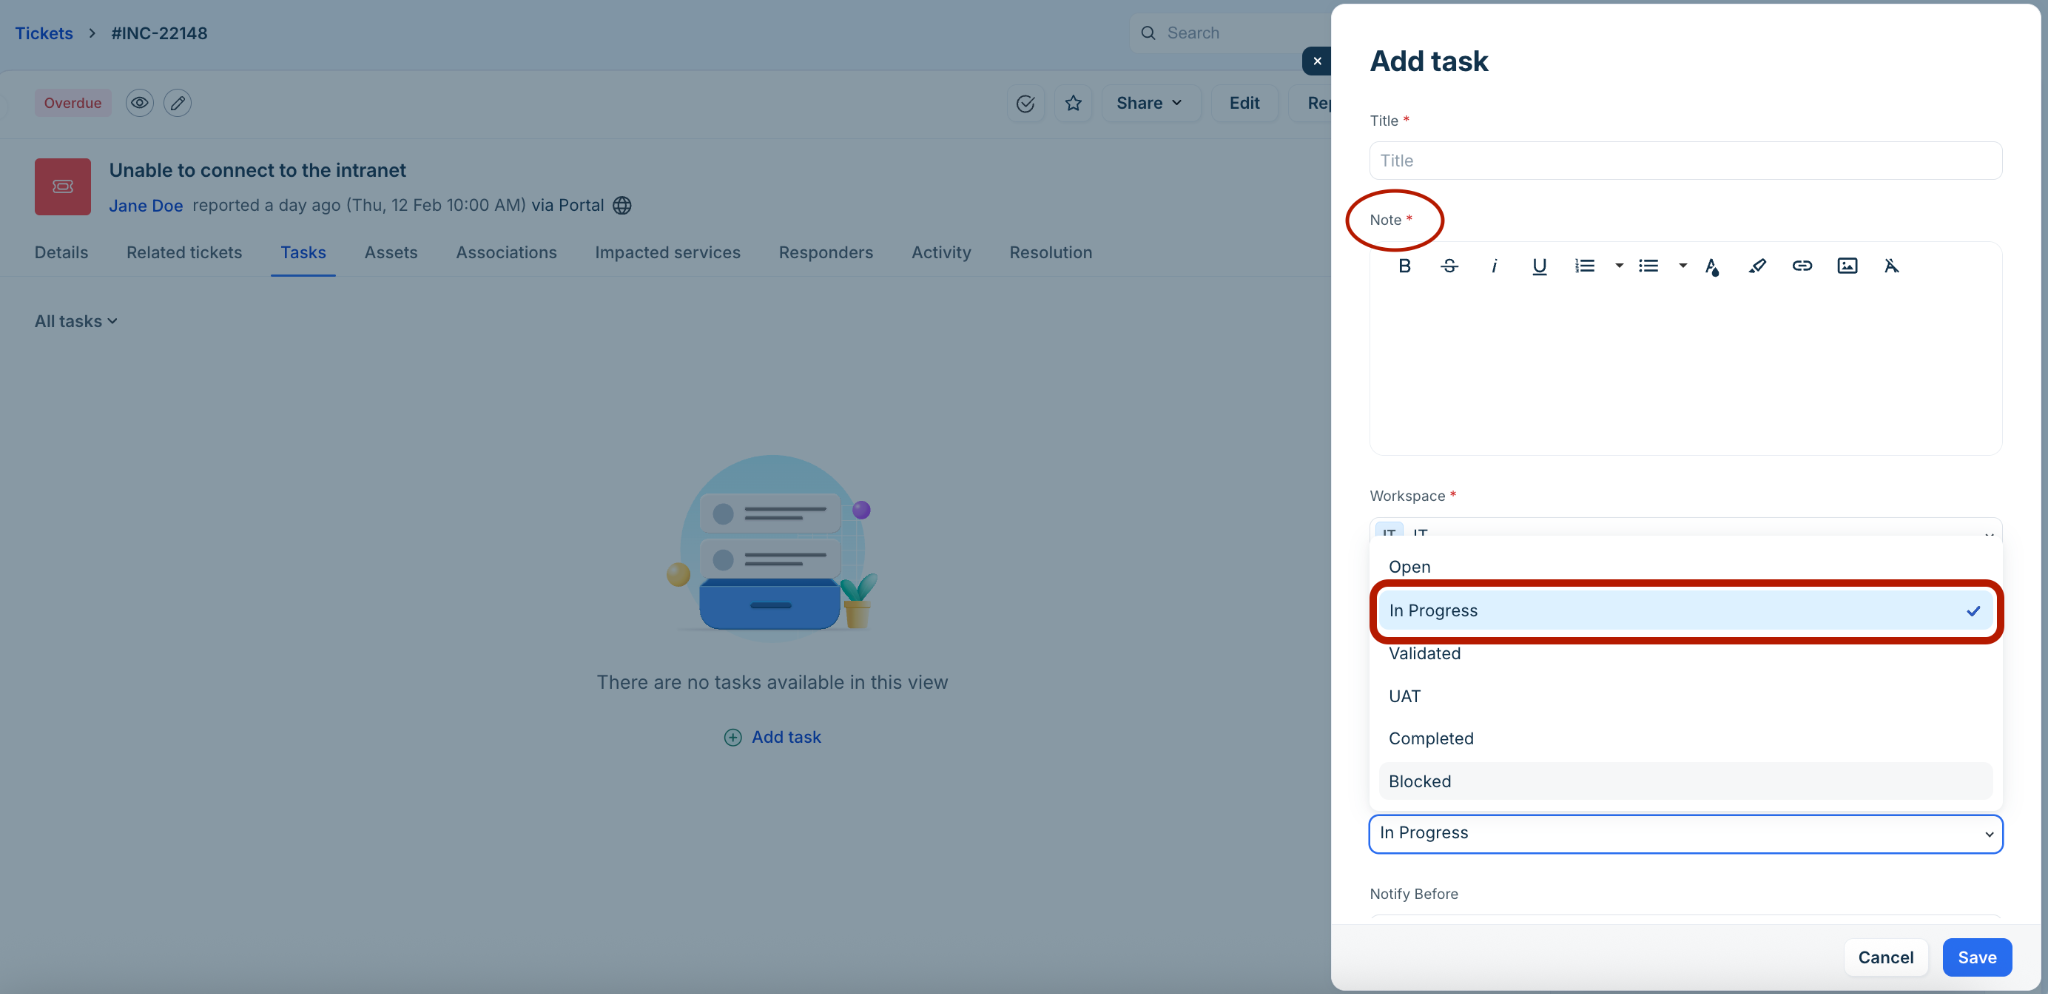
Benefits of tasks business rules
Some of the benefits of tasks business rules are as follows:
Practical example scenarios
Following are some practical example scenarios of business rules for tasks CTAs:
| Action | Example |
| Disable | Disable Assigned To if Status = Closed |
| Disable | Disable HR (Human Resource) fields (such as joining date and verification status) if Workspace is IT |
| Enable | Enable Assigned To if Status = Open |
| Hide | Hide Priority if Group = HR |
| Mandate | Mandate Due Date if Status = In Progress |
| Non-Mandate | Make Due Date (optional) if Group = IT |
| Remove options | Remove Closed from Status if Task Type = Approval |
| Set options | Restrict Group to \[IT, IT OPs\] if Workspace = IT Support |
| Show | Show Due Date if Status = In Progress |