Last updated: 2026-03-31
Source: https://support.freshservice.com/support/solutions/articles/50000012014-manage-subnets
``` Note: Available only for new signups after the 31 March, 2026 release. If you signed up earlier, refer to the existing ITAM documentation. ```
A subnet represents any Layer 3 network (IPv4 or IPv6) within your organization. Subnets can be associated with specific VLANs, though this is not a requirement. In Freshservice, every IP address must belong to a parent subnet to be valid.
You can create nested subnets automatically and can relocate manually created subnets as a nested subnet. To support nesting, a subnet must be assigned to a VRF group.
This article covers how to define network boundaries, manage parent-child subnet relationships within VRF groups, and automate IP discovery and population.
Prerequisites
You need the following before managing Subnet records:
Add a subnet record
To create a new subnet, follow these steps:
1. Go to IT Asset Management > Inventory > Subnets and click Add new.
2. In the Network and Mask Bits fields, enter the network address and the corresponding mask bits.
3. Select the appropriate Workspace and Service Level from the dropdown menus.
4. (Optional) Provide additional configuration details:
- VRF Group: Select a group if you intend to create nested child subnets within this range.
- Subnet Category: Use this to organize subnets or restrict permissions (required for the Multitenancy feature).
- Usable Network/Broadcast: Toggle this on if you want the network and broadcast addresses to appear as assignable IPs in your list.
- Range Begin and Range End: Enter the range of addresses. If you leave these fields blank, Freshservice automatically calculates the IP range based on the network and mask bits provided. 5. Enter any other relevant details and click Save.
View subnet information
To view your network segments, go to IT Asset Management > Inventory > Subnets.
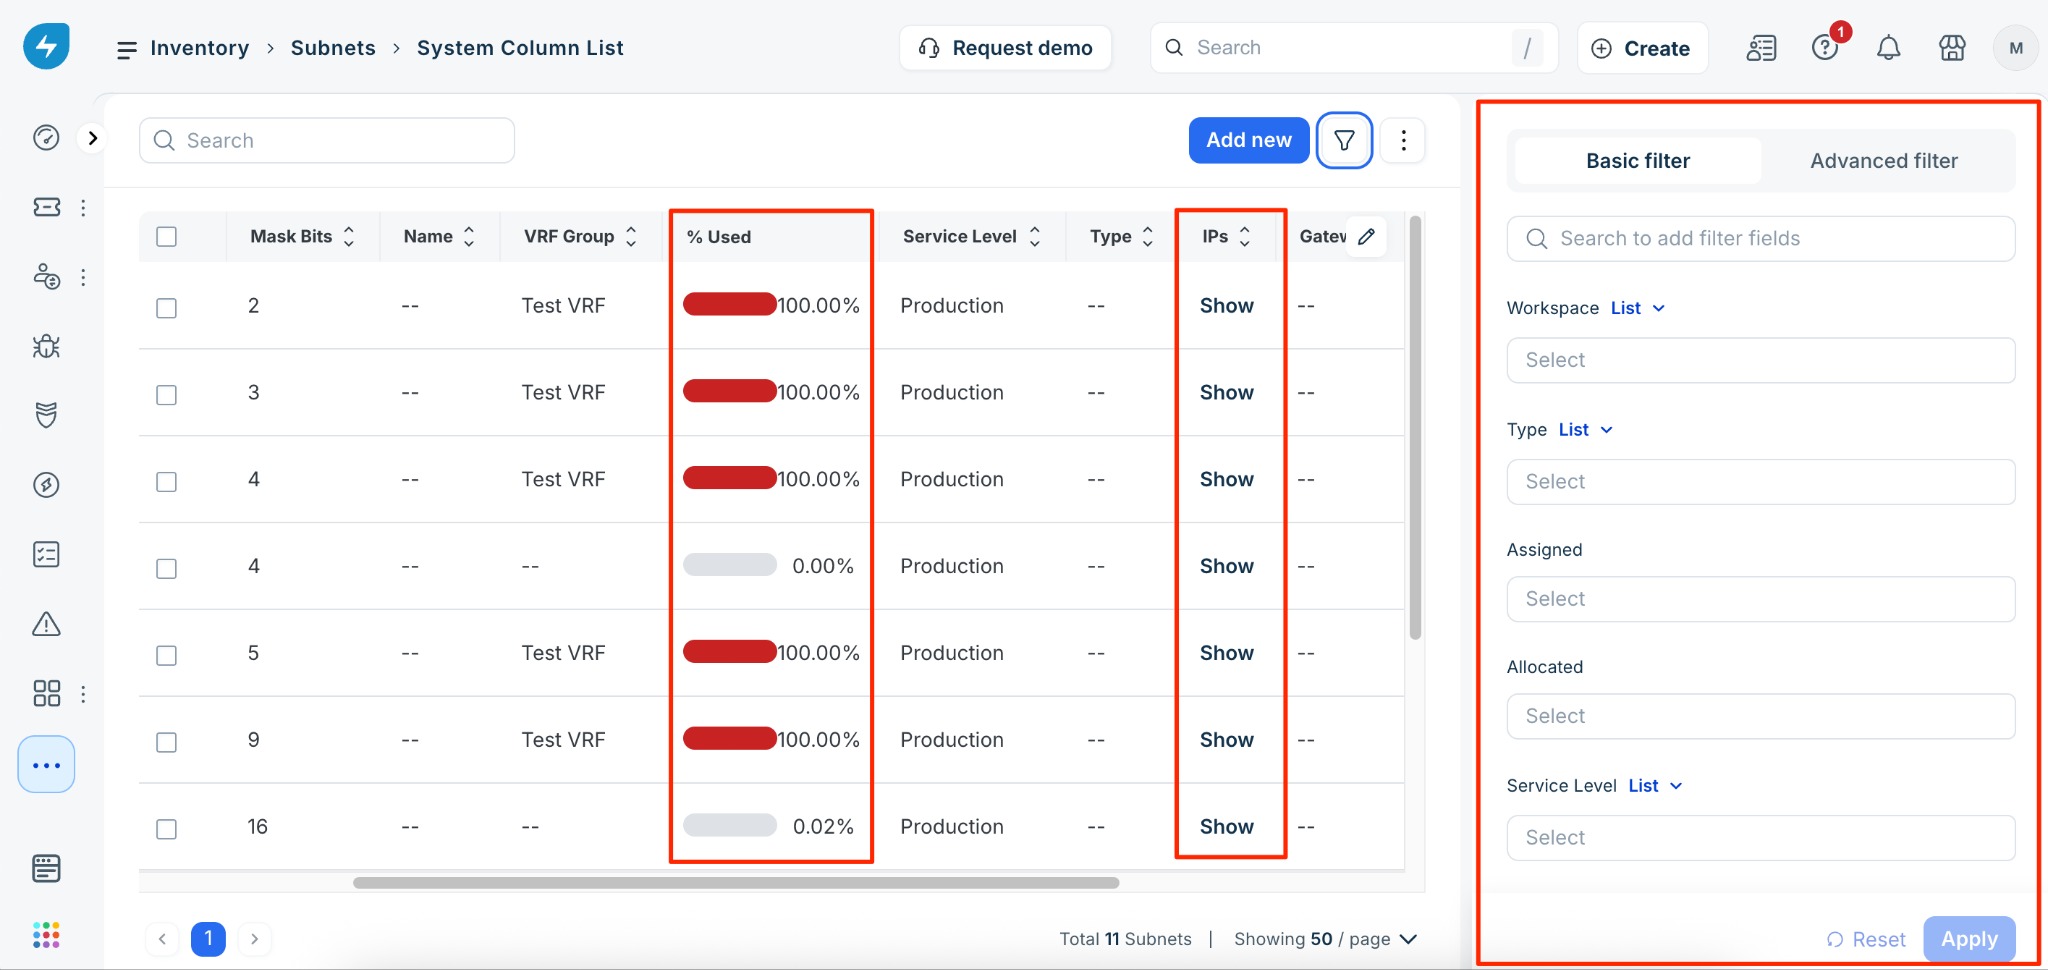
Use bulk actions for subnet management
To modify multiple subnet records simultaneously, go to the Subnets page and select the checkboxes next to the subnets you want to manage. Use the buttons that appear on the toolbar at the top of the list or click the More options (three vertical dots) icon to access additional options.
The following table describes the actions available for managing subnets:
| Action | Description |
| Delete | Permanently remove the selected subnet records |
| Change Cost Center | Update the value of the Cost Center field assigned to the subnets. |
| Create a Ping Sweep Job for selected subnets | Create a ping sweep job for a set of selected subnets. <br>Once the action is confirmed, click the View details link in the success message to review the job's configuration.<br>Alternatively, you can access the job by going to Admin > Scan and Discover, opening the Discovery Jobs tab, and selecting Ping Sweep. On the Ping Sweep page, click the specific ad hoc job and select Run Now on the details page to run it immediately. |
| Export selected items | Downloads the selected subnet data into a CSV file. |
| Add tags to selected items | Update tags in bulk to improve searchability and reporting. |
| Remove tags from selected items | Remove tags from the selected subnets in bulk. |
| Background Populate Subnets with IPs | Generate IP records within an existing subnet range. |
| Set Custom Field Value | Assigns a value to a specific custom field for all selected subnet records. |
Advanced subnet management
You can perform the following additional operations on subnets.
Create nested subnets
To create a child subnet within an existing range, follow these steps:
1. Go to the subnet details page and assign a VRF group to the subnet.
2. Click Save. The Subnet Tree tab appears on the page.
3. Click the Subnet Tree tab.
4. Hover over a specific subnet and click \+ New Subnet.
5. Enter the required details, such as the network address and mask bits.
6. Click Save to generate a child subnet.
Freshservice automatically validates the range and alerts you if there are any overlapping conflicts.
Relocate a subnet
You can move a subnet to a different position in the hierarchy or to a different VRF group. To relocate a subnet, follow these steps:
1. Go to the subnet details page.
2. Click the More options (three vertical dots) icon and select Relocate. Freshservice calculates if a suitable parent subnet exists to house the current range.
3. In the Relocate window, select a VRF group.
4. Click Relocate.
If Freshservice finds a valid parent and no IP conflicts exist, the subnet moves to the new position in the hierarchy.
Merge a subnet to a parent subnet
You can merge a subnet into its parent record. Note that this action deletes the existing child subnet record after the merge. To merge a subnet, follow these steps:
1. Go to the subnet details page.
2. Click the More options (three vertical dots) icon and select Merge With Parent.
3. Click Merge.
Delete or merge subnets
When you delete a subnet record, you can choose to move all associated IP addresses to the parent subnet. This process allows you to retire a small subnet and merge its records into a larger one without losing data. To delete or merge a subnet, follow these steps:
1. Go to the subnet details page.
2. Click the More options (three vertical dots) icon and select Delete.
3. In the Delete window, select If subnet(s) have a parent, merge children subnets & IPs to parent.
4. Click Delete.
The subnet record is removed, and its child subnets and IP addresses are moved to the parent record.