Last updated: 2026-05-23
An Agent Checklist is a list of steps an agent works through when fulfilling a service request. It is configured at the service catalog item level and appears on tickets raised against that item based on the applied conditions. If the checklist is linked directly without any conditions, it applies to all tickets raised using that service catalog item.
Each checklist has three parts:
``` Note: Checklists govern service item fulfillment, not ticket closure. An agent can close a ticket without completing every checklist item, but the service item cannot be marked as fulfilled until all mandatory items are checked. ```
Plan & Product Applicability
Before you set up and configure agent checklists, review the plan availability and scope of application.
Where to find checklist templates
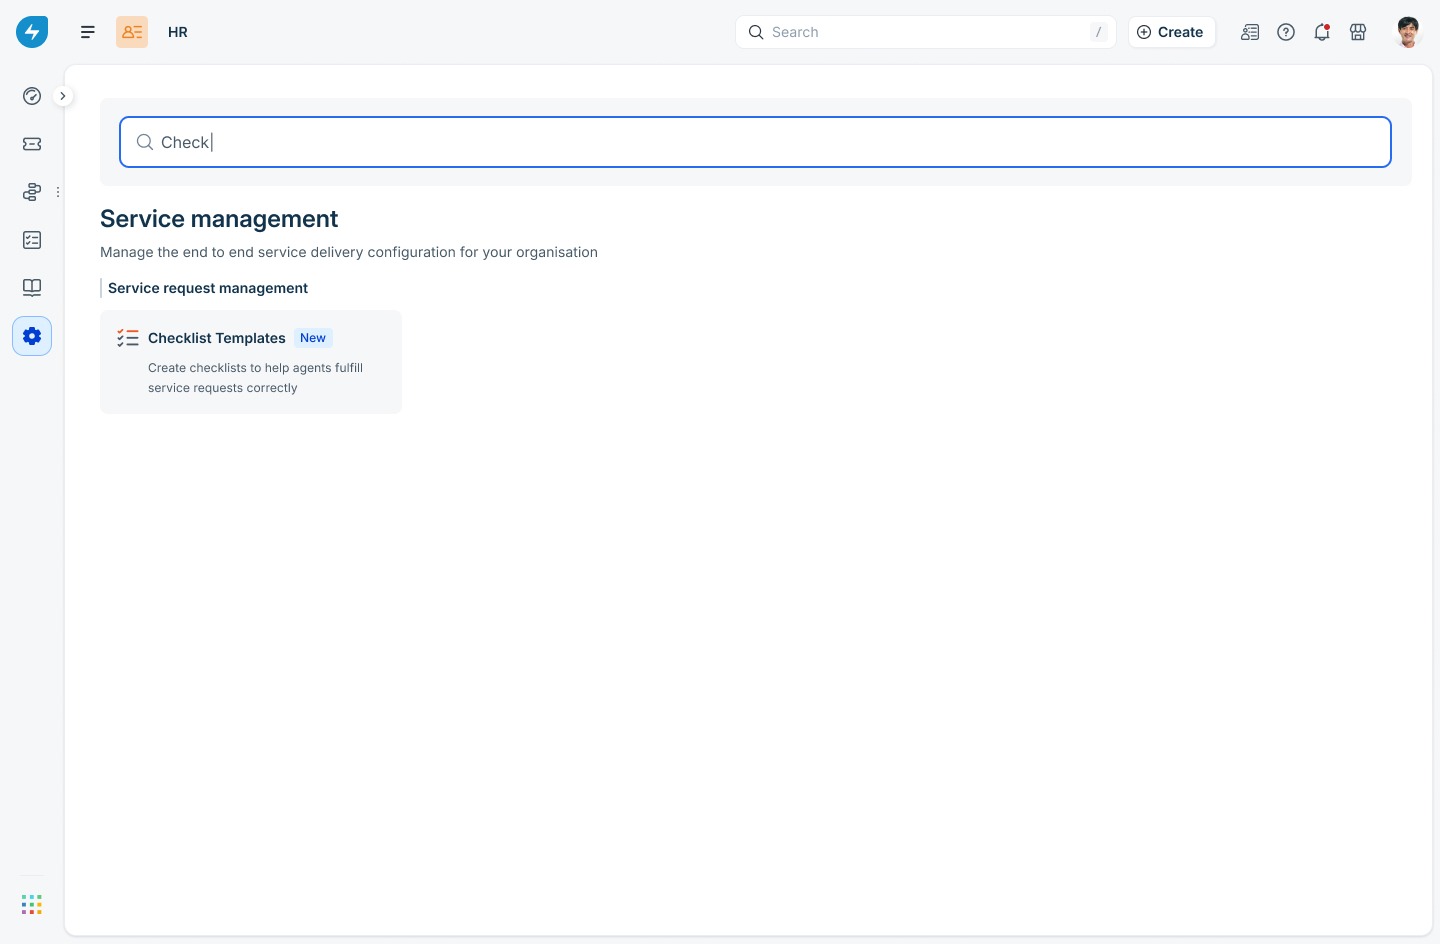
Checklist Templates are managed from workspace settings.
1. Go to Admin settings and click the Workspace hamburger menu in the top-left corner.
2. Select the desired workspace.
3. Under Service management, click Checklist Templates under Service request management.
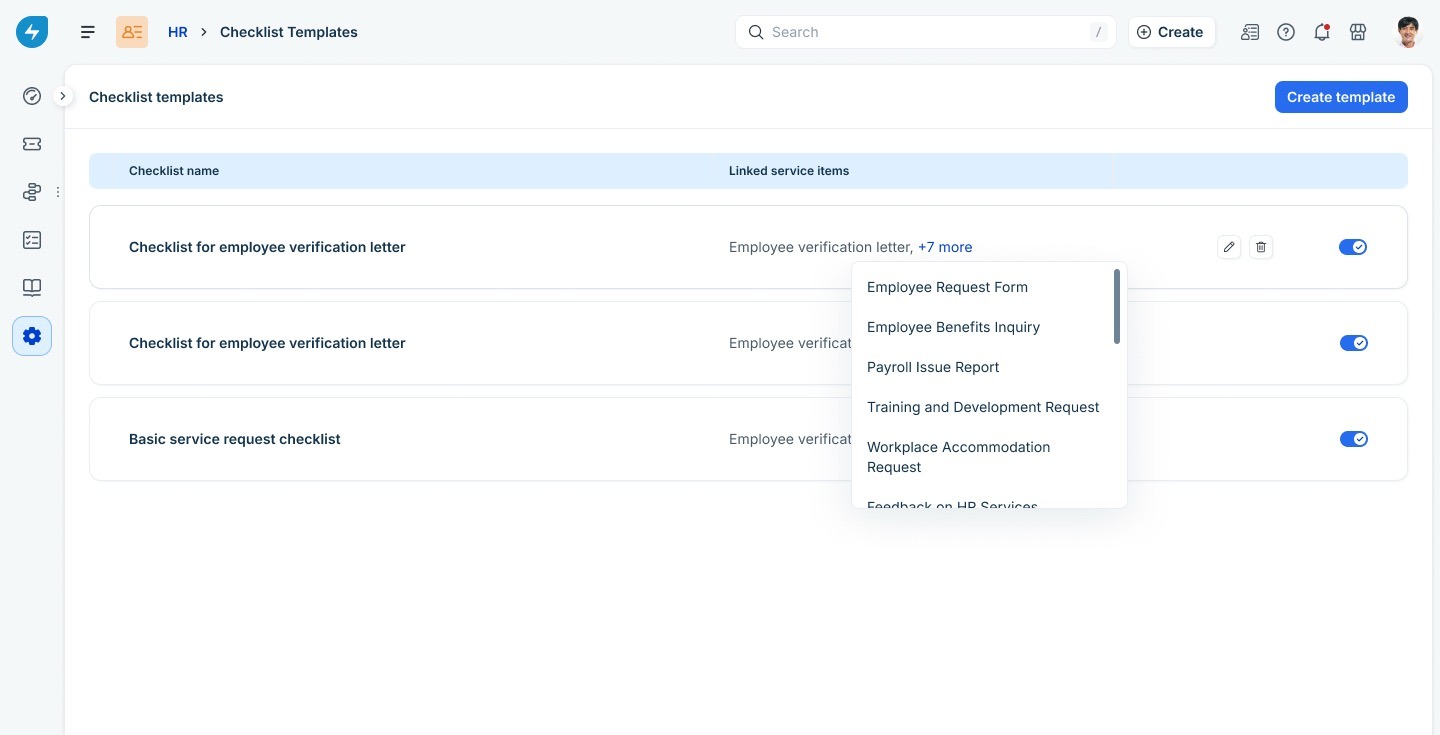
4. The Checklist Templates page lists every template in the workspace, the service items each one is linked to, and a toggle to enable or disable it. From this page, you can create a new template, edit an existing one, or remove templates that are no longer in use.
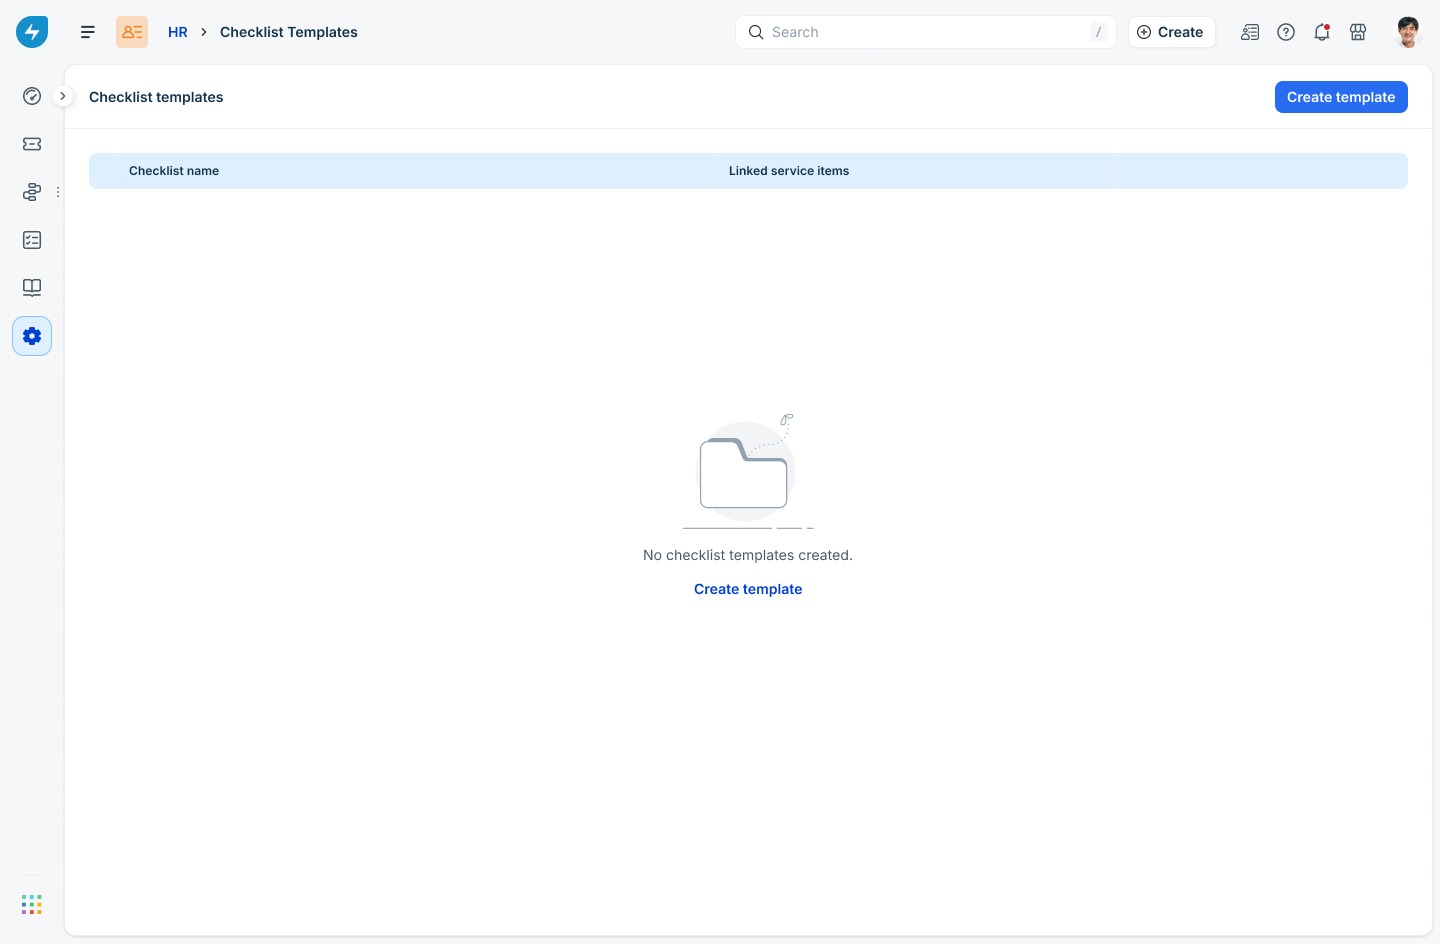
5. If no templates exist yet, the page shows an empty state with a Create template link.
Create a checklist template
Creating a template takes two steps: define the checklist, then link it to one or more service items.
Step 1: Define the checklist
1. On the Checklist Templates page, click Create template.
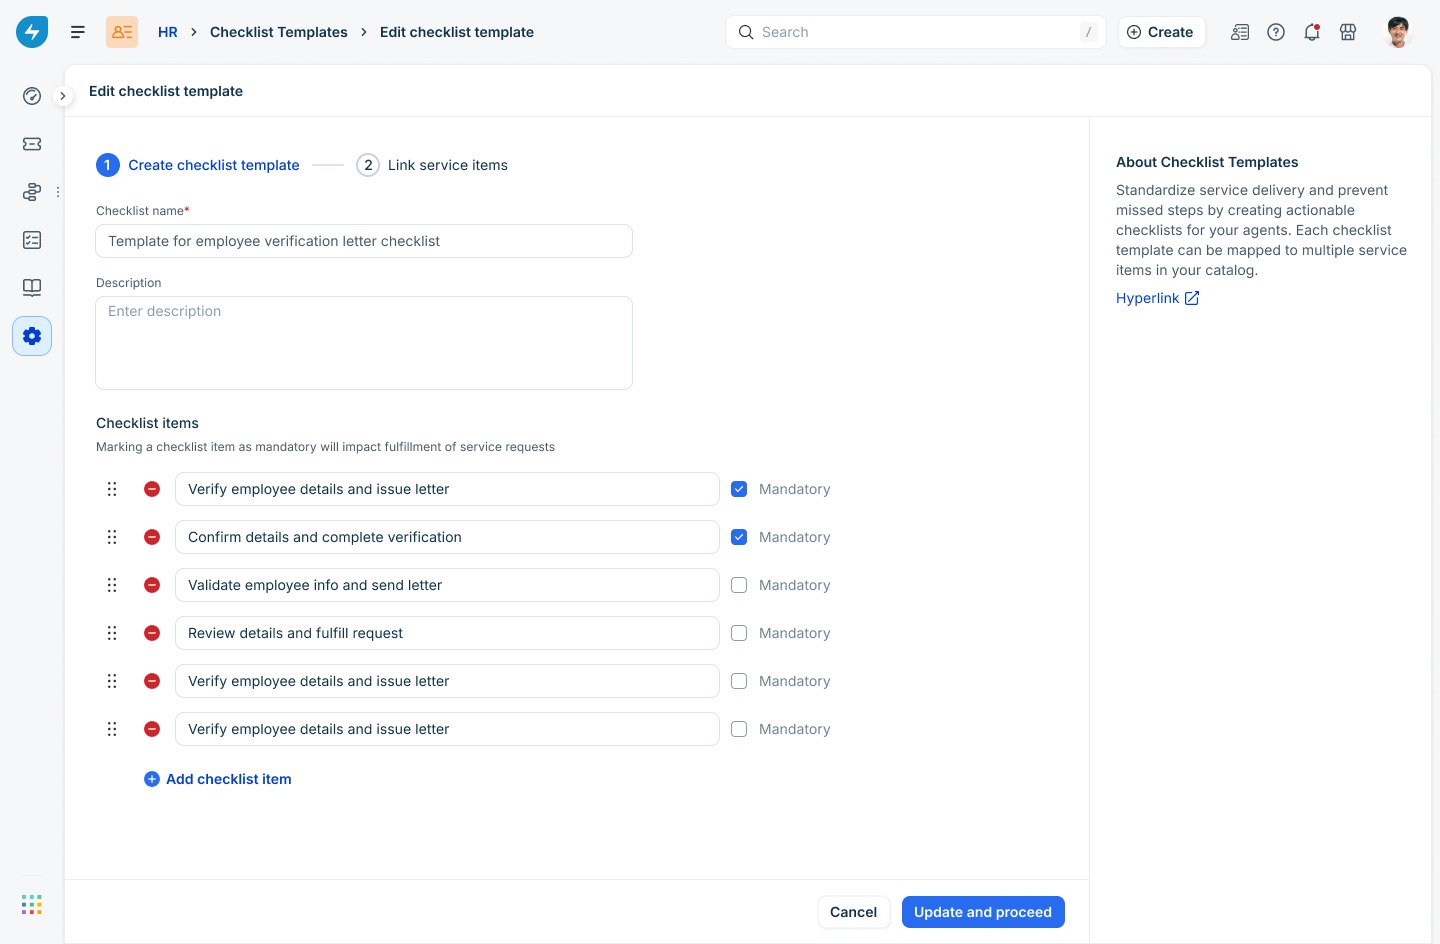
2. Enter a Checklist name. This is what agents see on the ticket, so keep it descriptive — for example, “Checklist for employee verification letter.”
3. Add an optional Description to explain when this checklist should be used. The description helps other admins but is not shown to agents.
4. Under Checklist items, type the first step and press Enter or click Add checklist item to add more. Each item supports up to 120 characters.
5. Select Mandatory on any step that must be completed before fulfillment. Mandatory steps block the requested item in the service request from being marked as Fulfilled.
6. Drag the handle next to any item to reorder the list. The order shown here is the order agents see on the ticket.
7. Click Create and proceed to move on to linking service items.

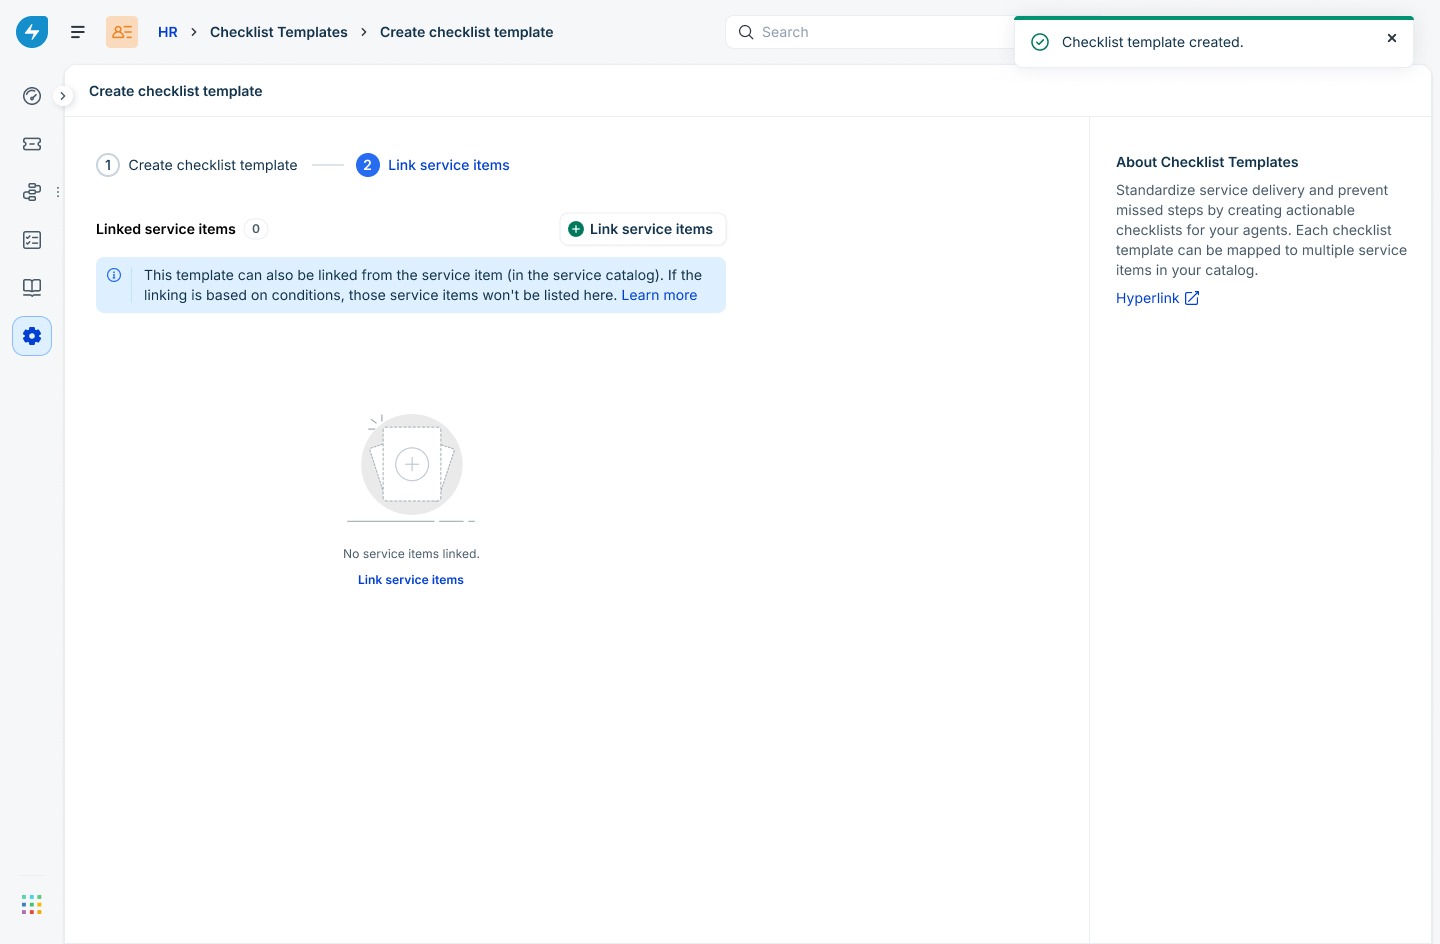
Step 2: Link service items
A checklist template is not visible to agents until at least one service item is linked to it.
1. On the Link service items step, click Link service items.
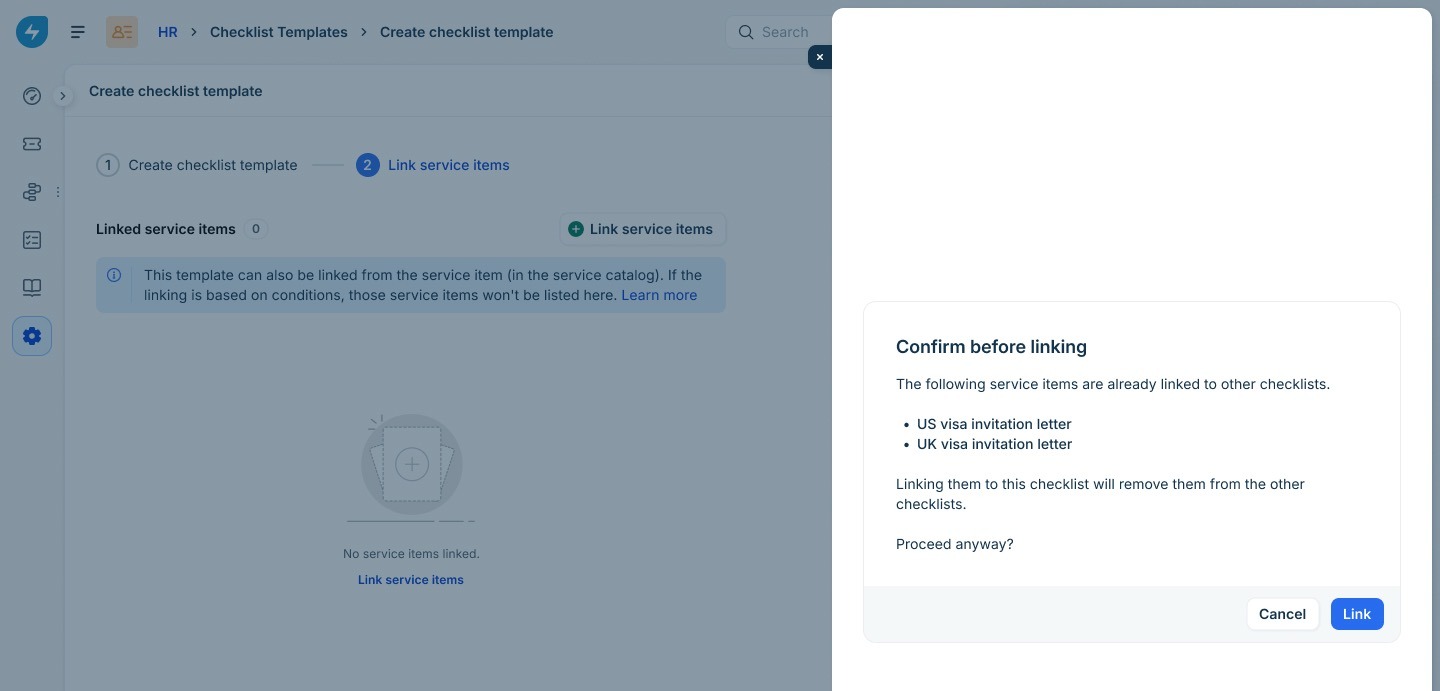
2. In the side panel, search for and select up to five service items at a time. Repeat to link more items.

3. Click Link.If any of the items you selected are already linked to a different checklist, the Confirm before linking dialog lists those items. Linking them here removes them from the other checklist, because each service item can have only one checklist at a time.
``` Note: If you exit the wizard without linking at least one service item, the template is saved but inactive. You can return later to link items. ```
Manage existing templates
Use the Checklist Templates page to edit, enable, disable, or delete templates you have already created.
Edit a template
1. Click the edit icon next to a template to update its name, description, or checklist items.
2. When you save, the Confirm before updating dialog shows how many service items are linked. Your changes apply only to future service requests raised for those items. Existing tickets, including ones in progress, are not affected.
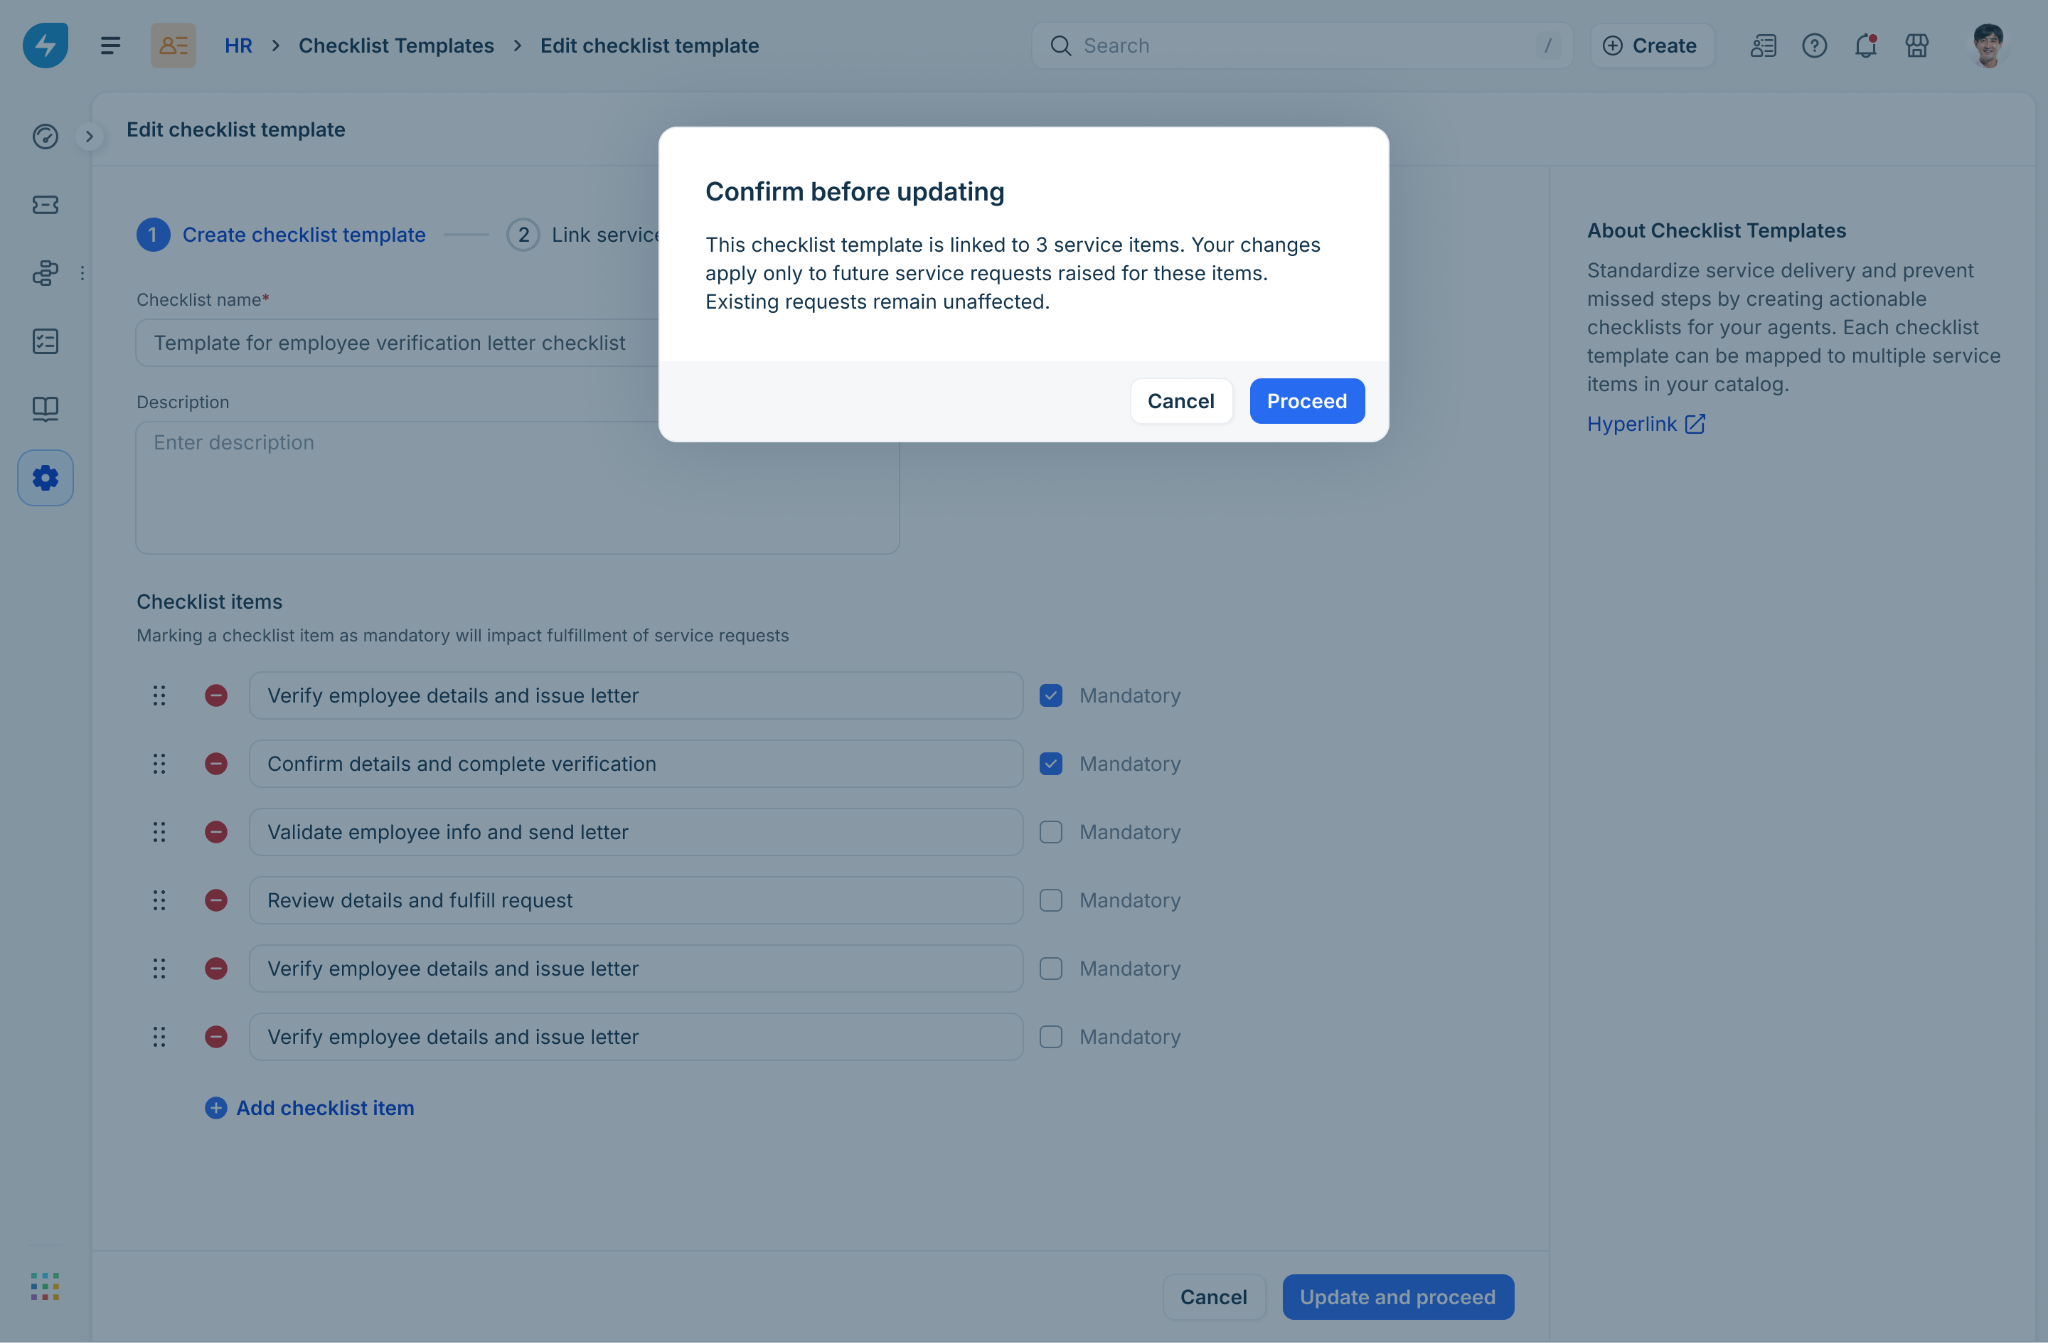
This rule prevents agents from losing progress mid-ticket if the SOP changes after the ticket is created.
Enable or disable a template
Each template has a toggle on the right of its row.
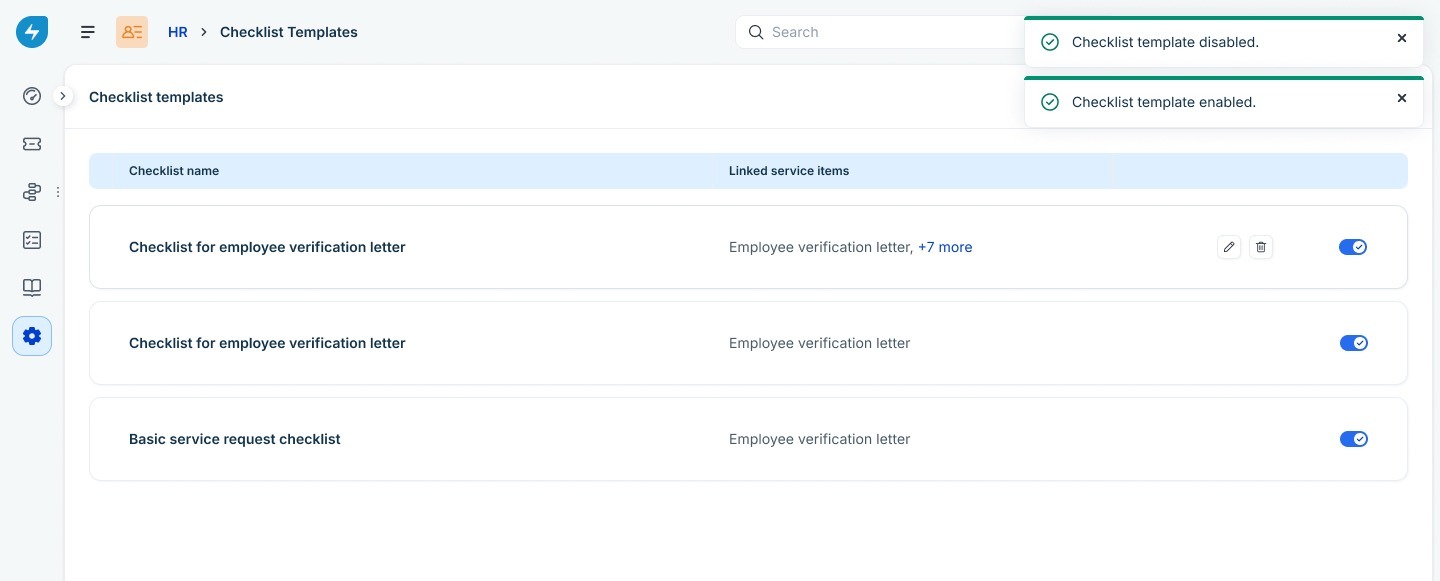
Only enabled templates appear in the service item picker.
Delete a template
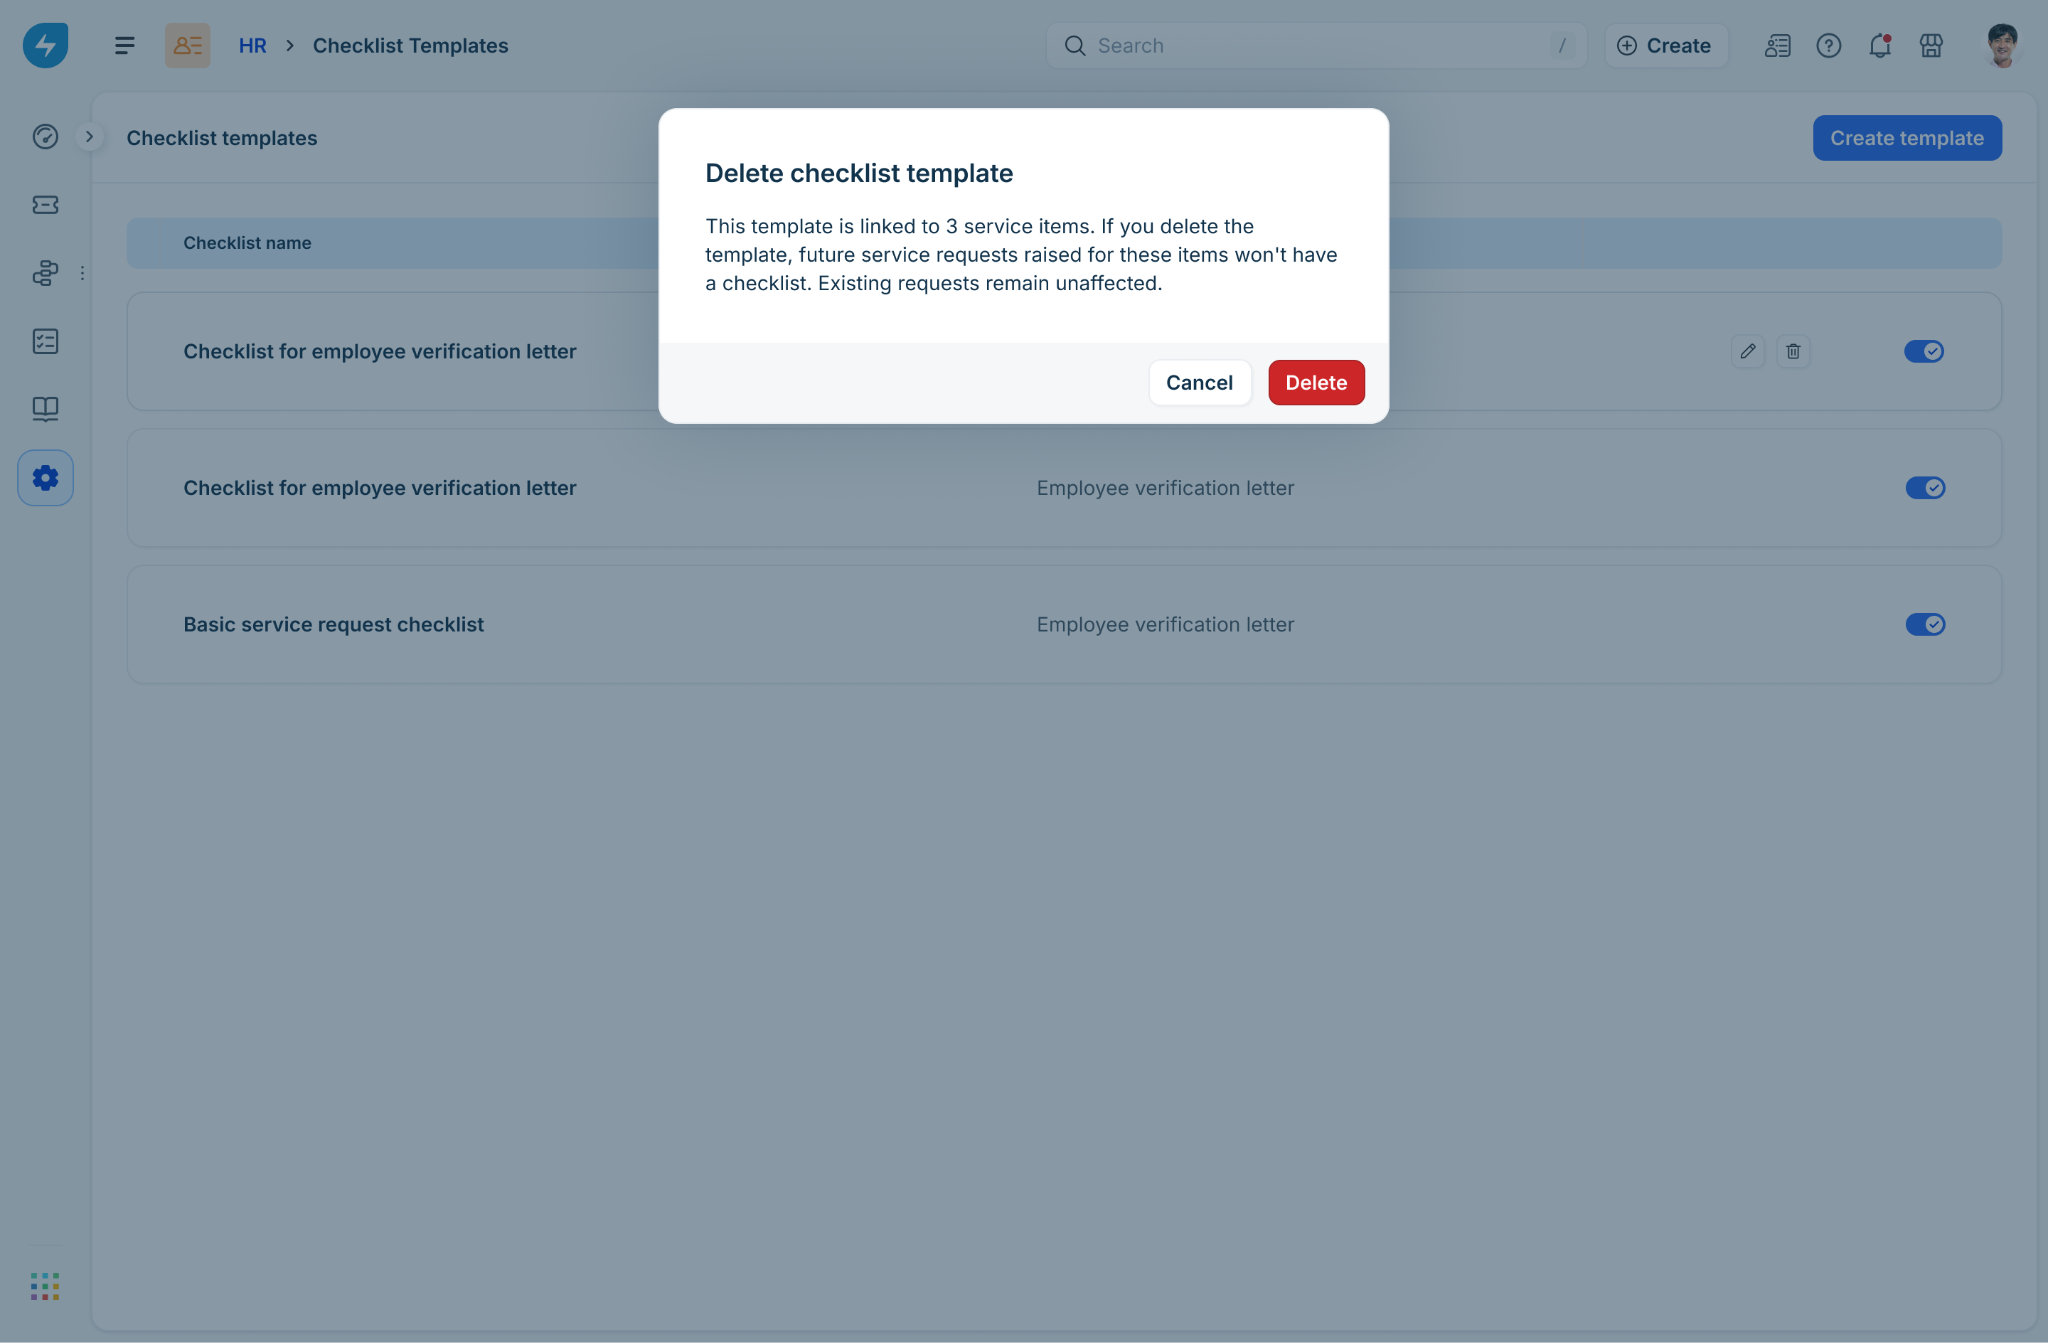
1. Click the delete icon next to a template.
2. In the Delete checklist template dialog, review the number of service items that are linked. Future requests for those items will be raised without a checklist; existing requests remain unaffected.
3. Click Delete to confirm.

Deletion is recorded in the audit log, along with the admin who performed it.
Audit log
Every change to a checklist template — create, update, enable, disable, delete, and service item link changes — is captured in the workspace audit log.
To review activity, go to Workspace settings > Audit log and filter by Checklist template. Each entry shows the timestamp, the action, the user who performed it, and the affected template.

Link a checklist to a service catalog item
A checklist template takes effect only after it is linked to a service catalog item. When linking from the Checklist Templates page, the template is linked directly - without any conditions. When linking from the service item page, you can link with or without conditions.
To link from the service item:
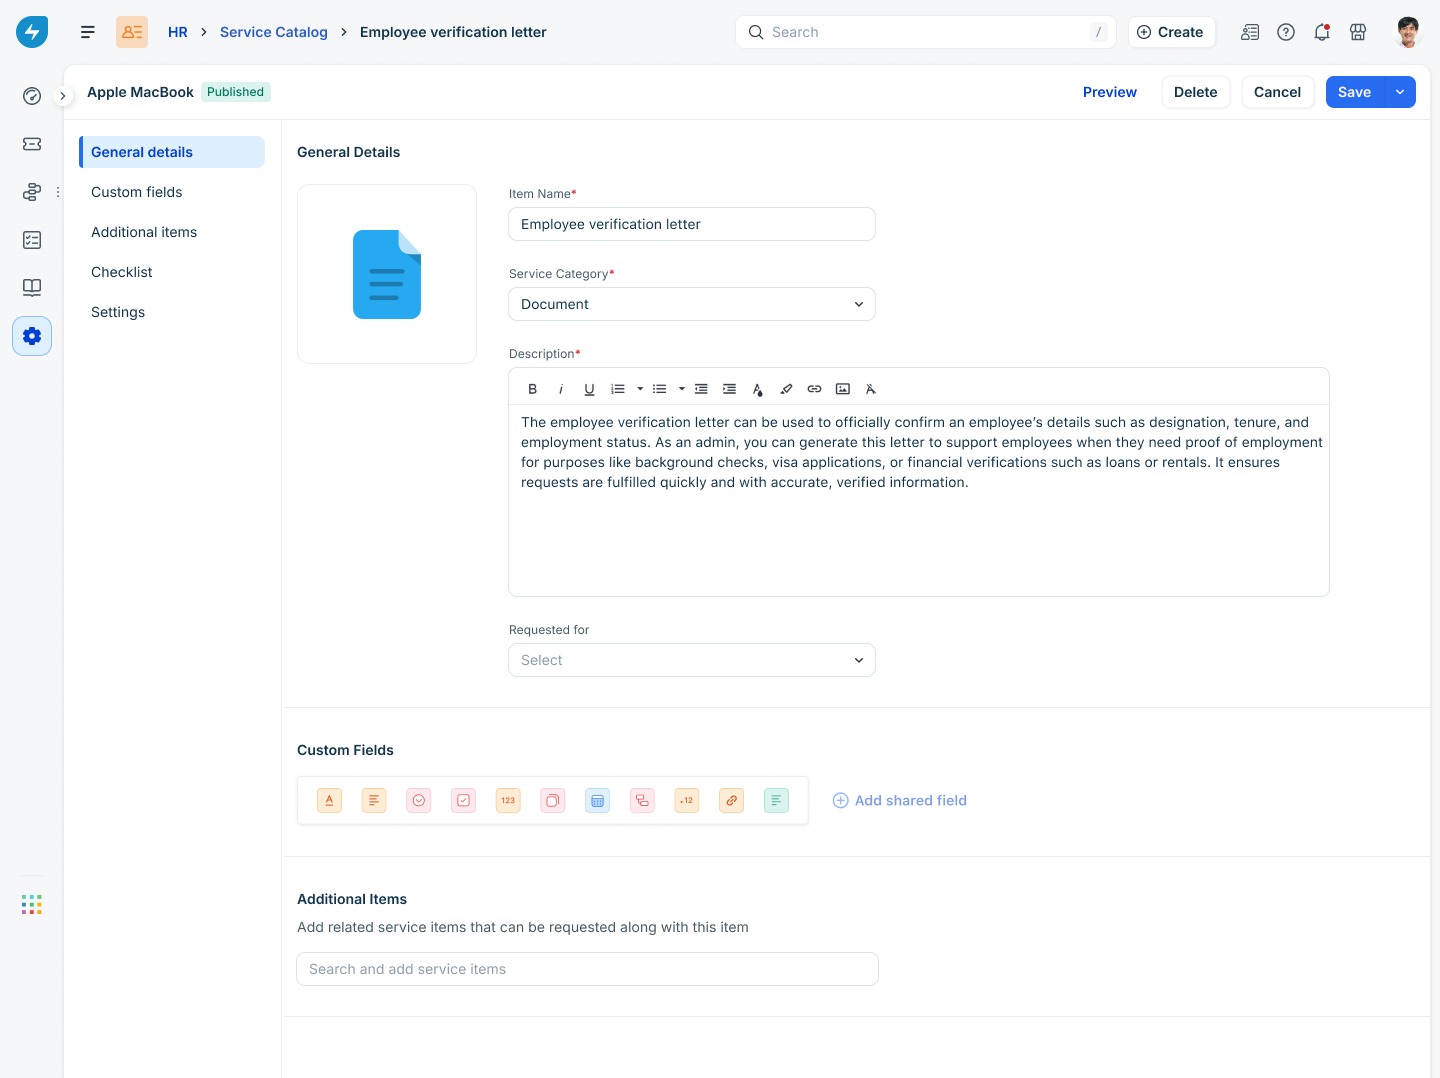
1. Open the service catalog item from the Service Catalog.
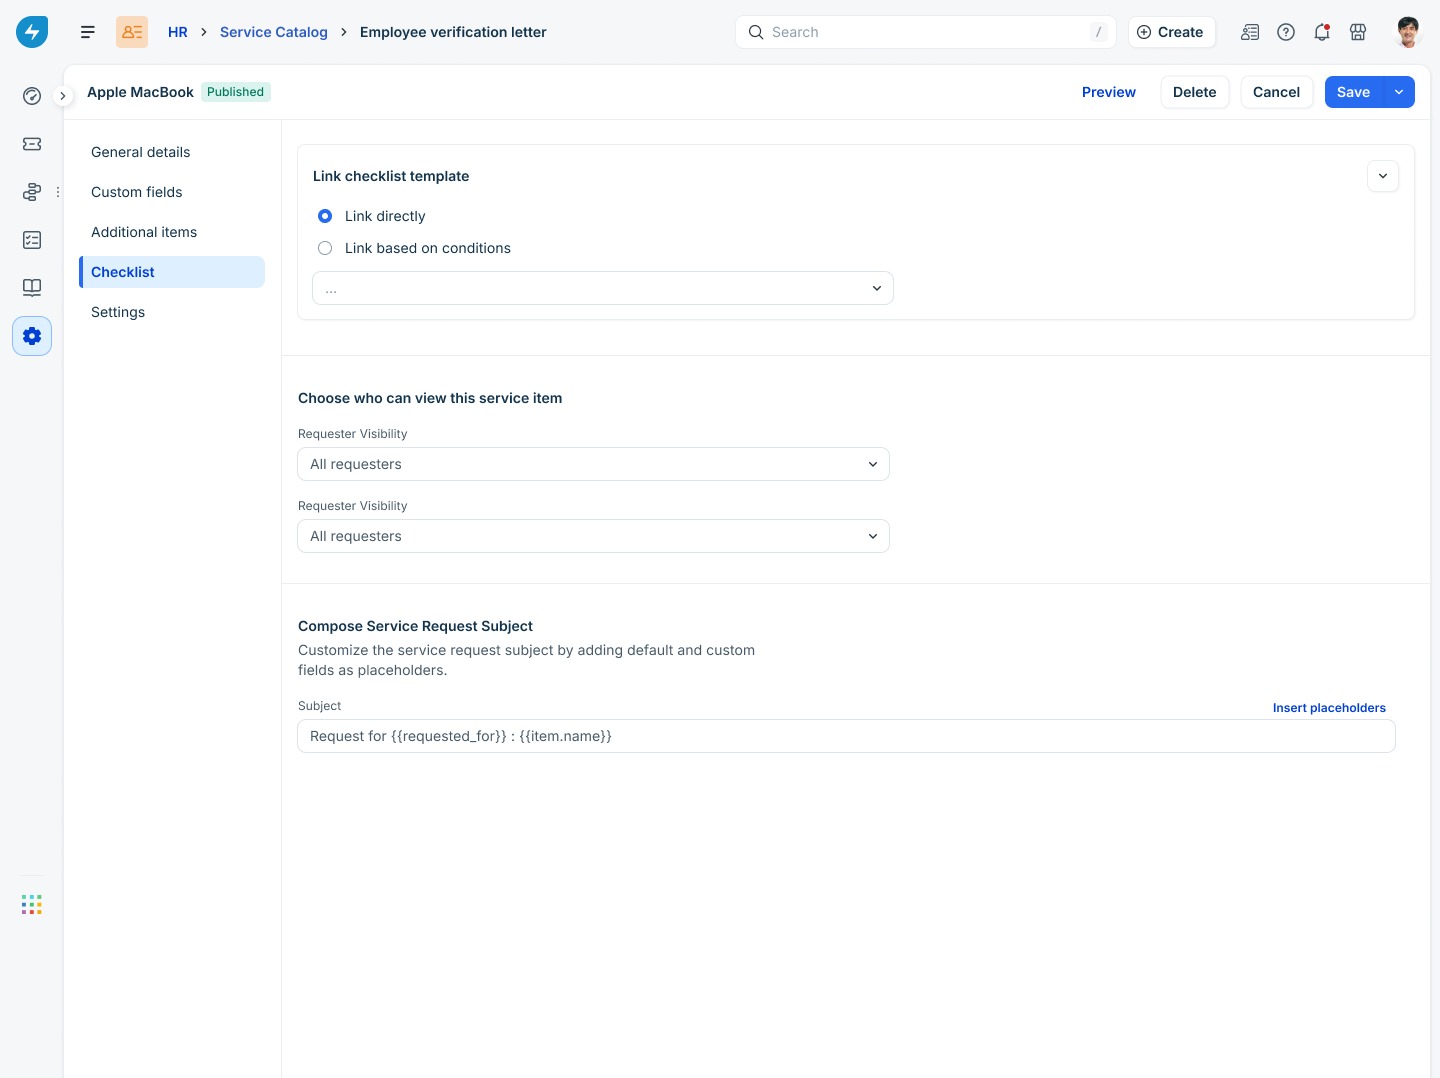
2. Open the Checklist tab.
3. Under the Link checklist template, choose one of the following options:
| Option | What it does |
|---|---|
| Link directly | Attach a single checklist template to this service item. Every ticket raised for the item receives the same checklist. |
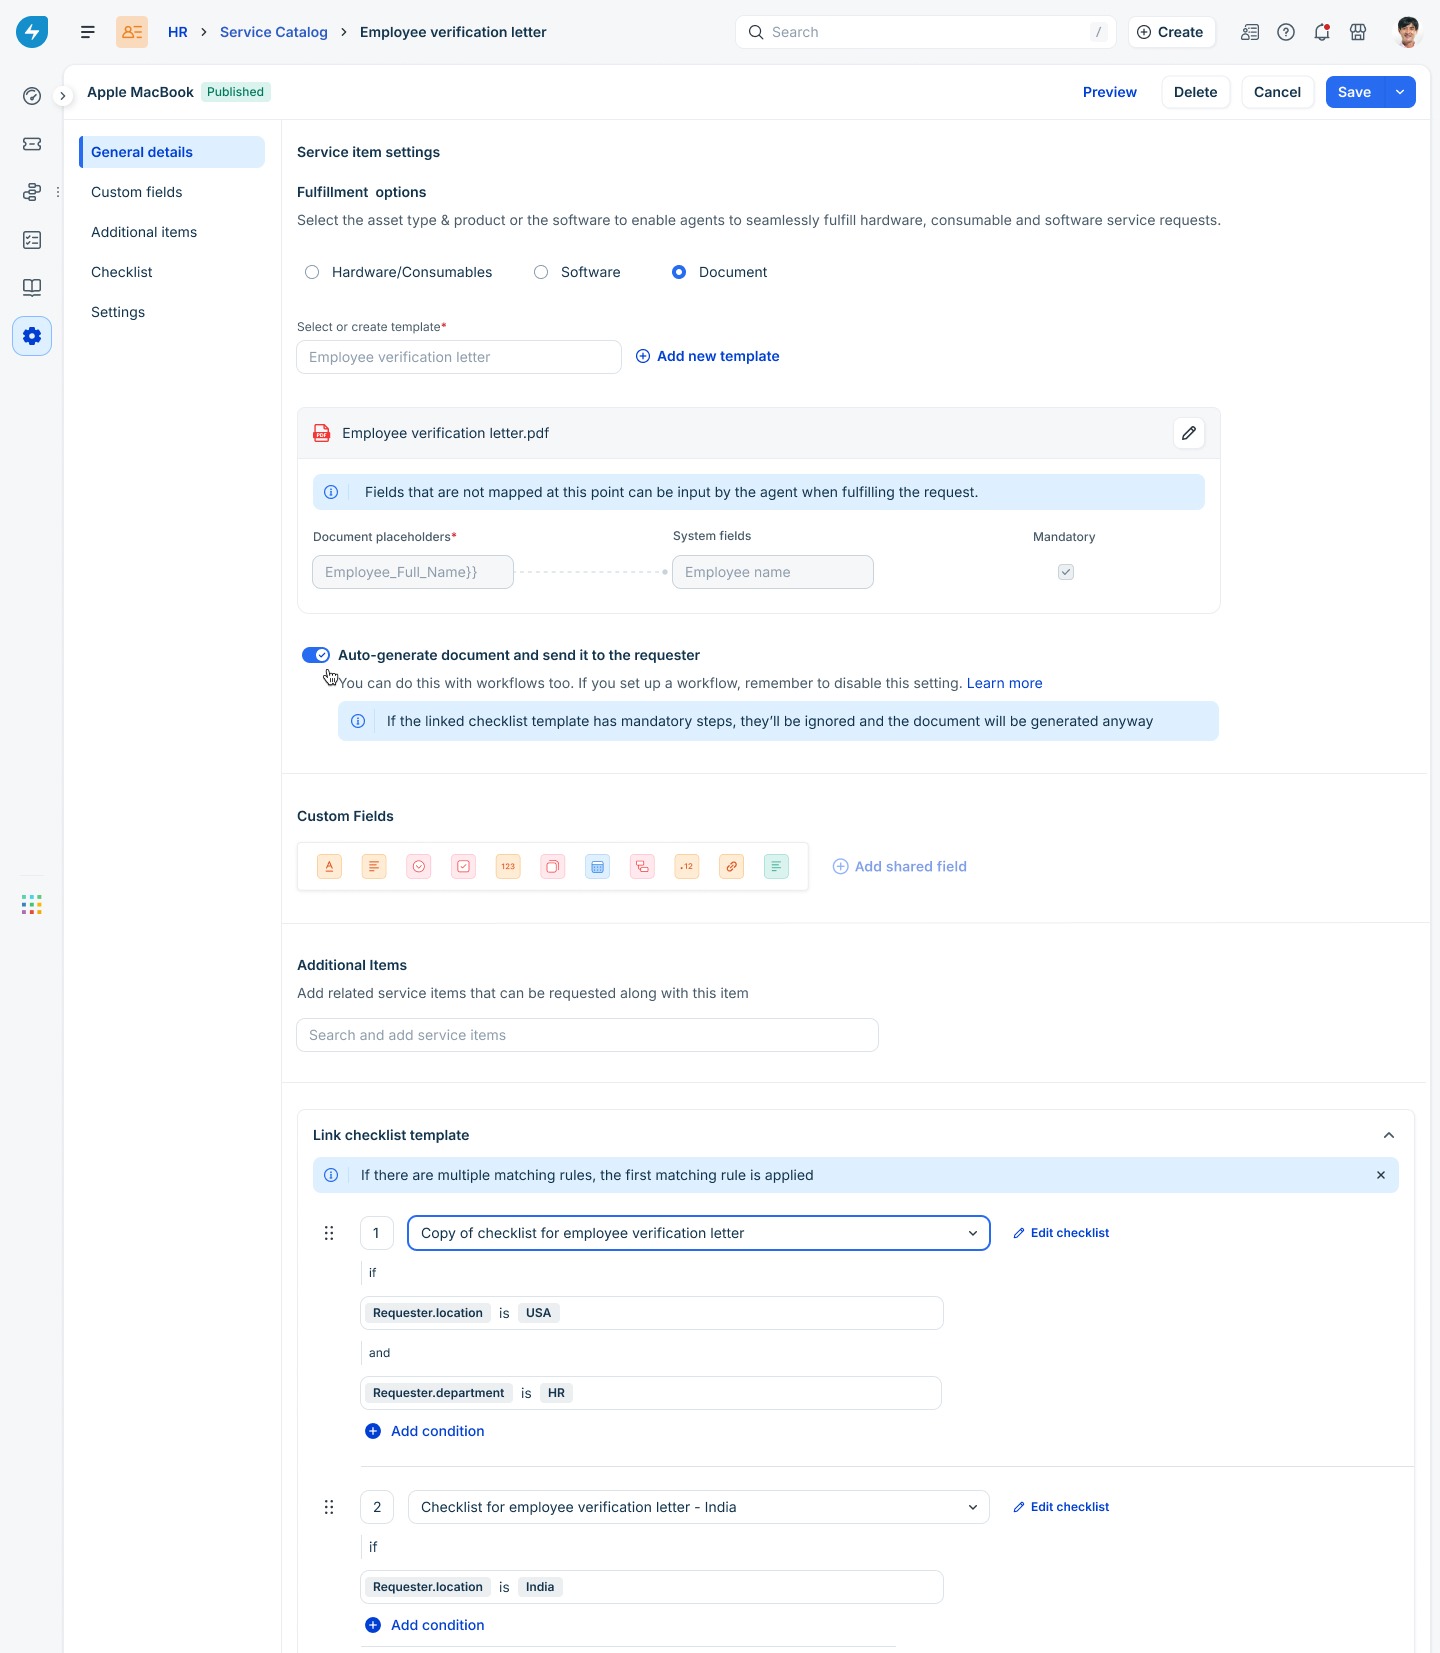
| Link based on conditions | Apply different checklists depending on requester attributes such as location or department. Add as many conditions as you need; the first matching rule wins. |
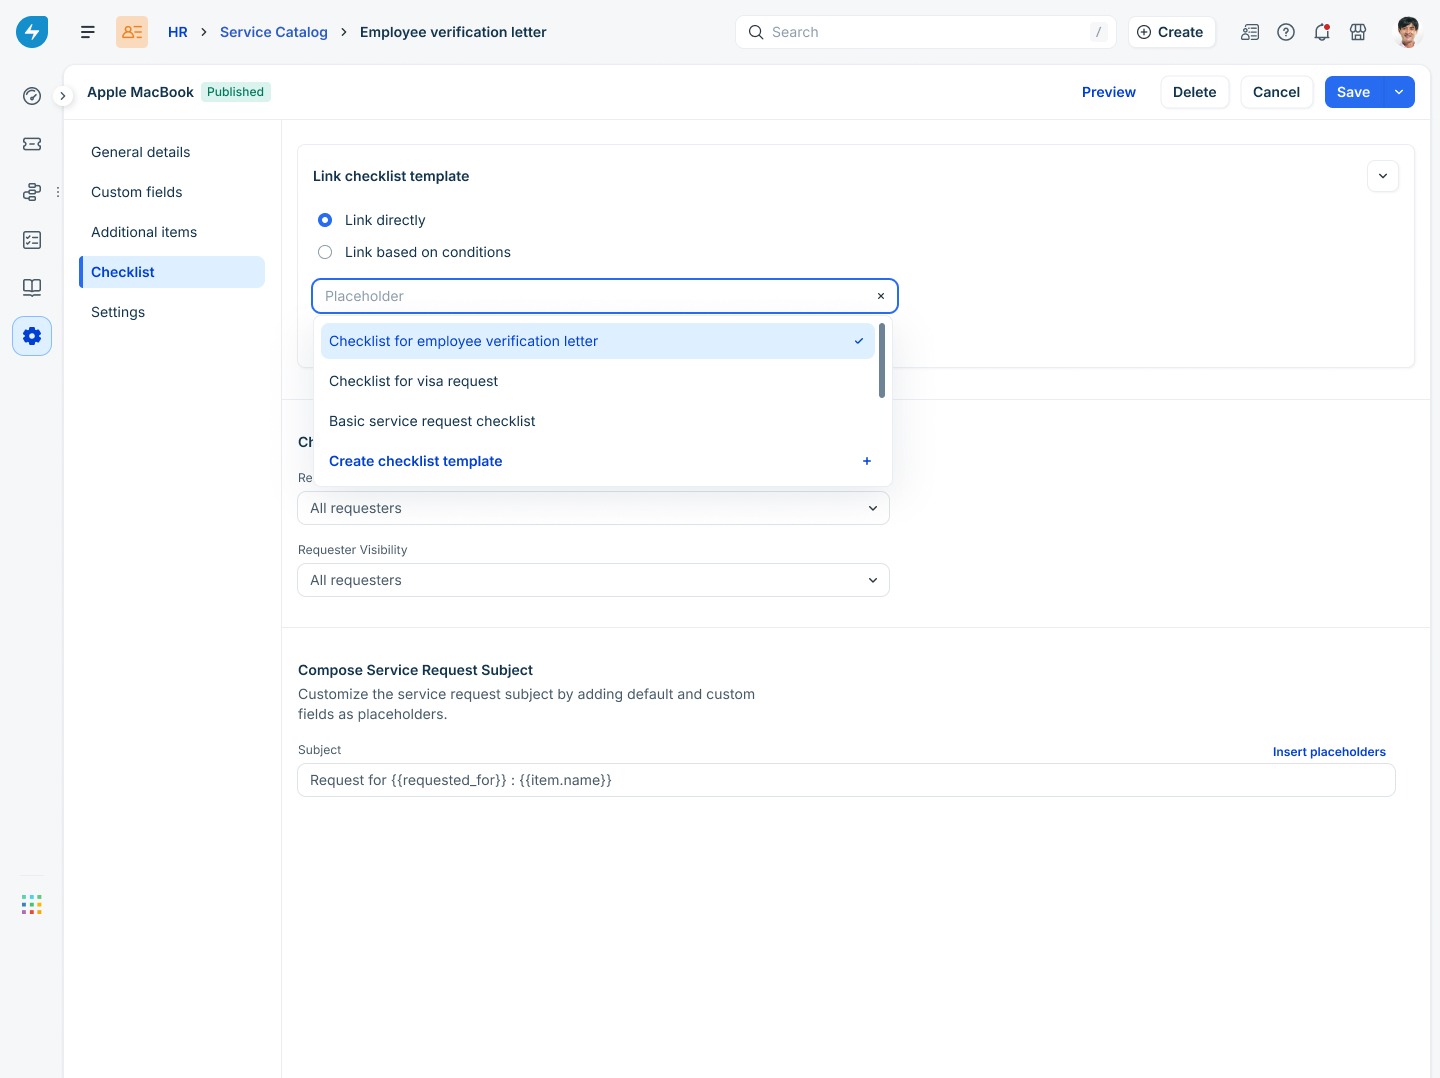
When you select Link directly, pick an existing template from the dropdown or click Create checklist template to build a new one inline.
When you select Link based on conditions, define one or more rules. For each rule:
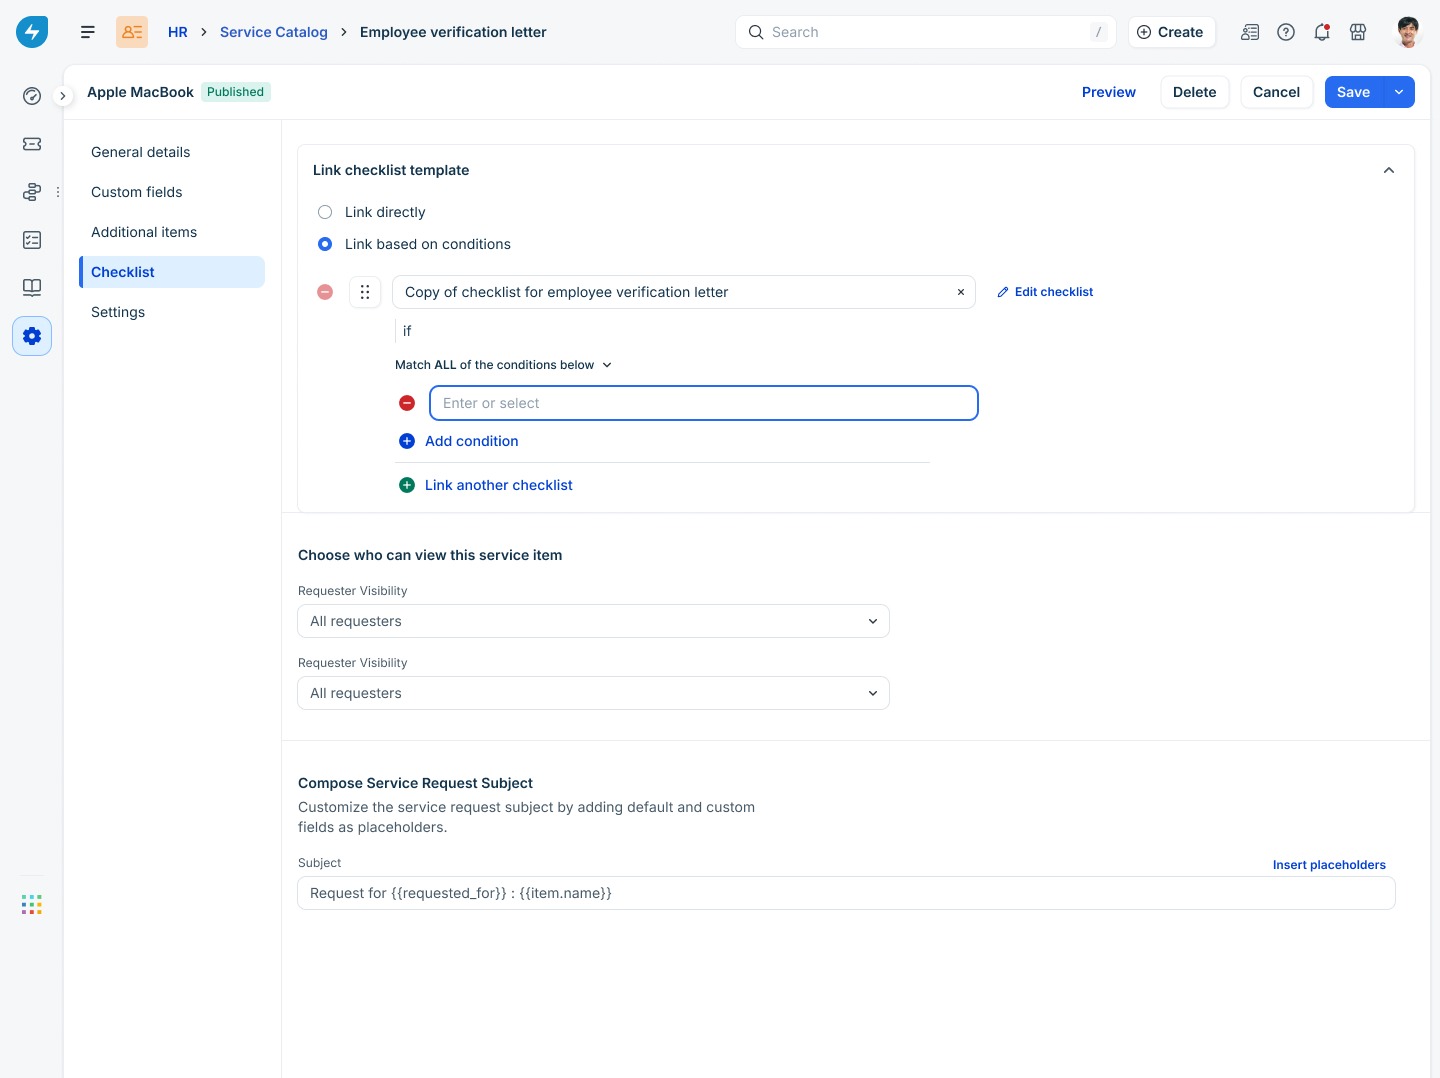
Rules are evaluated top to bottom. As soon as a rule matches, that checklist is applied, and the rest are skipped. If no rule matches, the ticket is raised without a checklist.
Edit a linked template from the service item
You can edit a checklist template directly from the service catalog item without opening the template settings.
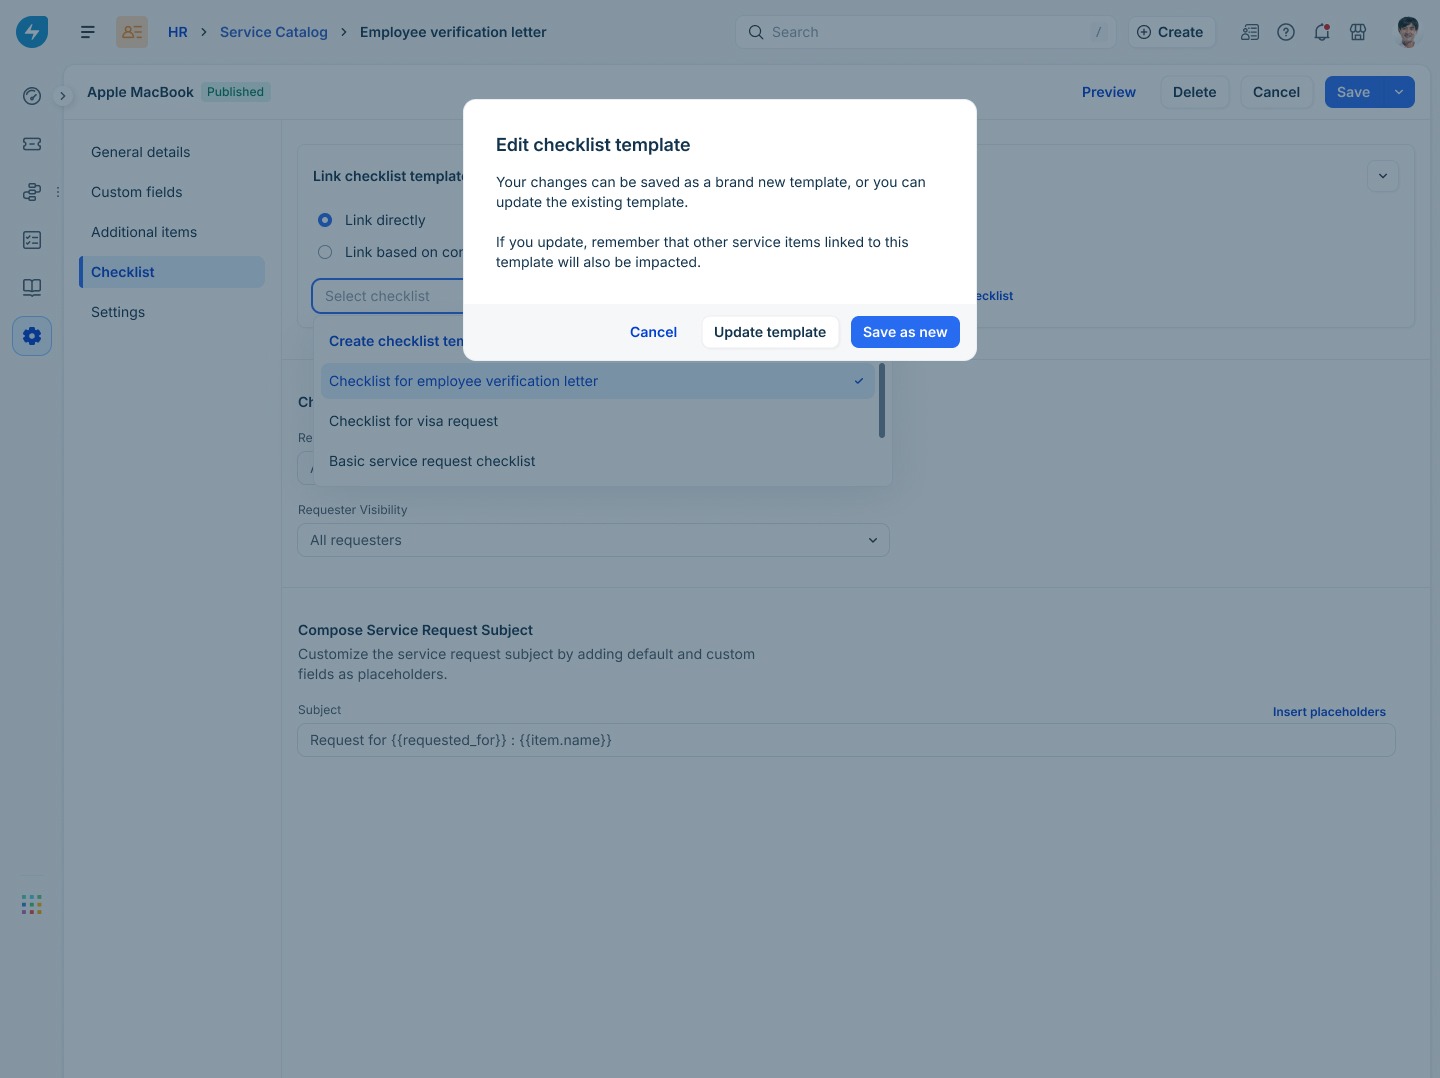
1. Click Edit checklist next to the linked template.
2. Make your changes.
3. When you save, the Edit checklist template dialog asks how to apply the change:
| Choice | When to use it |
|---|---|
| Update template | Apply your changes to the existing template. Every service item linked to this template uses the updated version going forward. |
| Save as new | Save your changes as a new template, leaving the original untouched. The new template is automatically linked to this service item. |
Use Save as new when your changes are specific to this service item, and you do not want to affect the other items that share the template.
Service items of document type
For document-type service items, such as employee verification letters, the checklist controls whether the document can be generated.
Admin permissions to manage and link checklists
Checklist actions are controlled through workspace roles. To review or update them:
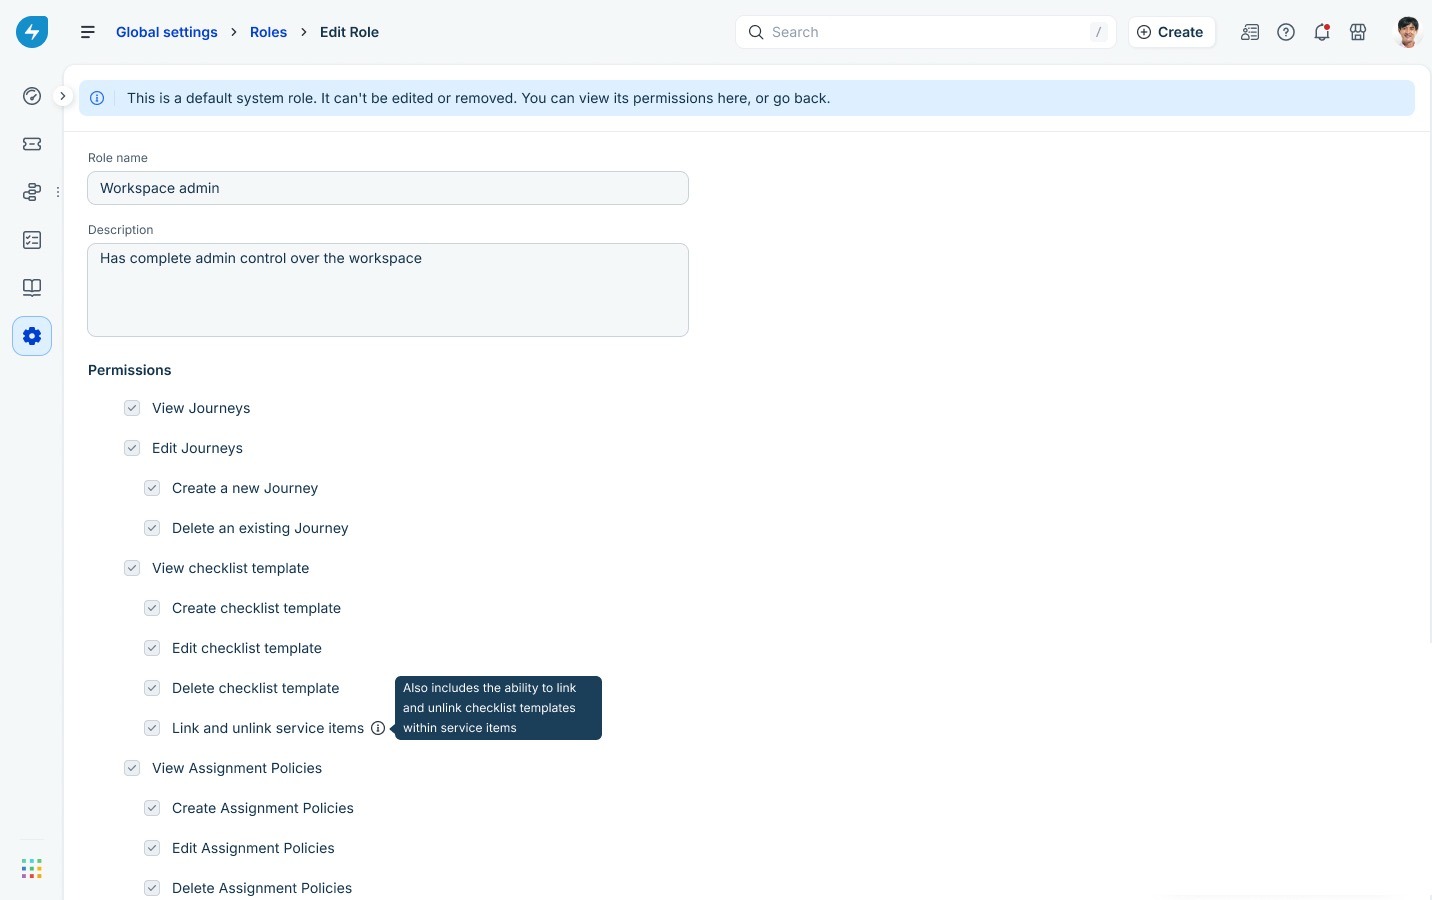
1. Go to Global Settings > Roles
2. Open the relevant role and look under Permissions > Roles
3. Create a new admin role or open an existing admin role to edit it.
| Permission | What it allows |
|---|---|
| View checklist template | See checklist templates in workspace settings and on service items. |
| Create checklist template | Create new templates from the Checklist Templates page or inline from a service item. |
| Edit checklist template | Edit the name, description, items, and mandatory flags on existing templates. |
| Delete checklist template | Remove templates from the workspace. |
| Link and unlink service items | Attach or detach checklist templates from service catalog items, including setting conditions. |
Ticket experience for agents
When an agent opens a ticket raised against a service item that has a checklist linked, the checklist appears in the right-side panel.
Where the checklist appears
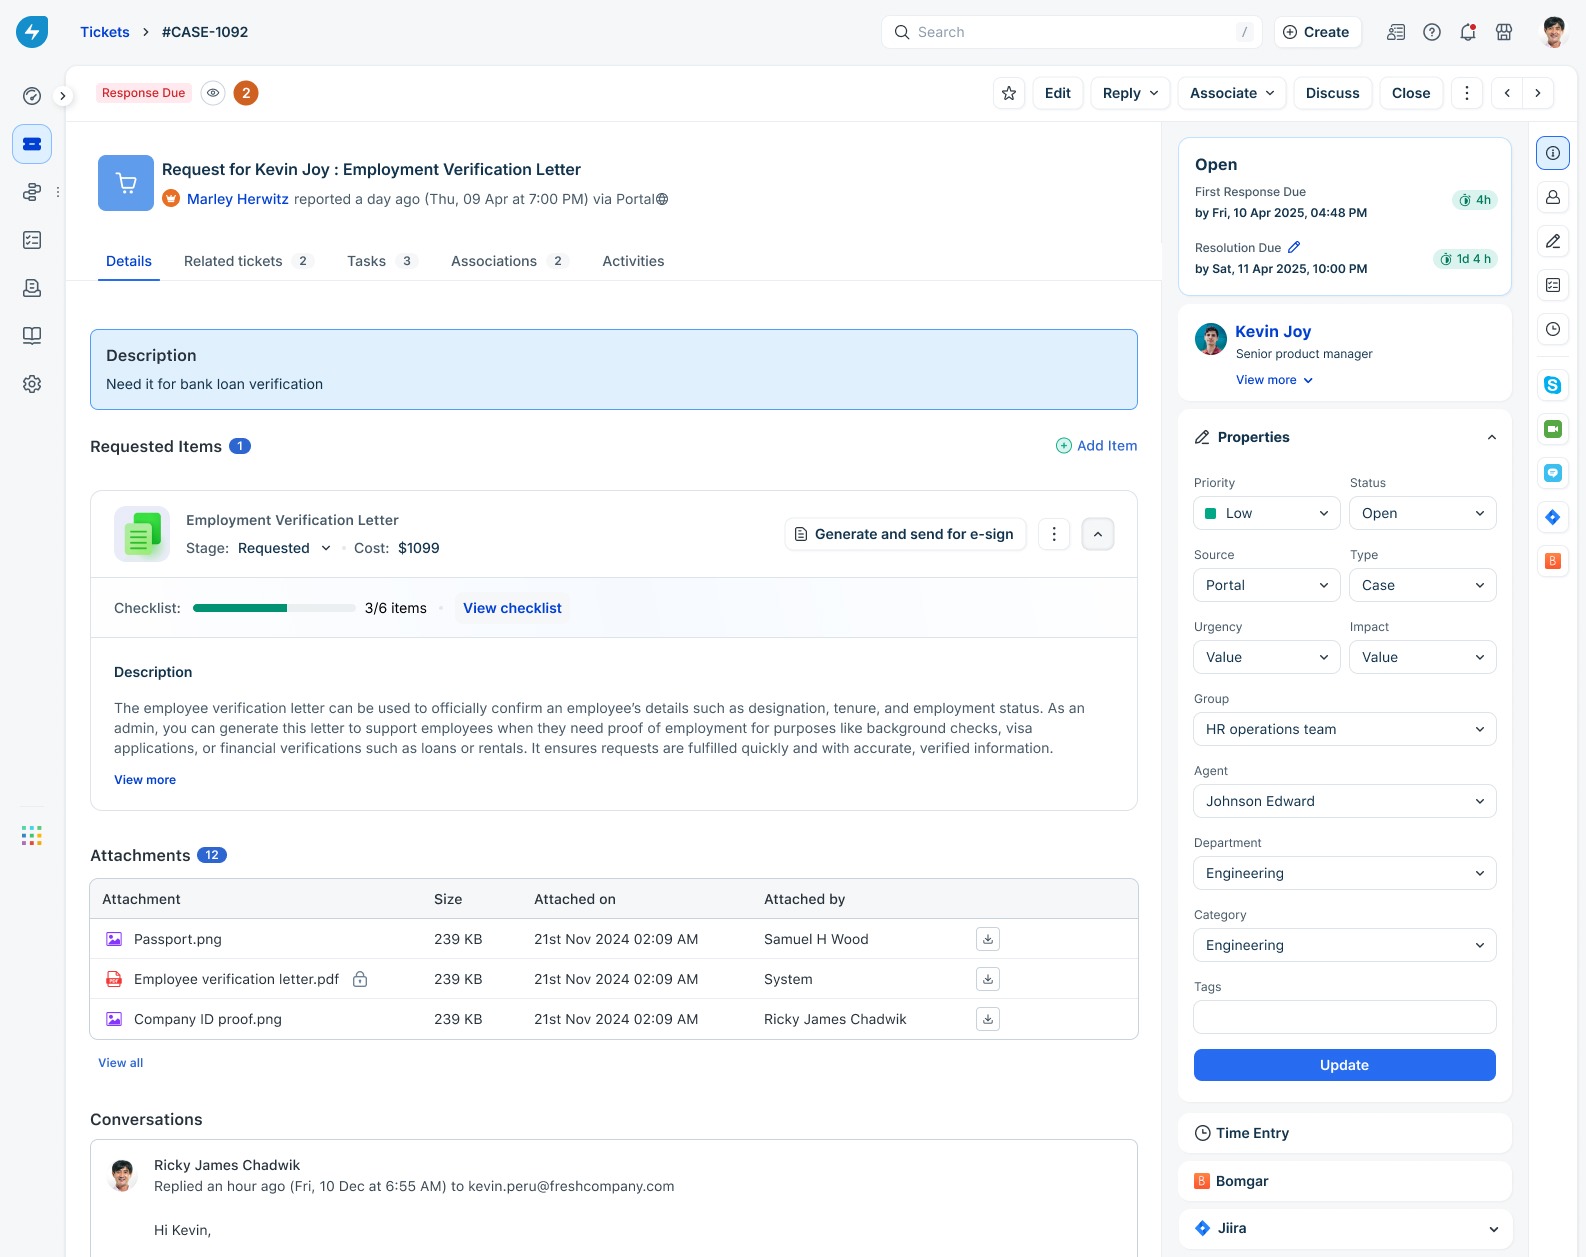
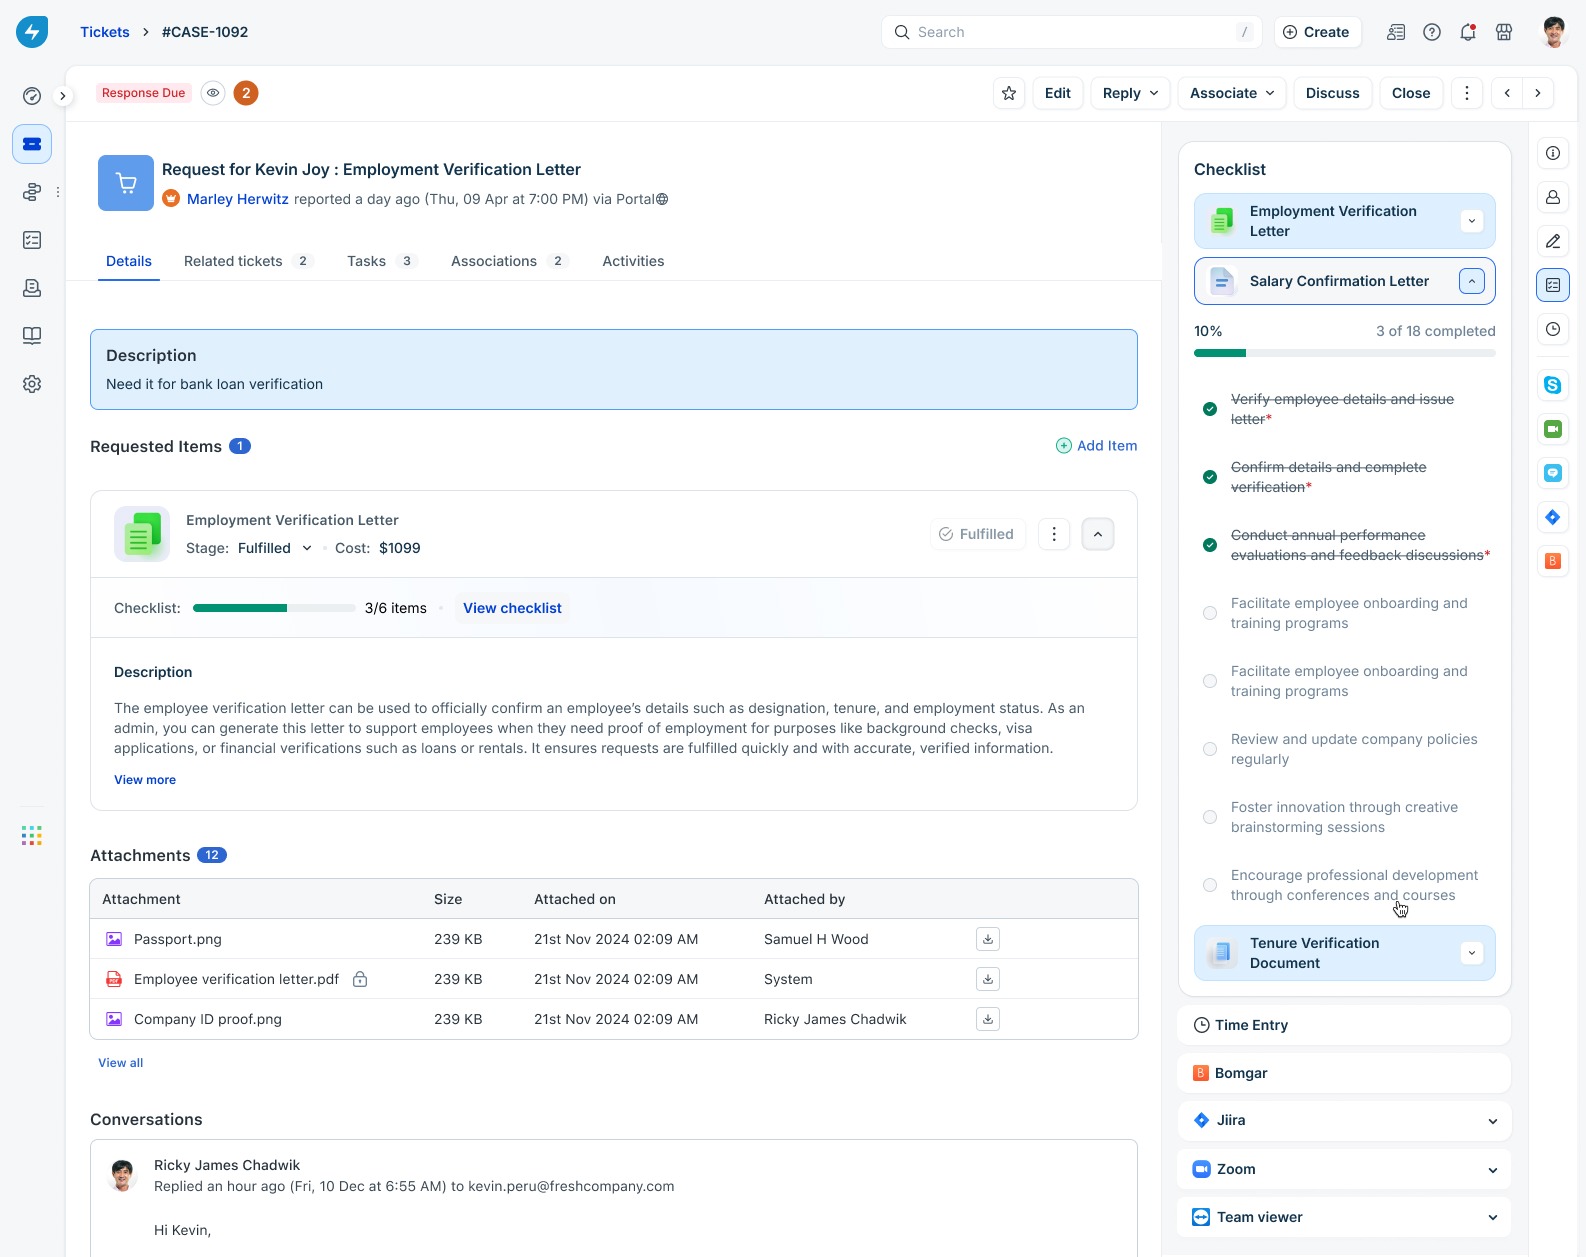
If a ticket has more than one requested item and each has its own checklist, all of them appear in the right panel. Agents can expand each one independently.
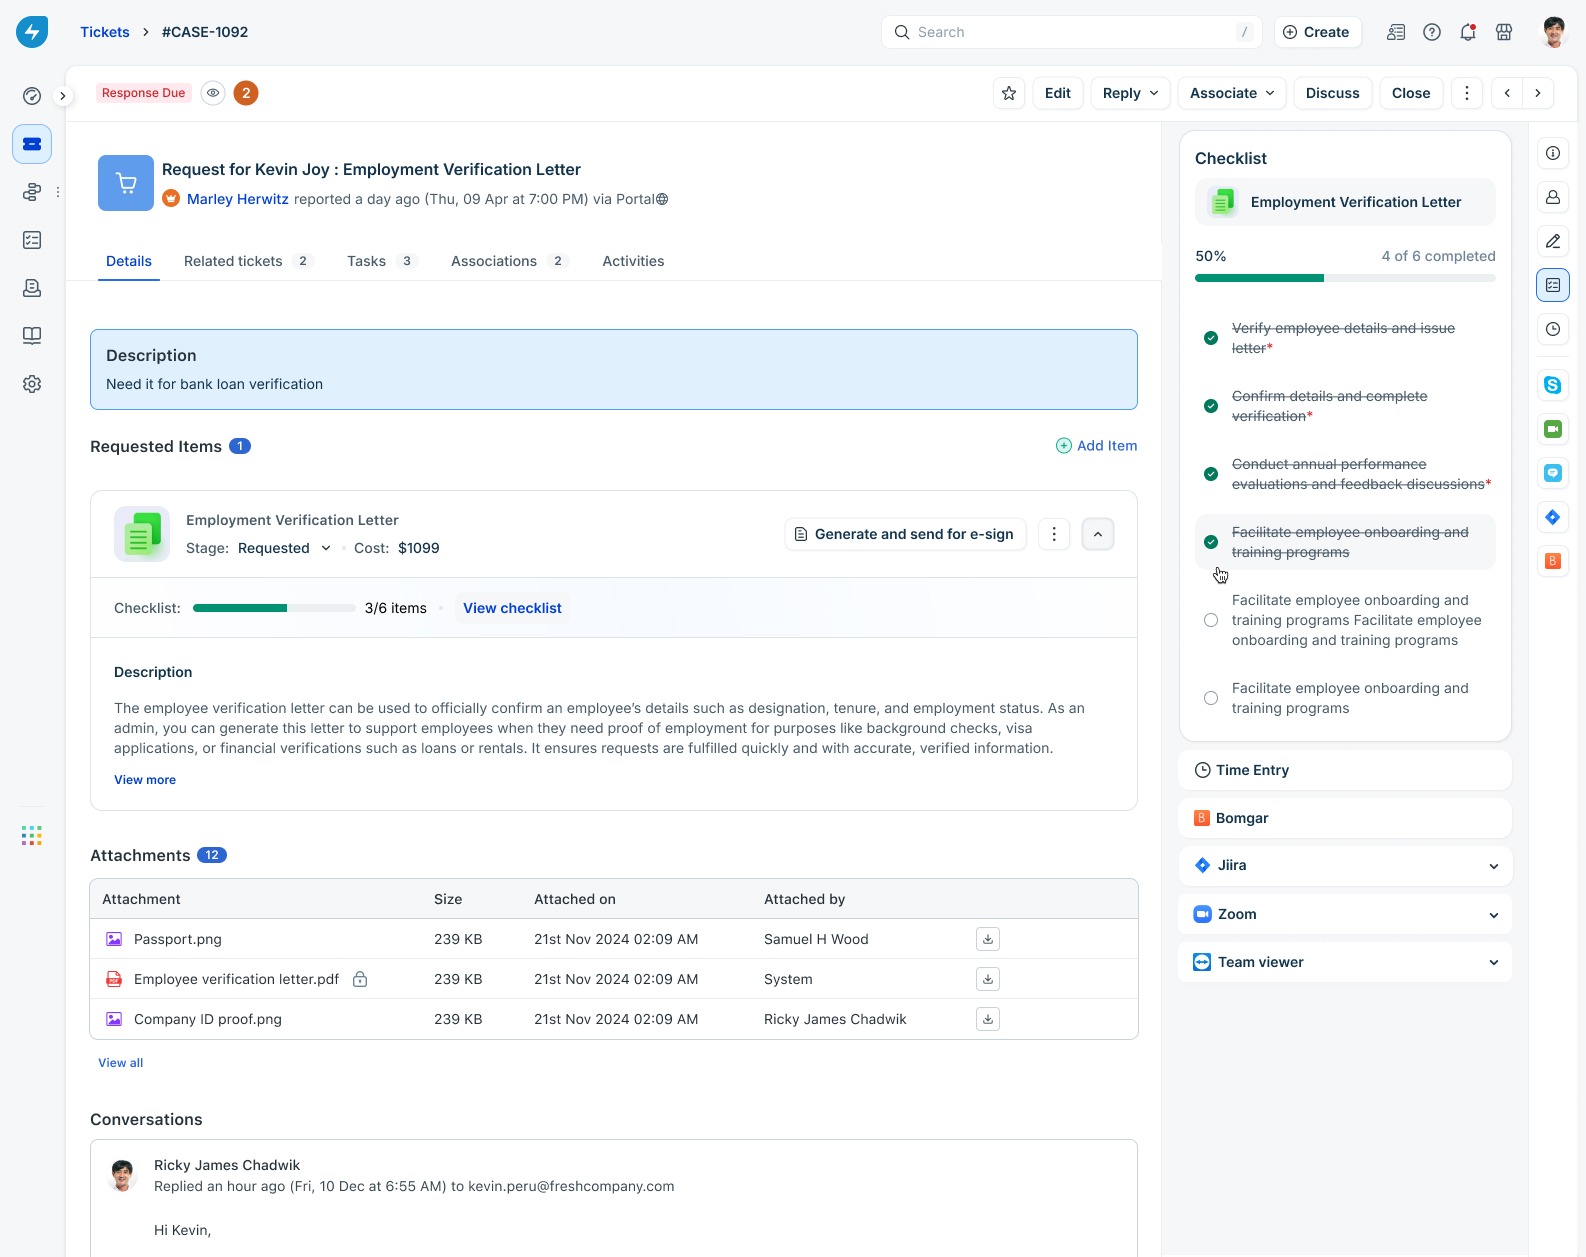
Check items off
Any agent with permission to update ticket properties can check or uncheck items. No separate permission is required.
Mandatory items and fulfillment
Mandatory items are marked with a red asterisk and labeled Complete this mandatory item on hover.
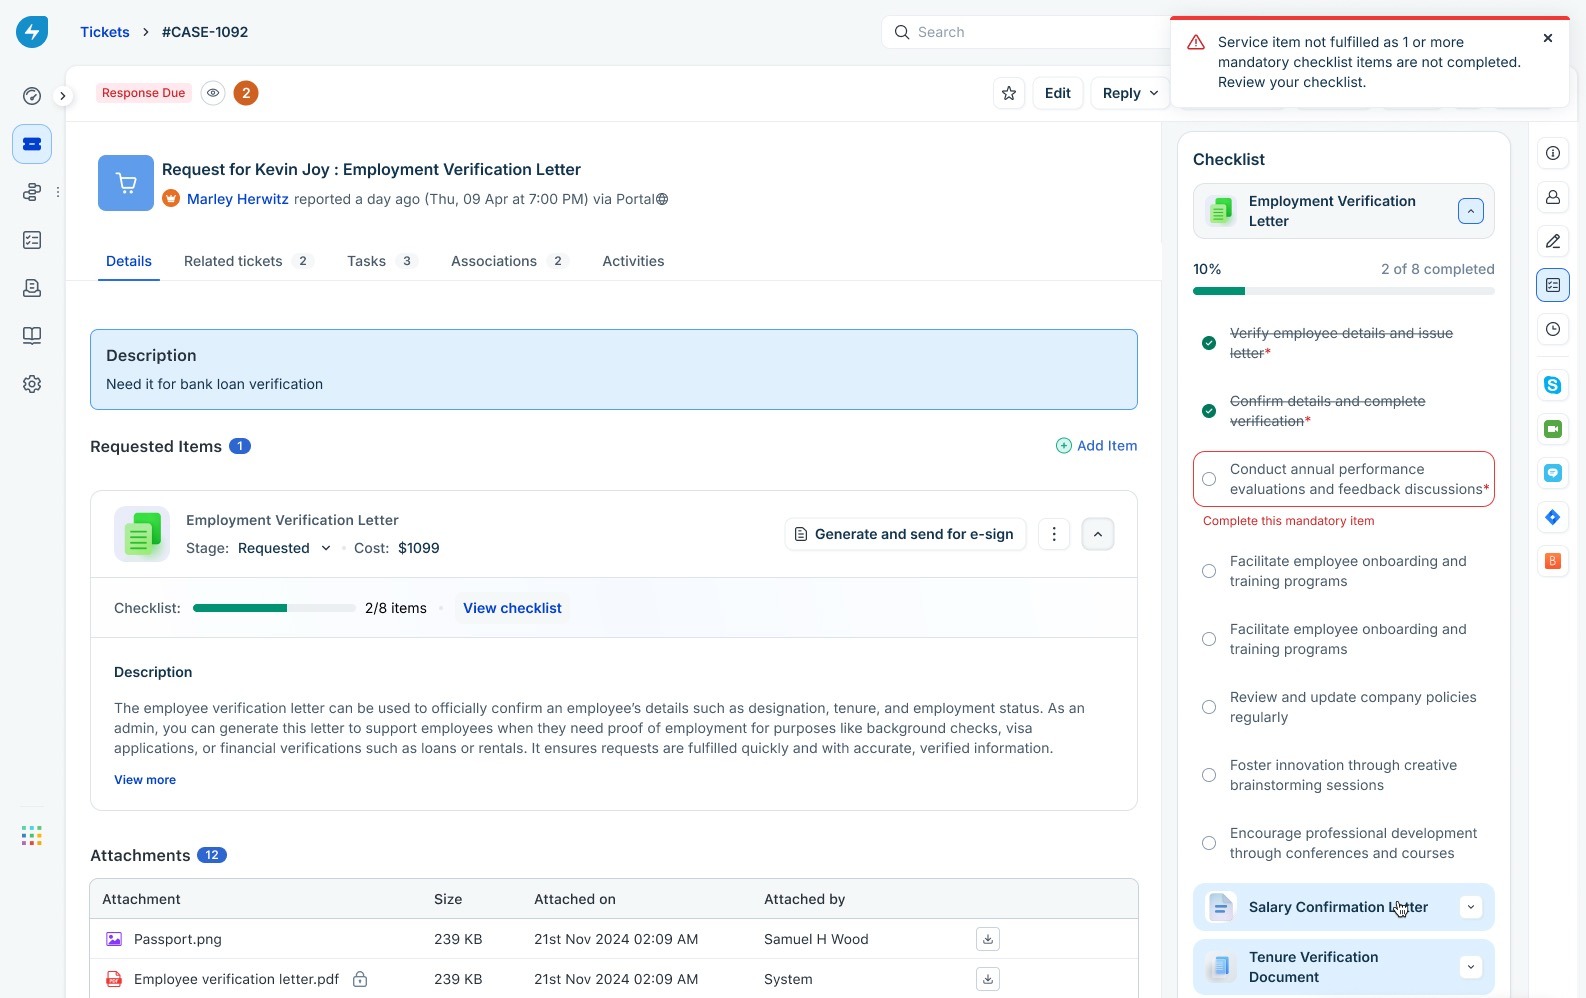
Non-mandatory items can be skipped without blocking fulfillment.
Audit trail on the ticket
Every checklist action is recorded on the ticket’s Activities tab:
This makes it easy to confirm later that the required steps were followed.
Behavior across stages
Best practices
Frequently asked questions
Can a service item have more than one checklist?
No. Each service item is linked to one checklist at a time, either directly or through the first matching condition. To apply different checklists in different scenarios, use Link based on conditions with multiple conditions.
What happens to existing tickets if I edit or delete a checklist template?
Existing tickets are not affected. Edits and deletions apply only to future service requests raised after the ticket is created for the linked items. Tickets already in progress continue with the version of the checklist they were created with.
Can agents add their own items to a checklist on a ticket?
No. Checklists are defined by admins at the service item level. Agents can only check or uncheck the existing checklist items on a ticket.
Does completing a checklist close the ticket?
No. Checklists govern service item fulfillment, not ticket closure. An agent can close a ticket without completing the checklist, and completing the checklist does not automatically close the ticket.
Can I reorder checklist items after a template is in use?
Yes. Open the template, drag the checklist items into the order you want, and save. Reordering changes the display order only; it does not enforce that item 2 can only be completed after item 1.
What if I link a service item that is already linked to another checklist?
Freshservice asks you to confirm. If you proceed, the service item is removed from the other checklist and linked to the new one. Each service item can have only one checklist at a time.
Are checklist changes captured anywhere for auditing?
Yes, in two places. The workspace audit log captures changes to checklist templates: create, edit, enable, disable, delete, and linking or unlinking of service items. The ticket Activities tab captures every checklist item an agent checks or unchecks, along with the agent's name and a timestamp.
Can I use checklists for incidents, problems, or changes?
Checklists are scoped to service catalog items. Extending them to other ticket types is on the roadmap.
Are Agent Checklists available for non-IT workspaces and non-IT agents?
Yes. Agent Checklists are supported in both IT and non-IT workspaces. The feature is also available to both IT and non-IT licensed agents, based on the plan and permissions configured for the account. Agent Checklists are available on Growth, Pro, and Enterprise plans.