Last updated: 2025-12-26
Scenario 1: Routing tickets to a specific team
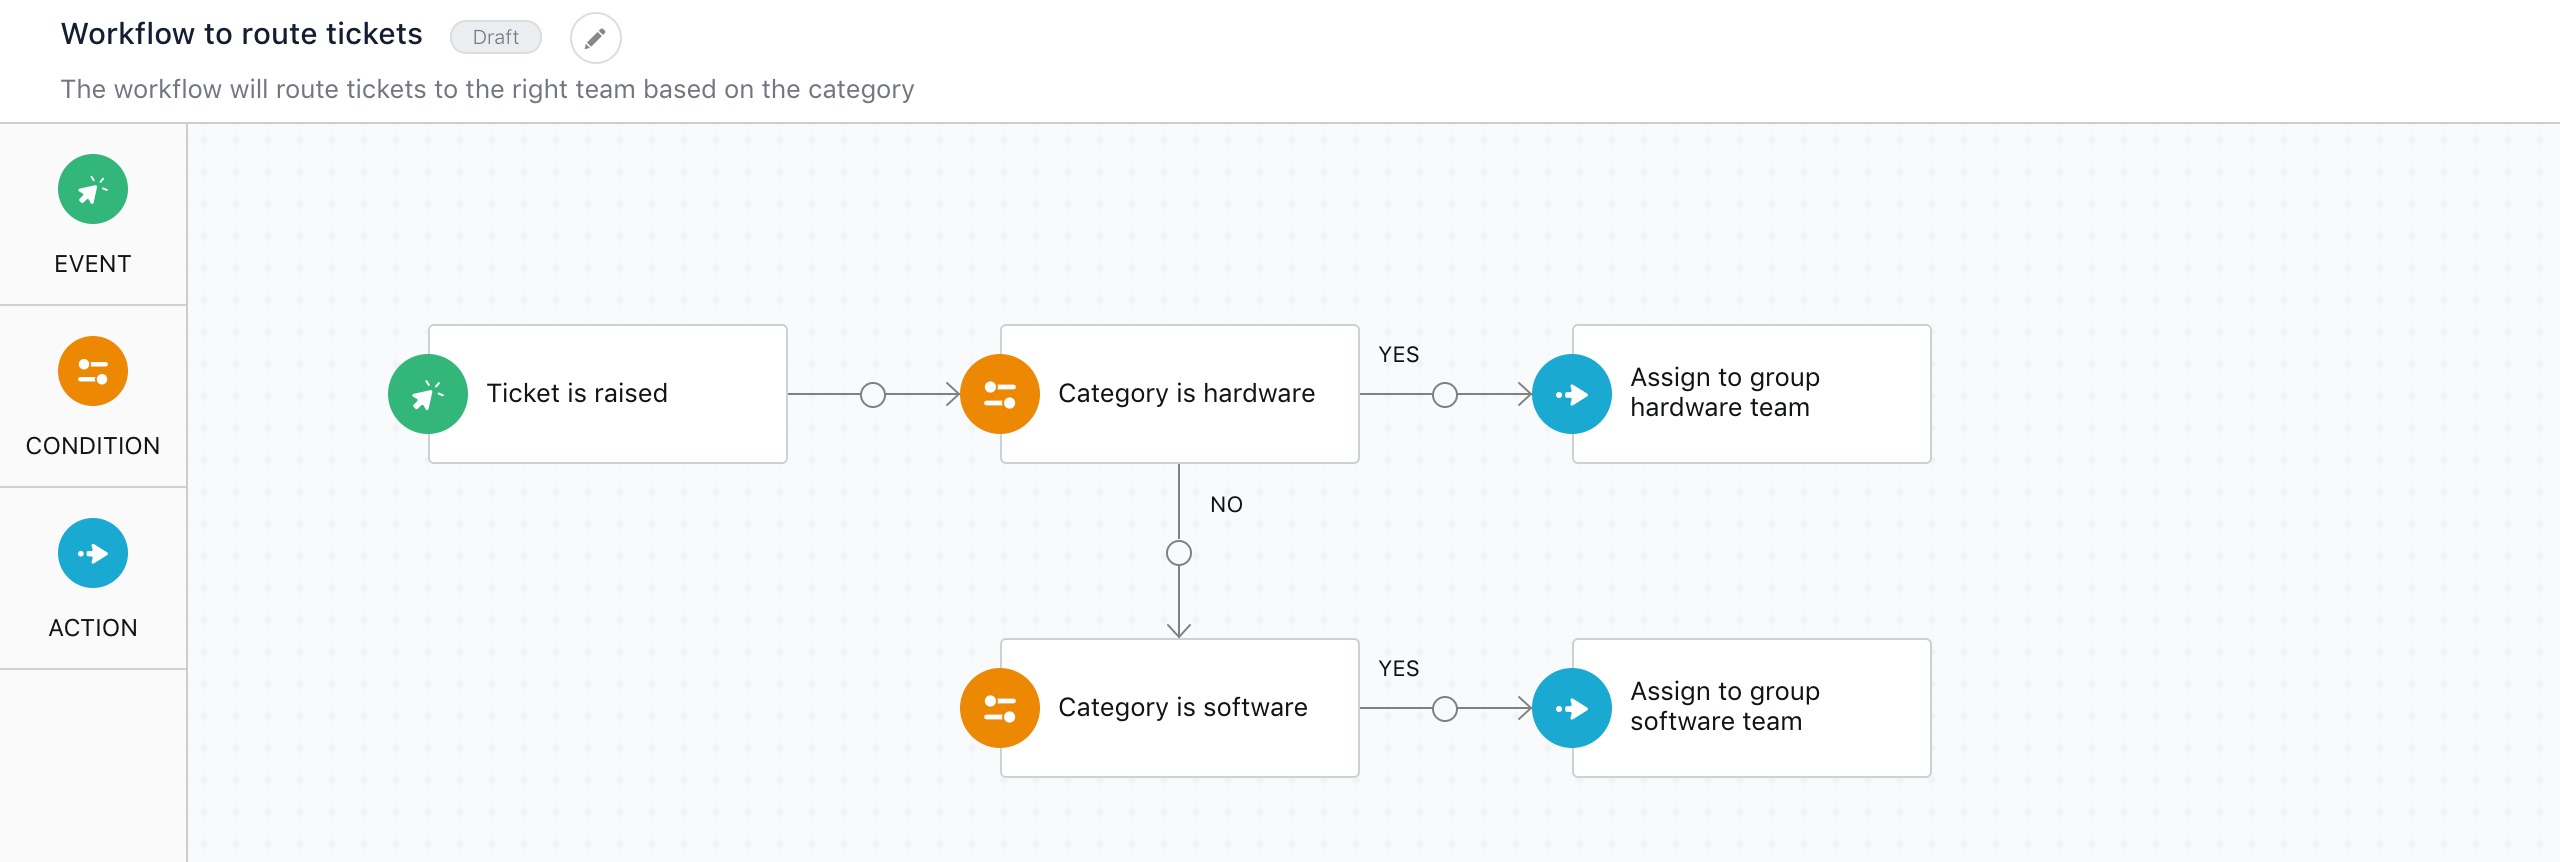
Let’s take a scenario where you wish to route all hardware related tickets to a dedicated hardware team. To convert this into a workflow:
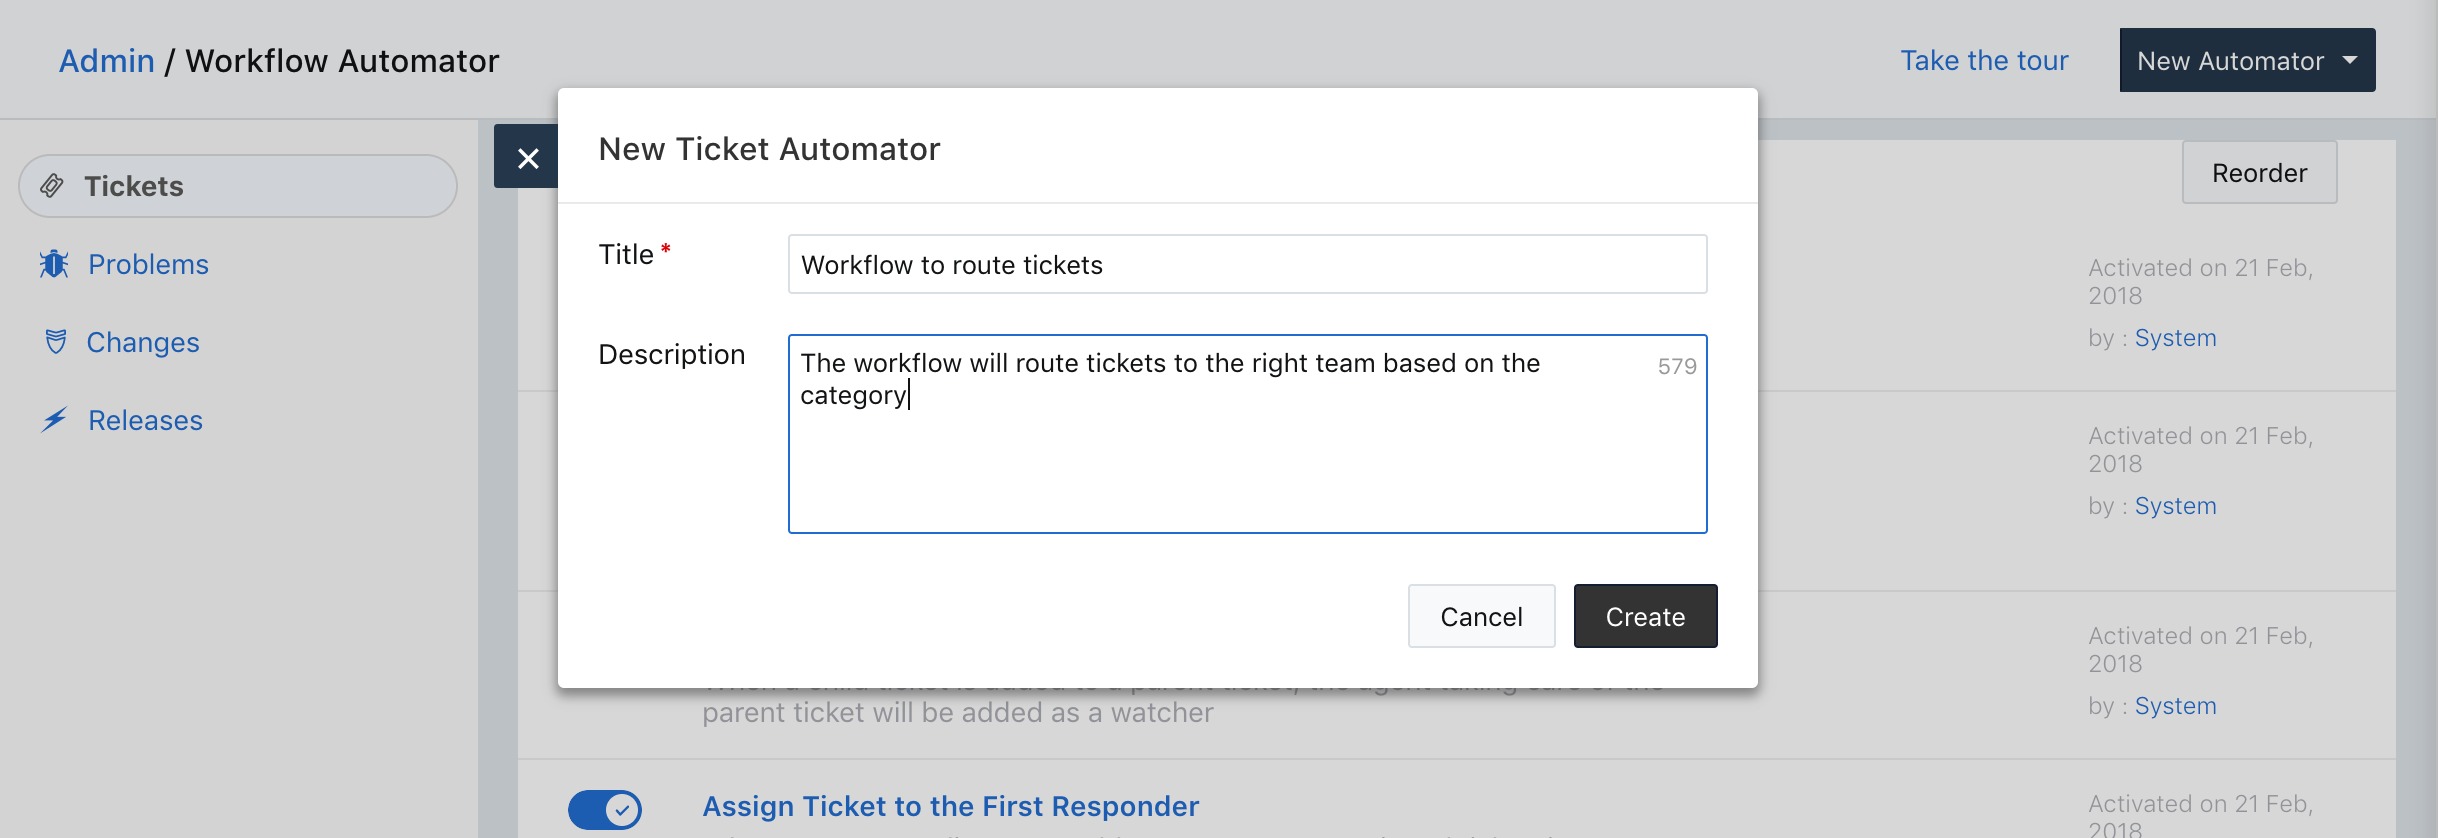
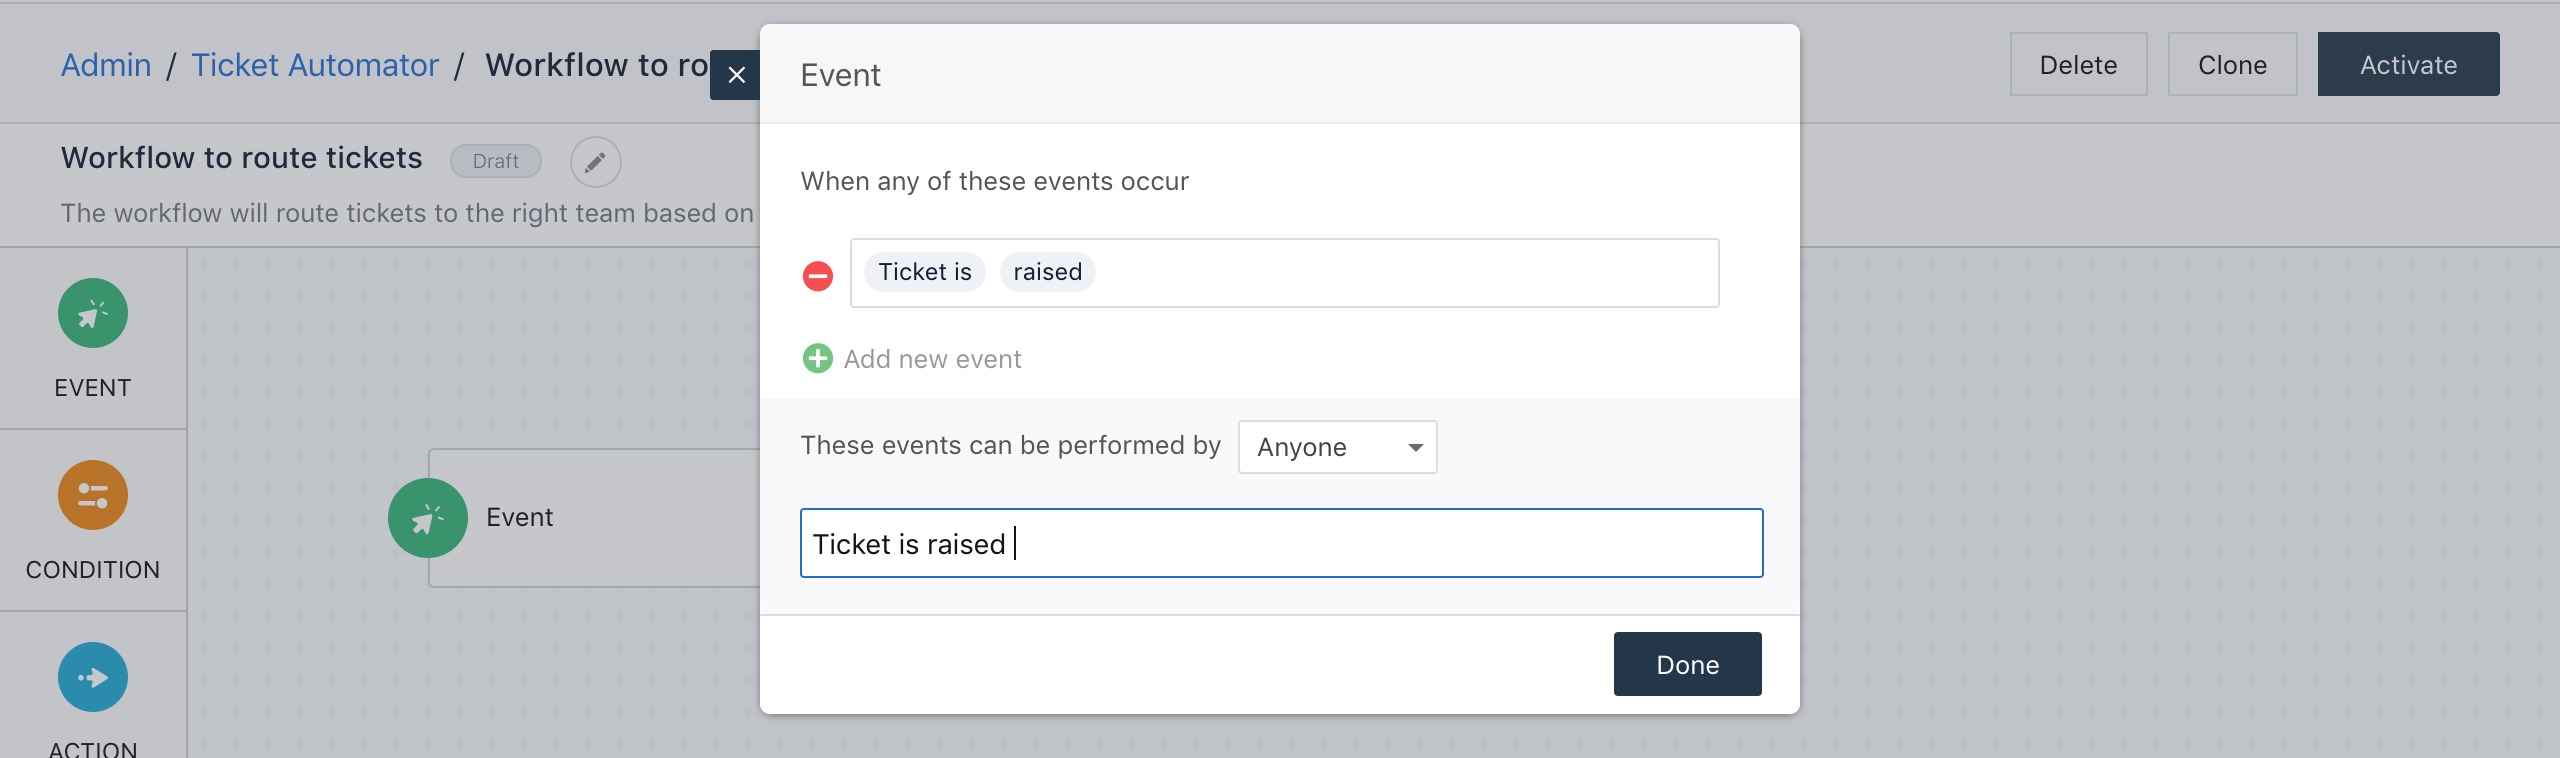
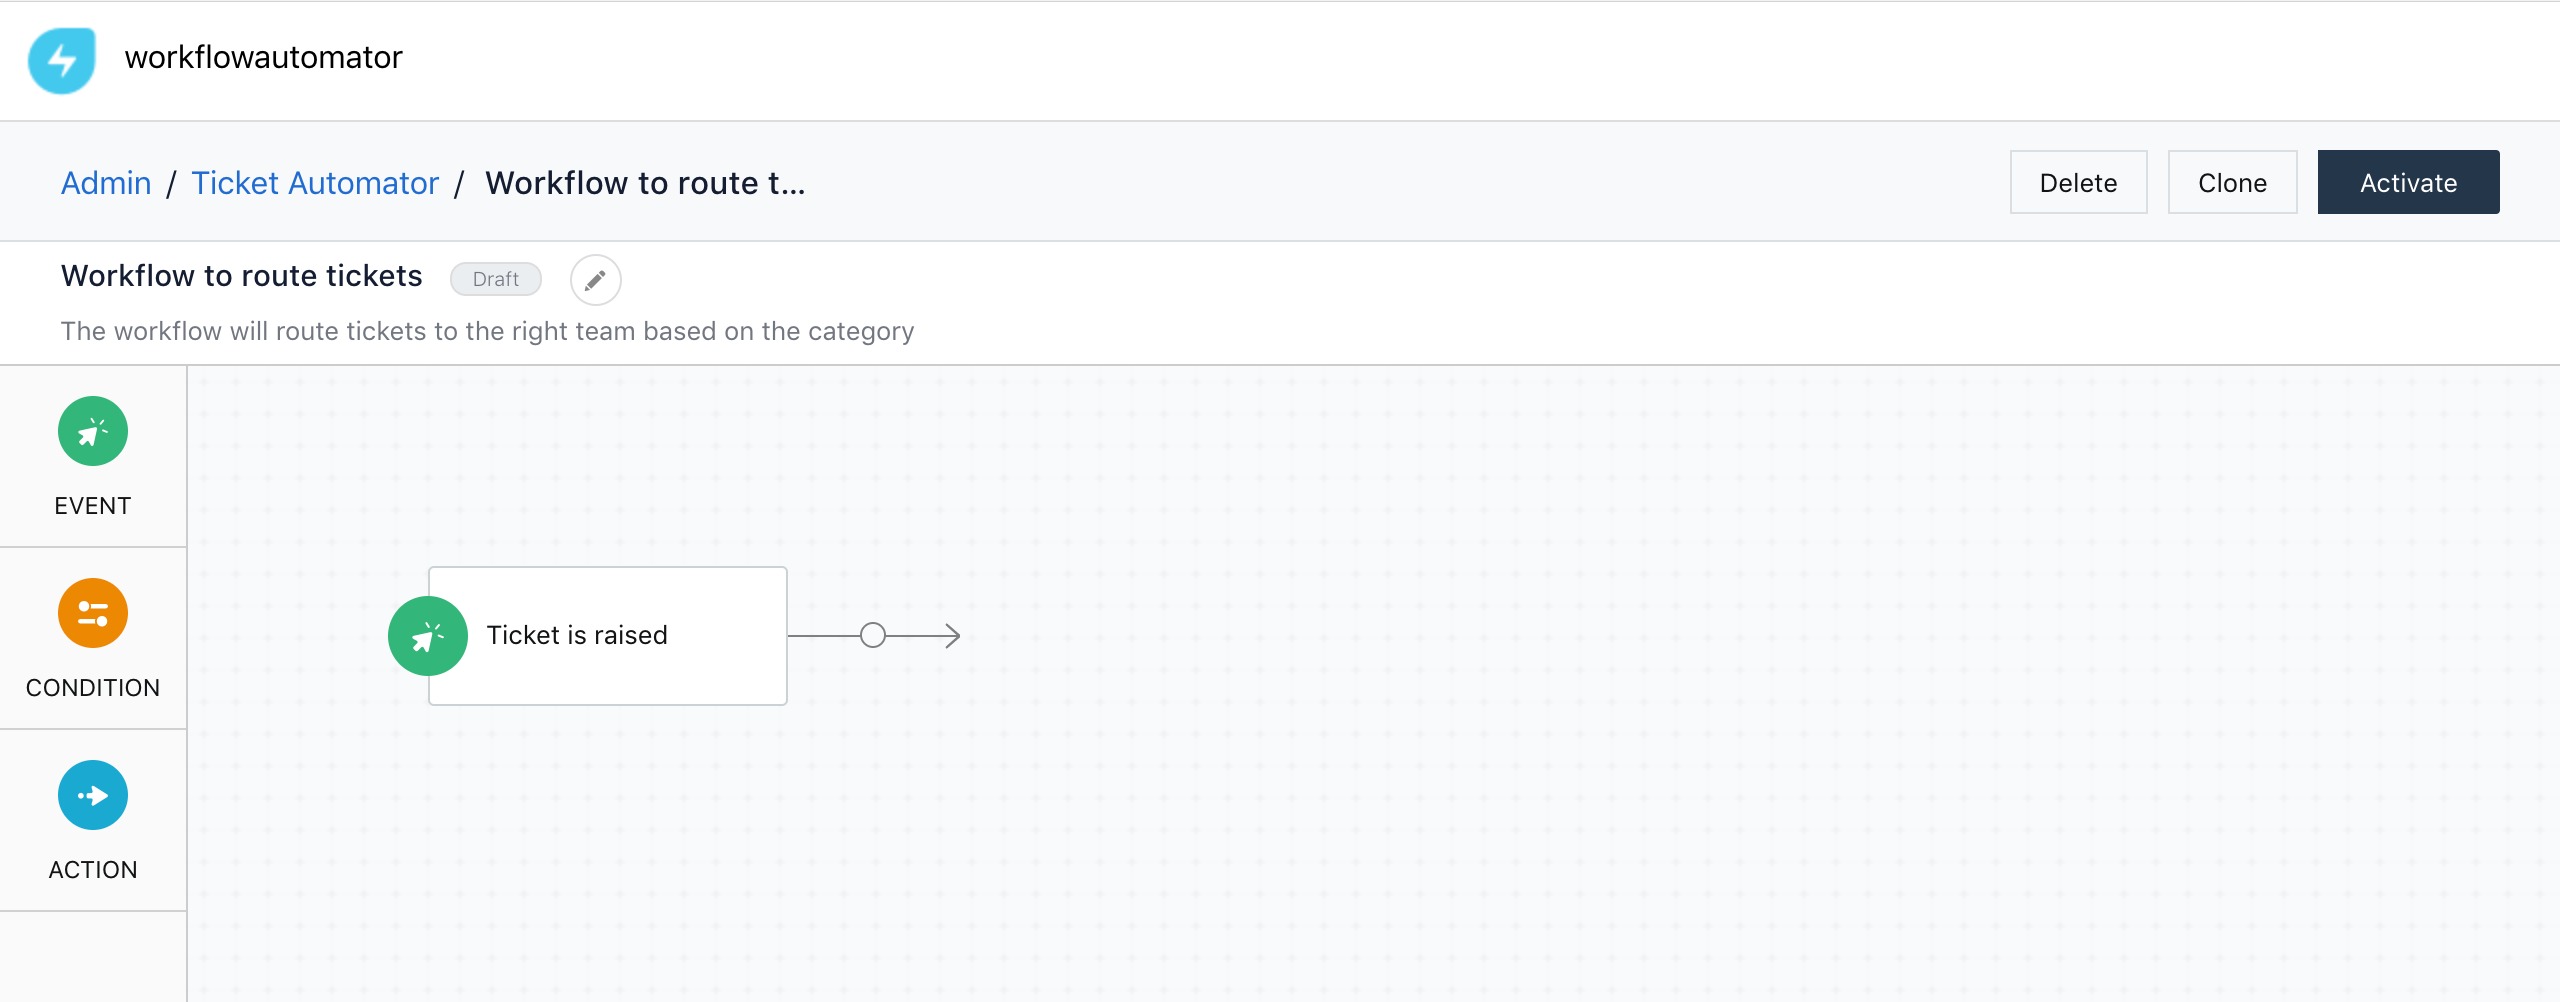
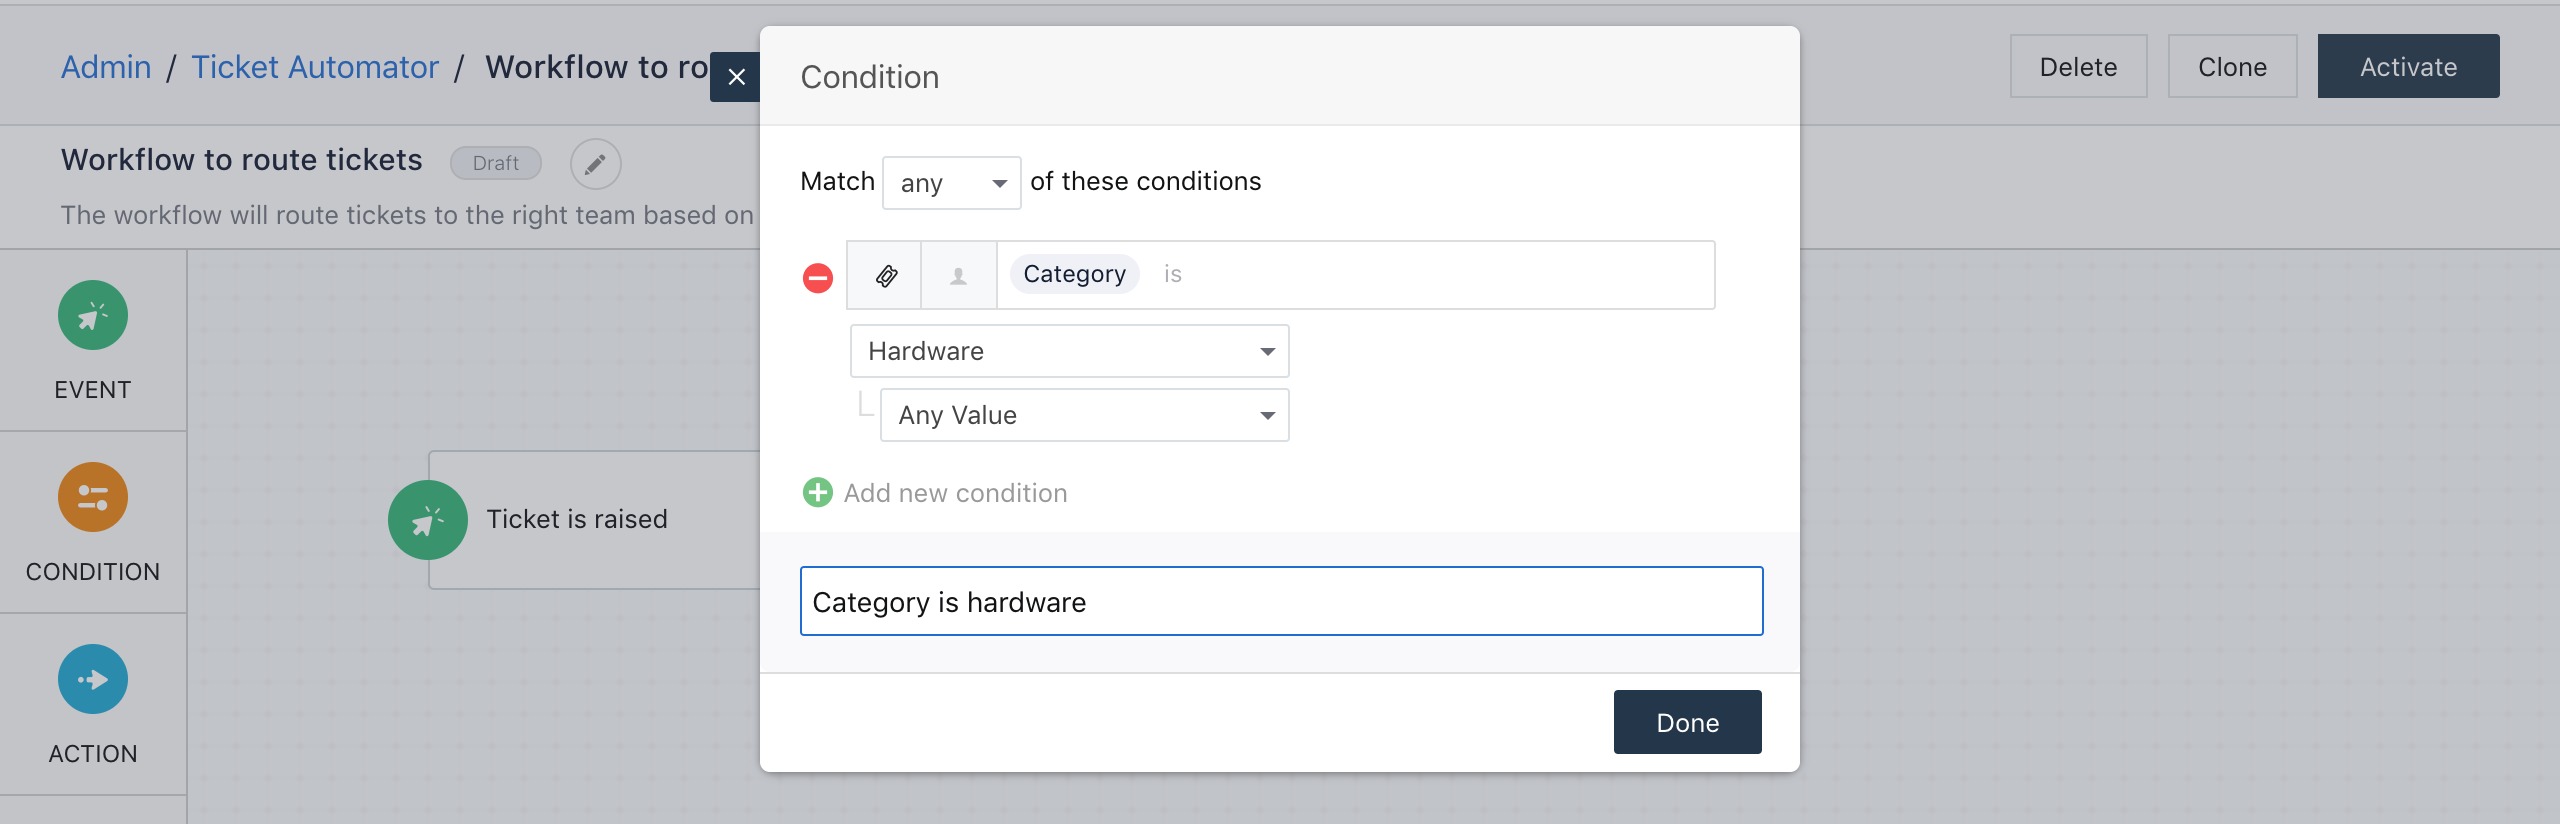
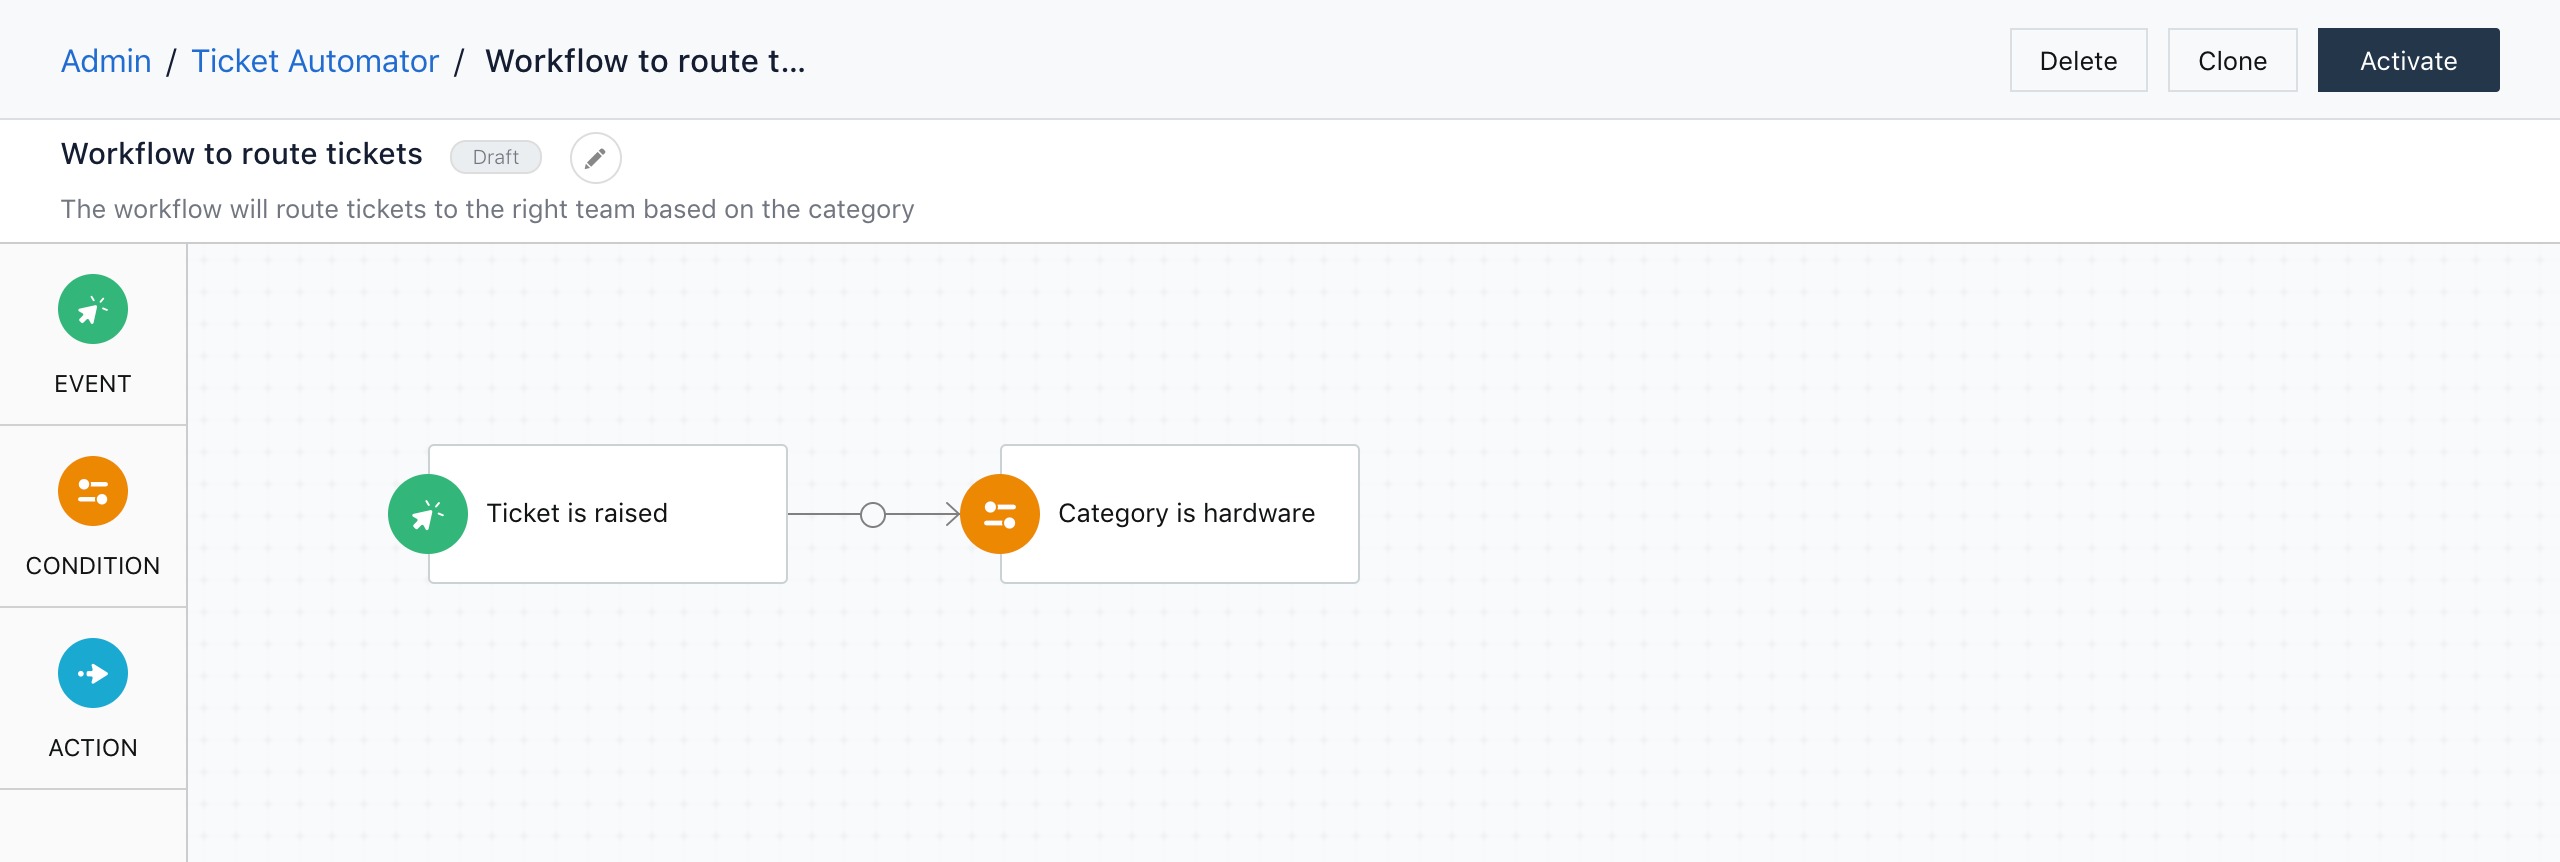
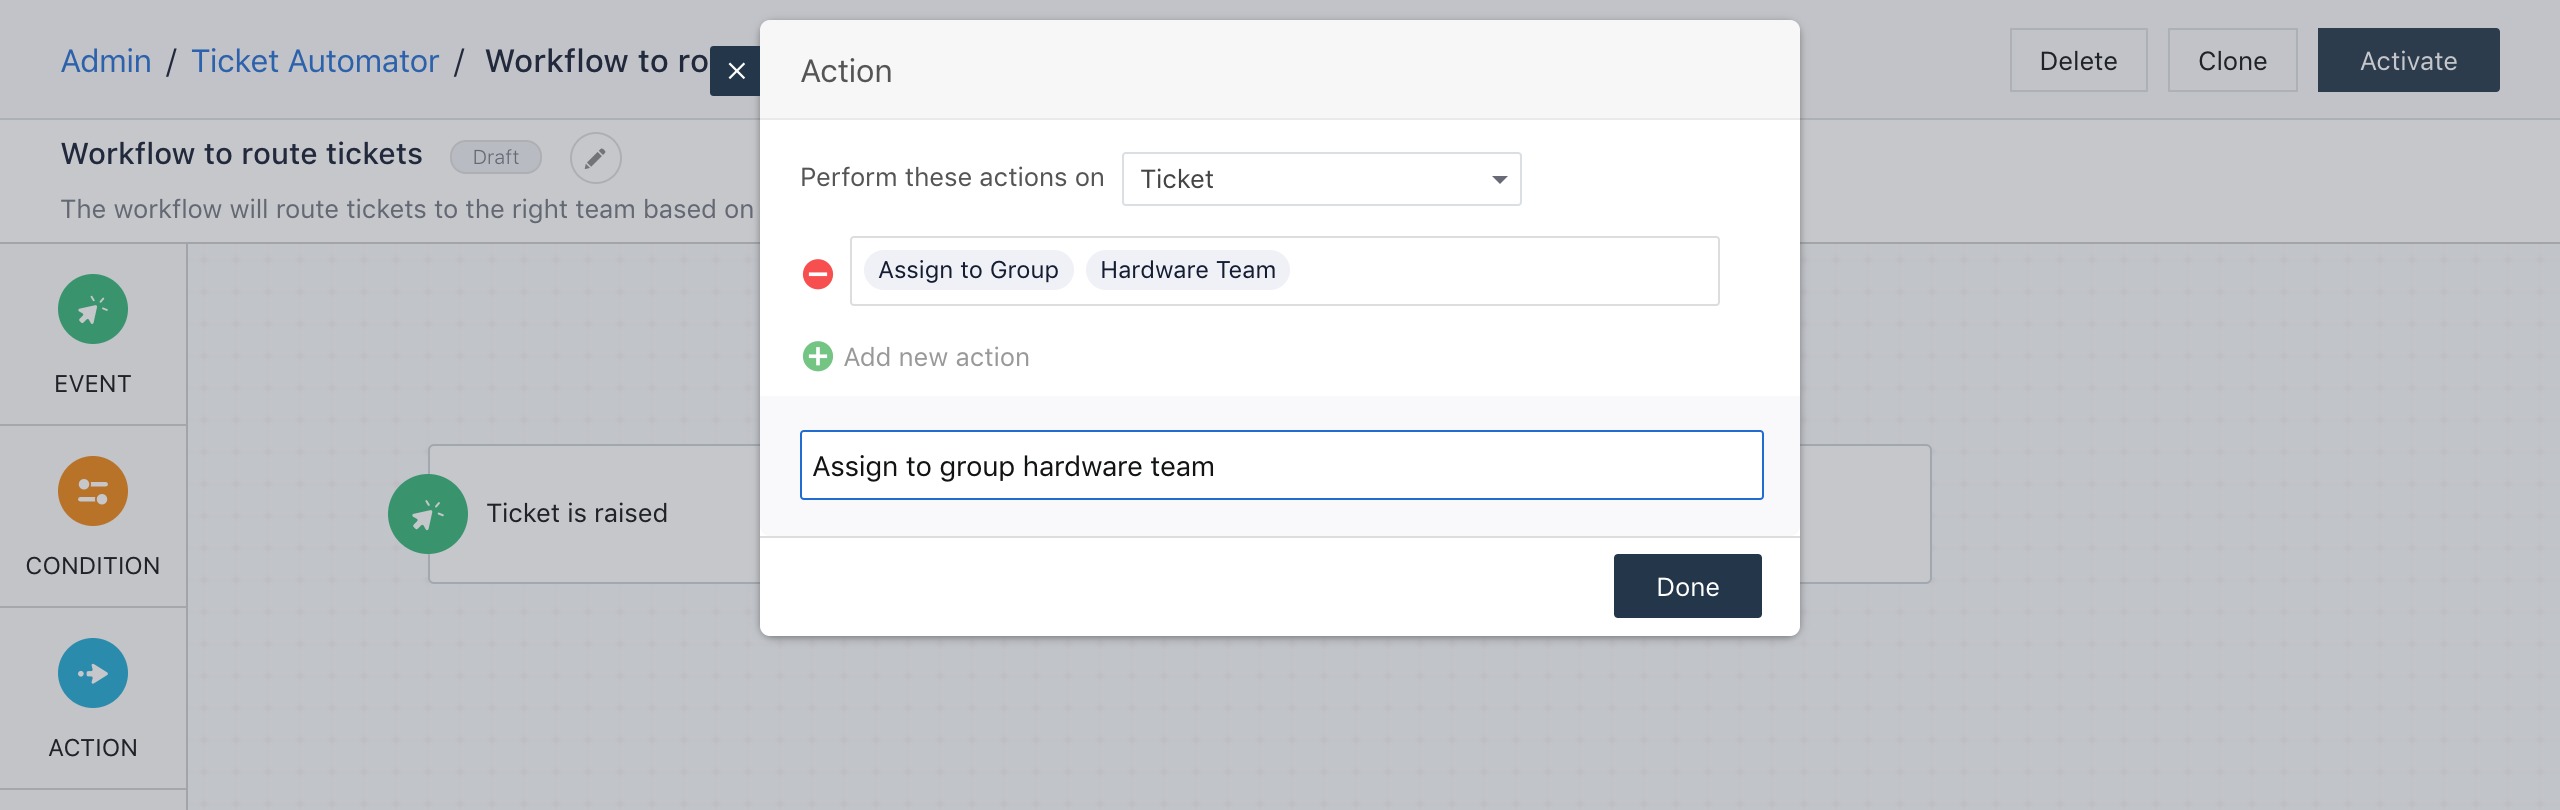
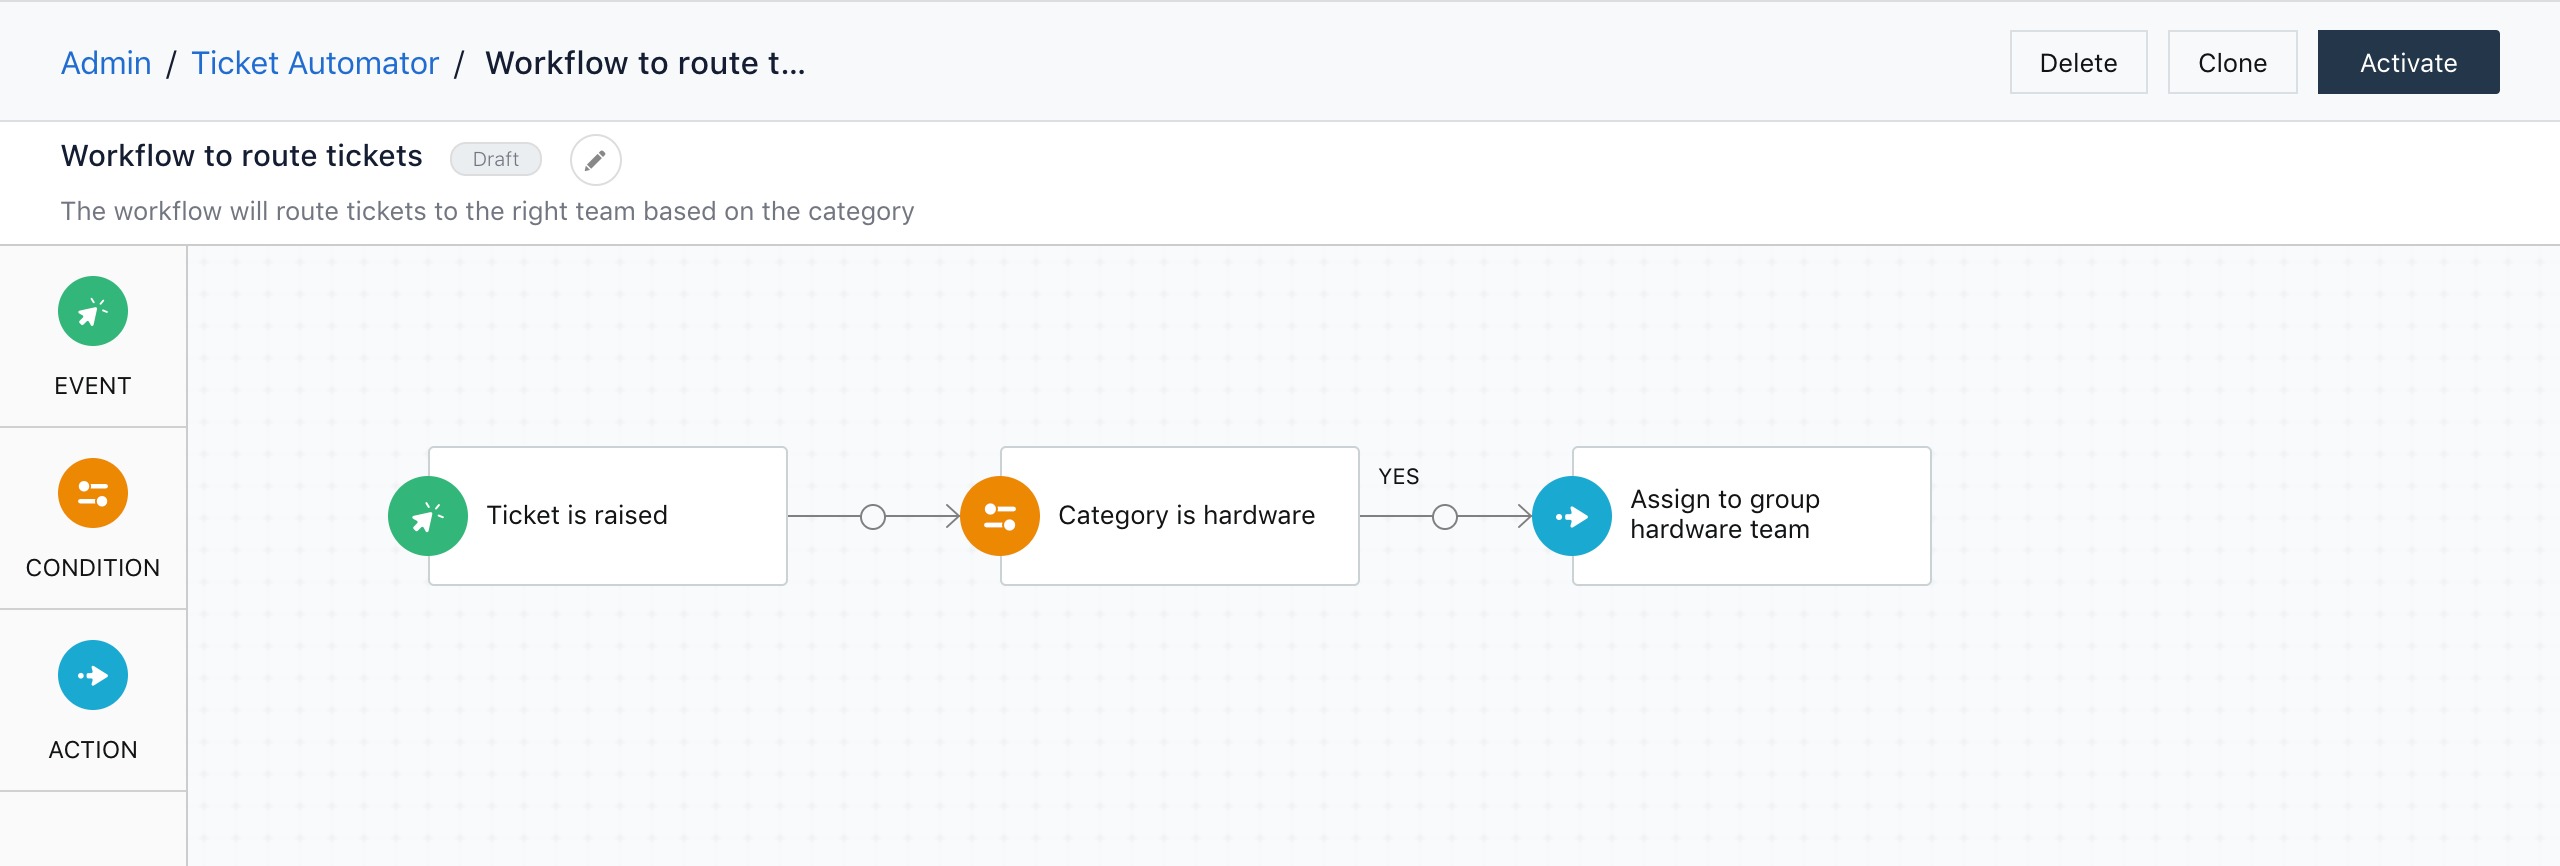
Now, the workflow to assign all hardware related tickets to the hardware team is ready. The workflow will be triggered when a ticket is created and it will check whether the category is ‘ hardware’. If yes, then the ticket will be assigned to the hardware to the hardware team.
Now, in the next scenario, we’ll go a little further and see how this workflow can be used to assign tickets of different categories to different teams.
Scenario 2: Routing tickets to different teams
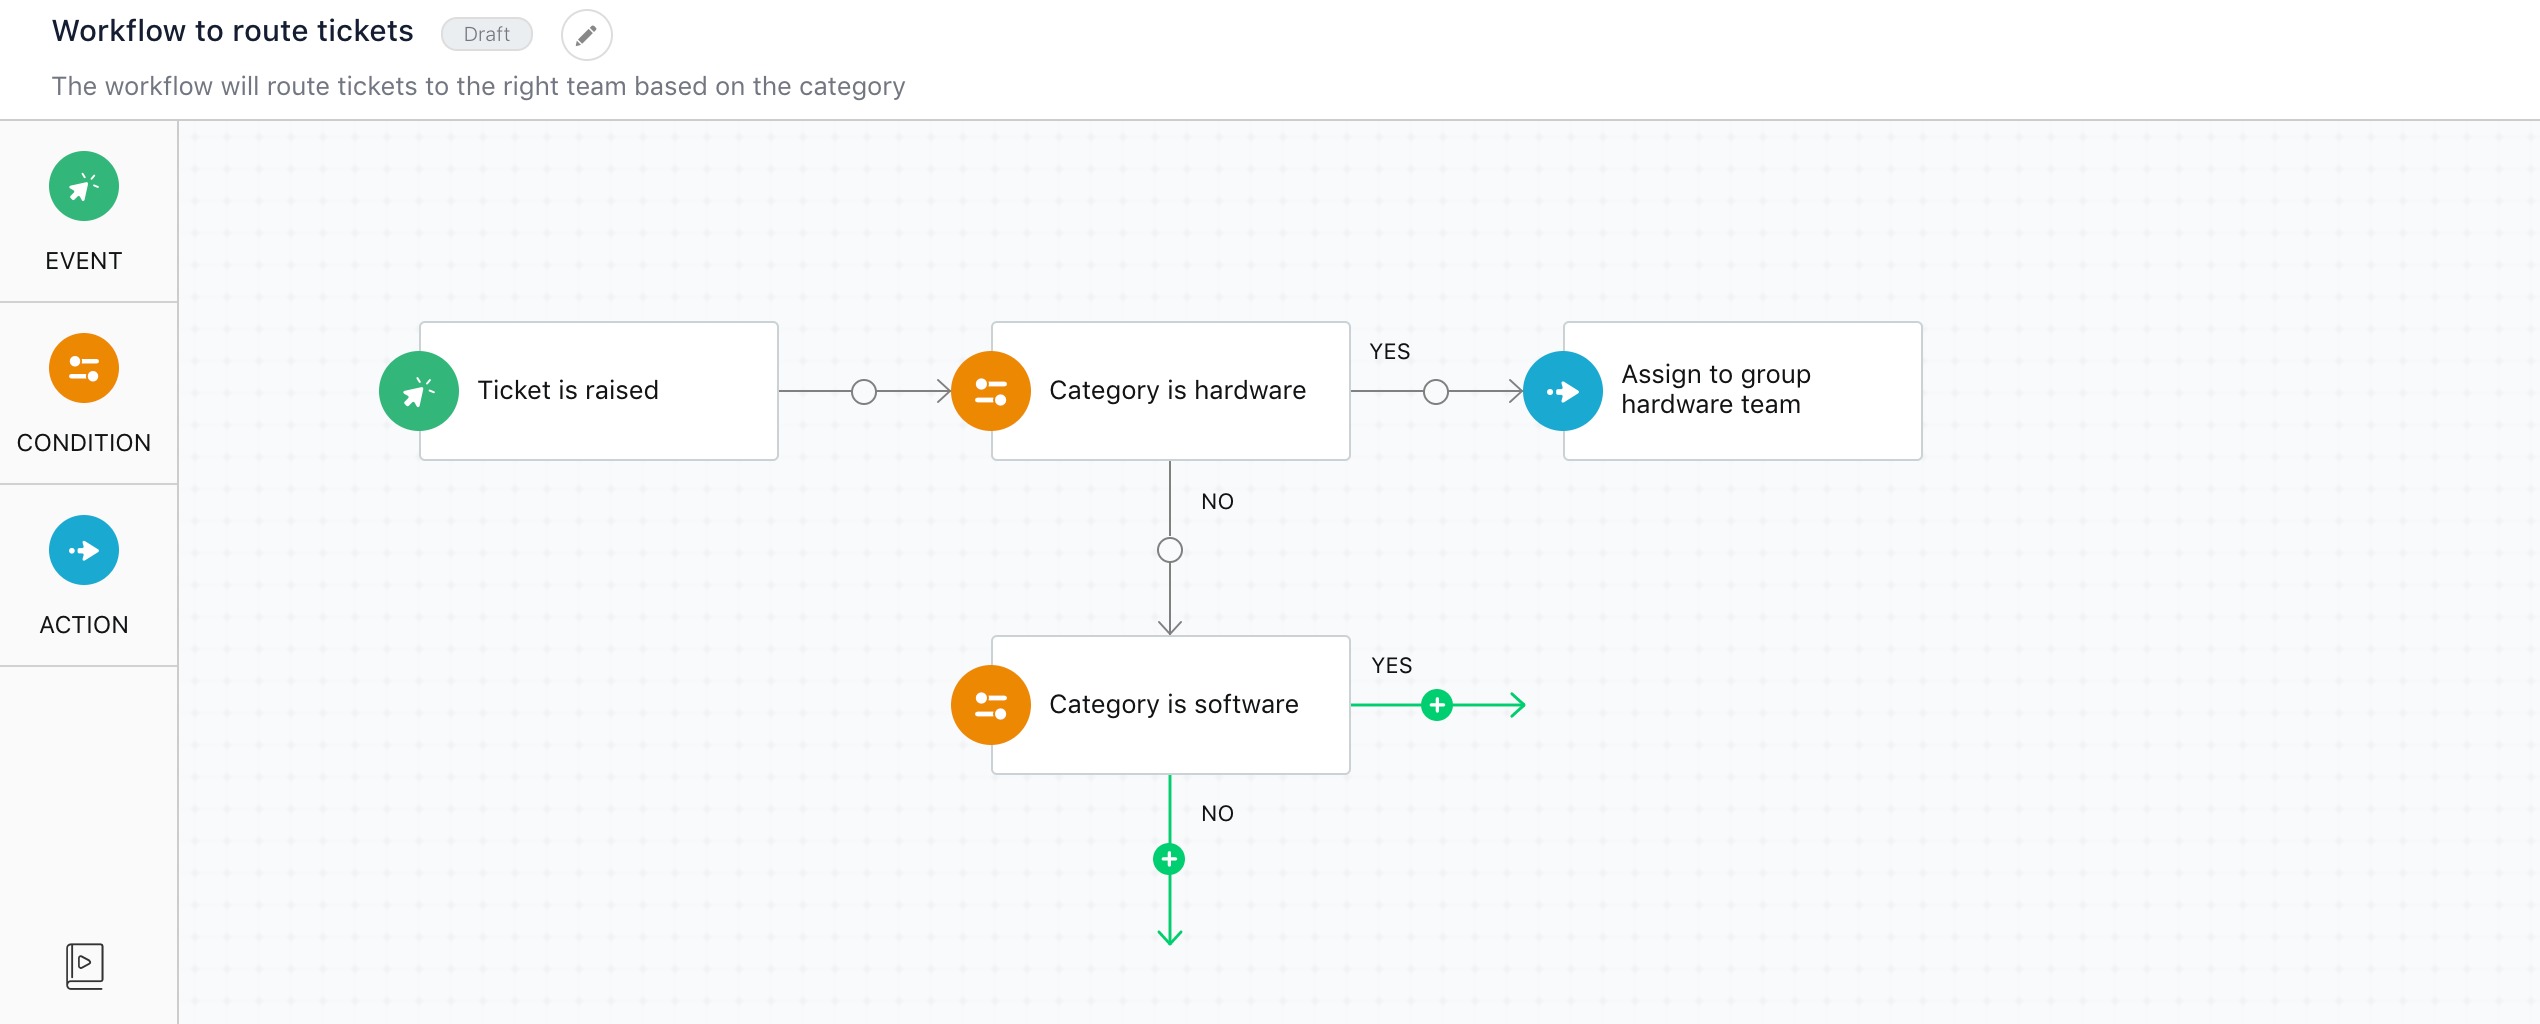
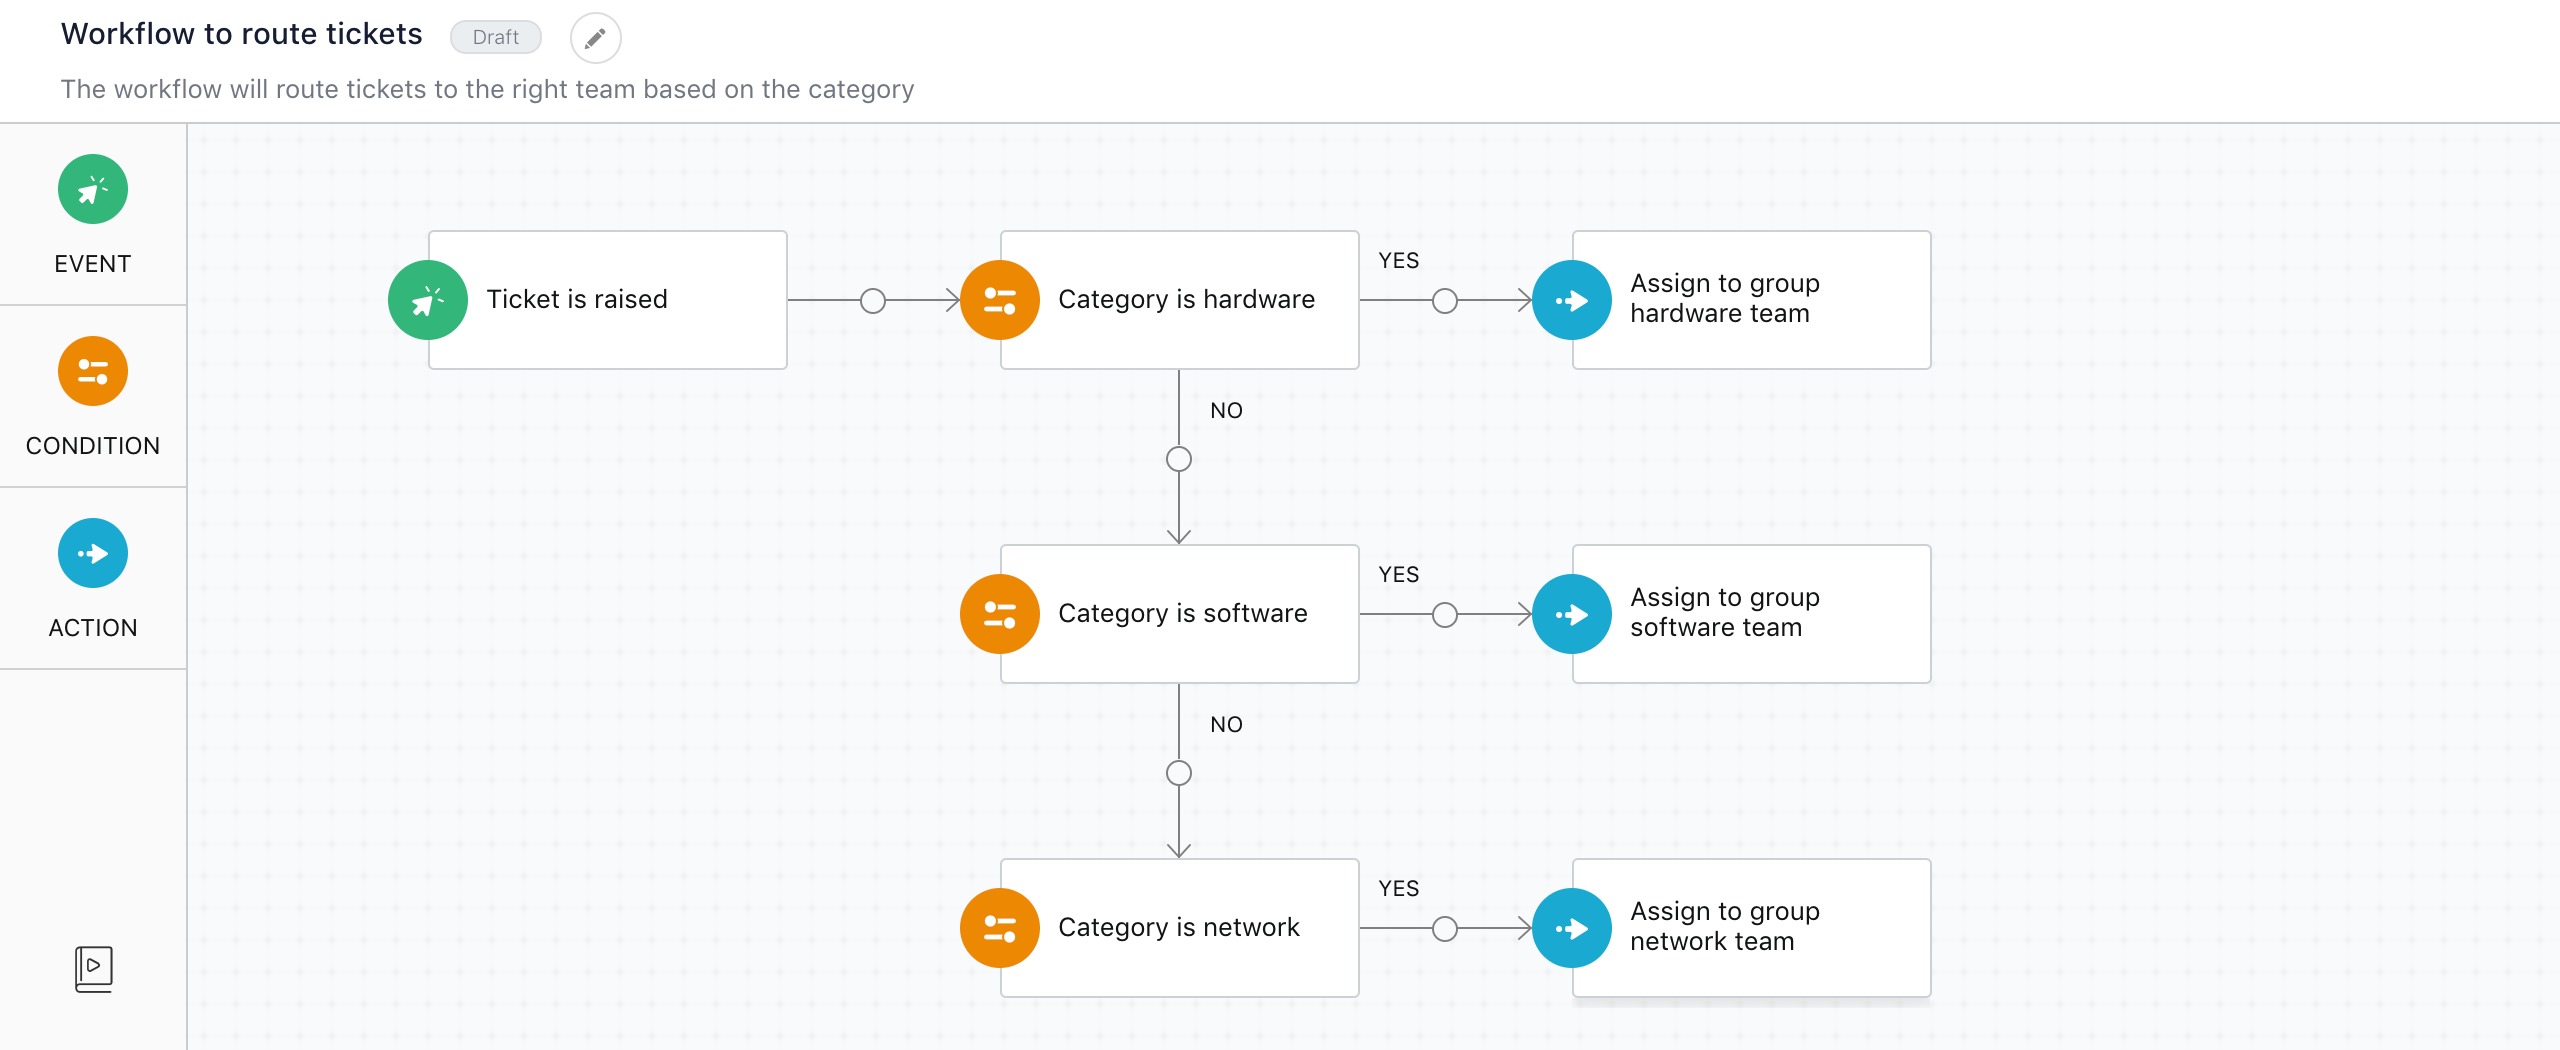
Let’s take a scenario where you want to assign hardware, software, and network-related tickets to hardware, software, and network teams. Let’s take the workflow discussed in the previous scenario and see how we can customize it assign tickets to multiple teams.
Follow the below-mentioned steps to expand the previous workflow to accomplish more.
Scenario 3: Setting up Multi-stage approval
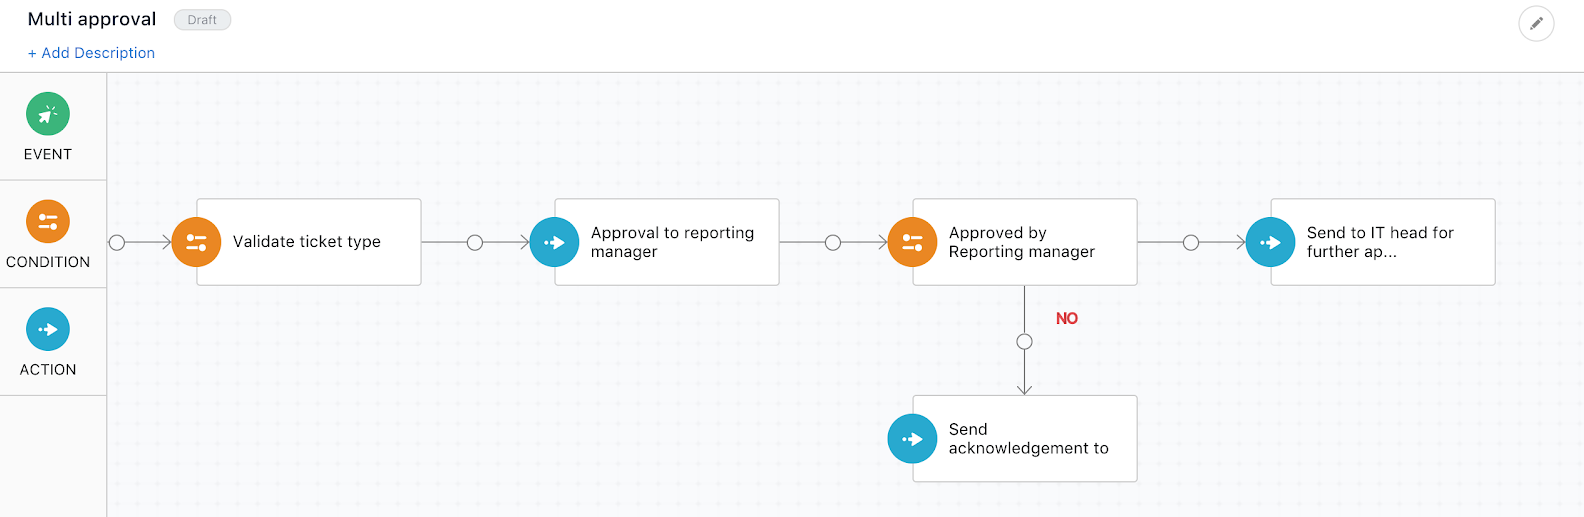
Consider a scenario where you want to set up a multi-stage approval process. Whenever an employee requests a laptop priced higher than $1500 dollars, the request needs approval from the employee’s reporting manager and the company’s IT head.
To set up this workflow:
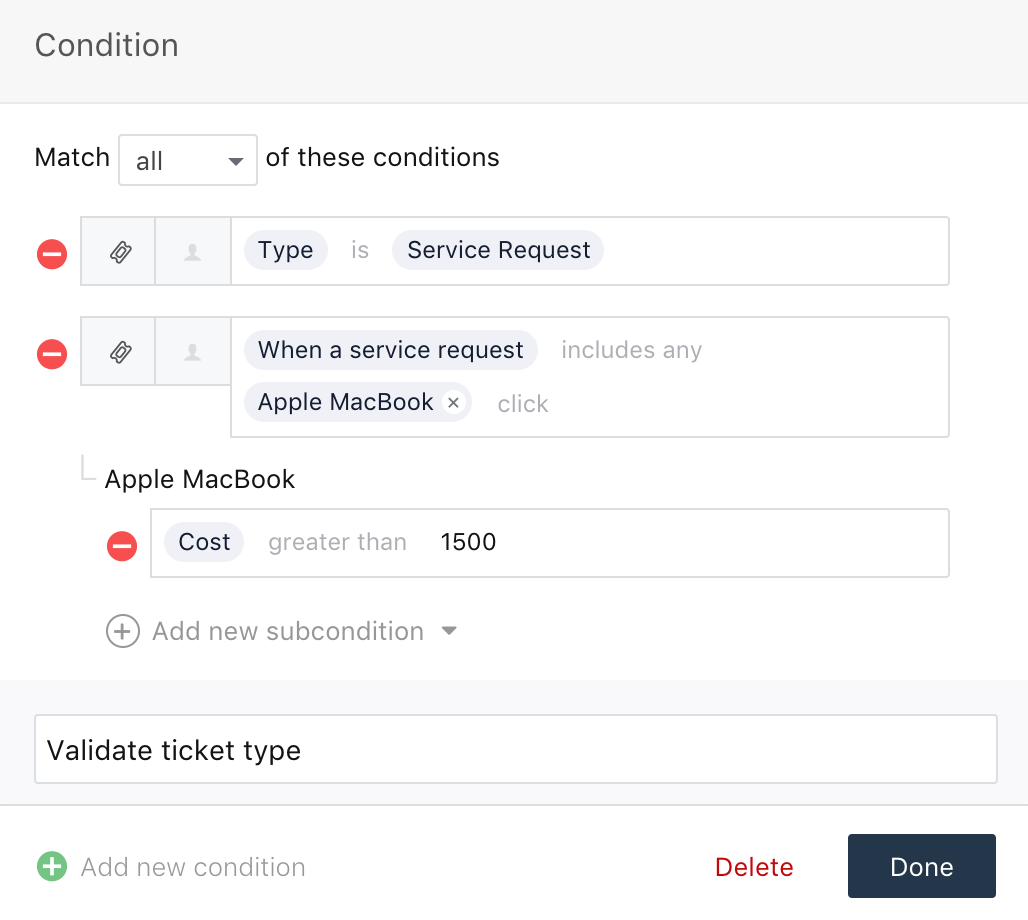
01. Set the workflow to be triggered when a ticket is created. 02. Add a condition and set the parameter when Type is Service Request. 03. Add another condition and choose the parameters When a service request includes any Apple Macbook 04. Choose Cost under sub condition and enter the value 1500.
05. Add an action and choose the options Send approval email to and Reporting Manager. Provide a label and click Done. 06. This completes setting up the first stage of approval. 07. To add the second stage of approval, add another condition and choose the parameters when Request Approval is Approved. 08. Add another action next to the newly added condition and choose the option Send approval email to and IT head. 09. In the event of notifying the requester through email, you can add another action and select the Send email to option. Enter the subject, add recipients in the Cc and Bcc fields, compose the email content, and include placeholders where necessary. The Send email to group option is available for ticket, problem and 10. Provide a label and click Done.
Additional information on Reader and JSON Parser Nodes
What are Reader Nodes?
Let’s say you want to route your service request based on the service item requested.
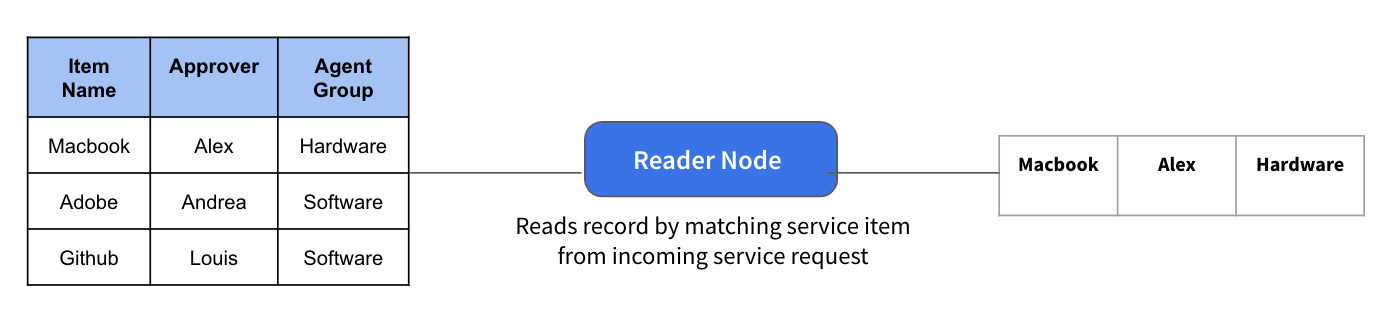
The reader nodes are used to read and reference information from the custom objects into the workflows. You can create conditions based on which a record is read into workflows from the custom objects.
For example, if a service request was raised requesting for a Macbook, the reader node can read the record from the business object by matching the service item information, and returns the right agent groups and approvers to route the request to.
Note:
To learn more about custom objects and reader nodes, you can refer to the articles here.
Reader Nodes
| Before Using Reader Node<br>Click on the image to zoom in | After Using Reader Nodes<br>Click on the image to zoom in |
JSON Parser Node

The JSON Parser node enables you to parse any JSON payload within the context of the workflow and use the outputs with subsequent conditions and actions.
You can use the JSON Parser node right away to work with JSON outputs from app actions that get custom attributes from GSuite, Okta and JIRA... Looking ahead you will also be able to use this to parse rest API responses within the workflow automation. Learn More
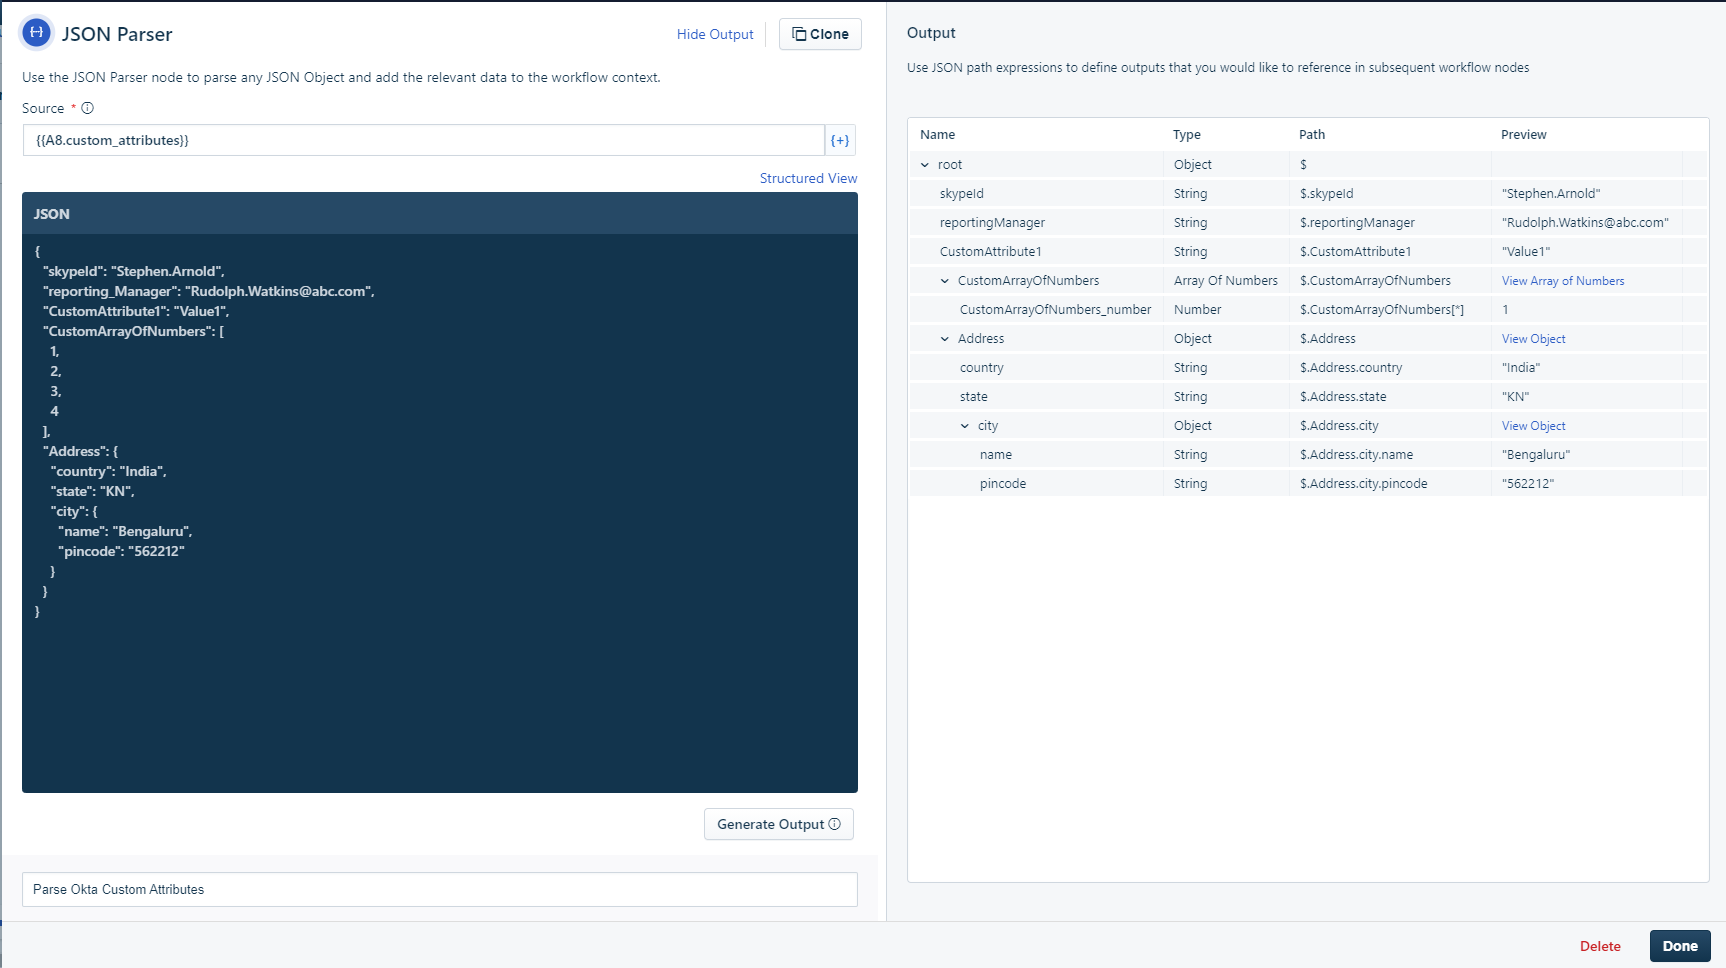
Image: Left side: The source of the payload and a sample JSON payload is configured
Right side: Outputs can be generated automatically or configured manually using JSON path expressions.
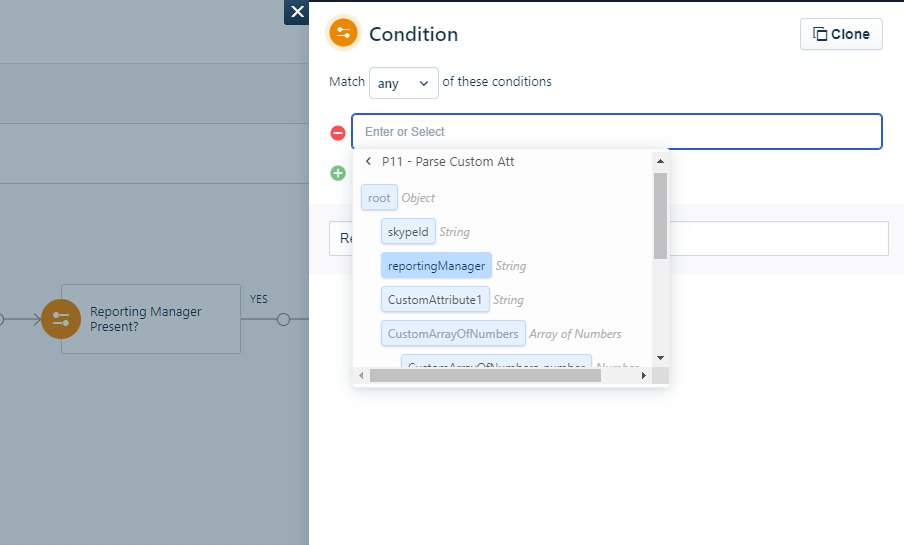
Image: The outputs configured in the JSON parser node can be referenced and used in the subsequent nodes