Last updated: 2026-03-31
Source: https://support.freshservice.com/support/solutions/articles/50000011940-sccm-discovery
Note: Available only for new signups after the 31 March, 2026 release. If you signed up earlier, refer to the existing ITAM documentation.
SCCM discovery integrates with your existing Microsoft System Center Configuration Manager (SCCM) or Microsoft Endpoint Configuration Manager (MECM) to synchronize hardware and software inventory data. This integration allows you to automatically import device, operating system, CPU, memory, network, and software details directly into your asset inventory.
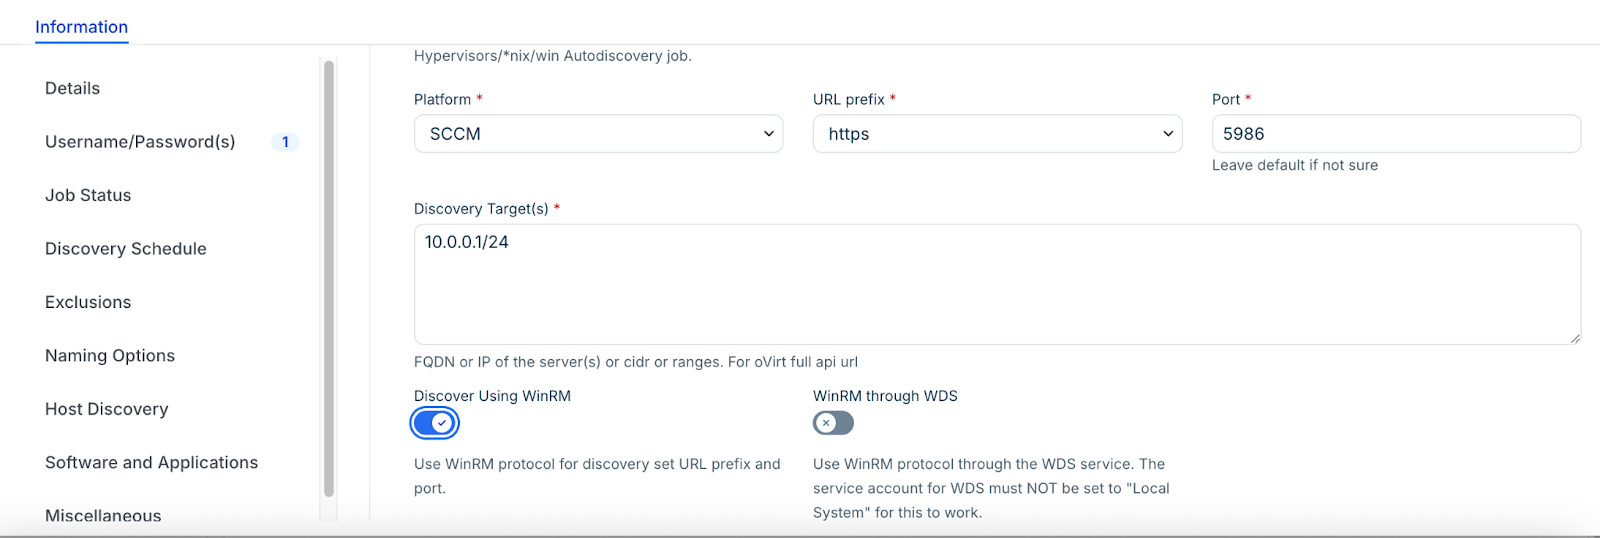
If you use SCCM to manage physical and virtual devices, this discovery job syncs Configuration Item (CI) data to maintain a centralized and unified inventory. The discovery can be performed using Windows Remote Management (WinRM), Windows Management Instrumentation (WMI), or through direct database discovery.
Prerequisites
You need the following before the installation:
- INFORMATION\_SCHEMA.TABLES
- v\_GS\_COMPUTER\_SYSTEM, v\_GS\_X86\_PC\_MEMORY, v\_GS\_PROCESSOR
- v\_GS\_Add\_Remove\_Programs, v\_GS\_Add\_Remove\_Programs\_64v\_R\_System,
- v\_GS\_PC\_BIOS, v\_GS\_NETWORK\_ADAPTER\_CONFIGURATION
Create an SCCM discovery job
To configure the SCCM integration, follow these steps:
Note: The discovery user must belong to the administrator's user group to discover databases successfully.
Step 1: Add a new discovery job
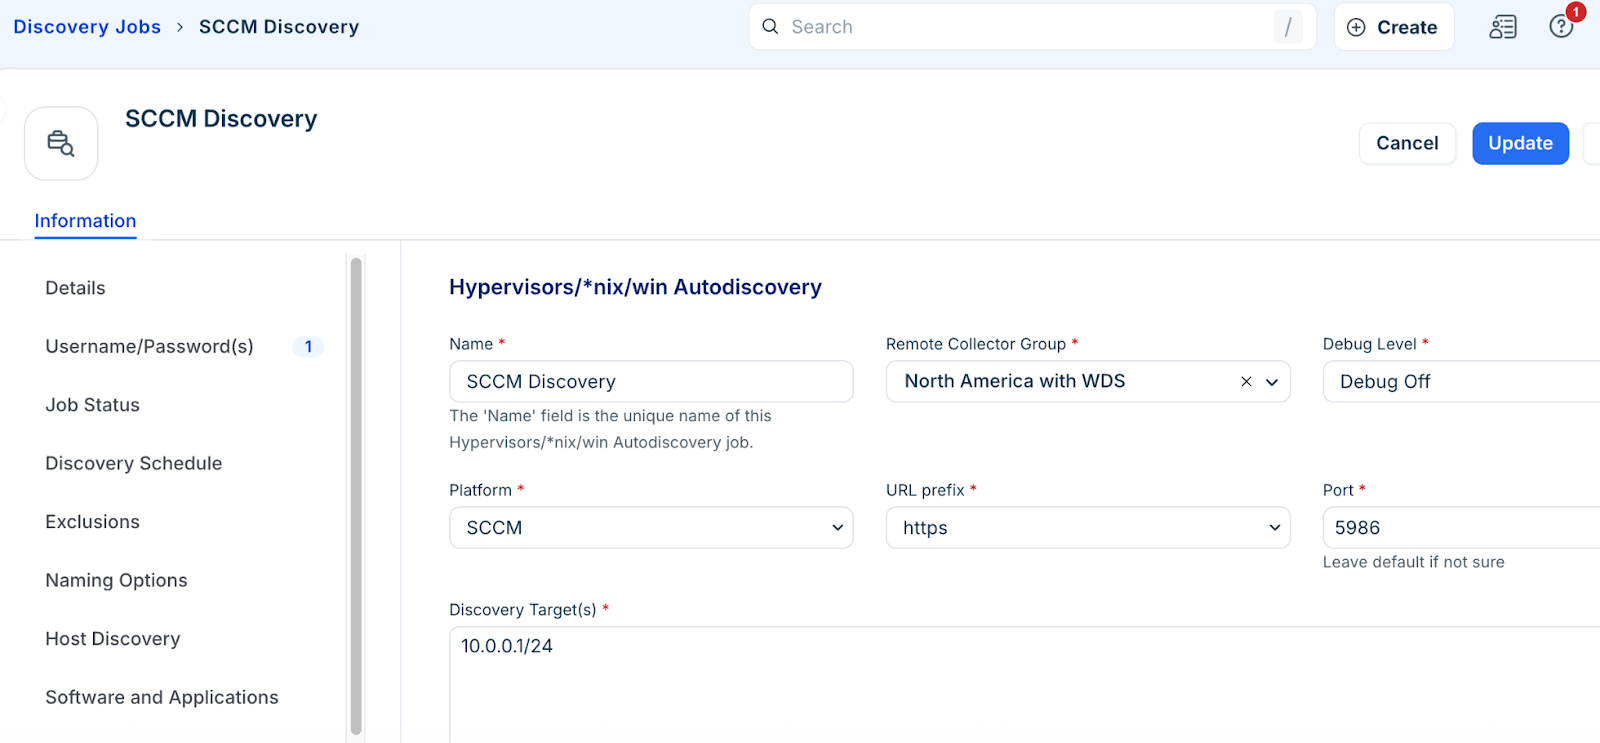
1. Go to Admin > Asset Management > Scan and discover and click the Discovery Jobs tab.
2. Select Hypervisors / \*nix / Windows from the list of discovery jobs and click Add new.
3. Enter a unique name for the job.
4. Select SCCM as the Platform.
5. Enter the FQDN or IP address of the SCCM database server in the Discovery Target(s) field.
Step 2: Choose a connection method
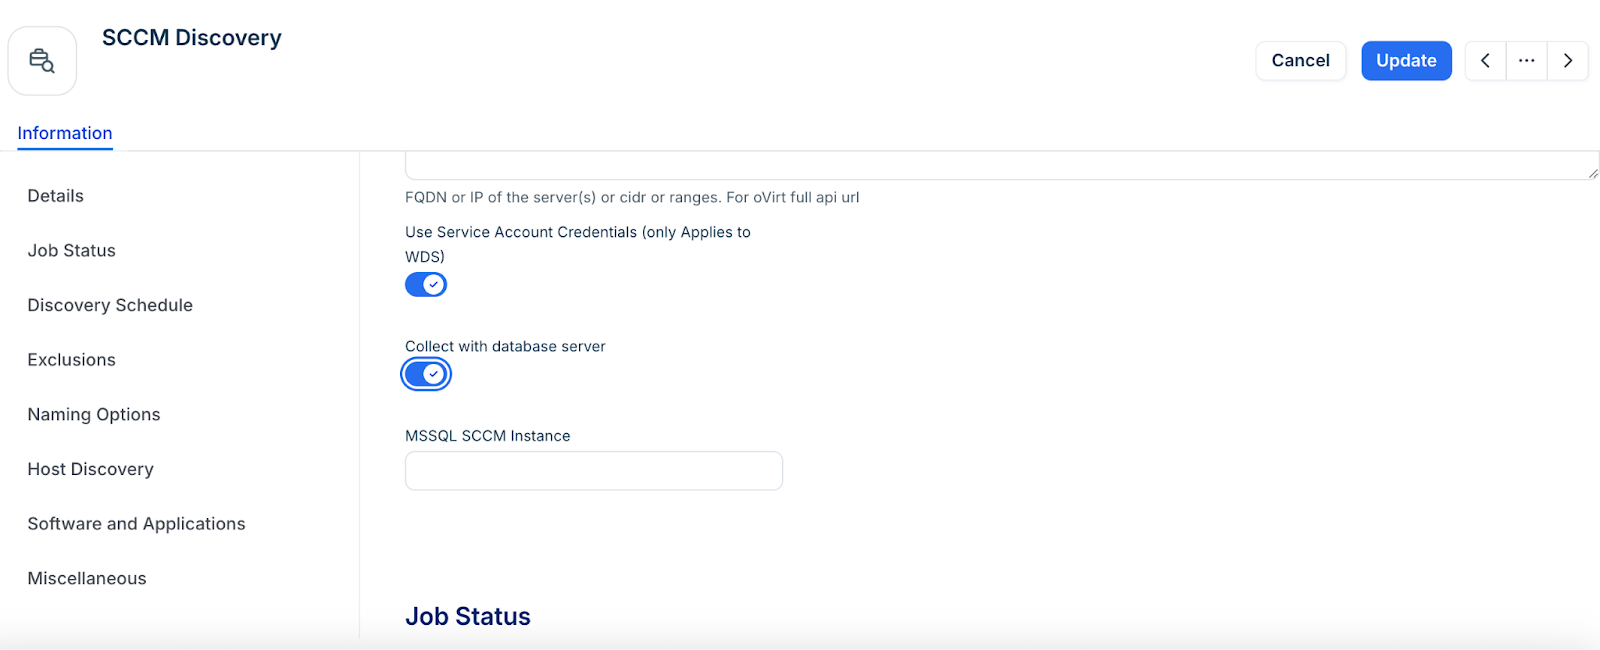
Configure the connection based on your environment's requirements:
Note: Leave the MSSQL SCCM Instance field blank unless your environment uses a non-standard instance name.
Step 3: Schedule and run the discovery job
1. In the Discovery Schedule section, click Add new to create a recurring schedule.
2. Click Save.
3. To start the synchronization immediately, click Run Now on the Discovery Jobs tab or within the job details page.