Last updated: 2026-03-12
``` Note: This feature works the same across all Freshservice products. Some screenshots or articles may reflect older designs, but the functionality remains unchanged. If certain options do not appear in your account, they may not be included in your current plan. ```
Employees often require official documents, such as salary certificates or proof of employment, for purposes like loan applications, rental agreements, or visa processing. Freshservice streamlines this process by automating document generation. You can create reusable templates and link them to service request items, allowing employees to submit document requests with ease.
What You Learn
This article guides you through the complete setup and usage of the Document Generation feature in Freshservice. You'll learn how to:
``` You can use out-of-the-box templates are provided at the end of this article. ```
Create a document template
Document templates are workspace-specific. This means templates uploaded in one workspace are only available for use within that workspace and cannot be accessed from others.
Perform the following steps to create a new document template:
1. In your Freshservice instance, navigate to Admin > Service Request Management > Document Templates and eSignatures.
2. Click New Template.
3. Enter a template name and a short description.
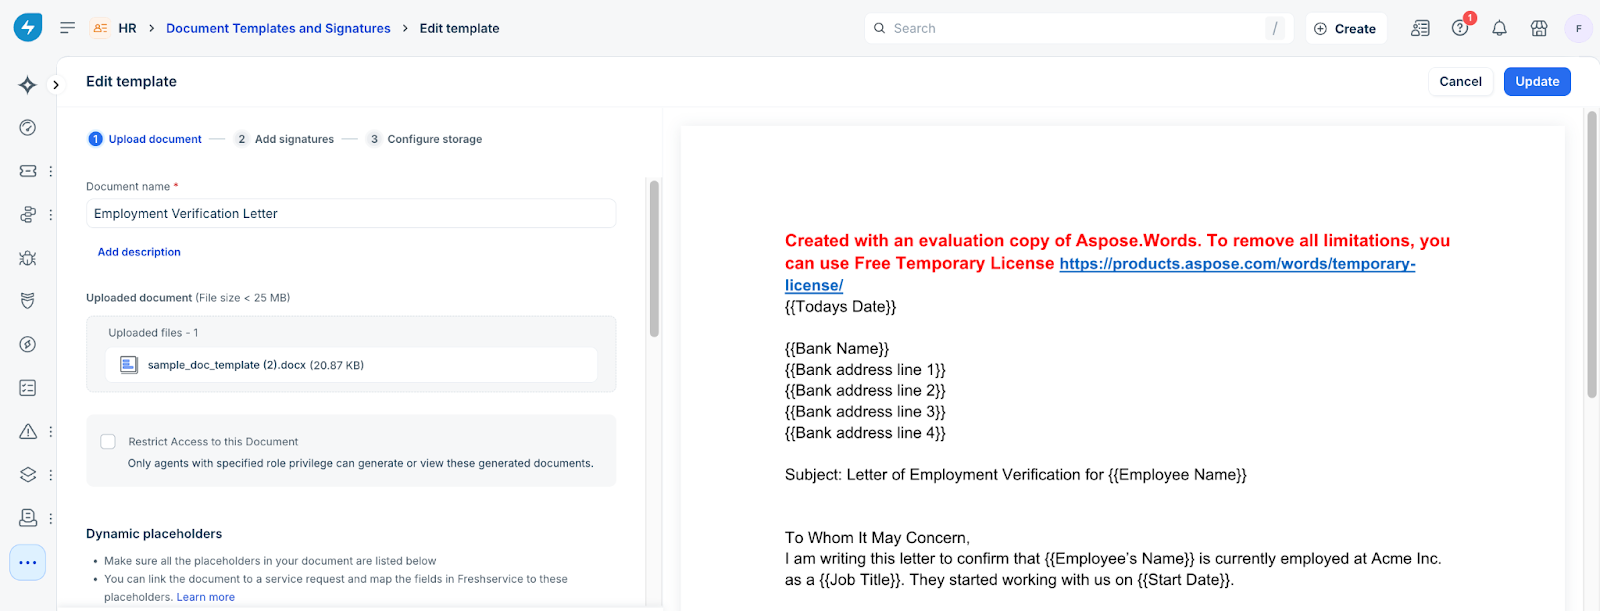
4. Upload your .docx file by either:
- Dragging it into the designated upload area, or
- Click to select the file from your system. For more information about the supported languages and fonts for document templates, see Supported Languages and Fonts in Documents.
Note: For more information about the template requirements, see Understand Template Requirements. 5. Once uploaded, a preview of the document is displayed as shown in the image below. Note that all identified placeholders are highlighted for review.
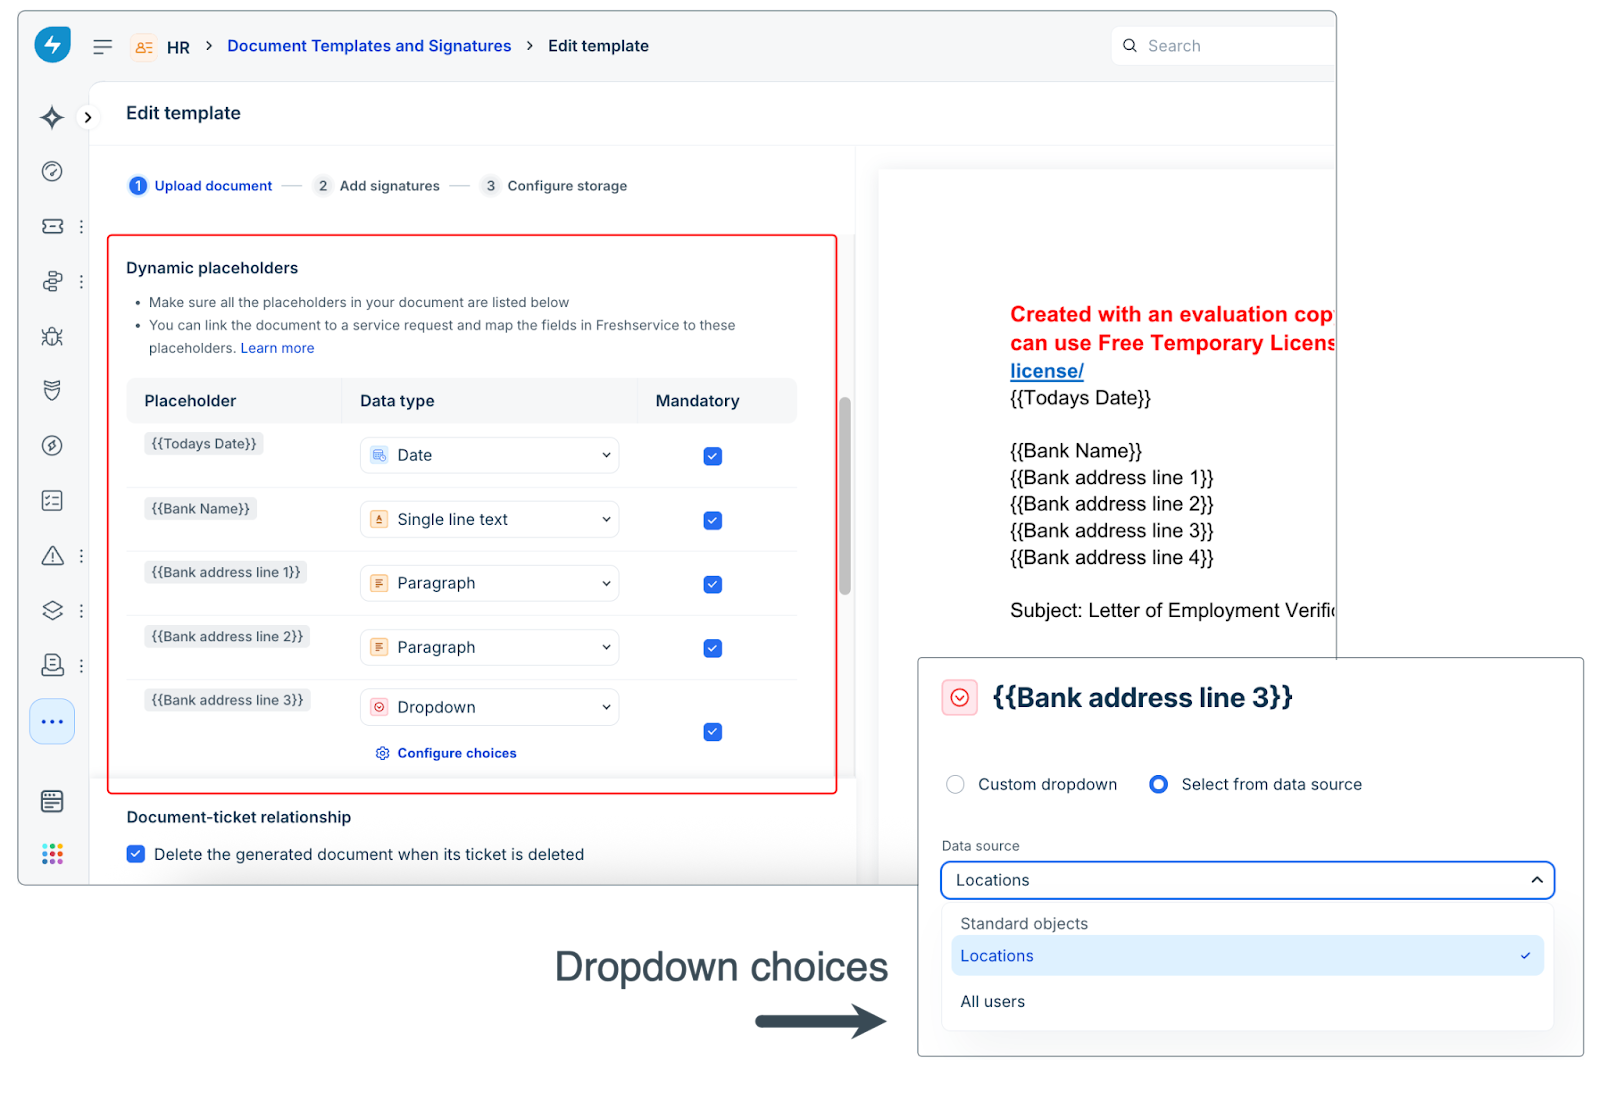
6. Assign a data type to each placeholder to match the required input format. Selecting a specific type, such as Date, ensures the system processes the input correctly rather than as plain text. Here are the following data types available for selection:
Note: Dropdown fields support either custom choices or mapping existing account data, such as users, email IDs, or locations.
Note: This enables more accurate search and filtering in the document repository using those placeholder values. Learn more
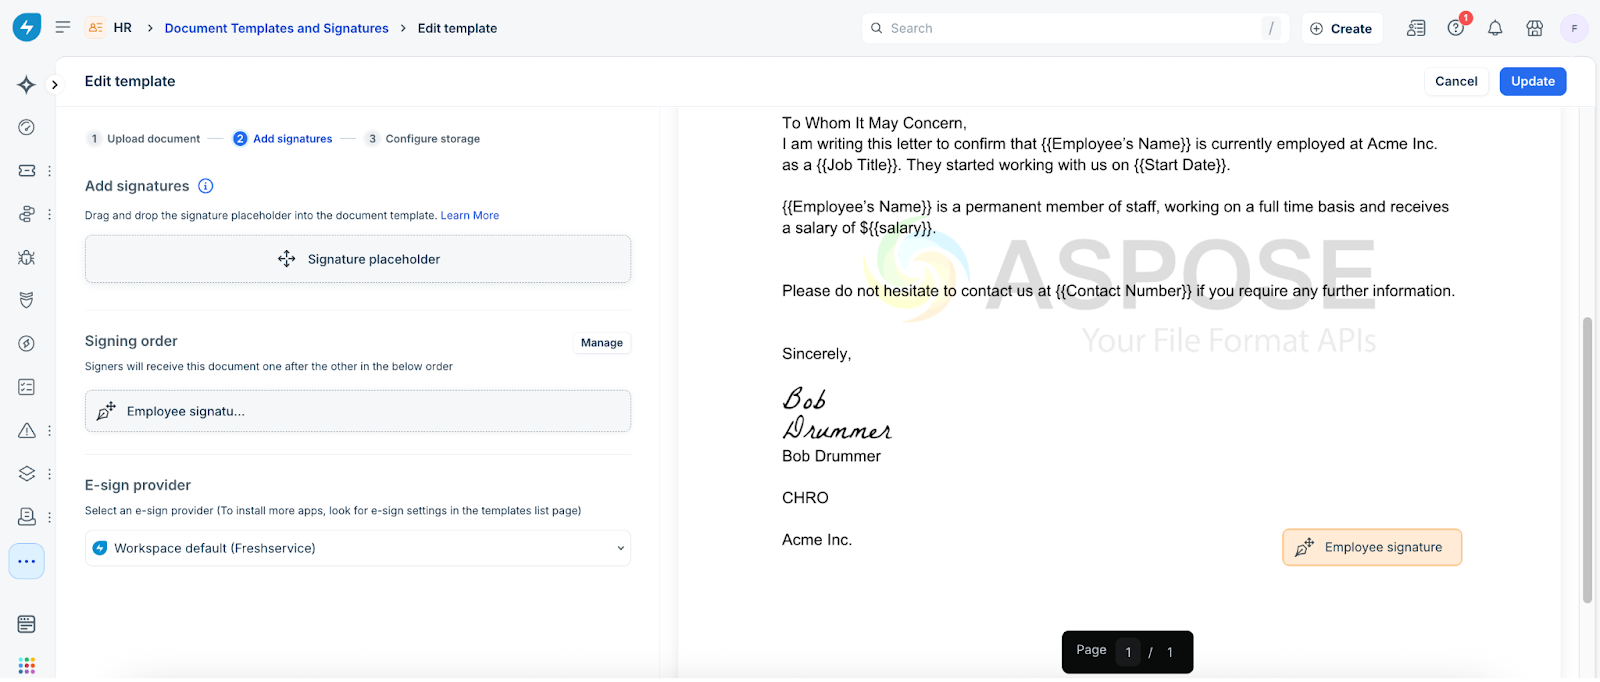
7. To add signature fields, click the Add Signatures tab. This step is optional.
8. Drag and drop the signature fields to the correct locations on the document.
- Give each signature field a unique title so you can identify it later when you map the fields.
- You can reorder the signature fields as needed.
- If a person needs to sign in multiple locations, you can place their signature field on the document multiple times.
 9. When you are finished, click Save. The template is stored in draft mode.
Pro-tip: If one person must sign a document in multiple places, you don't need to provide multiple email addresses for them. Just place the same signature placeholder at each required location in the template. To learn more about e-signatures, see Embed e-signatures in documents.
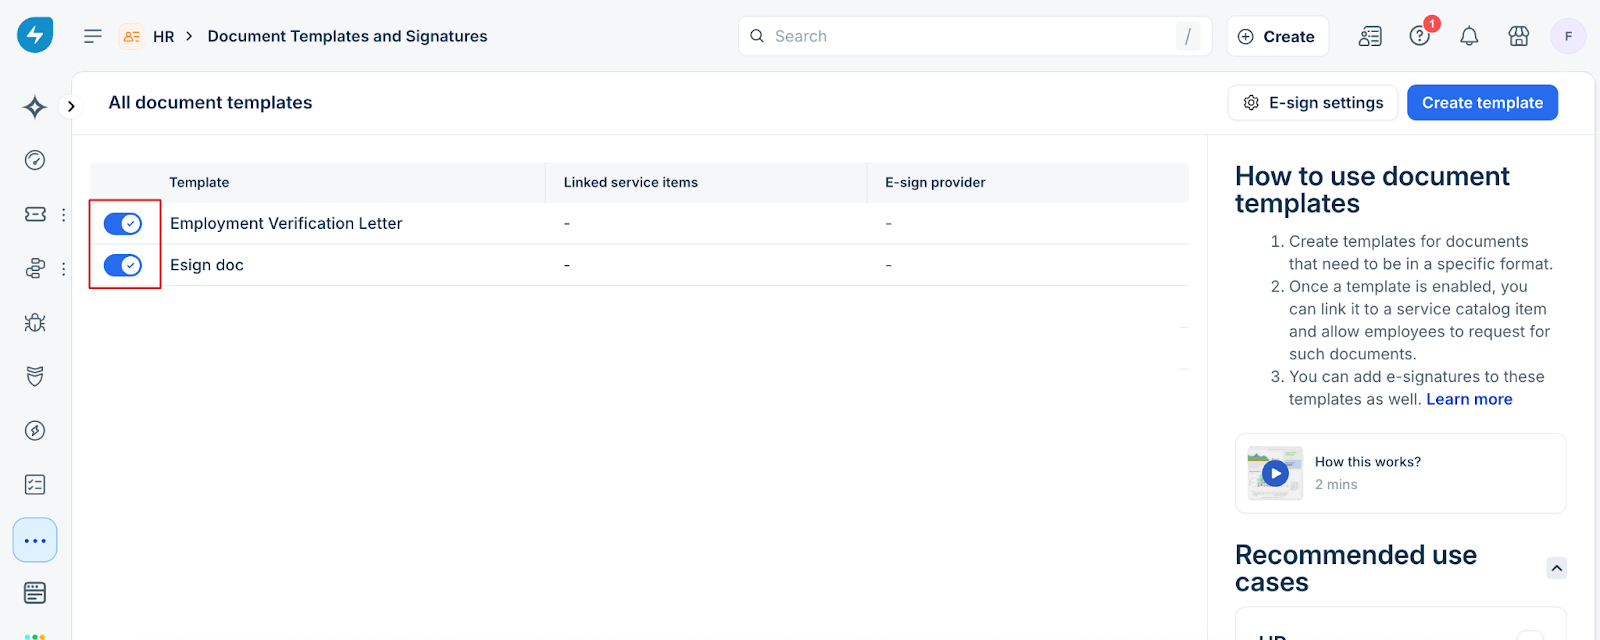
10. To make the template available for service requests, toggle it on from the template list.
11. Once activated, the template can be linked to a service request item and used in document generation workflows.
Create a service request item and link a document template
Perform the following steps to configure a service request item that employees can use to request official documents:
1\. Create a service request item
1. Navigate to Admin > Service Request Management > Service Catalog in your Freshservice instance.
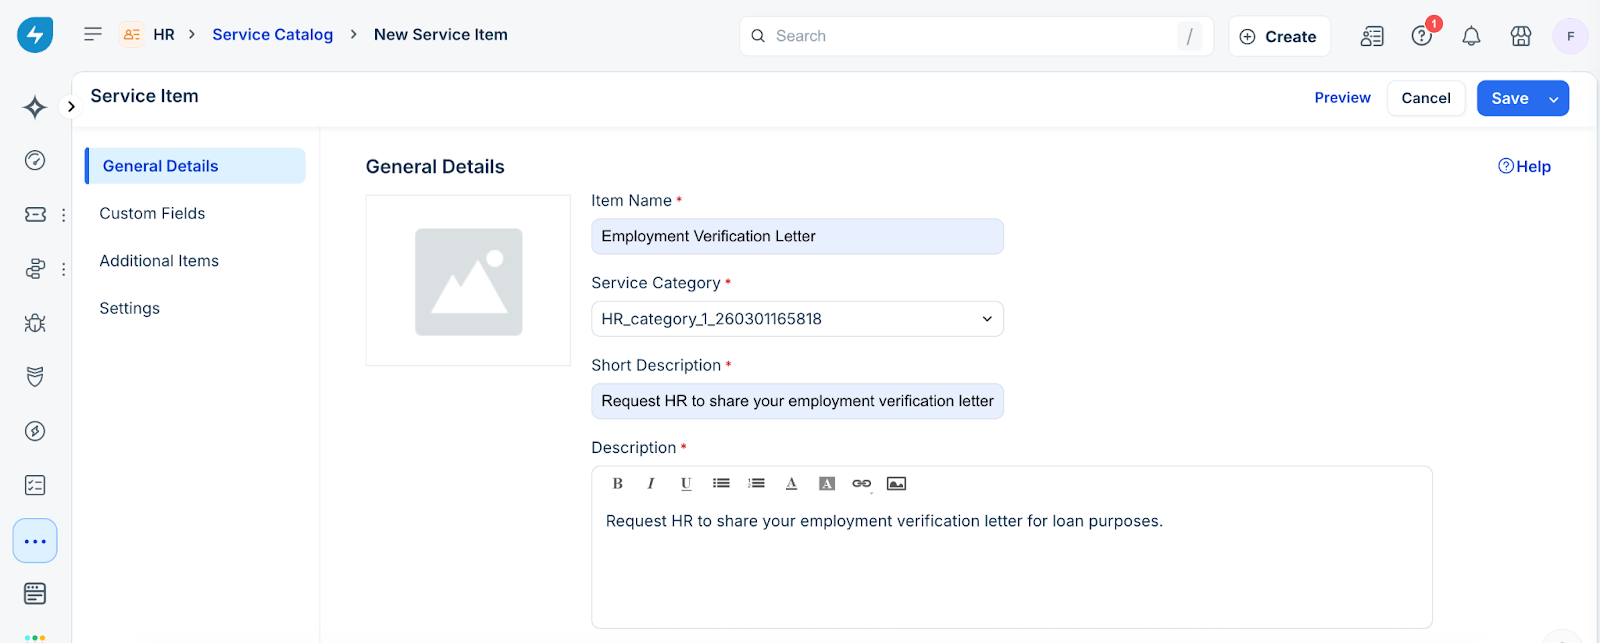
2. Based on the selected workspace, a list of service categories and service items is displayed. You can either use an existing service item or click Add New to create one. For example, a service item titled Employment Verification Letter allows employees to request a formal letter confirming their employment status.

3. Once you have finalized the service item, configure its details by providing a suitable name and description under the General Details section, as shown in the image below.
2\. Add custom fields to the form
1. After Drag and drop custom fields onto the service form to collect the data required for document generation.
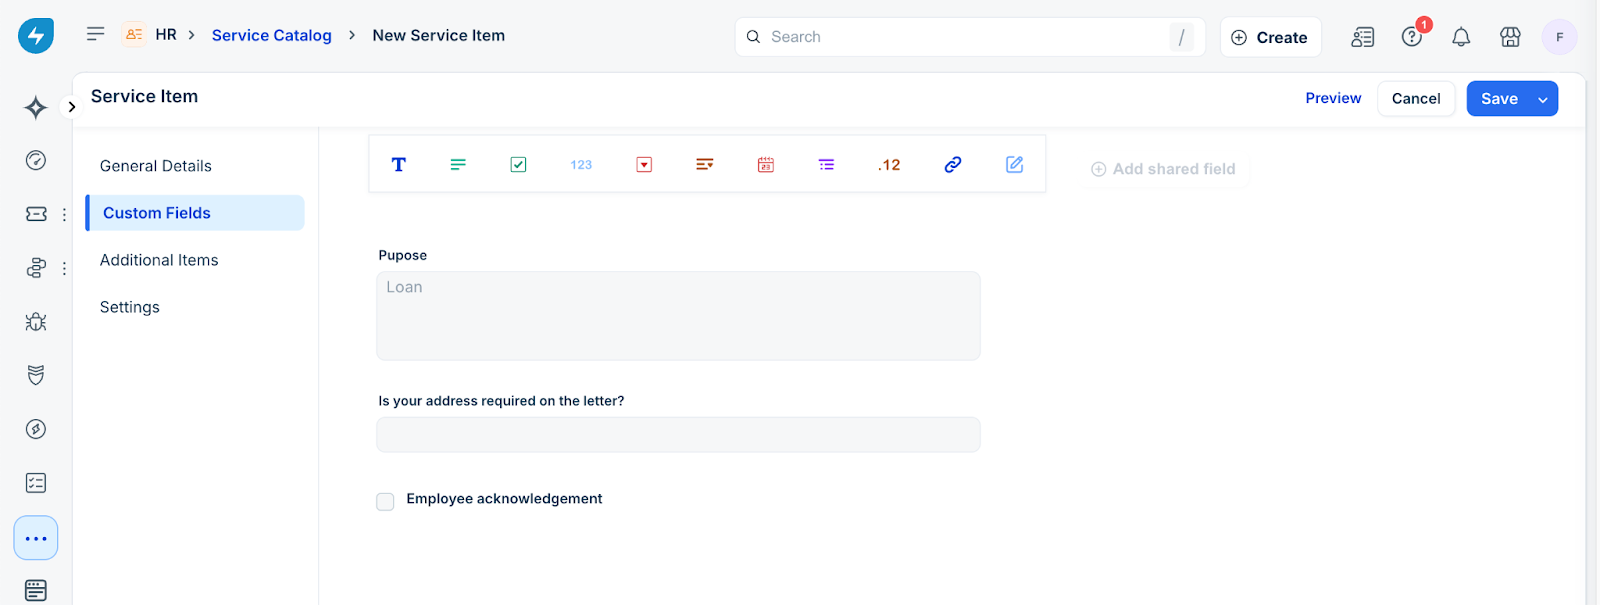
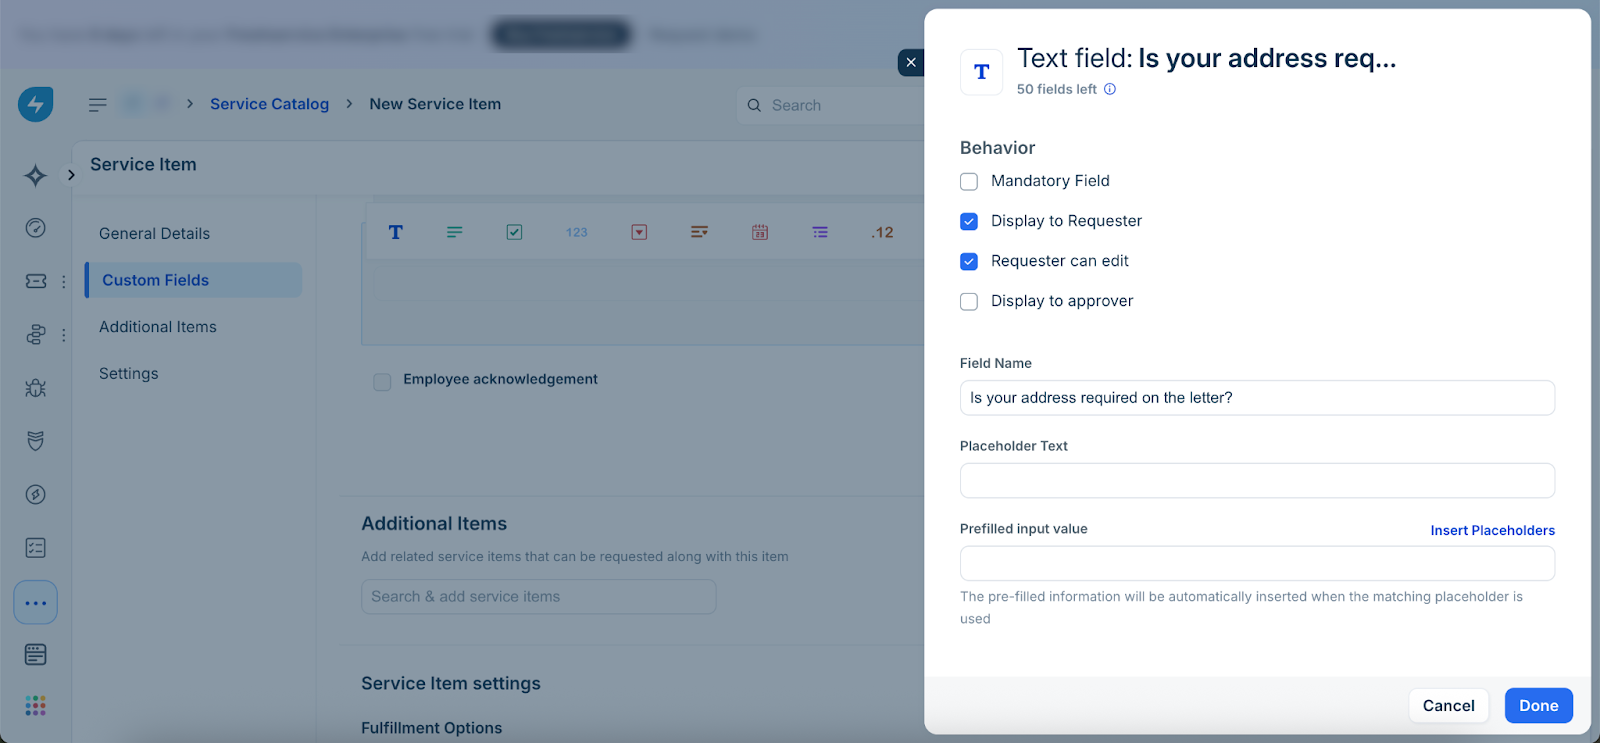
2. Configure the field behavior as needed (For example, mandatory, hidden, or conditional). Example custom fields:
- Purpose of Request – Specify the reason for the verification letter, such as a loan application, visa processing, or rental agreement.
- Employee Acknowledgment (checkbox) – Confirm that the information provided will be used to generate the verification letter.
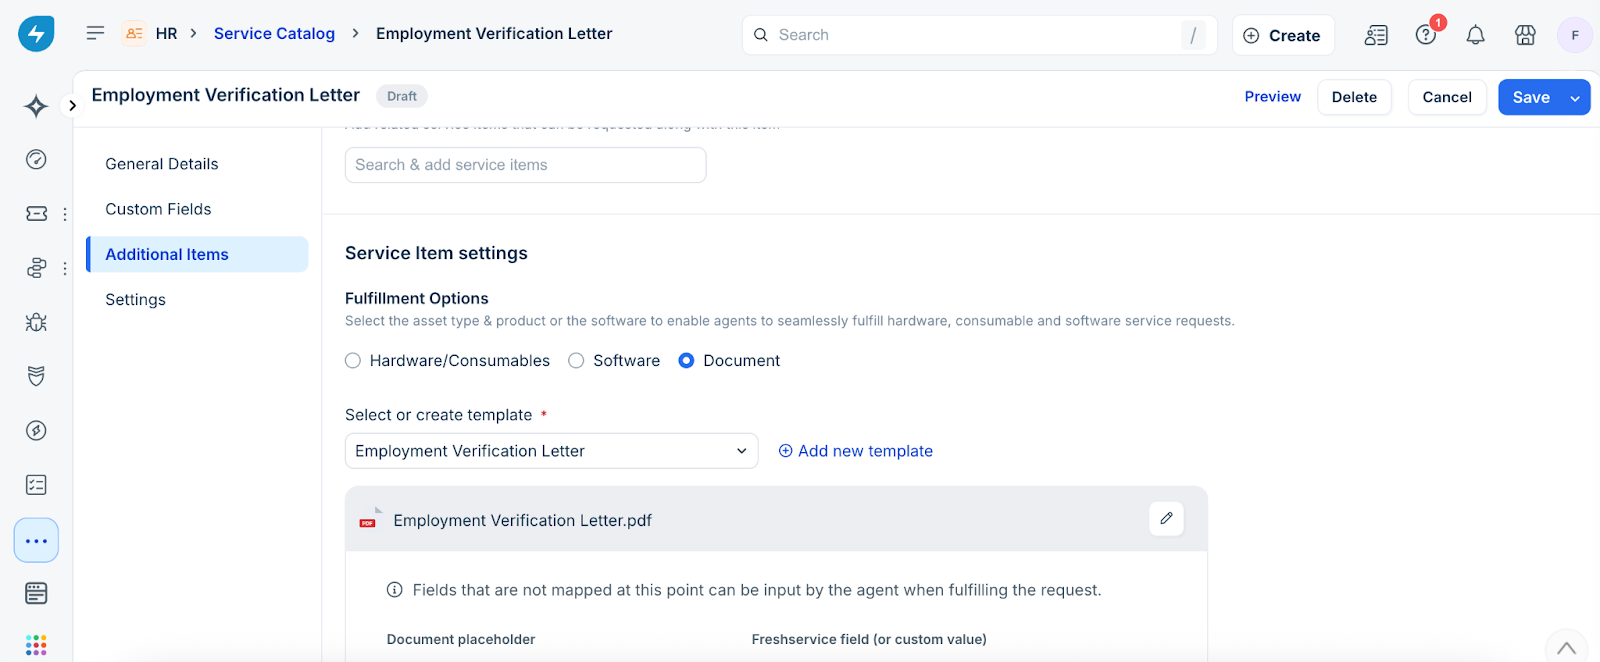
3\. Configure fulfillment settings
This step links the service request form to a document template, enabling automatic document generation when a request is submitted.
1. In the Settings tab for the service item.
2. Under Fulfillment Options, select Document.
3. From the Select or create template drop-down, choose an existing document template or click Add new template to create one.
4\. Map placeholders to Freshservice fields
1. After linking your document template to the service request item, the next step is to map each placeholder in the template to the corresponding fields in Freshservice. To begin mapping, click the Edit icon as shown below.
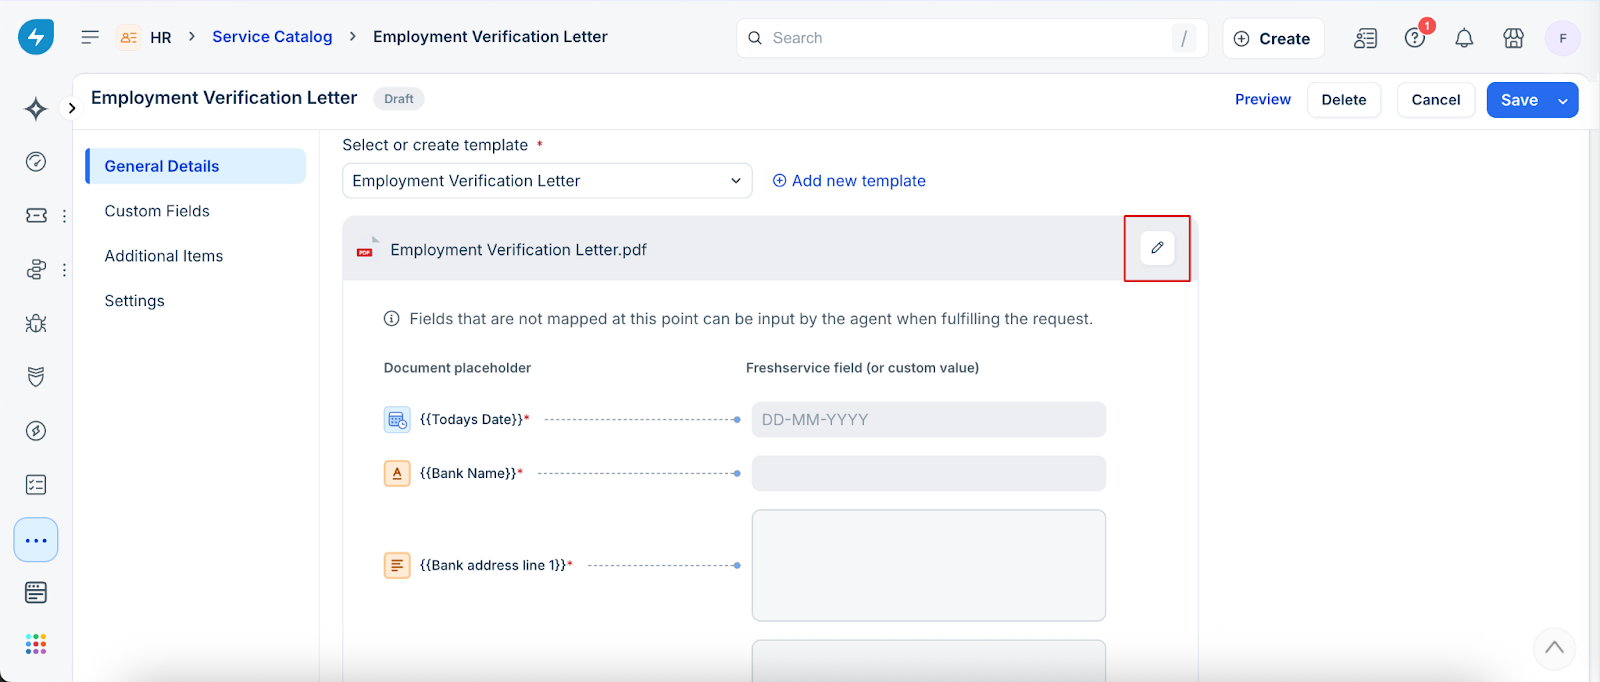
2. Map each placeholder in the template to the corresponding Freshservice system field. This ensures the document is automatically populated when it is generated and sent for e-signing. To map a field, click the + icon next to the placeholder and select the appropriate field from the available options.
- Use default fields from available categories such as Ticket, Requester, Service Item, and others.
- You can also use custom fields added to the form, such as Employment Start Date or Bank Name.
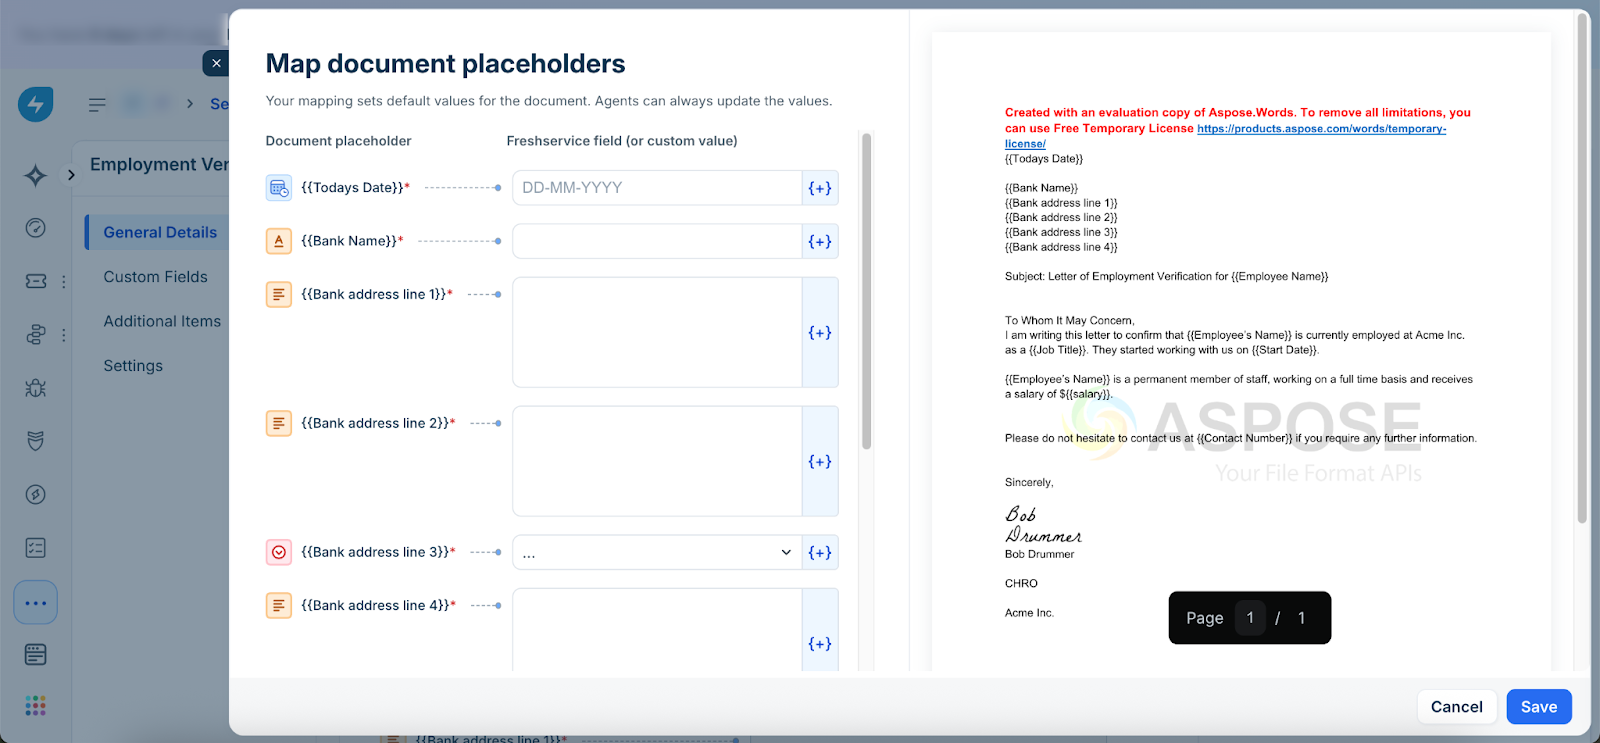 3. You can leave certain placeholders unmapped if the data is unavailable or requires manual verification. Agents can enter these values manually while generating the document, which is useful for fields like salary or other sensitive data.
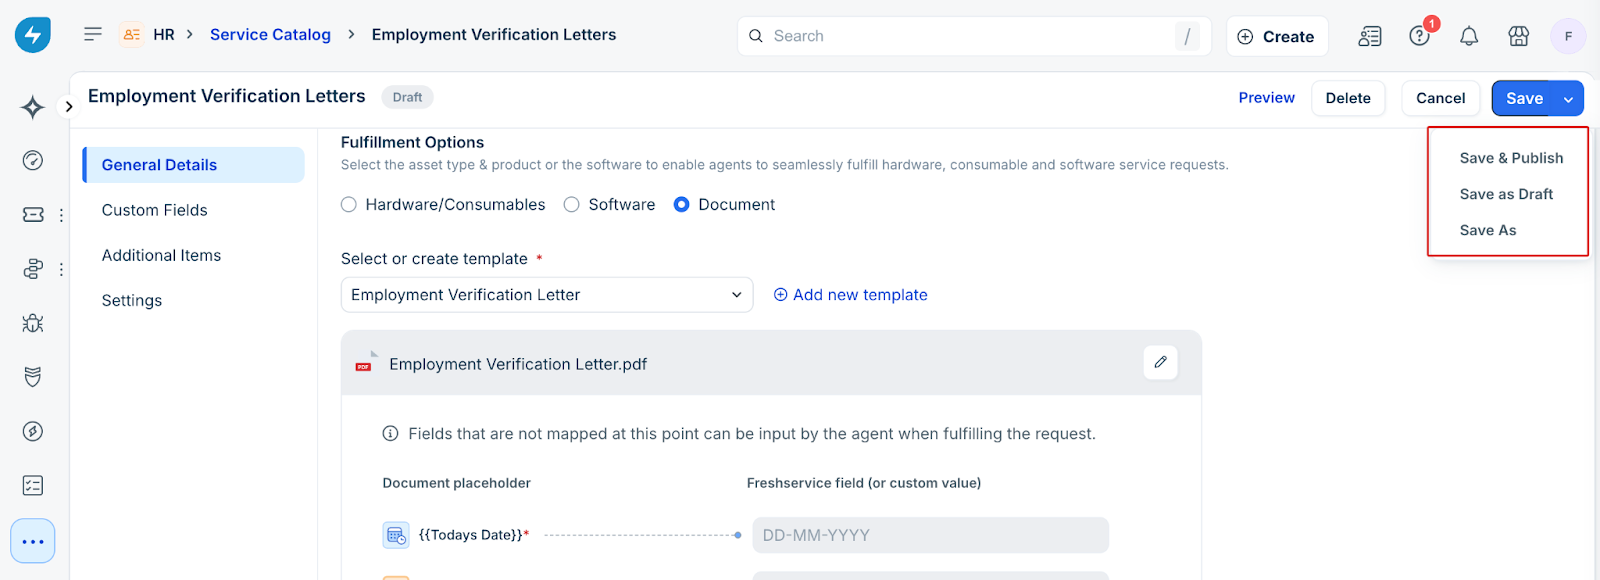
4. After mapping the placeholders, click Save to apply your changes. You can also set up the document to be sent automatically, without an agent's review.
5\. Save and publish the service request item
Generate and Share Documents From the Agent Portal
1. Open the relevant ticket from the ticket list.
2. Click Generate document to start the fulfillment process.

3. The system displays a preview of the document and automatically maps all relevant Freshservice fields to the placeholders in the template, based on service item settings.
4. Agents review the preview and enter any missing values manually. For example, fields like Job Title or Employment Start Date—which might not be available in Freshservice—can be filled in at this stage, often using information from external systems such as the HR application.
5. All placeholder fields must have values before proceeding.
6. Agents can click Update preview to see an updated version of the document with the newly entered information.

7. Optionally, agents can mark the ticket or request as fulfilled before generating the final document, aligning with other fulfillment workflows.
8. Click Generate and send to finalize the document. The system will display a default reply message that agents can customize. To modify the reply, click the dropdown arrow next to the Generate and send button.
9. The generated document is attached to the ticket and is ready to be sent to the requester. Agents can send the document directly from the ticket by clicking Send.

Note:
Others
Regenerate Documents
In many real-world scenarios, you may need to have a document re-signed by an employee or stakeholder. For example, revised offer letter, employee name or address correction, contract amendment and so on.
In any scenarios where you need to regenerate a document and collect signatures again from the stakeholder, perform the following steps:
1. On the Service Request Details screen, click the More options icon (three dots).

2. Select Regenerate Document from the dropdown menu.
3. On the confirmation window, click Regenerate. Note that this action will consume a new e-sign credit. To learn more about how e-sign credits work across different plans, see Embed e-signatures in documents.

Automate Document Generation
You can configure documents to be generated and sent automatically, if required:

Understand Template Requirements
``` Document templates are specific to a workspace. Templates created in one workspace cannot be accessed from another. Ensure you upload and manage templates in the correct workspace, especially if your organization uses multiple workspaces for different departments or business units. ```
A document template in Freshservice must meet the following requirements:
Understanding Placeholders
Dear {{Recipient Name}},
This letter is to confirm that {{Requester Name}} has been employed with us since {{Employment Start Date}} as a {{Job Title}}.
Sincerely,
{{Agent Name}}
Dear {{Recipient Name}},
I am writing to notify you that {{Requesters Name}} is seeking a visitors visa to the United States and that we are his employer. Ms {{Requester surname}} is a permanent member of staff here since {{Employment Start Date}}.
If you require any further information, please do not hesitate to contact me at {{Phone number}}.
Yours Sincerely,
{{Agent Name}}
Access the Template Library and Linked Service Items
Perform the following steps to manage document templates:
1. In your Freshservice instance, go to Admin settings in your workspace.
2. Navigate to Service Management > Document Templatesand eSignatures.

3. In the new screen that appears, all existing templates configured in the workspace are displayed as shown in the image below.
4. This screen also allows you to view the service items linked to a particular template. If there is more than one service item, click the service items link to view the complete list of linked service items, along with their statuses.

Pre-seeded Templates
Freshservice includes default templates for commonly requested documents based on the workspace type (for example, HR, IT, Finance, Legal, Facilities). These templates are:
Support Portal Template Library
Through the support portal, you can also access a shareddocument templates library containing reusable templates from other departments.
``` Look for the Recommended use cases panel on the right side of the support portal to explore and download templates by department. ```

Fields Available for Mapping
The following is a list of available fields for mapping.
| Tickets | - Ticket ID<br> <br>- Subject<br> <br>- Description<br> <br>- Ticket URL<br> <br>- Public Ticket URL<br> <br>- Portal specific ticket URL<br> <br>- Due By Time<br> <br>- Tags<br> <br>- Last public comment<br> <br>- Group Name<br> <br>- Agent Name<br> <br>- Agent Email<br> <br>- Ticket Department<br> <br>- Workspace<br> <br>- Approval URL<br> <br>- Portal specific approval URL<br> <br>- Approval Comments<br> <br>- Last Approver Name<br> <br>- Ticket ID (numeric)<br> <br>- Department Head<br> <br>- Associated Asset IDs<br> <br>- Associated Asset Names<br> <br>- Total Billable Hours<br> <br>- Total Non-Billable Hours<br> <br>- Acknowledged By Name |
| Ticket Fields | - Status<br> <br>- Priority<br> <br>- Source<br> <br>- Ticket Type<br> <br>- Urgency<br> <br>- Impact<br> <br>- Category |
| Requester | - Requester Name<br> <br>- Requester first name<br> <br>- Requester last name<br> <br>- Requester Email<br> <br>- Requester phone number<br> <br>- Requester address<br> <br>- Requester Location<br> <br>- Reporting Manager |
| Requested For | - Requested For Name<br> <br>- Requested For first name<br> <br>- Requested For last name<br> <br>- Requested For Email<br> <br>- Requested For phone number<br> <br>- Requested For address<br> <br>- Requested For Location<br> <br>- Reporting Manager |
| Service Desk | - Service Desk name |
| Service Item | - Requester Name<br> <br>- Requester first Name<br> <br>- Requester last Name<br> <br>- Requested for<br> <br>- Item Name<br> <br>- Item category<br> <br>- Item Cost |
| System Fields | - Current Date |
| Custom Fields (for this example only!) | - Bank Name<br> <br>- Bank Address line 1<br> <br>- Bank Address line 2<br> <br>- Bank Address line 3<br> <br>- Bank Address line 4 |
Languages and Fonts Supported in Document Files
Freshservice supports a predefined set of languages and fonts for .docx files that are uploaded as Document templates.