Last updated: 2025-07-16
Agents can now set their availability to receive tickets (from their profile menu at the user level) with either of the following two options:
_Note:_ _The Work Schedule module is now available across all Freshservice plans, giving agents greater control over how their availability is managed. Work schedules indicate an agent's work days and hours. See Work Schedule__for more information._
Time-Off Made Easy: Agents can also manage their time-off directly from their avatar menu under _Manage Out-of-Office Hours_. When time-off is logged, the system automatically adjusts agent availability ensuring that round-robin ticket assignments always reflect real availability. Agents can view, add, edit, or delete the upcoming, in progress, or past time-off entries.
_Note:__When automatic ticket assignment is turned on for a group, tickets are assigned to agents of a group in a round-robin order to ensure proper distribution. See Auto-assigning Tickets to Agents in a Group (Round Robin)__for more information._
.
IT service desk supervisors with appropriate permissions also have the ability to manually adjust agent availability.
Manage agent availability
To manage agent availability to receive tickets:
1. Log in to your Freshservice account.
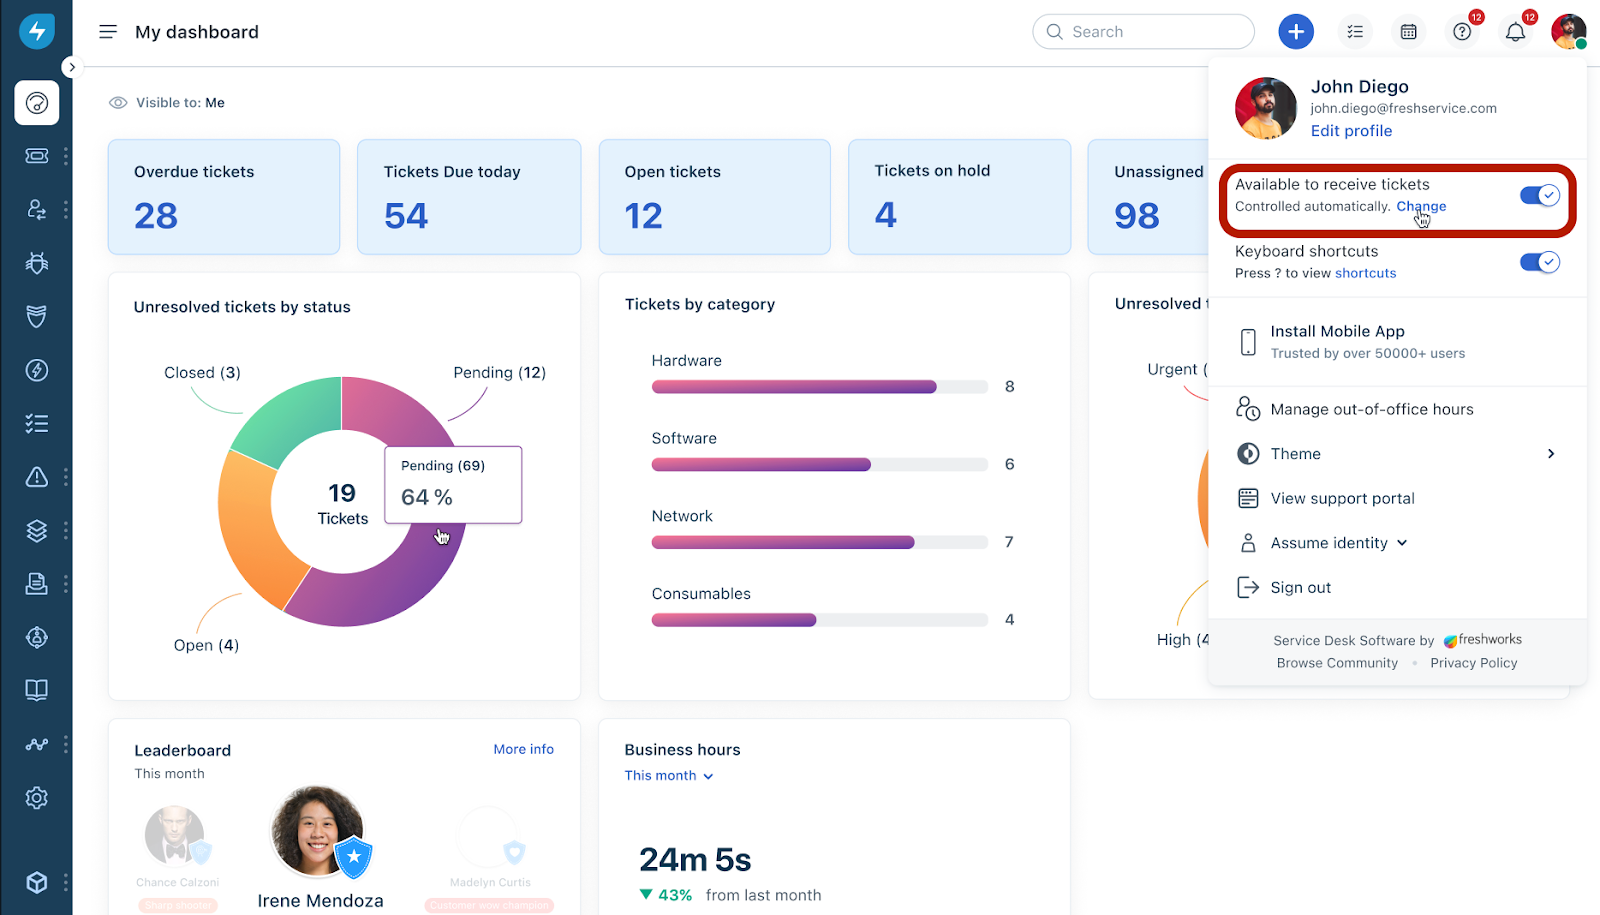
2. Click your profile icon on the top right corner, and ensure that the Available to receive tickets toggle is enabled.
3. Click Change next to Controlled automatically.
The Manage availability dialog opens.
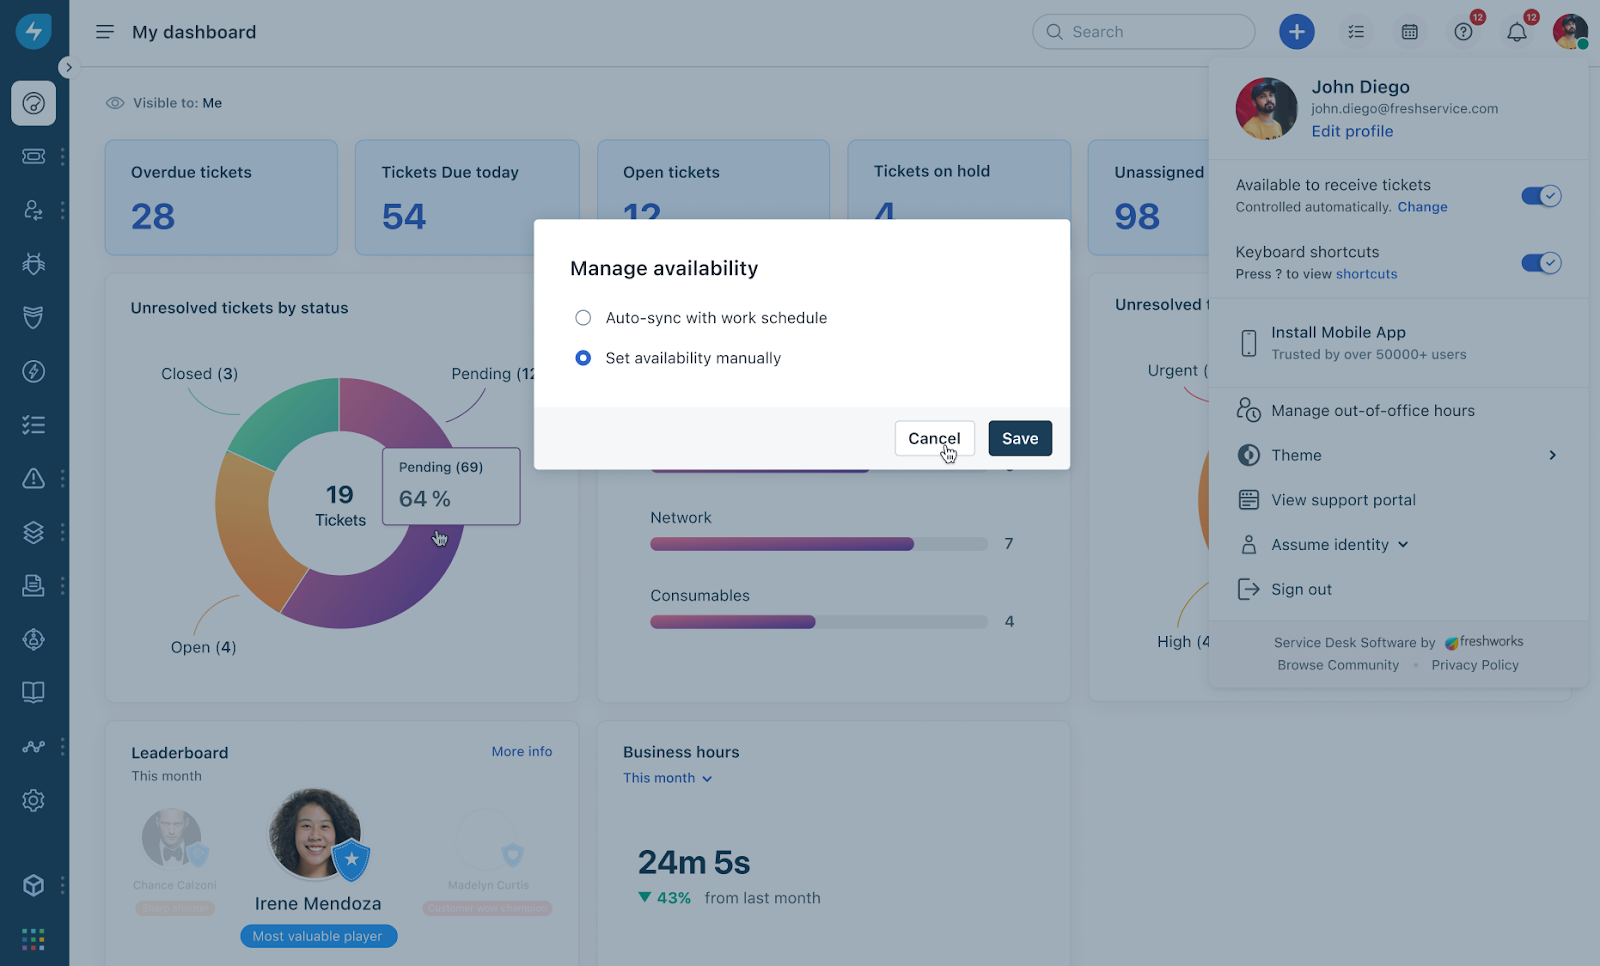
4. Select the required option, and click Save.
_Note:_
Add time-off entries
To add time-off entries:
1. Log in to your Freshservice account.
2. Click your profile icon on the top right corner, and select Manage out-of-office hours.

The Manage out-of-office hours screen opens on the right side of the page.
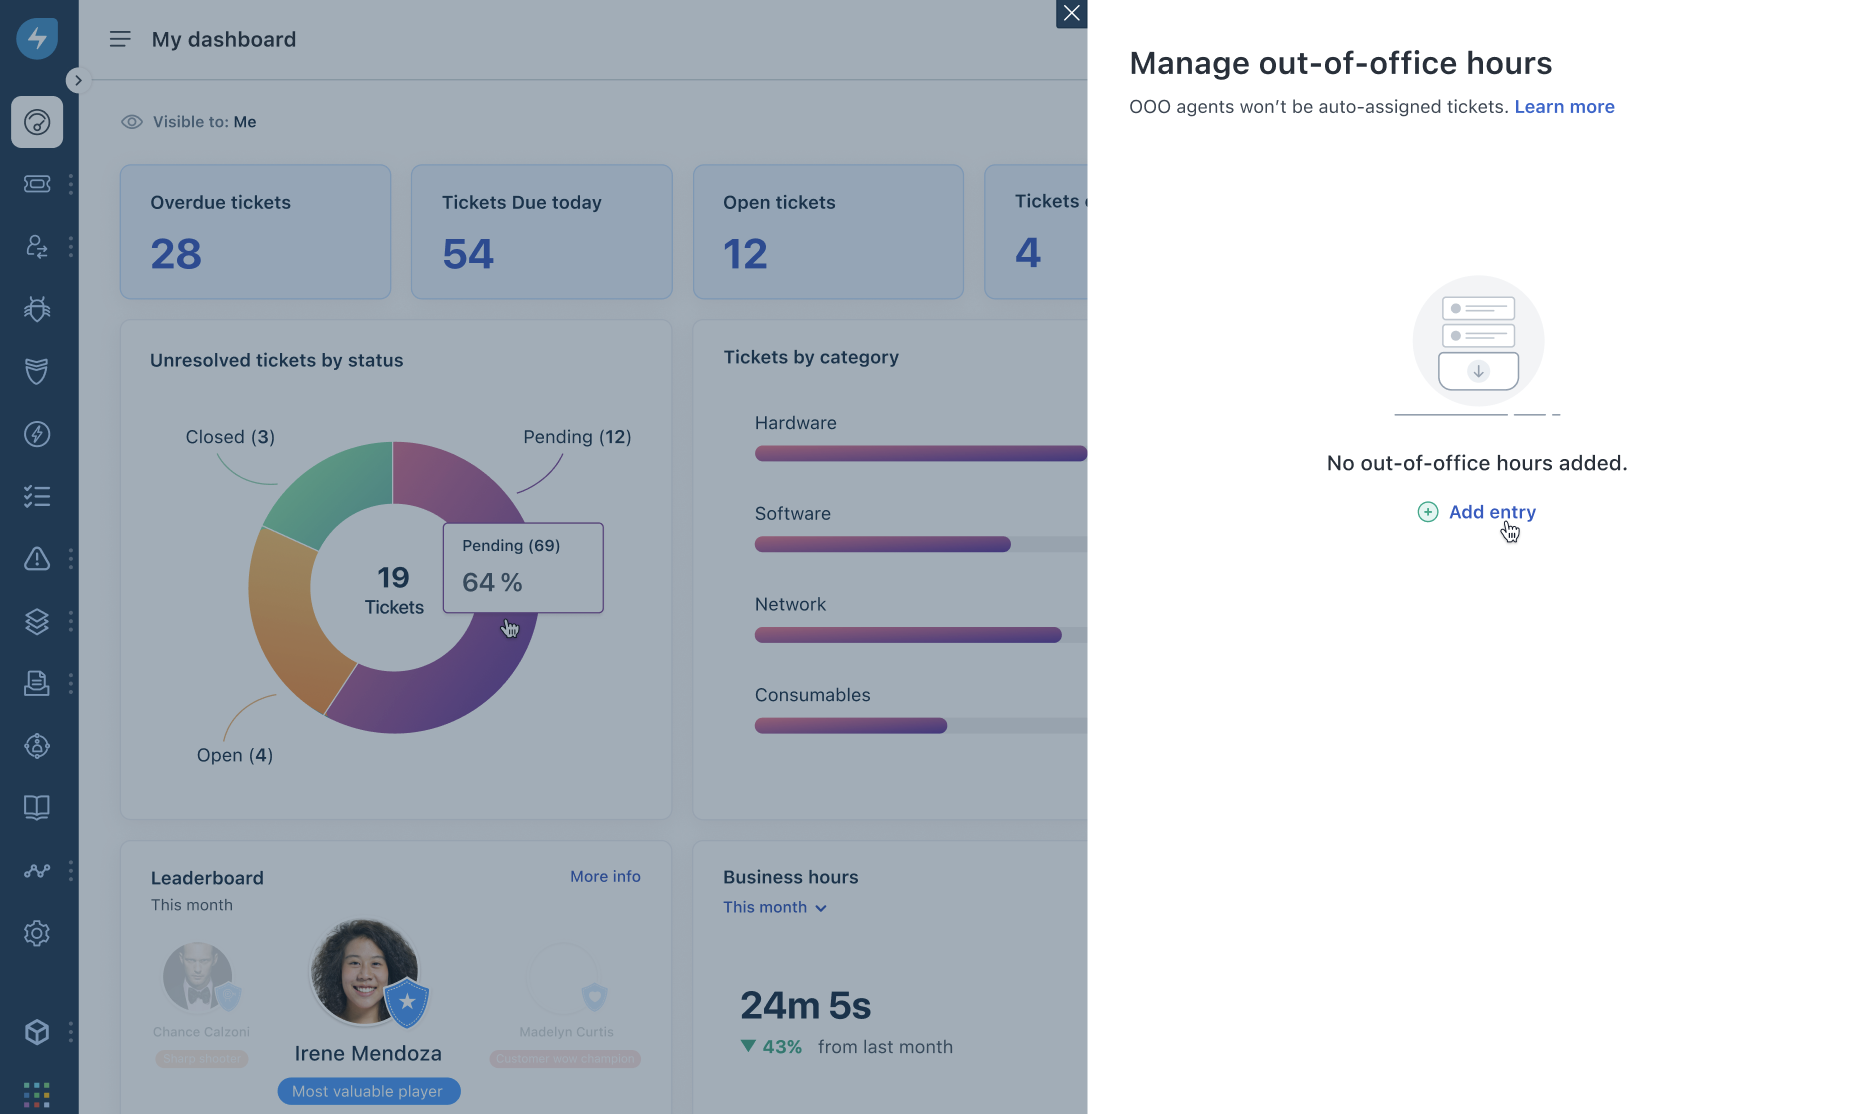
3. Click Add entry. The Addout-of-office hours screen opens.
4. Select the relevant date and time for a new entry from the From and To calendar options.
5. If you want to add an entry for another agent, select the Request for someone else checkbox. Then, search and select the agent.
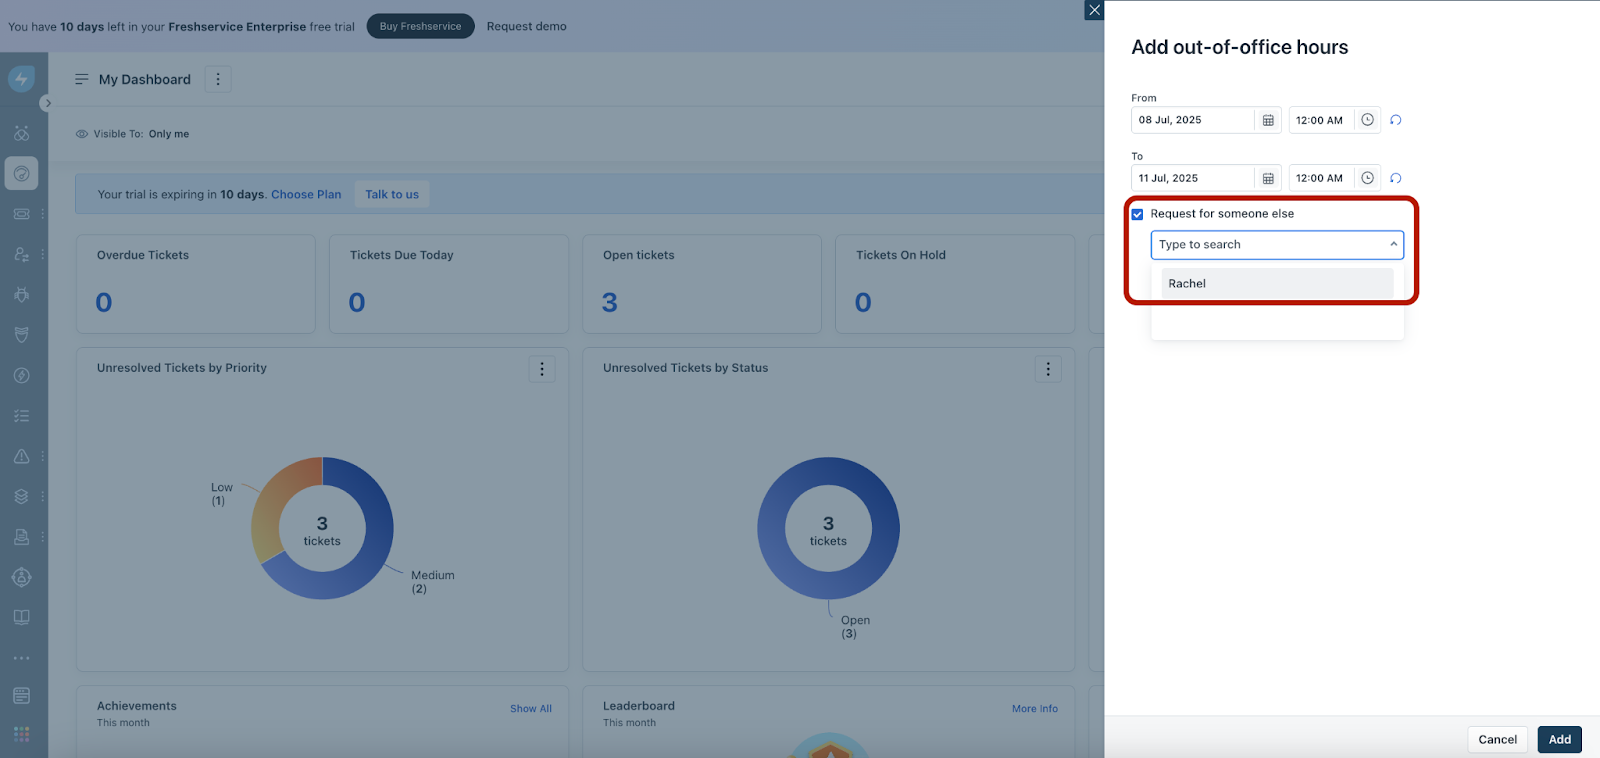
6. Click Add.
Edit or delete time-off entries
To edit or delete time-off entries:
1. Log in to your Freshservice account.
2. Click your profile icon on the top right corner, and select Manage out-of-office hours.
All your out-of-office entries are shown under the Recent entries section with any of the following statuses: Past, Upcoming, or In progress.
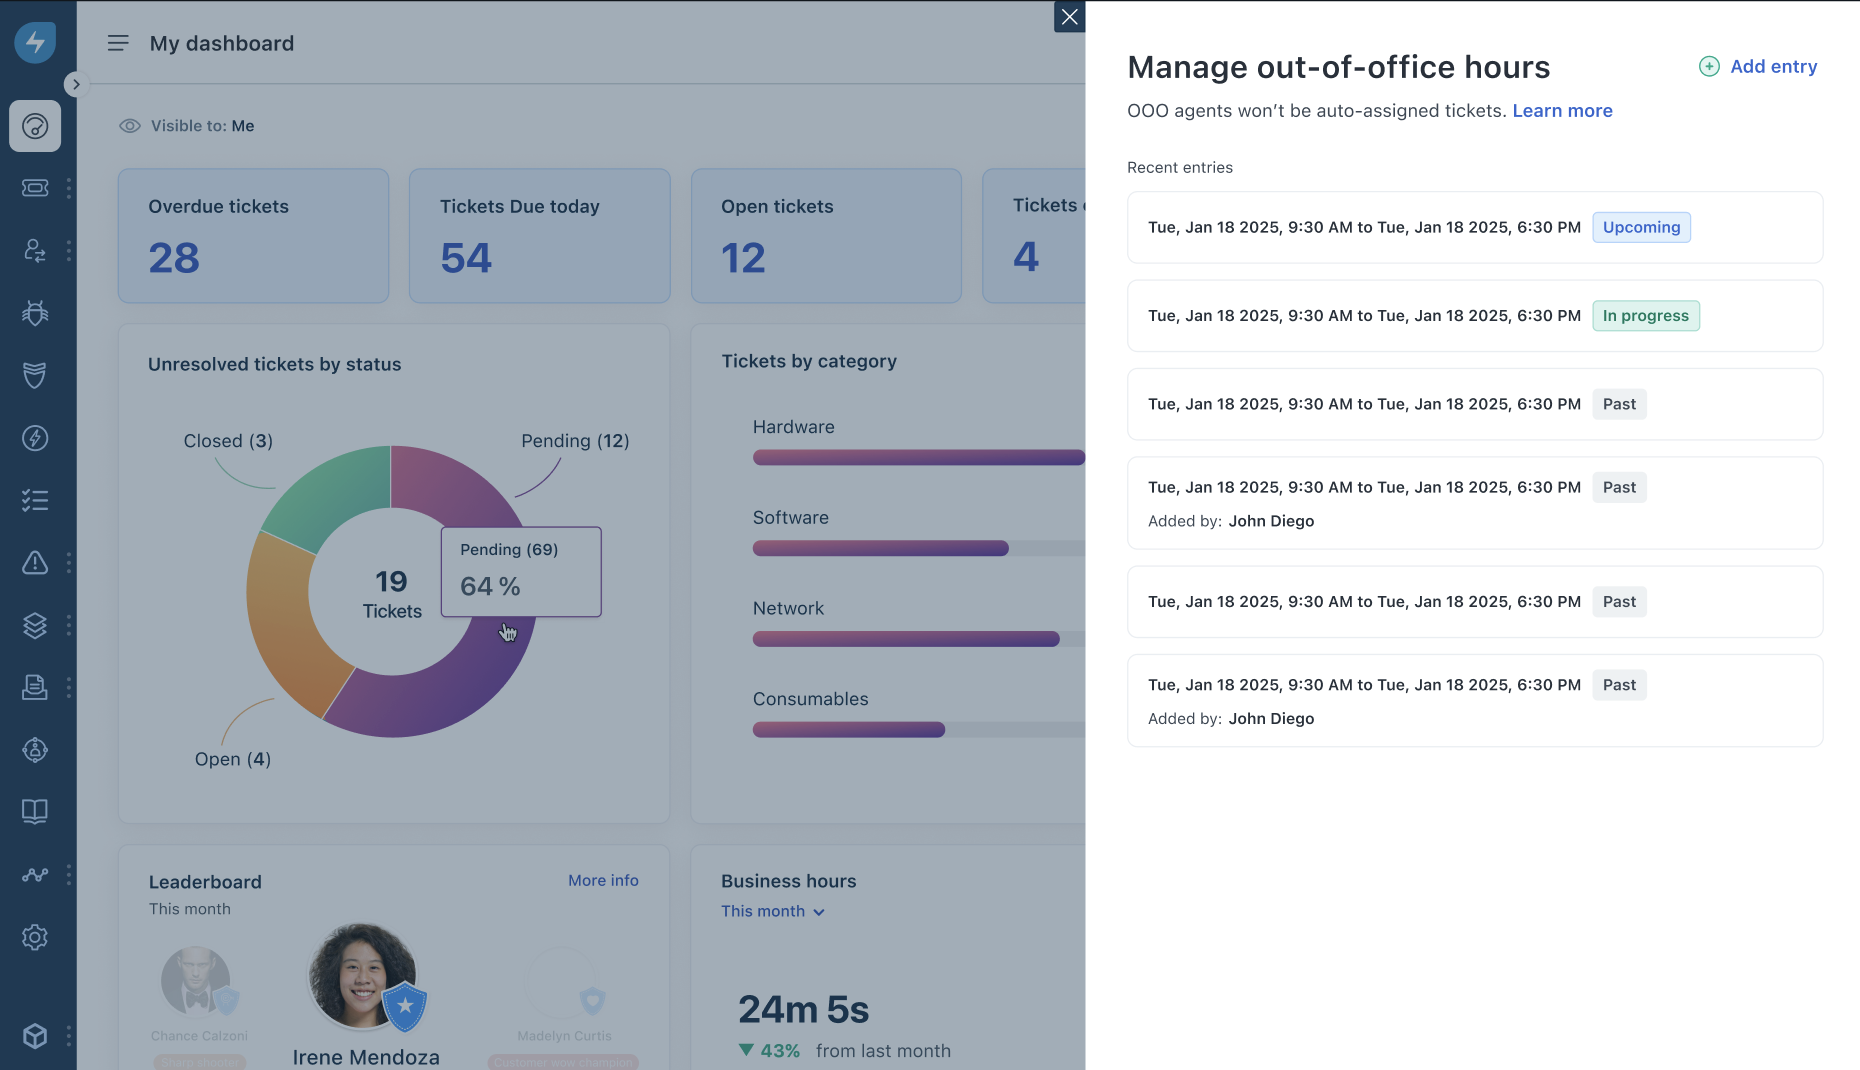
3. To edit an entry, click the ellipsis (3-dots) icon next to it, and click Edit.
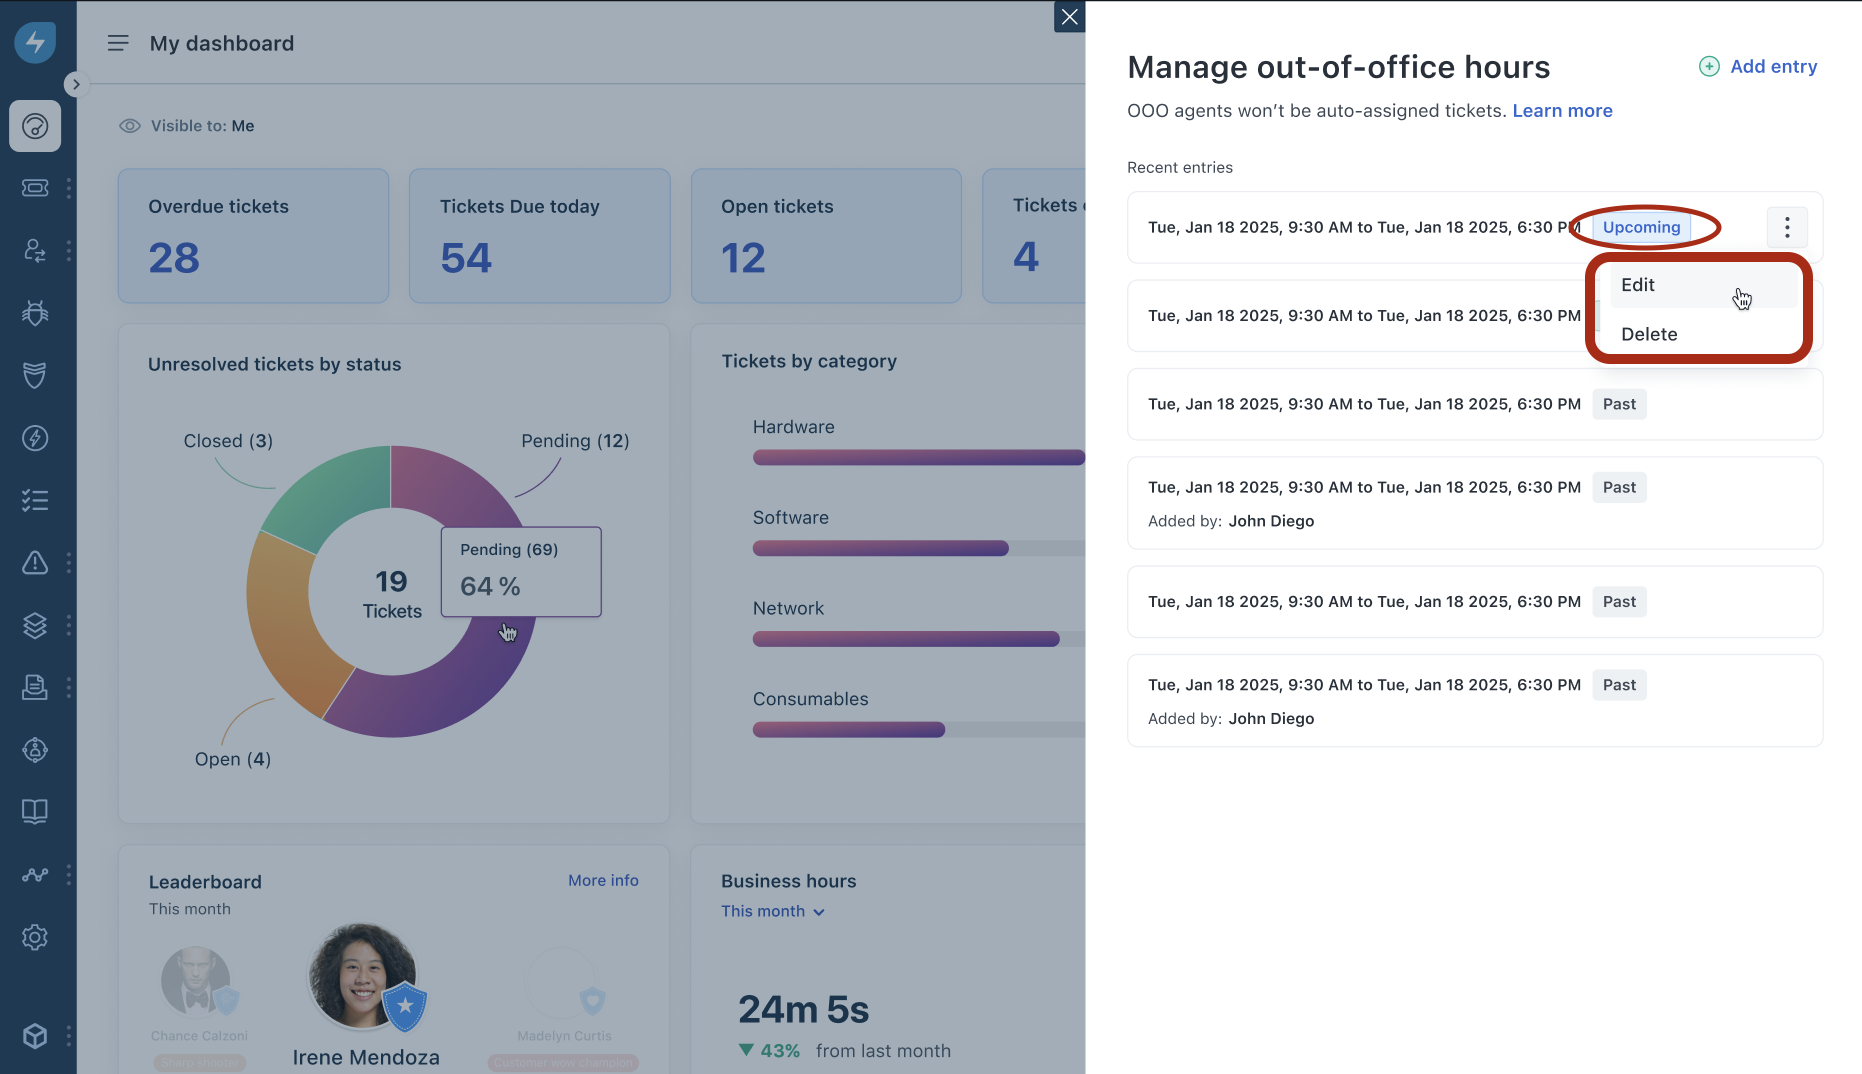
The Editout-of-office hours screen opens.
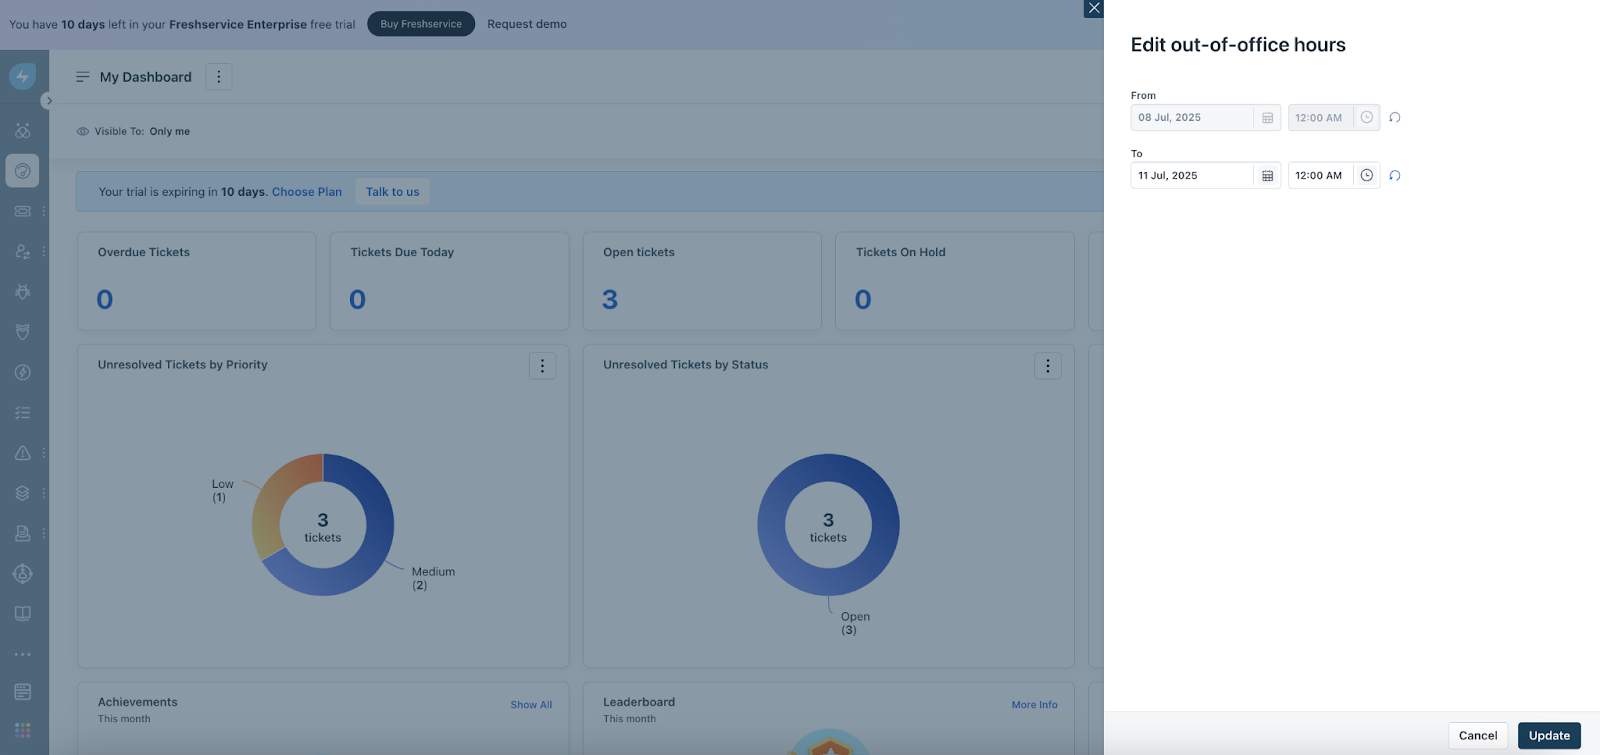
4. Make the necessary changes and click Update.
5. To delete an entry, click the ellipsis icon next to it, and click Delete.
_Note:__‘In progress’ out-of-office entries cannot be deleted._
Create time-off request reports
To create reports on agent time-off requests:
1. Log in to your Freshservice account.
2. Go to Reporting > Analytics.
3. Click New Report.
4. Drag and drop any widget to create the report (for example, _Chart_).
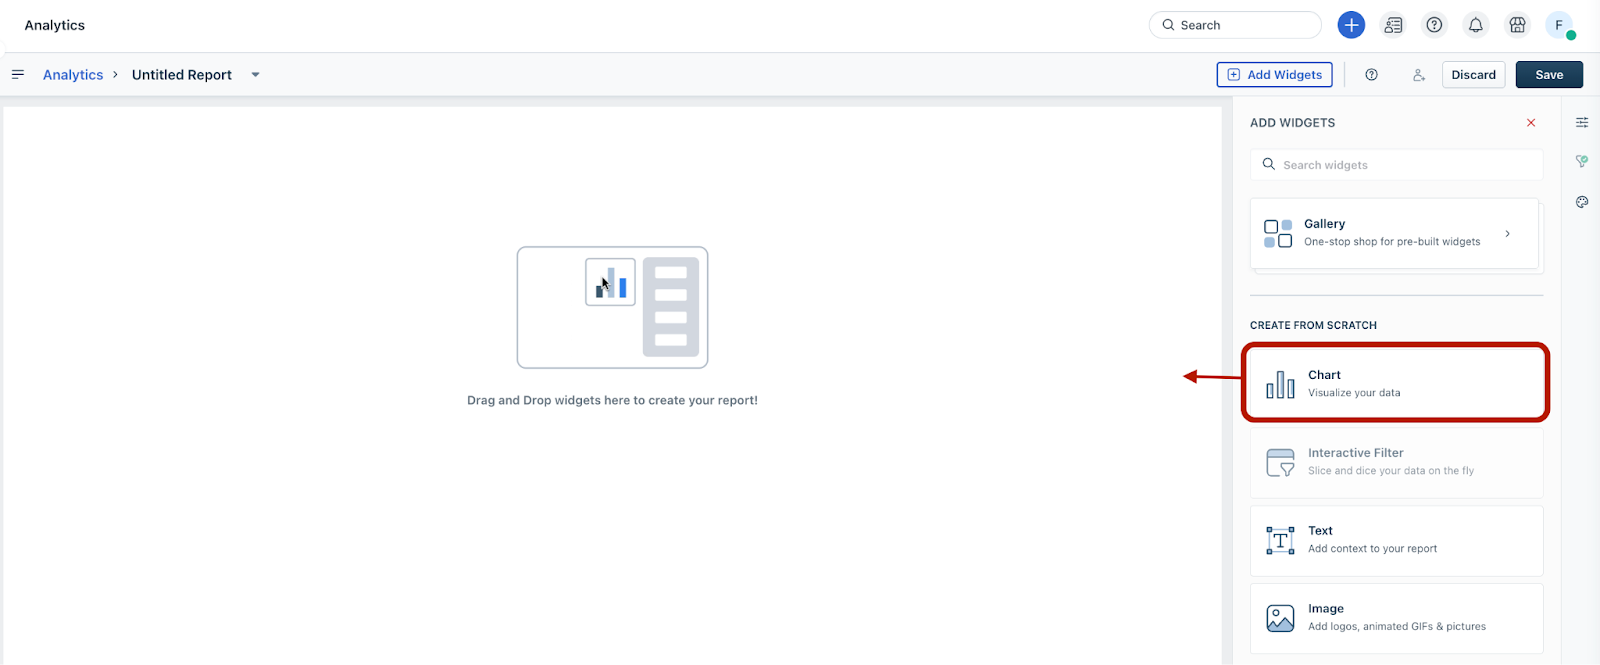
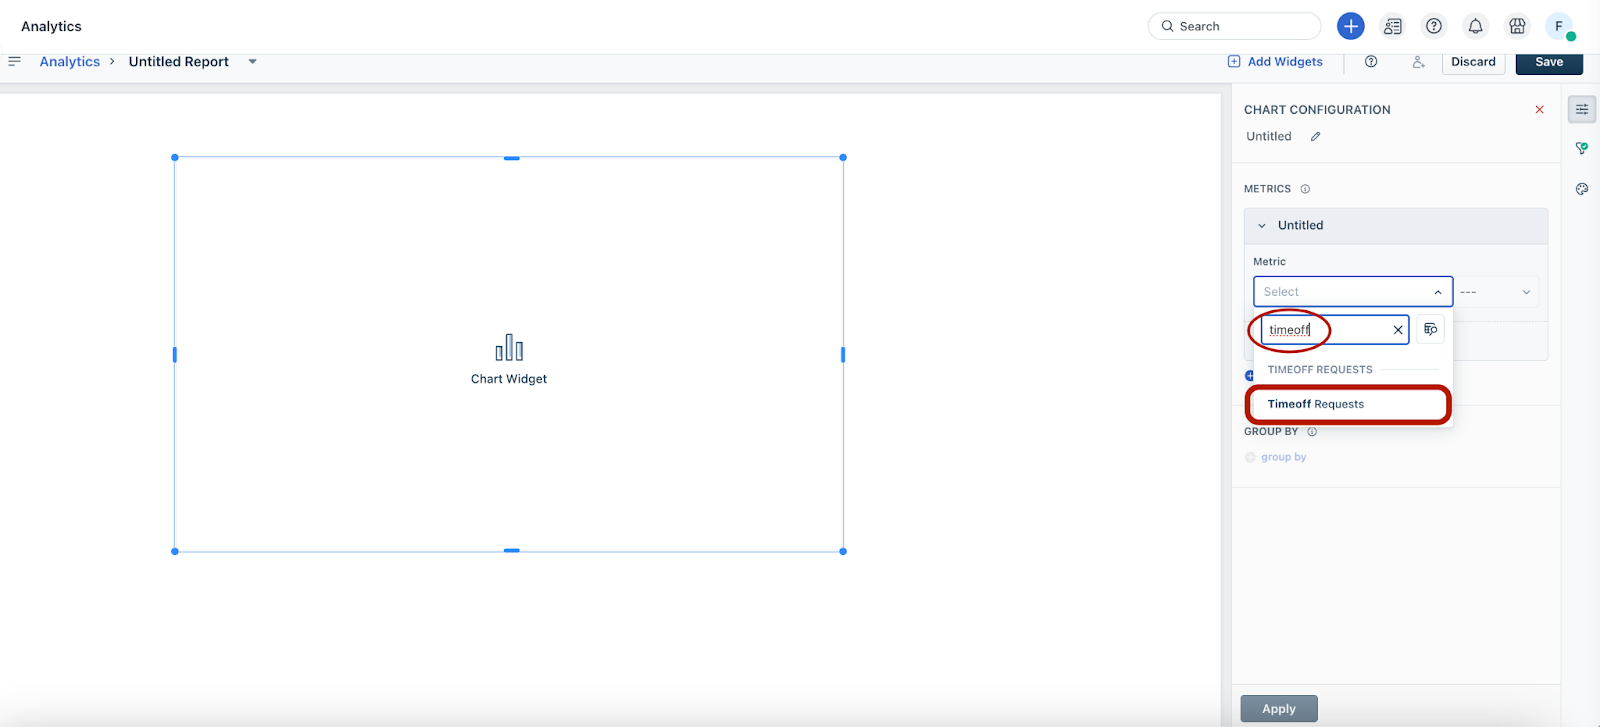
5. Search and select the Timeoff Requests metric (as shown below).
6. Click Apply.
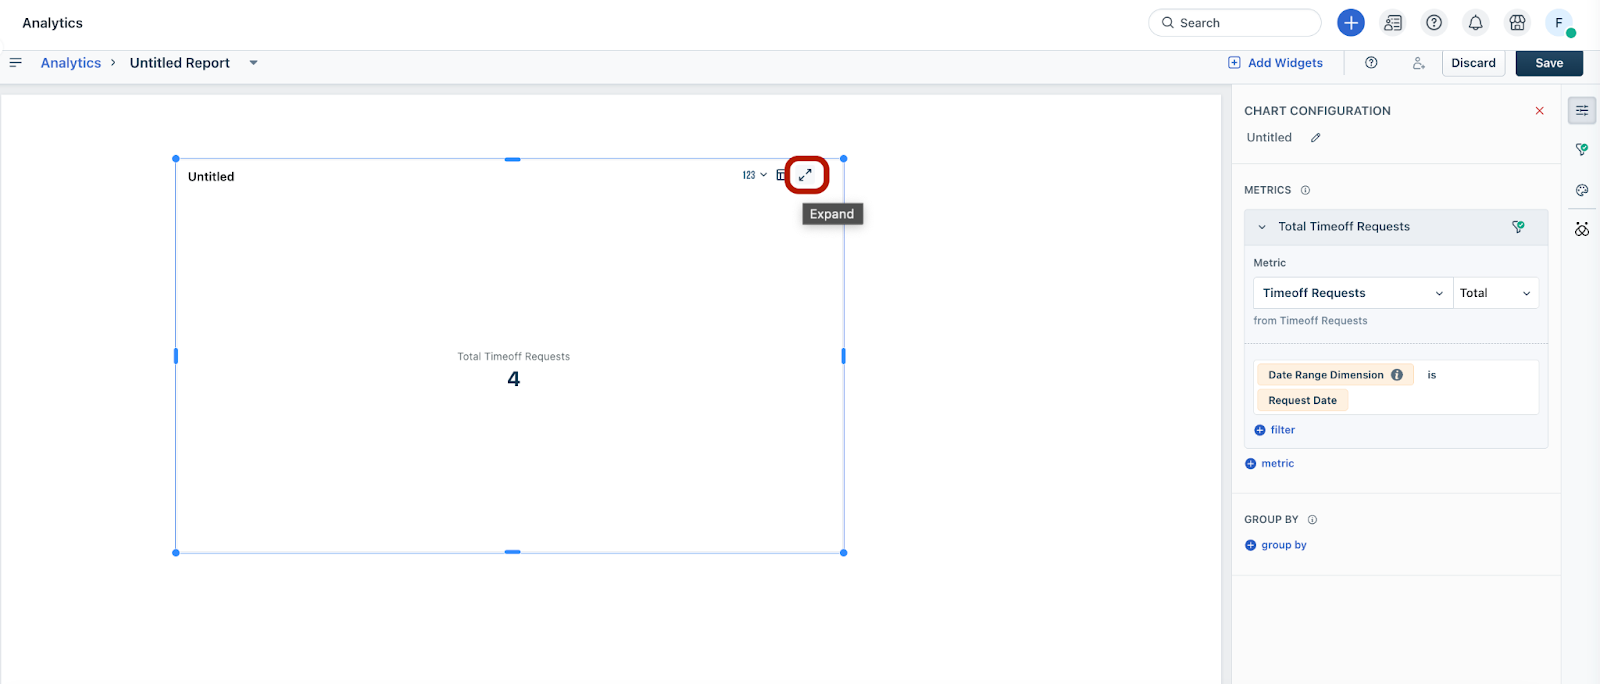
7. Then, click the ‘Expand’ icon in the widget.
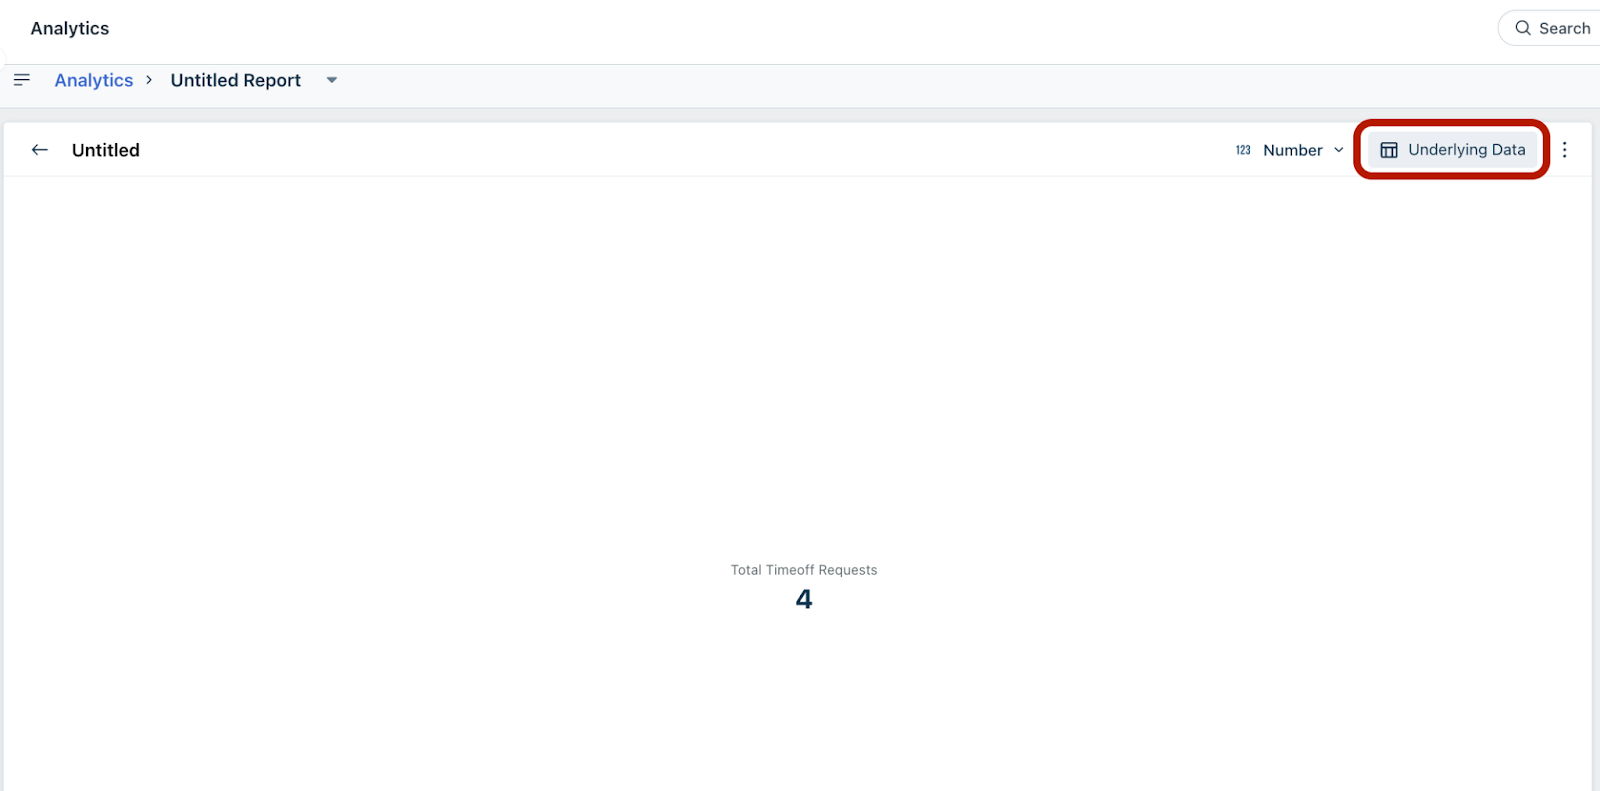
8. In the expanded chart view, click Underlying Data.
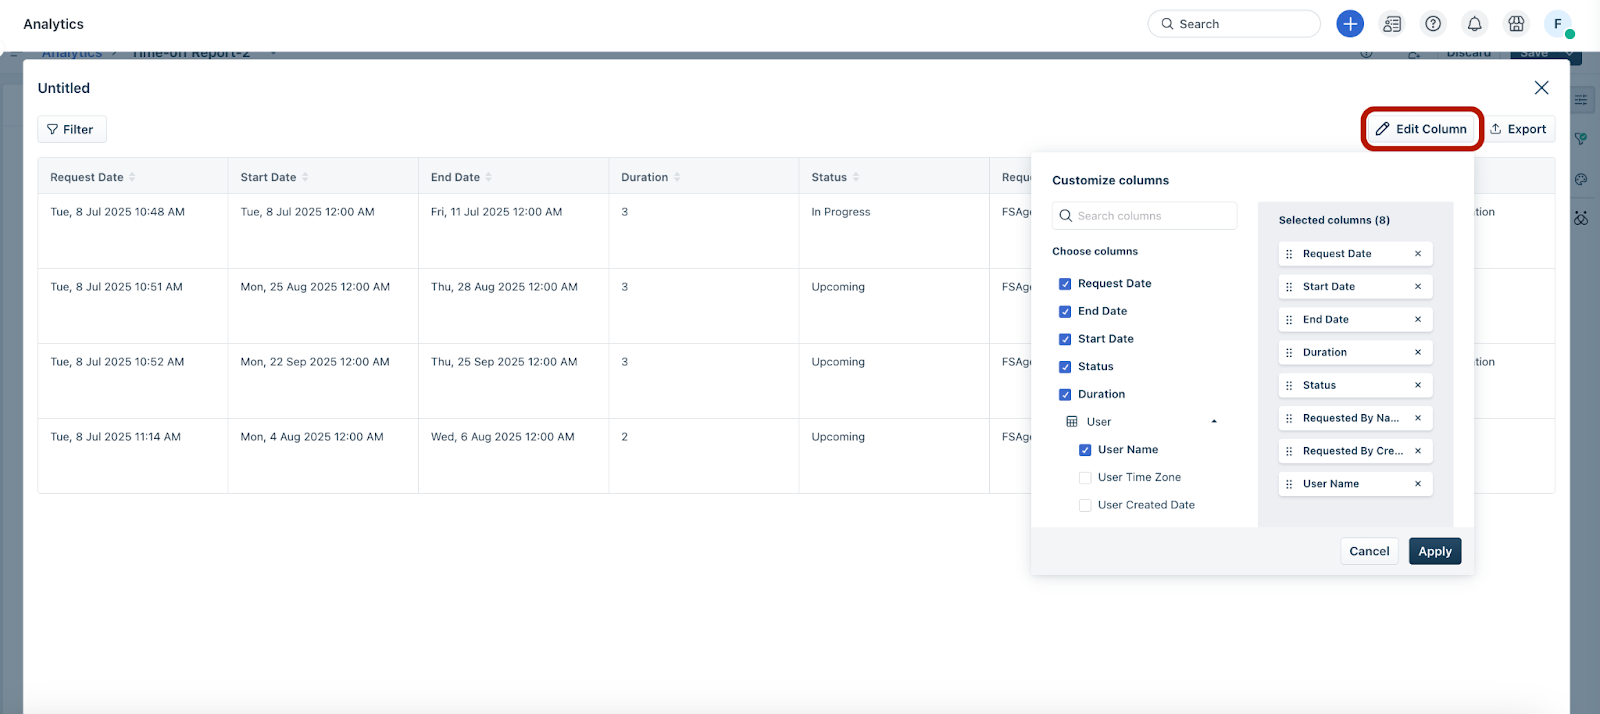
9. Then, click Edit Column.
10. Select the required columns (for example, _Request Date_ _, Start Date, End Date, Duration, Status, Requested By Name, Requested By Created Date,_ and_User Name_).
11. Click Apply.
All time-off requests data is displayed, based on the selected columns.
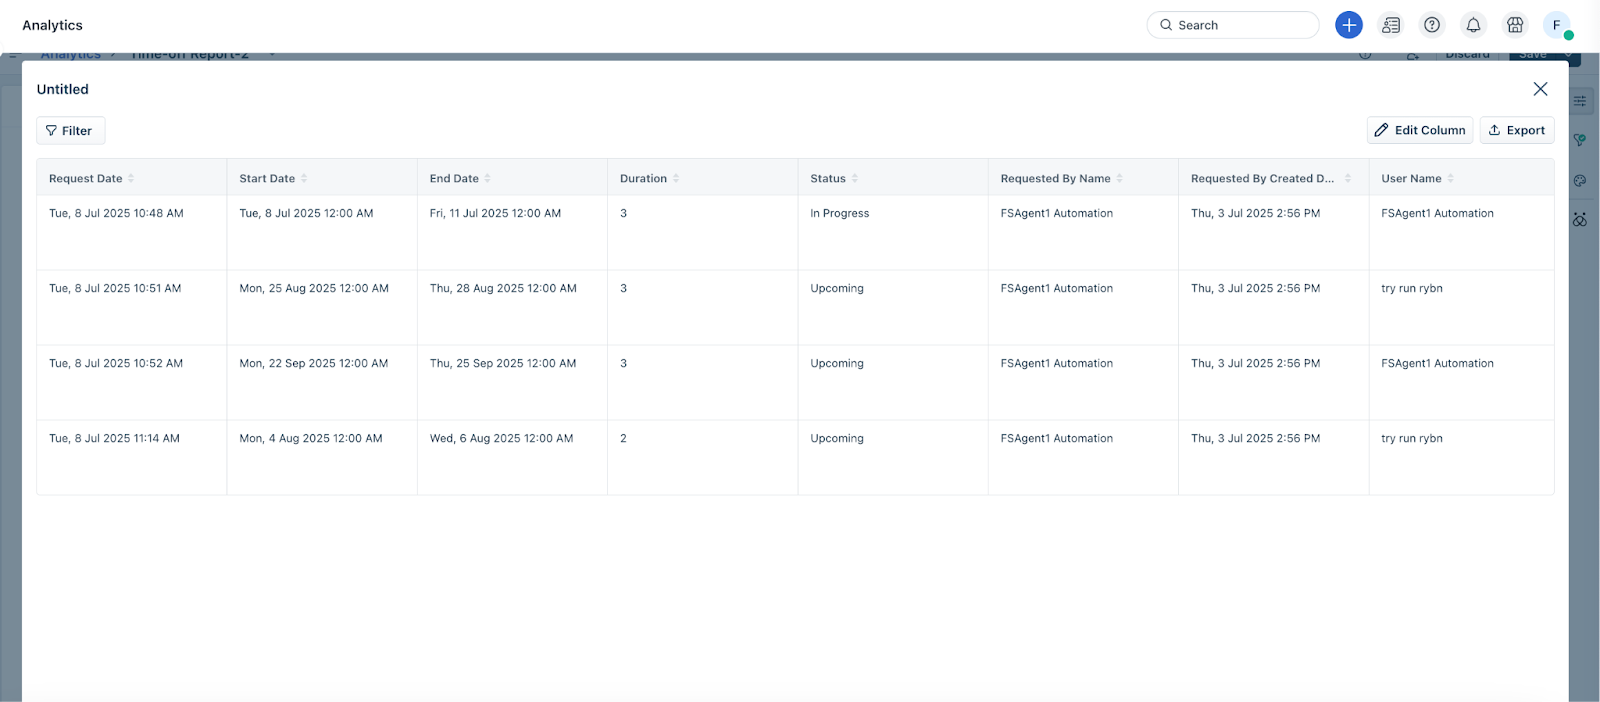
12. Save the report.
_Note:_