Last updated: 2025-10-30
Freshservice integration with Riverbed Aternity enables employee experience optimization through continuous monitoring, analysis, and improvement of IT applications, endpoints, and security performance.
Further, this integration empowers service desk agents to gain real-time visibility into IT applications and device health, and trigger remediations directly within Freshservice tickets.
In this article:
About the integration
This section provides an overview on the key benefits, focus areas, and scope of integration.
Key benefits
The _Riverbed Aternity for Freshservice_ app integration enables:
Focus areas
The Riverbed Aternity digital employee experience (DEX) and Freshservice integration is built for proactive IT service management, which ensures endpoint issues are automatically captured and addressed. This aligns with two critical pillars of DEX:
Scope of integration
The following table highlights the scope of incident management and reporting, based on types of devices, operating system, and supported applications.
| Types of Devices (Operating System) | Types of Applications supported |
| \- Windows<br>\- MAC<br>\- Windows Virtual Devices (VDI, Citrix, AVD, AWS) | Desktop applications:<br>\- Windows<br>\- MAC<br>\- Windows Virtual Devices<br>Web applications:<br>\- Chrome<br>\- Microsoft Edge<br>\- Internet Explorer<br>\- Firefox |
Prerequisites for integration
Ensure you have the following, as part of the prerequisites for integration:
How to install the app
For proactive support, you need to install both the _Riverbed Aternity for Freshservice_ app (installed on your Freshservice instance) and _Freshservice Help Desk Integration_ app (installed on your Aternity instance).
How to install Riverbed Aternity for Freshservice app
To install the Riverbed Aternity for Freshservice app:
1. Log in to your Freshservice account.
2. Go to Admin > Automation & Productivity > Extensibility > Apps.
3. Or, click the Marketplace Apps icon on the top-right corner, and select Marketplace Apps.
4. Search and select the Riverbed Aternity for Freshservice app using the Search apps option.
5. Click Install on the installation page. The Configuration page opens.
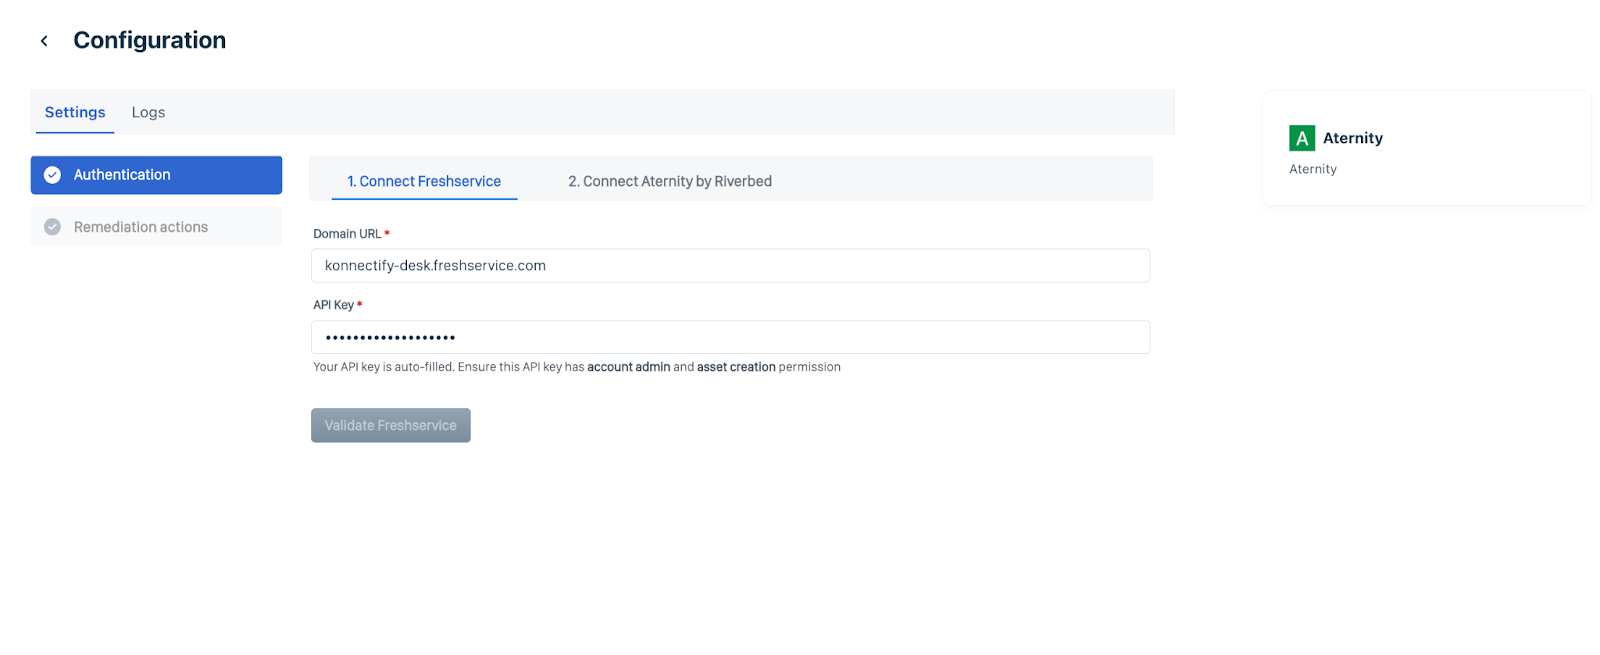
6. In the Authentication section, validate your Freshservice and Aternity credentials in the respective tabs.
7. On the Connect Freshservice tab, the Domain URL and API key fields are auto-populated.
_Note:__Ensure that your Freshservice API key is enabled before initiating the installation._
2. Click Validate Freshservice to validate the Freshserviceconnection.
3. On the Connect Aternity by Riverbed tab, enter the Riverbed app URL, Username, Password, Remediation Username, and Remediation Password details.
_Note:__For this integration, use a newly created 'local account' username. Do not use an employee or user-specific username._
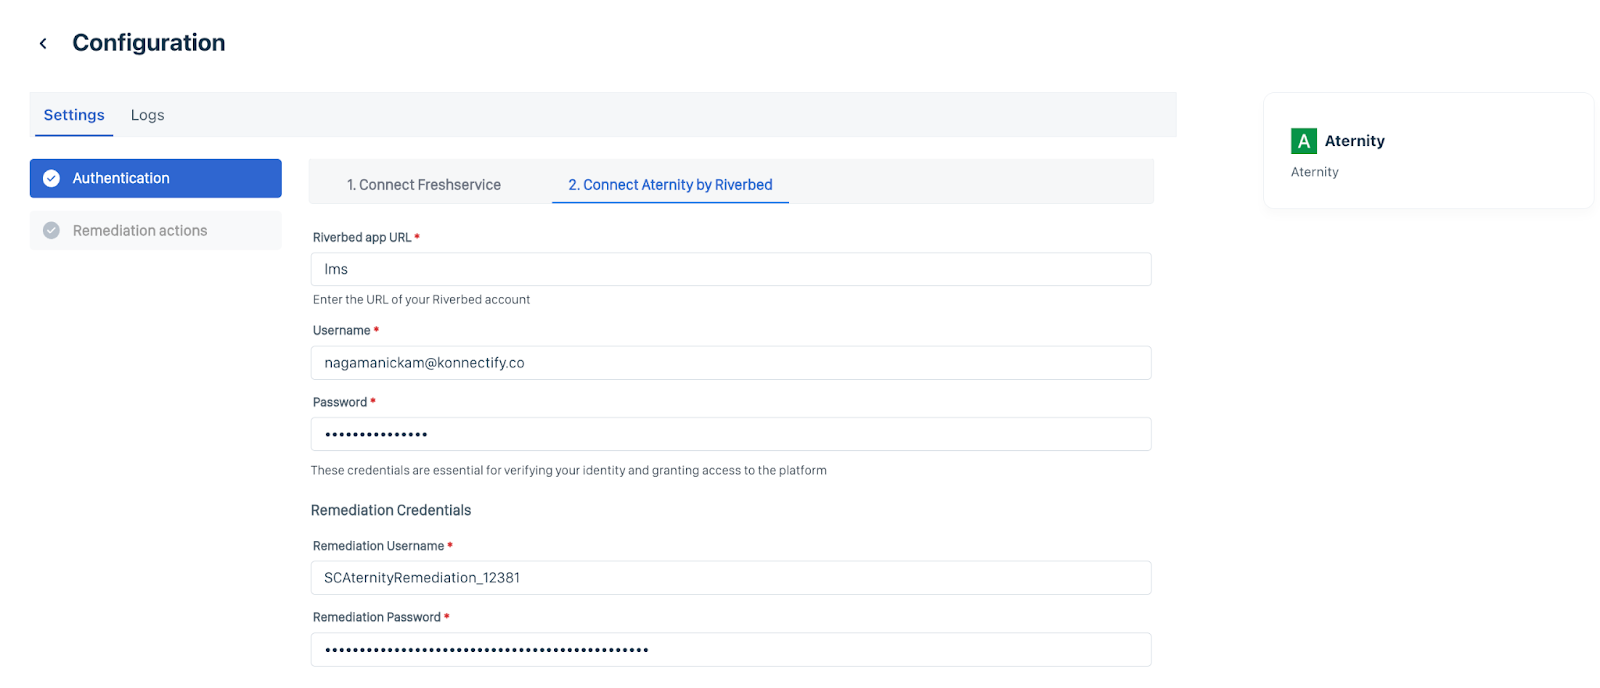
4. Click Validate Aternity to validate the Aternityconnection.
7. In the Remediation actions section, enable or disable the required remediation actions.
_Note:_
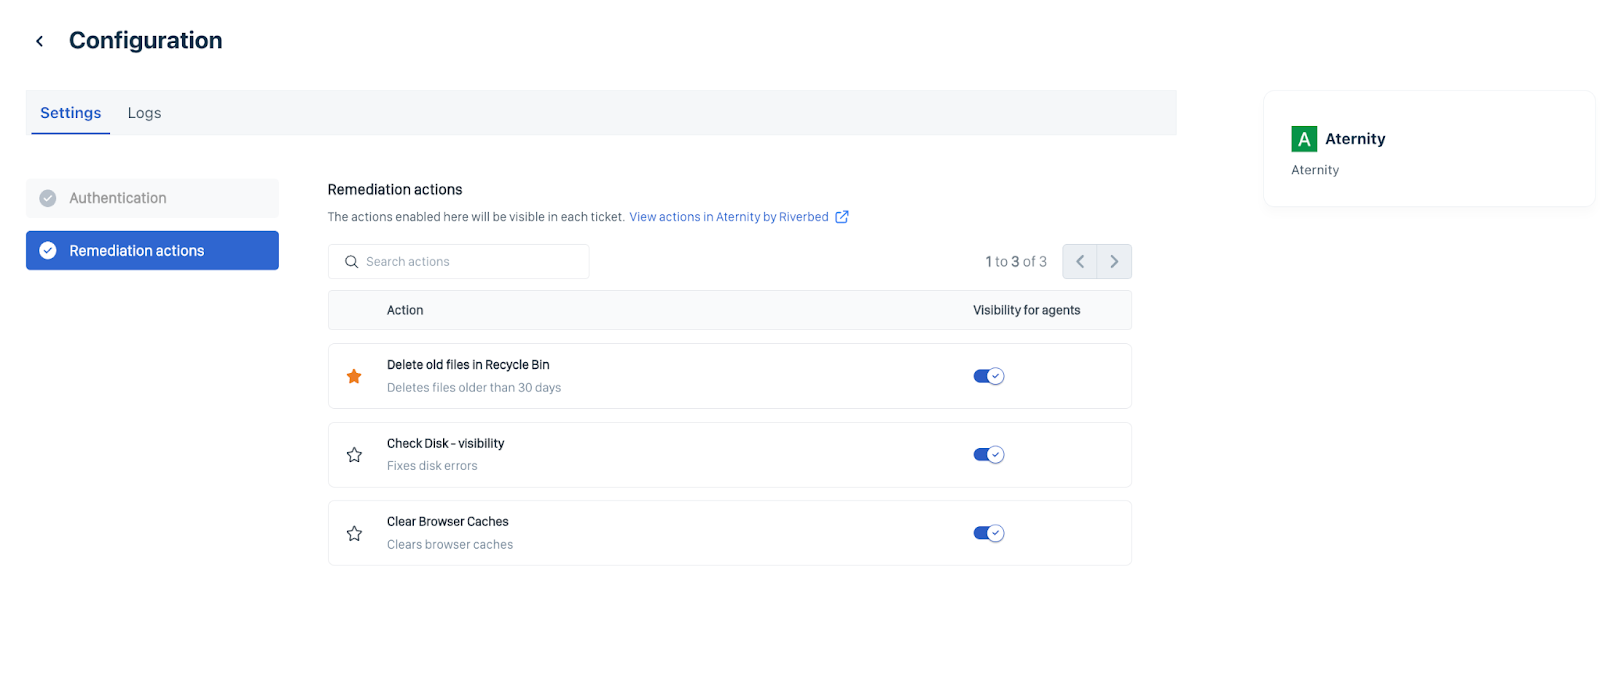
8. Click Install.
How to install Freshservice Help Desk Integration app
See Riverbed Aternity product documentation for information on installing the Freshservice Help Desk Integration app.
How the integration works
The Riverbed Aternity DEX-Freshservice integration works effectively in the following ways:
Devices metrics and health
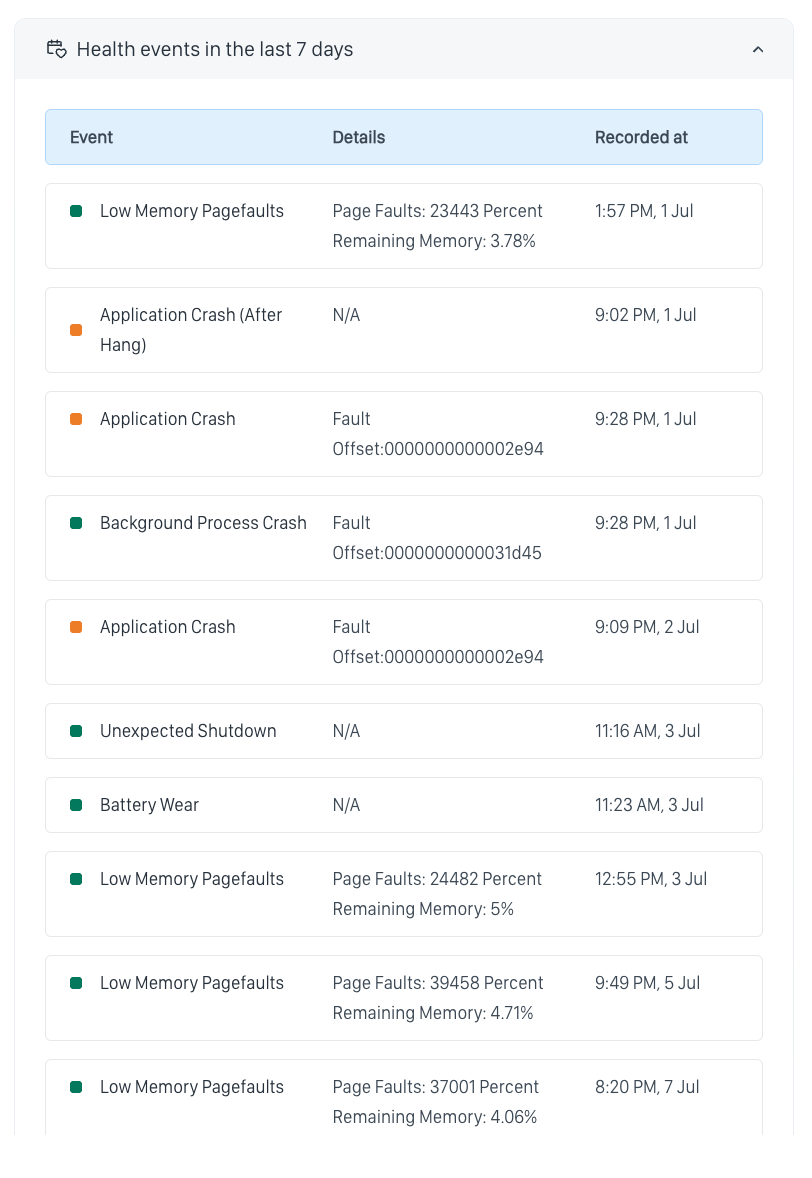
The following figures highlight the scope of incident management and reporting, based on device metrics, health statistics, and health events.
_Figure 1: Sample device metrics_
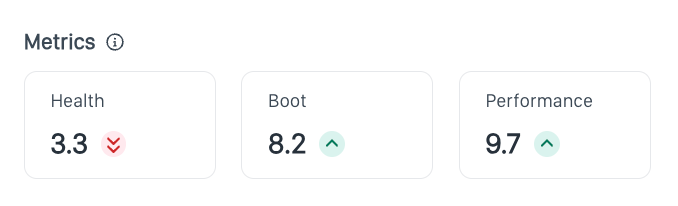
_Figure 2: Sample health stats_
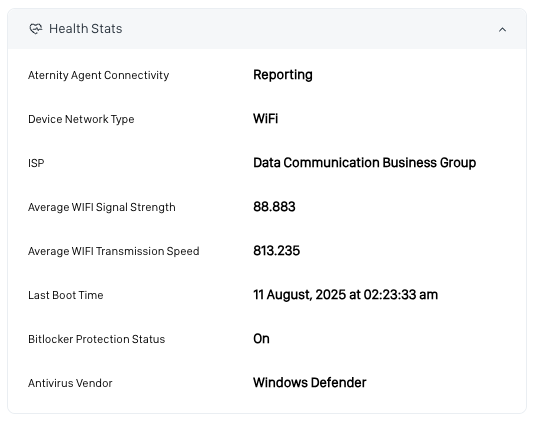
_Figure 3: Sample health events_
Remediation examples
Some of the remediation examples related to IT applications, endpoints, or security incidents identified and flagged by the Riverbed Aternity DEX-Freshservice integration are as follows:
How to add device and run remediations
To add device to a service desk ticket and run remediations:
1. Log in to your Freshservice account.
2. Go to Tickets > List.
3. Click any ticket Subject to open the ticket Details page.
_Note:__The Riverbed Aternity for Freshservice app is displayed as a widget on the right side of the ticket details page._

4. Click Add device.
_Note:_ _You can add only one device to a ticket, at any given time._
5. Search and select a device with the requester username.
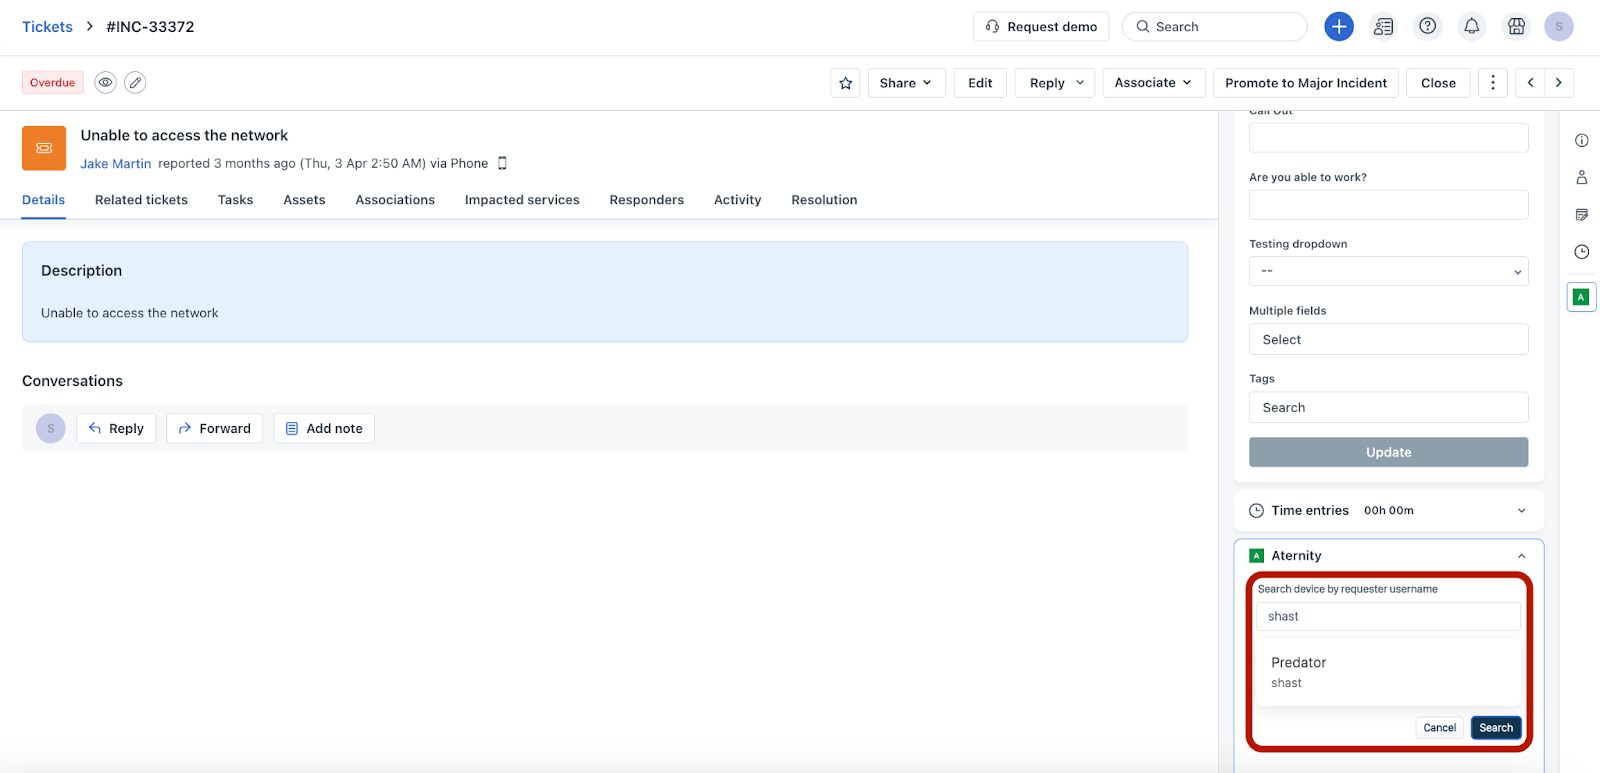
The device is added to the Aternity widget showing you a list of remediation actions for the device.
_Note:_ _All remediations shown in this widget are configured within your IT Service Desk. If a remediation is not visible, this means it's not configured in your service desk dashboard. Ensure the 'Include this in the IT Service Desk dashboard' option is enabled for each remediation within Aternity._
6. Click the device name in the Aternity widget to view device metrics, health statistics, and health events.
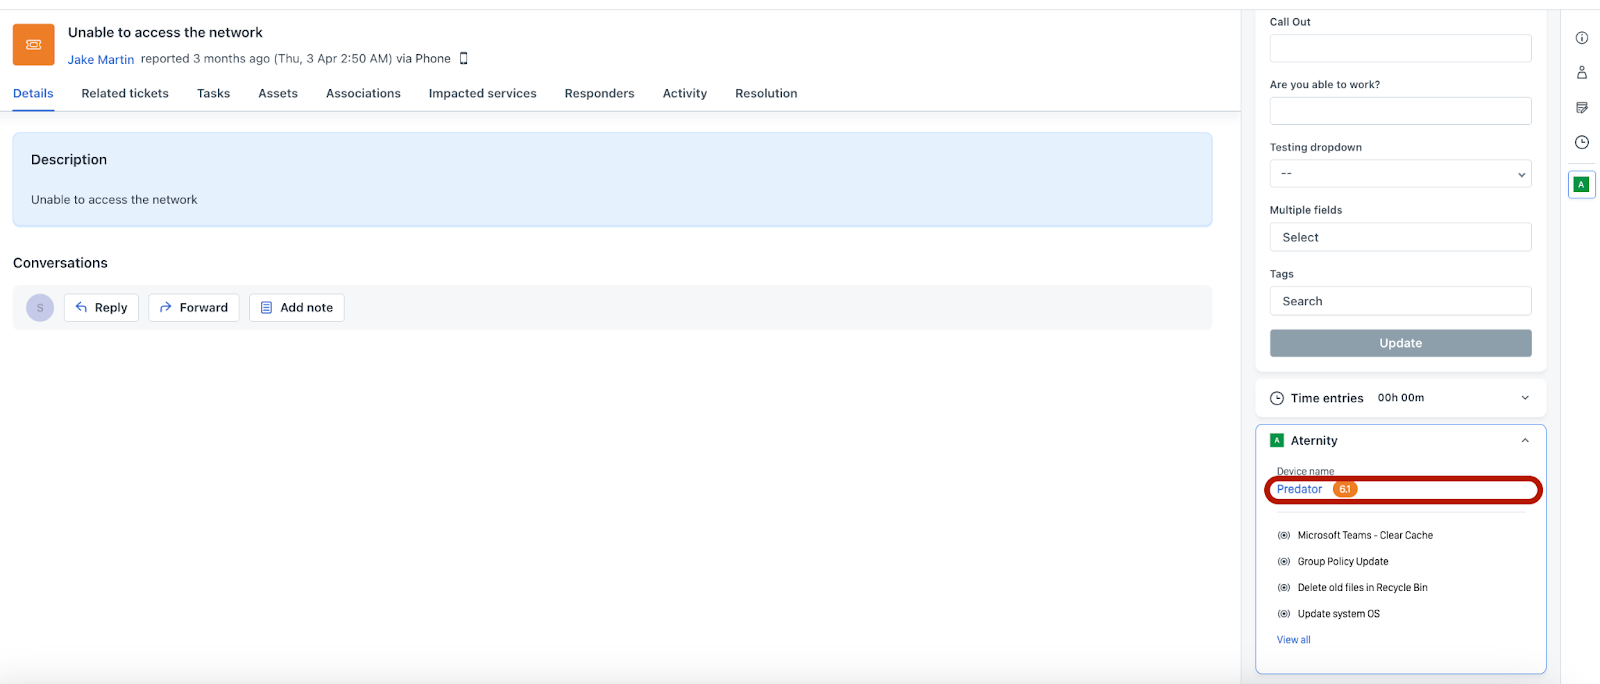
The Device overview section opens on the right pane.
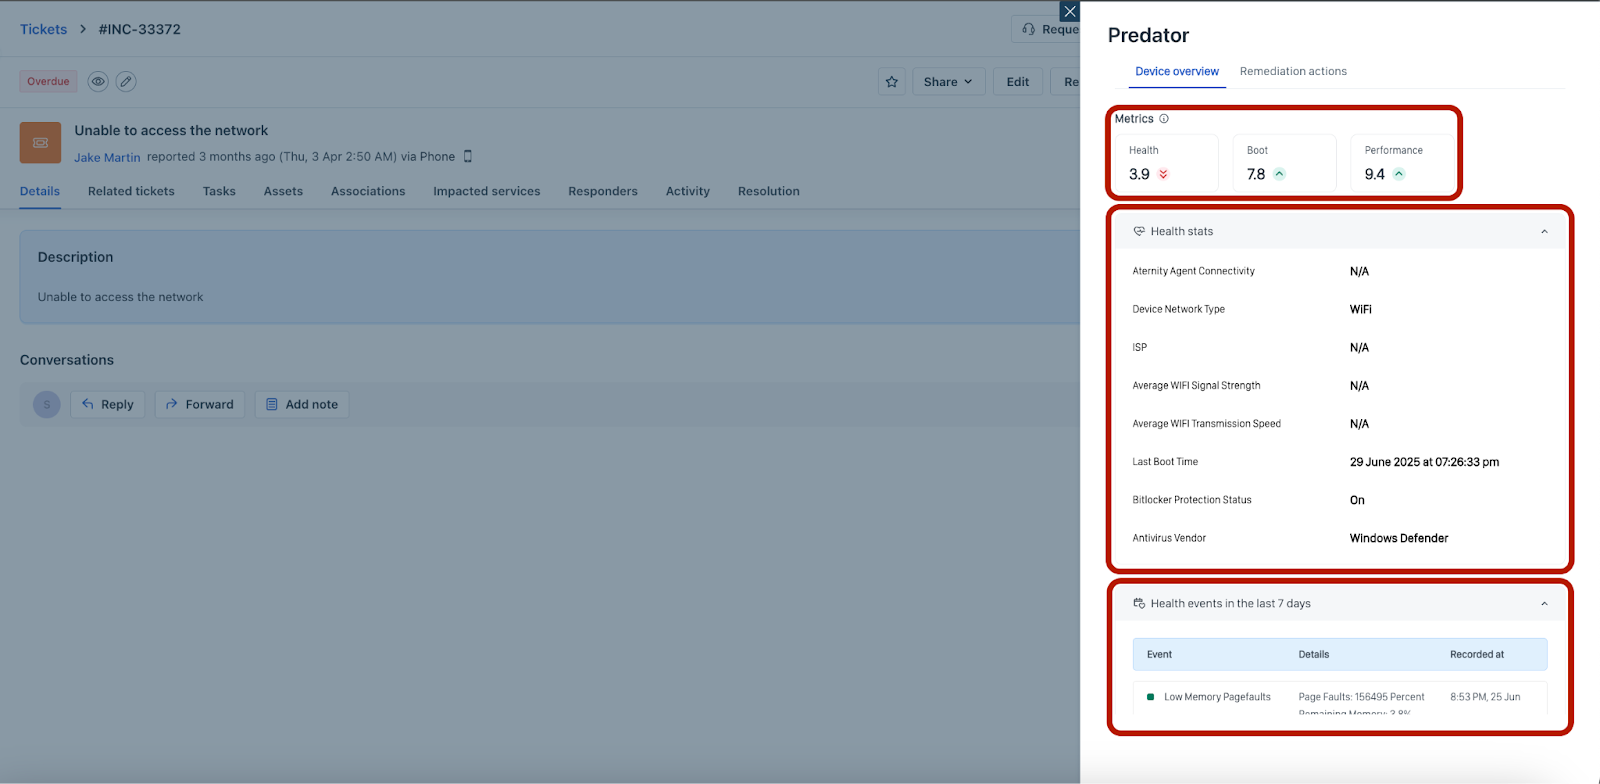
_Note:_ _In the Device overview section, you can view Metrics (such as Boot and Performance), Health stats (such as Device Network Type and Last Boot Time), and Health events (such as Battery Wear, Low Memory Pagefaults, and Application Crash)._
7. Click View all in the Aternity widget to view all the remediation actions.
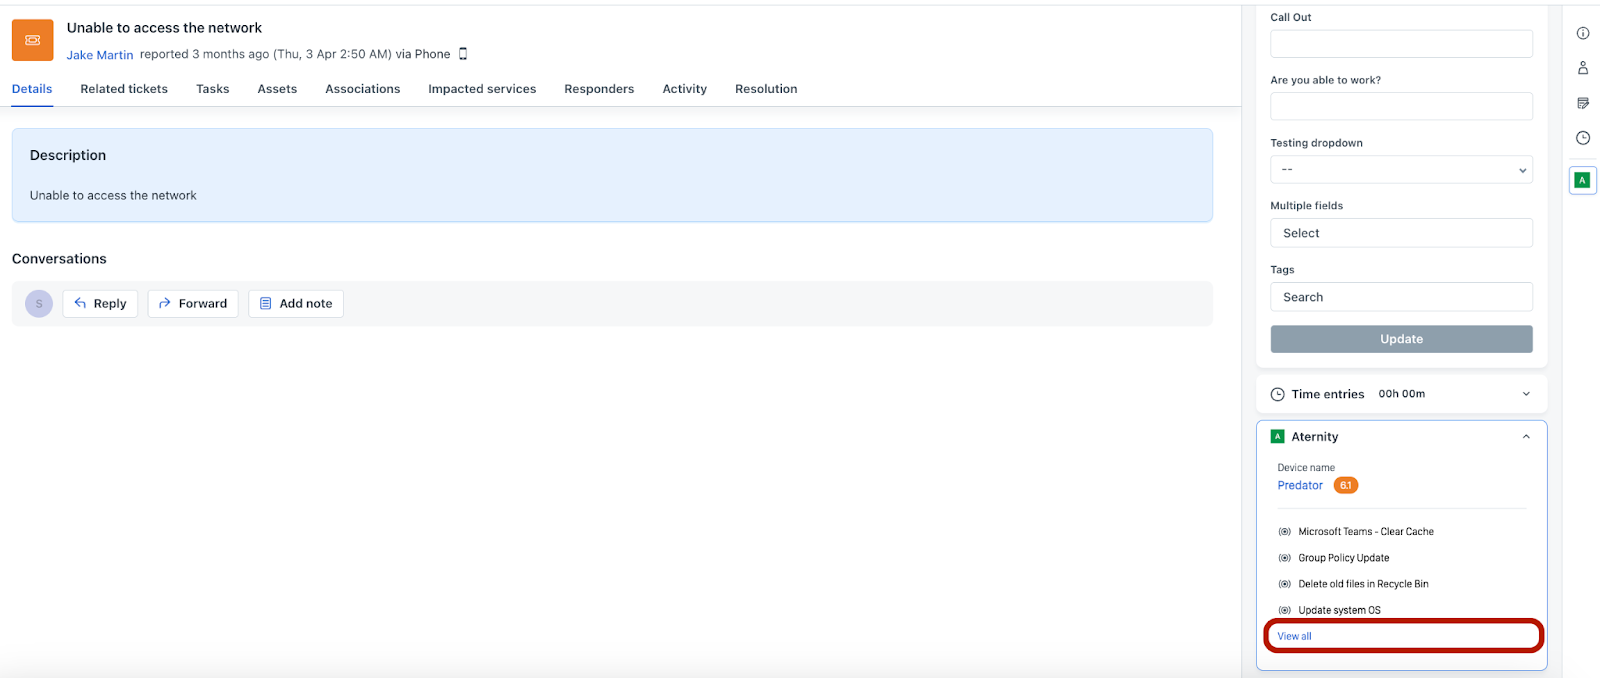
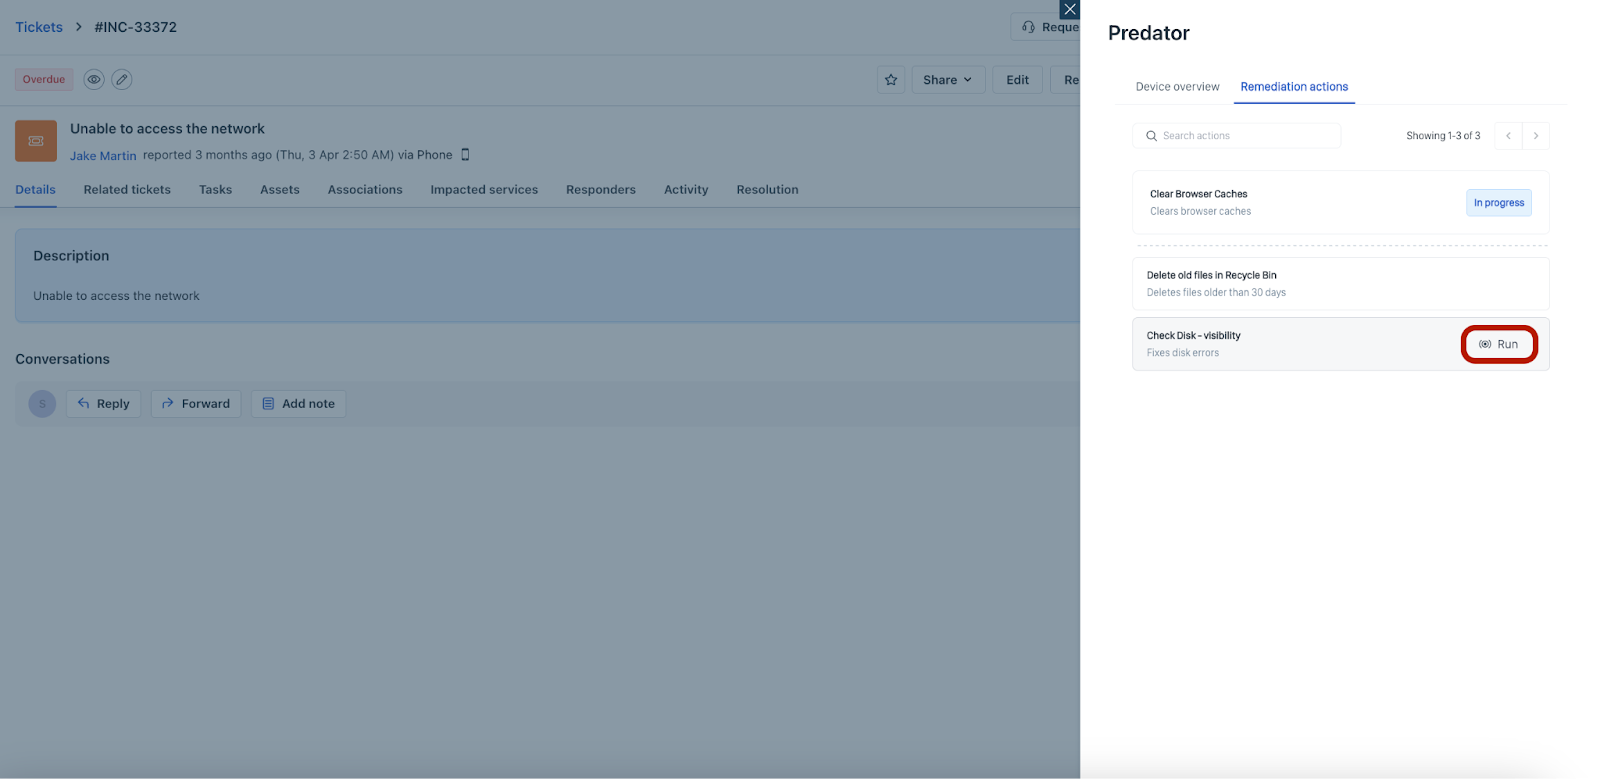
The Remediation actions section opens on the right pane.
8. In the Remediation actions section, hover over any remediation action you want to run on the device, and click Run.
_Note:_ _To search for a specific remediation action, enter the remediation name in the Search actions field._
9. Or, in the Aternity widget, click any remediation action you want to run.
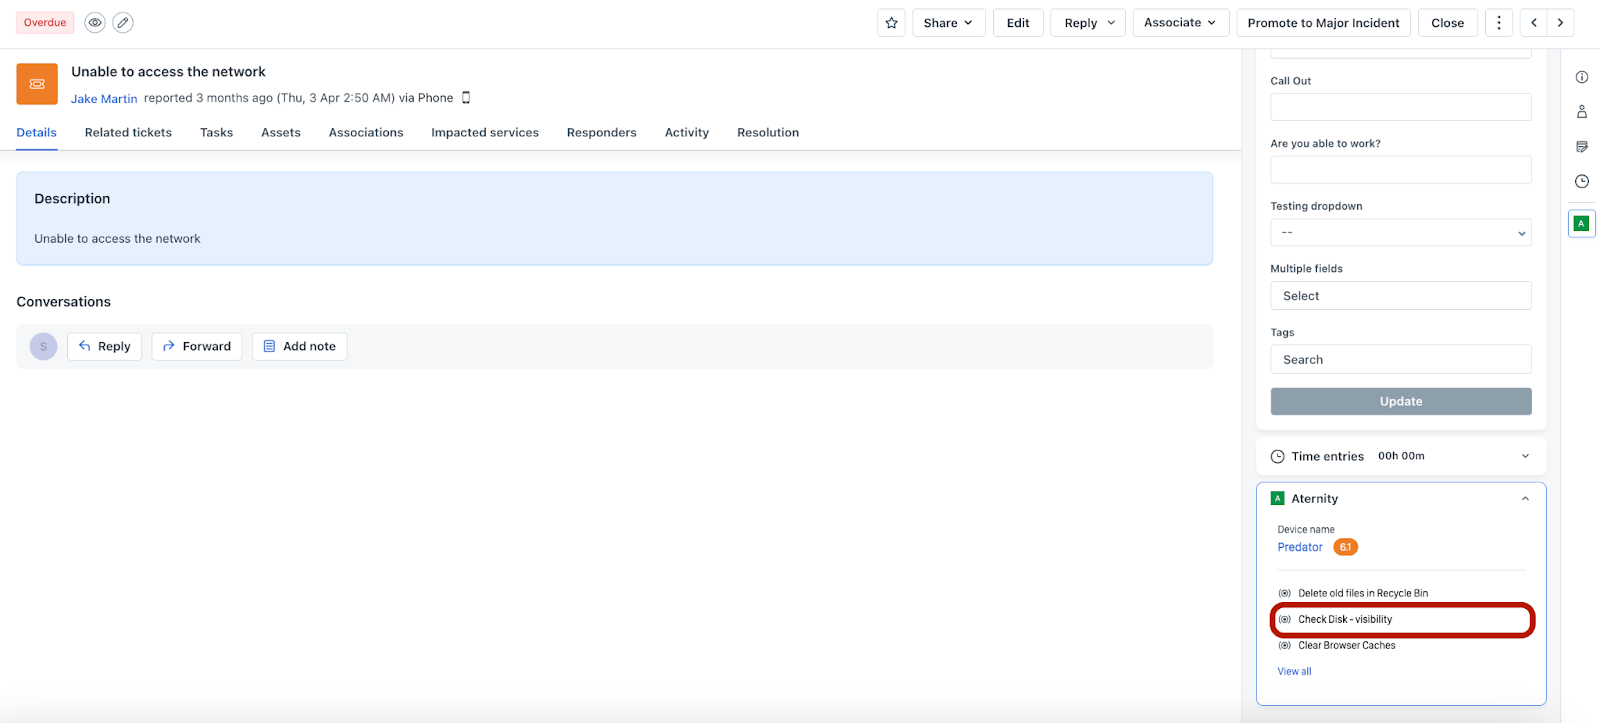
The Run remediation action section opens on the right pane.
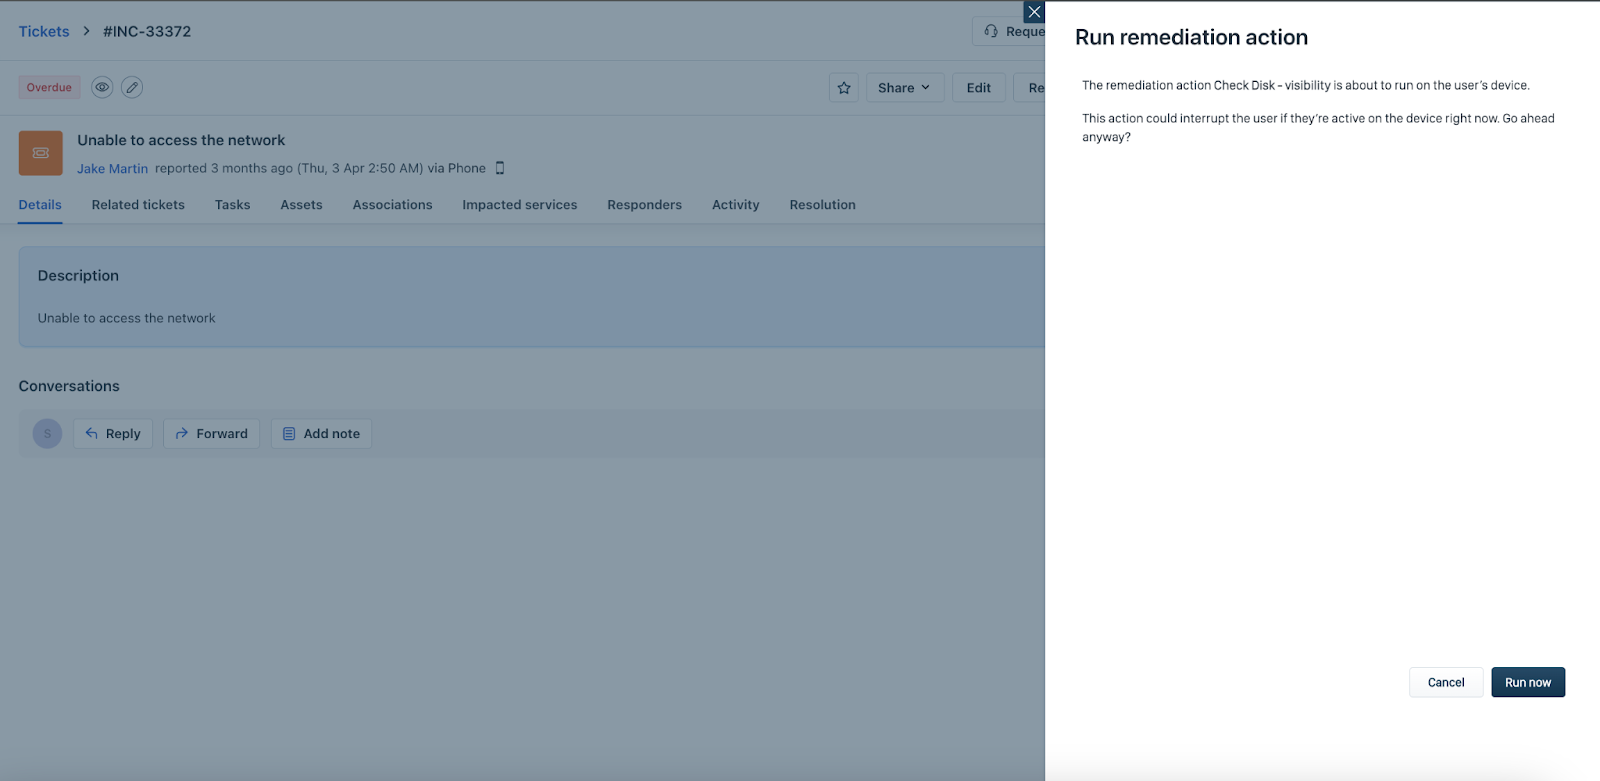
10. If applicable, specify any required details based on the selected remediation action. Then, click Run now. The selected remediation action shows In progress status, while it is running.
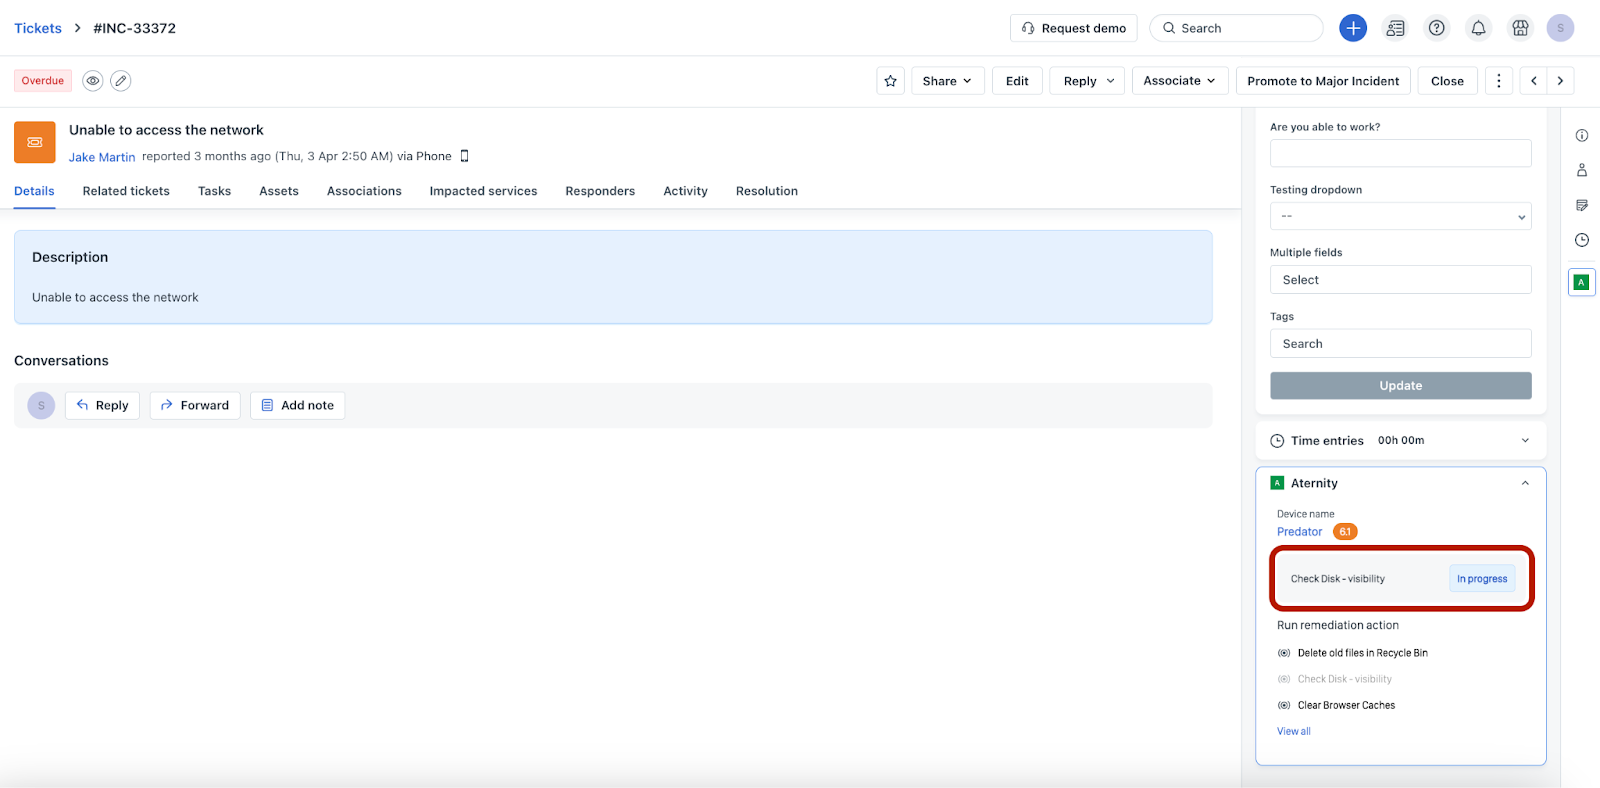
_Note:_ _If there are more than one remediation actions running within a specific time interval, the initial run remediation will have ‘In progress’status till it completes, and other remediations will have ‘In queue’ status. Each remediation action is executed in a sequential manner, one after the other, as run by the user._
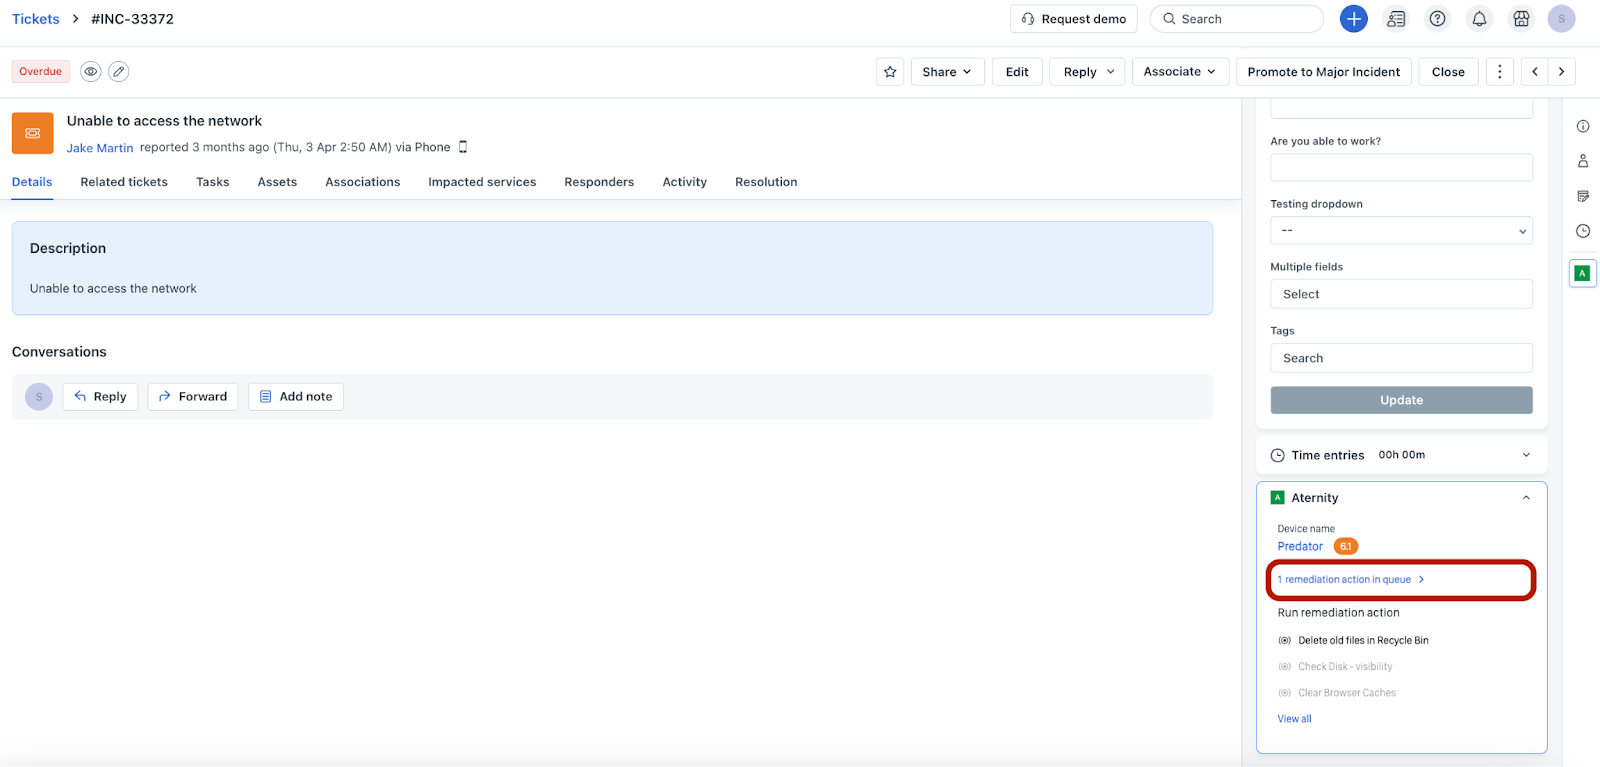
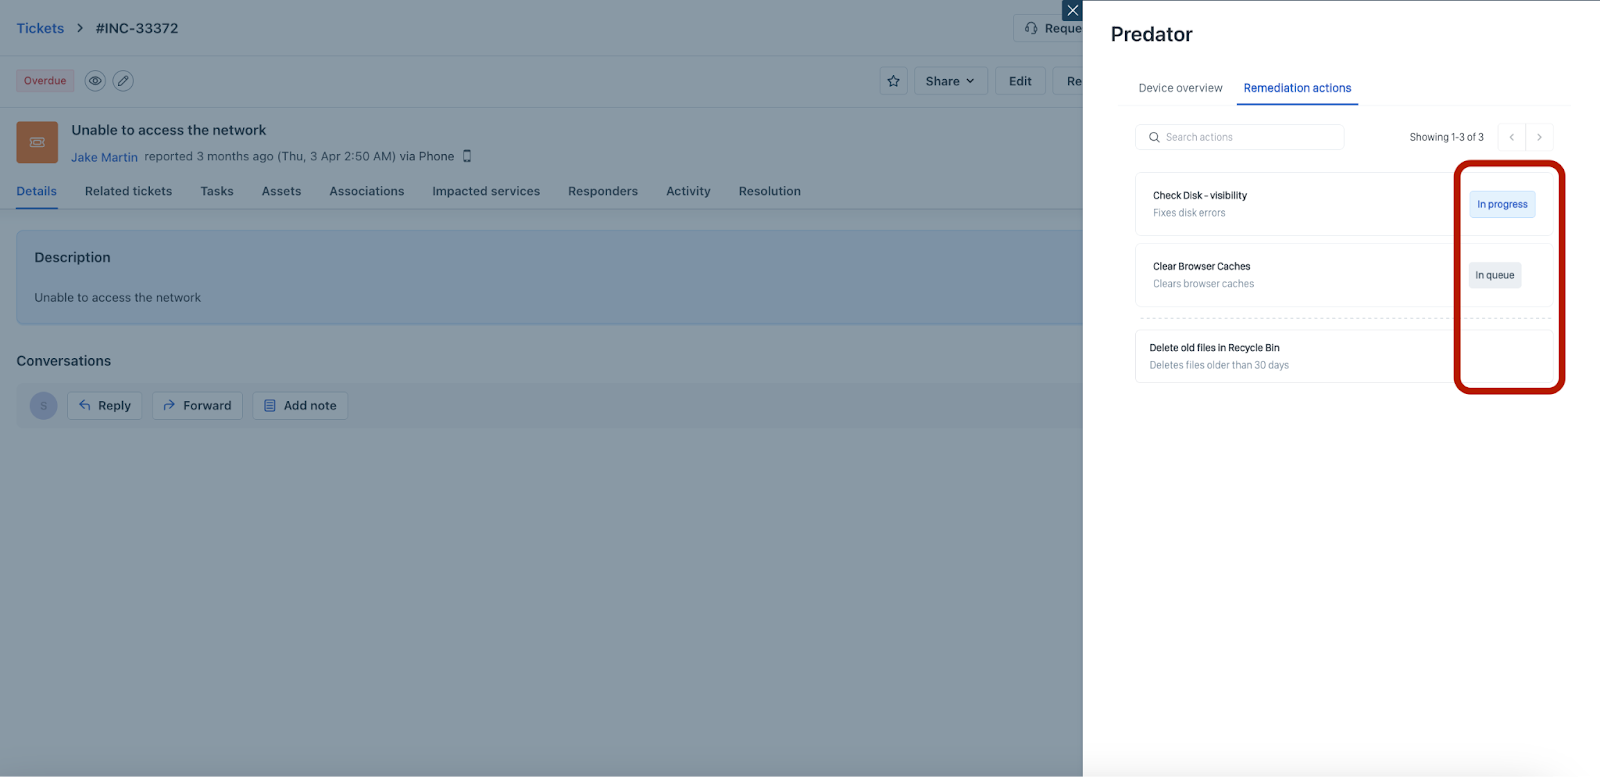
11. To view the status of all remediation actions, click View all in the Aternity widget. The Remediation actions section opens on the right pane, where you can view the status of each remediation.
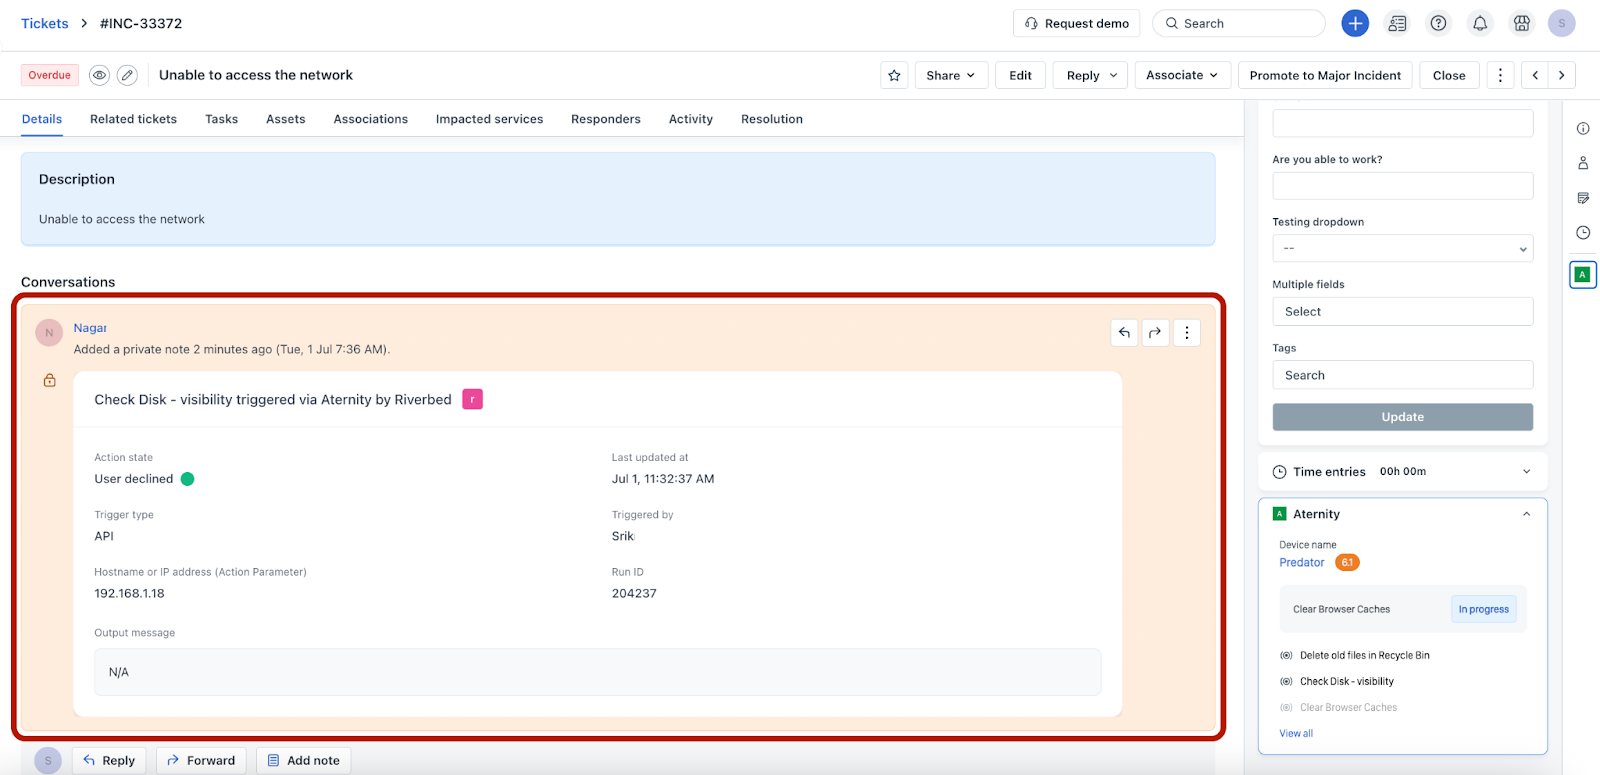
12. After a remediation action is complete, a private note is added to the ticket conversation with various details, such as Action state, Trigger type, Run ID, and so on.
13. If you want to delete a device, hover over the device name in the Aternity widget, and click the ‘Bin’ icon.
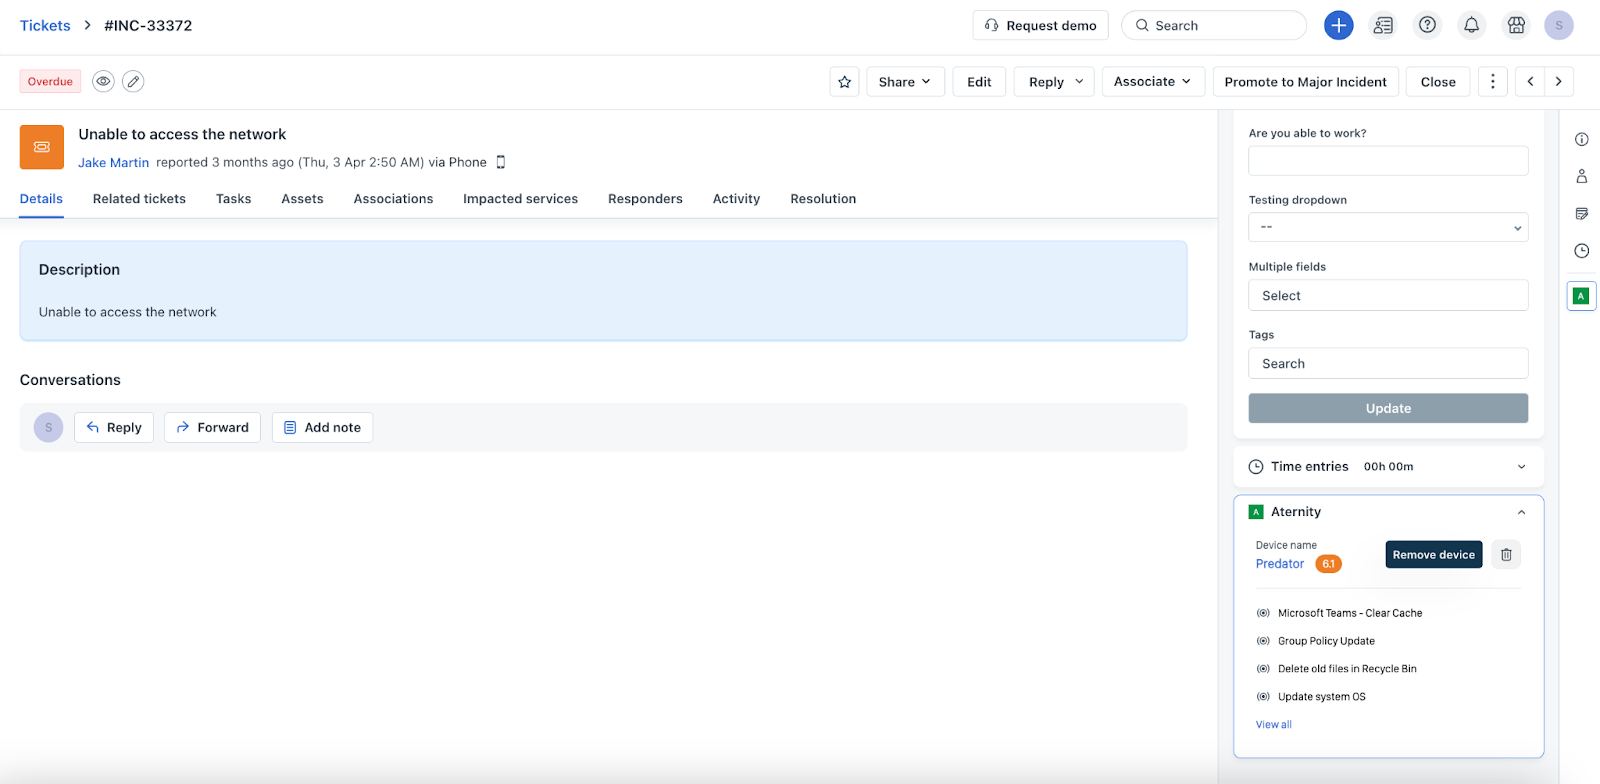
_Note:_ _If you delete a device while any remediation actions associated with the device are still running, private notes are added to the ticket conversation after the remediation actions are completed._