Last updated: 2026-05-25
Overview
The Freshservice integration with the Amazon Connect CTI App offers an all-in-one solution for efficient call management, ensuring every employee interaction is logged and accessible within Freshservice.
Prerequisites
The following are the prerequisites for installing Amazon Connect CTI integration with Freshservice:
Install the app
1. Log in to your Freshservice account.
2. Go to Admin > Automation & Productivity > Extensibility > Apps.
3. Search and select the Amazon Connect CTI app. Then, click Install.
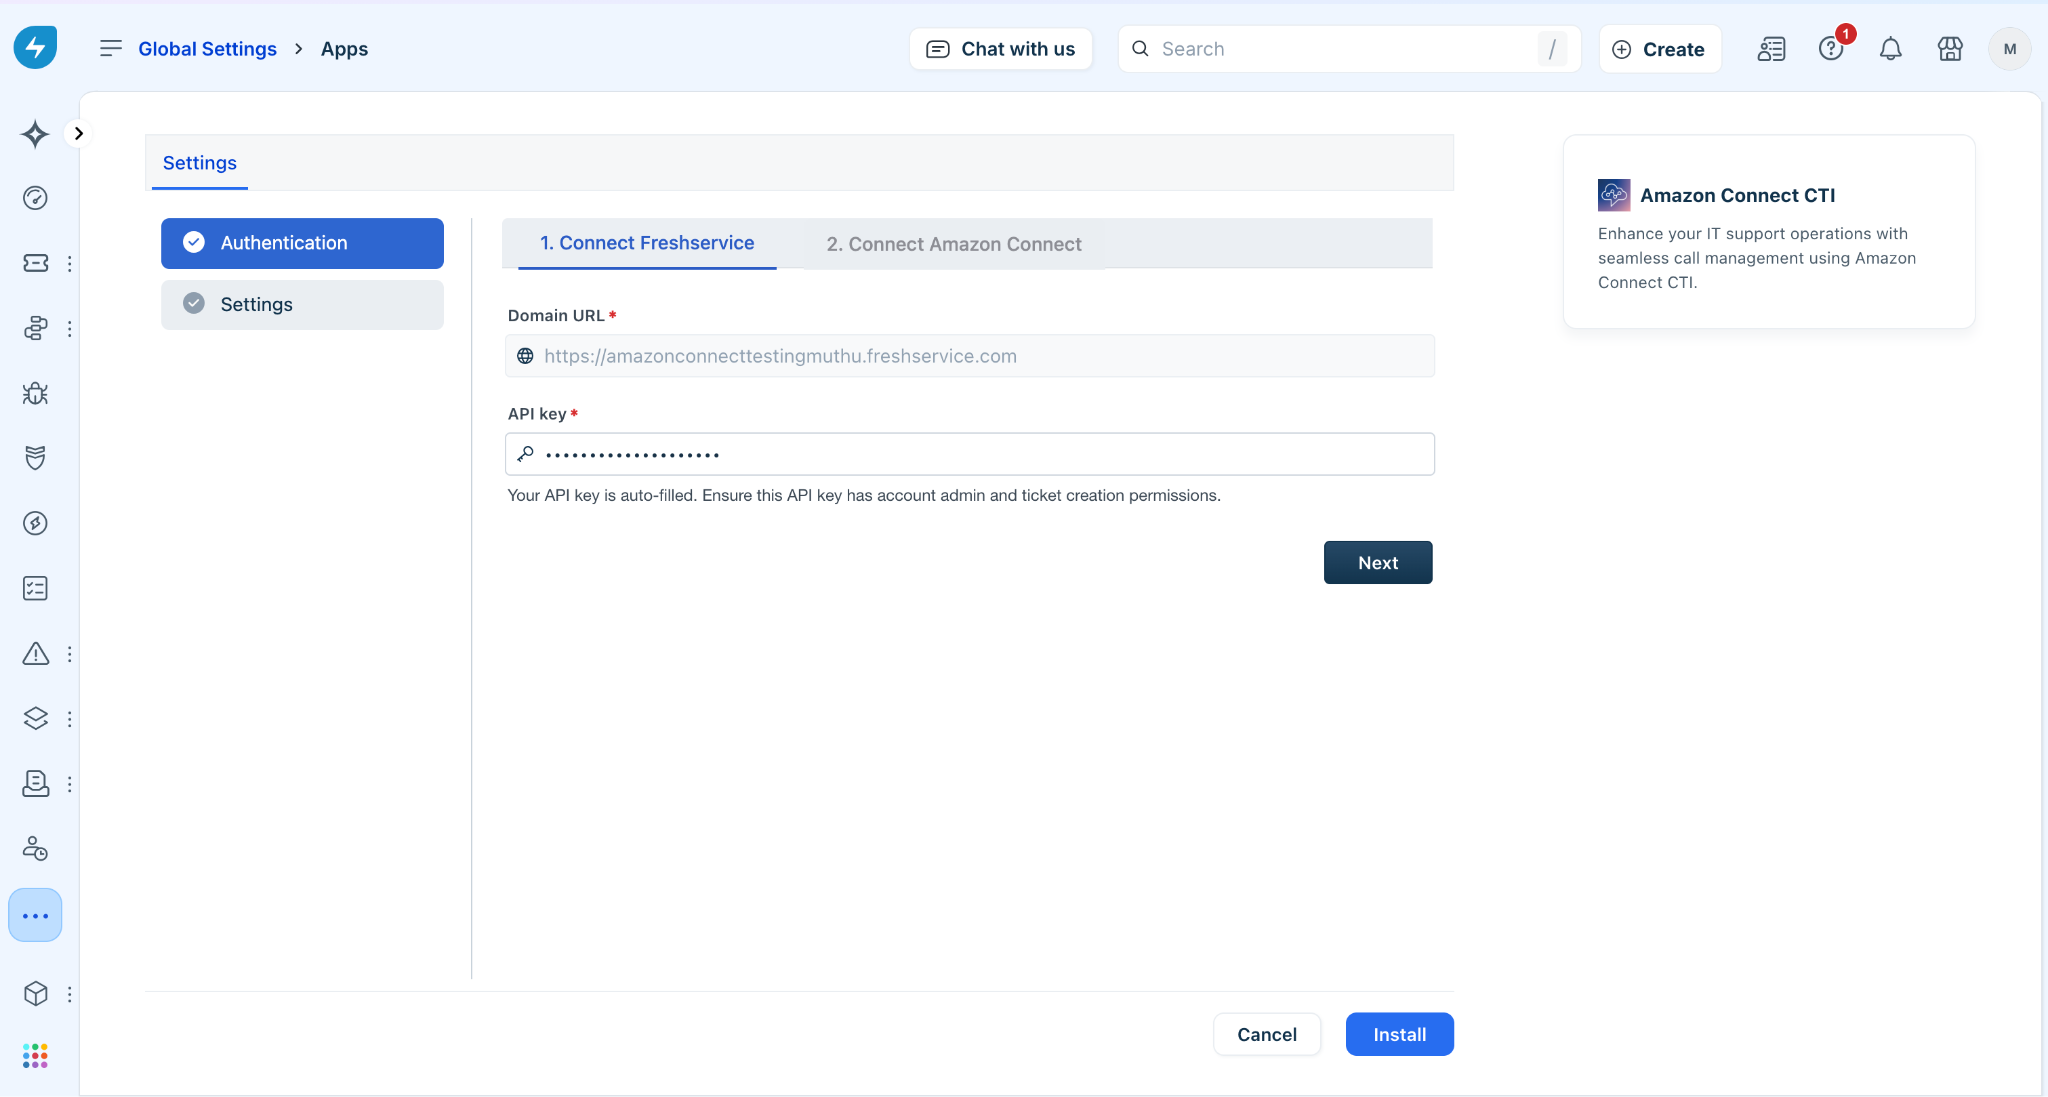
4. In the Connect Freshservice tab, enter your Freshservice Domain URL and click Next.
Note:
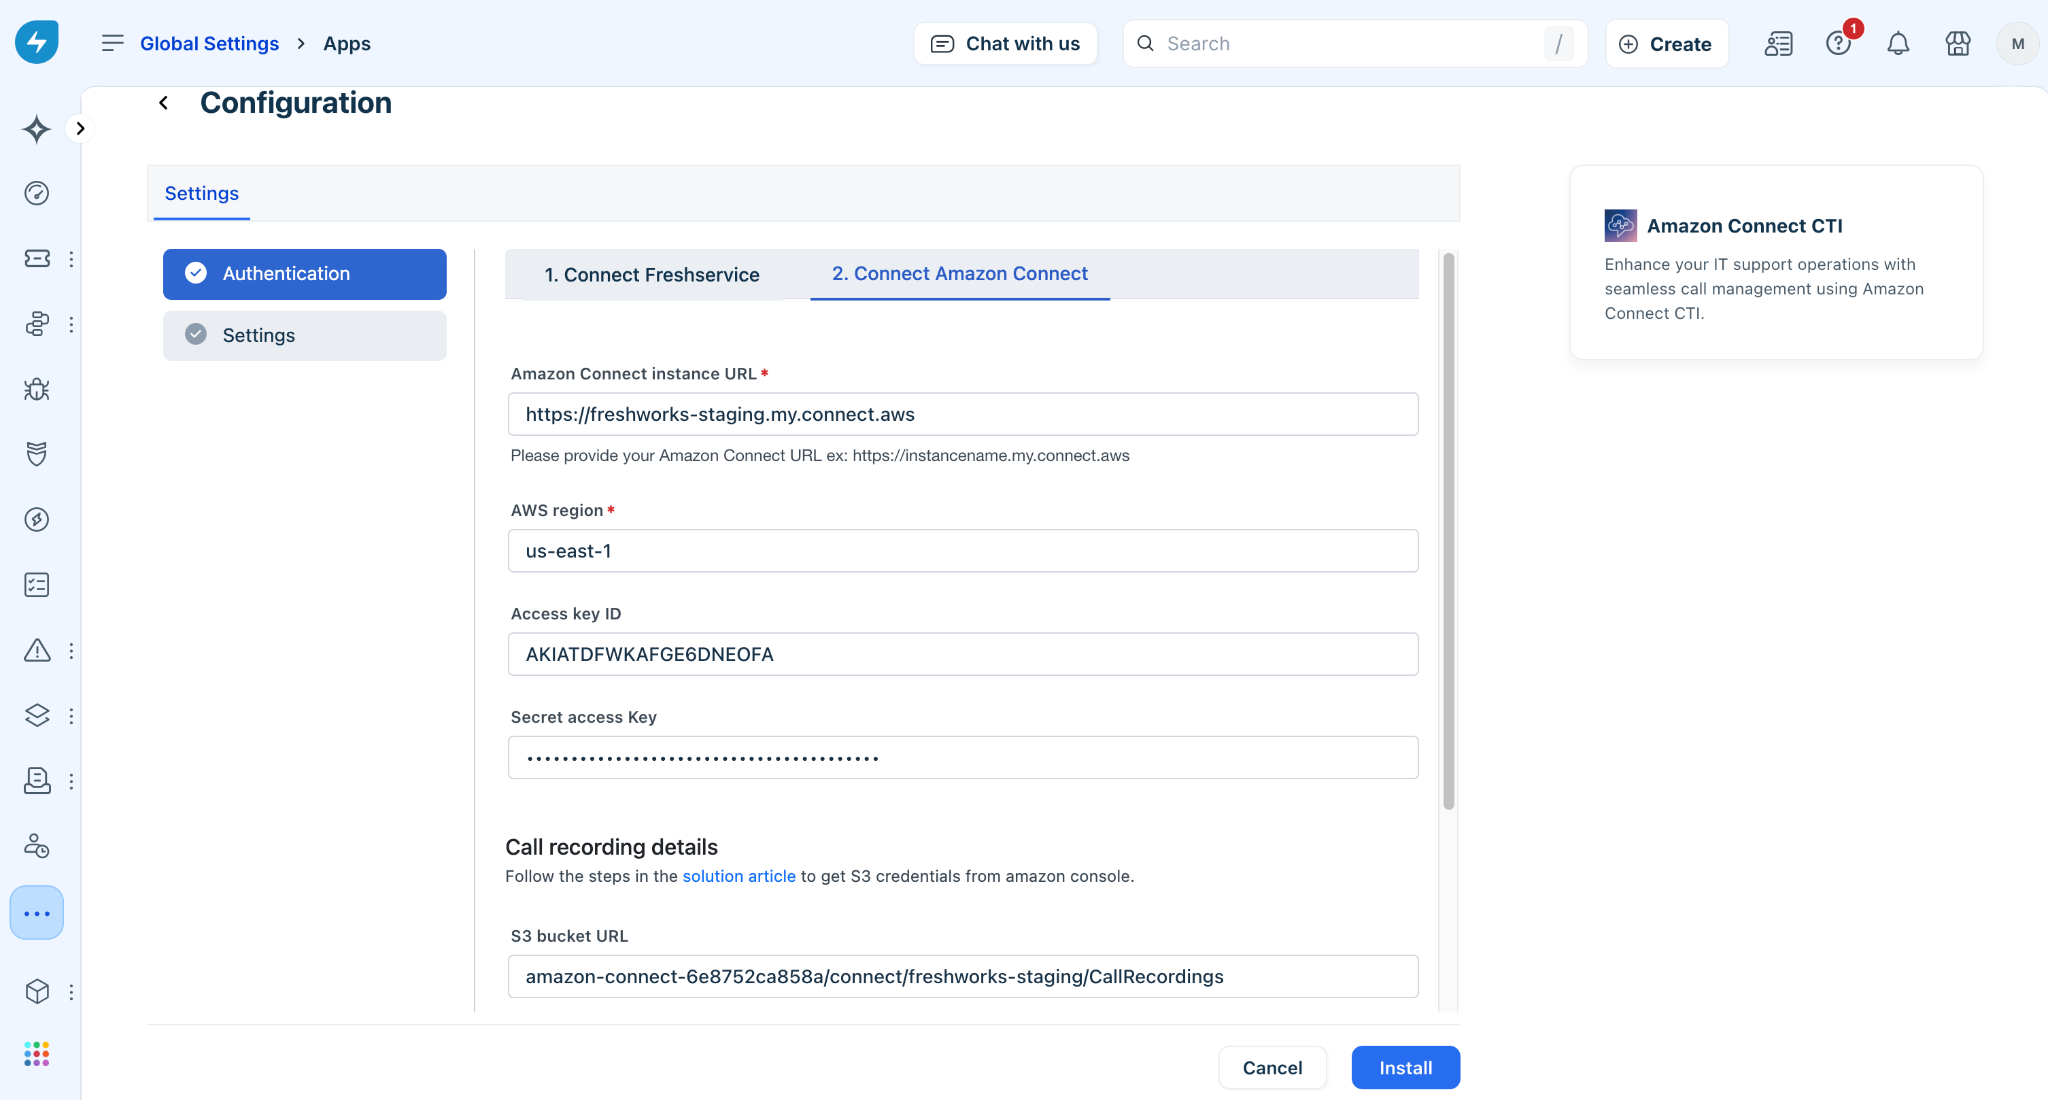
5. In the Connect Amazon Connect tab, enter the Amazon Connect Instance URL, AWS region, Access key ID, and Secret access key details.
6. In the Call recording details section, enter the S3 bucket URL and click Next.
Important note: To enable the Call transcript details settings, you must complete the installation (for new installations) or update to the latest version of this app (for accounts that already have this app installed).
7\. In the Settings section (on the left pane), the Subject, Status and Priority fields are auto-populated when a ticket is created.
8\. Select the required workspace and groups that can access the app.
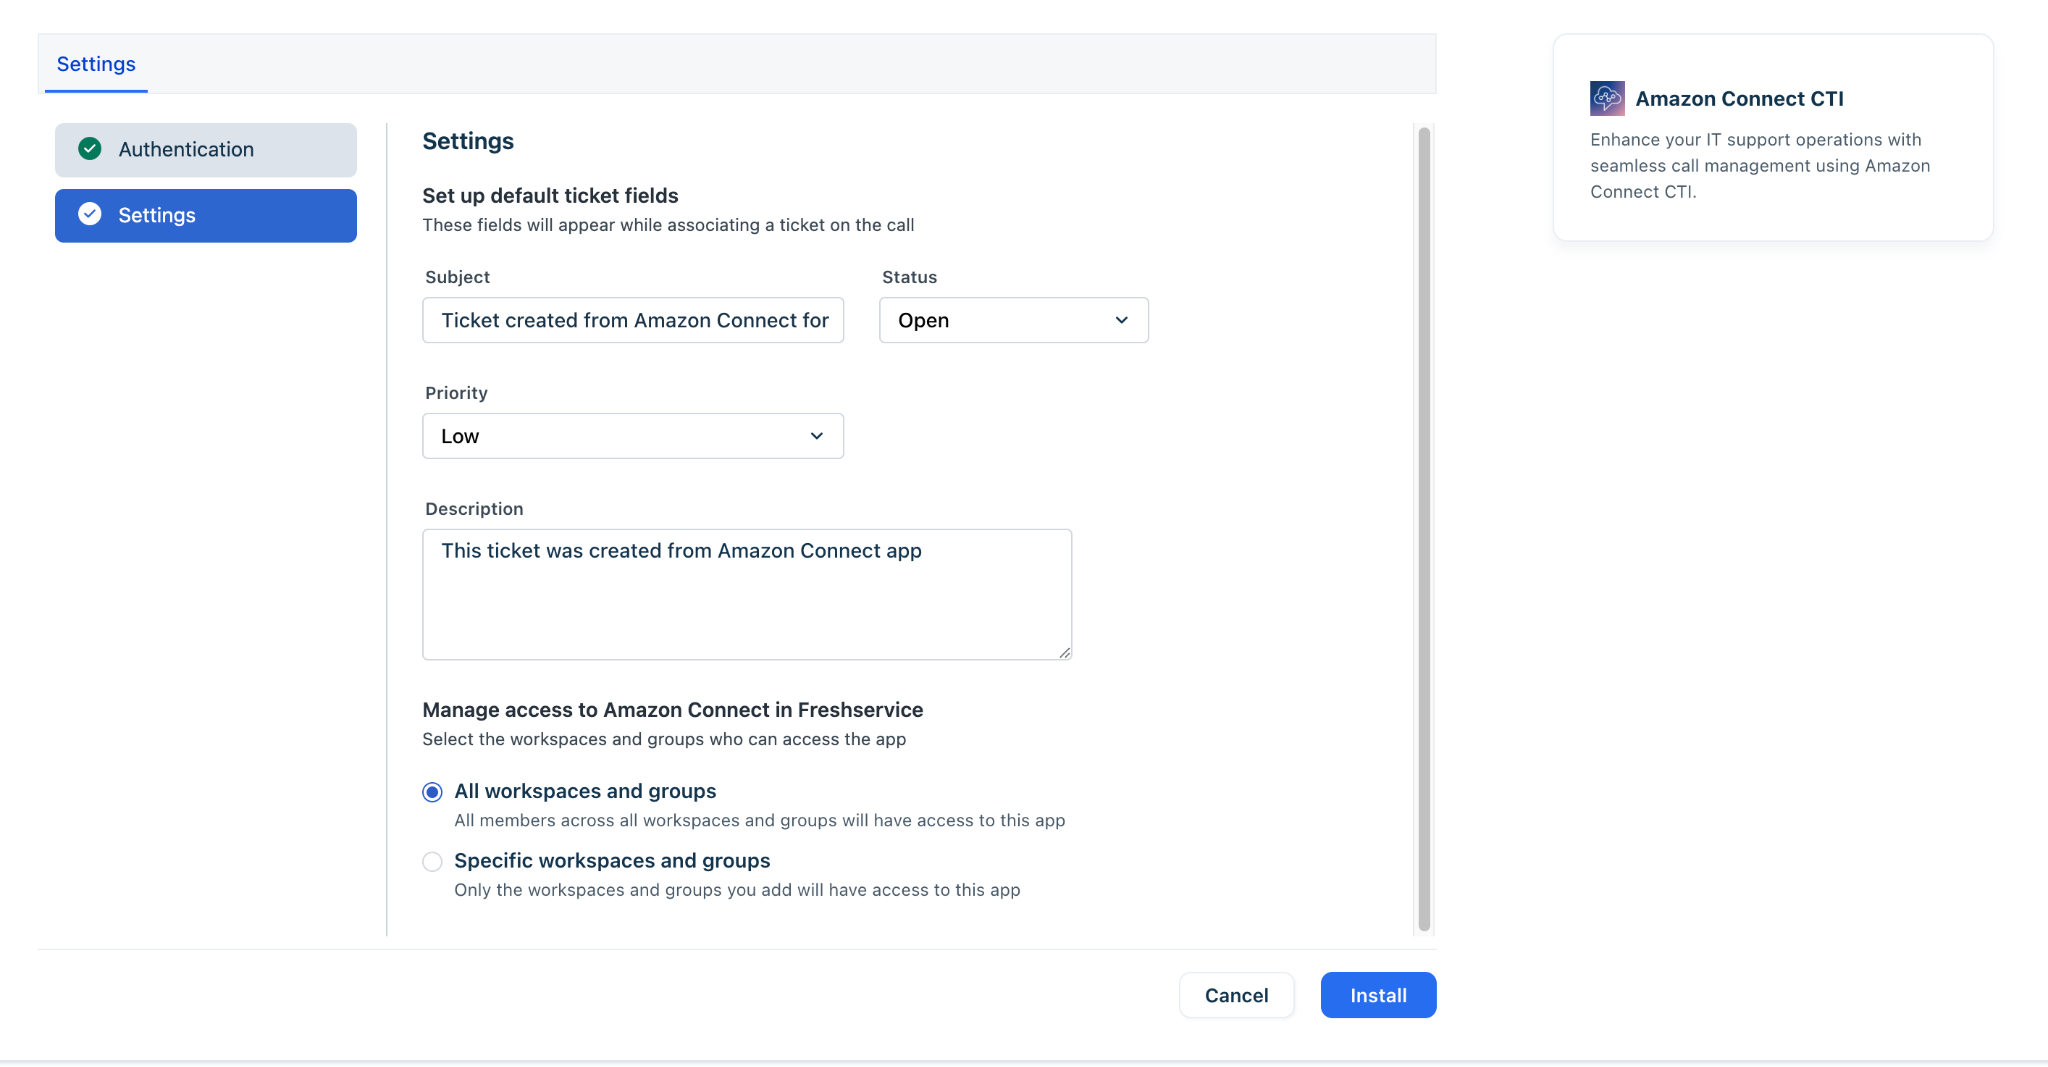
9\. Click Install to install the app, or click Save if you’re updating to the latest version.
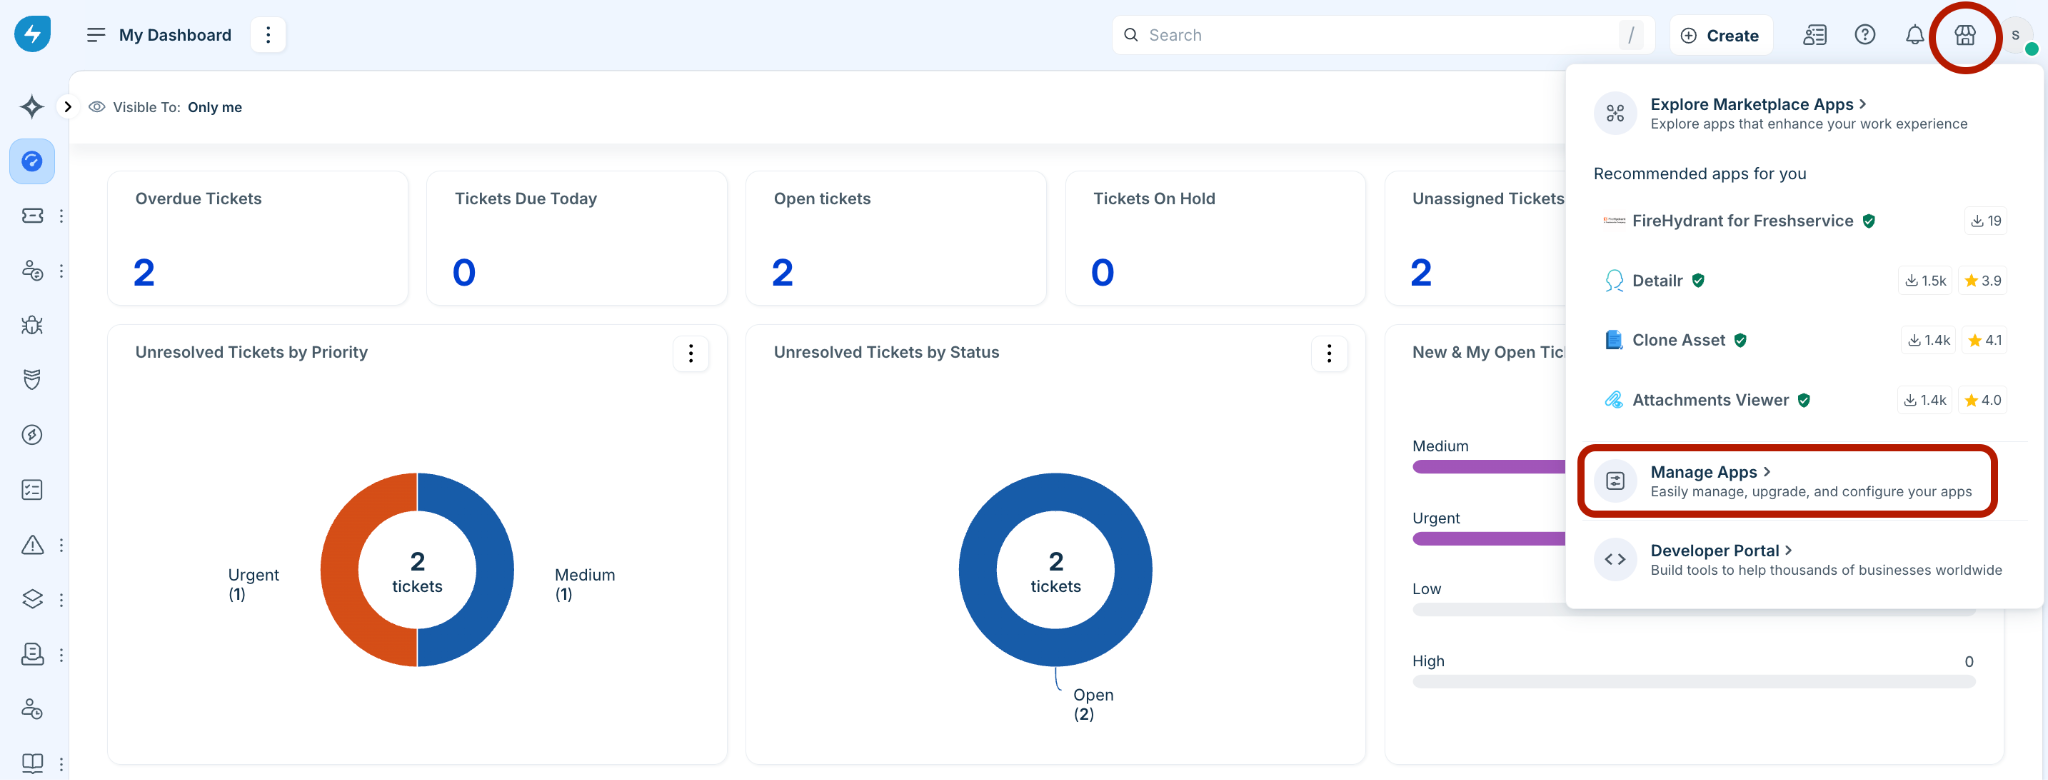
10\. After the app is installed or updated, click the Marketplace Apps icon at the top-right corner and select Manage Apps.
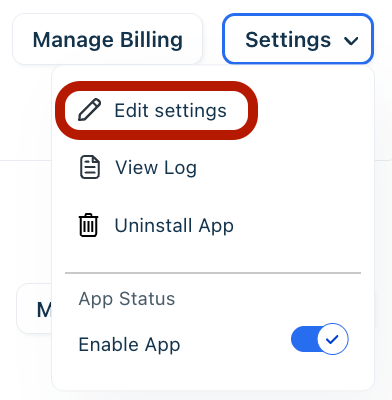
11\. Then, click the Settings dropdown next to Amazon Connect CTI app and select Edit settings.
12\. Go to the Connect Amazon Connect tab. You will see that the Call transcript details settings is enabled.
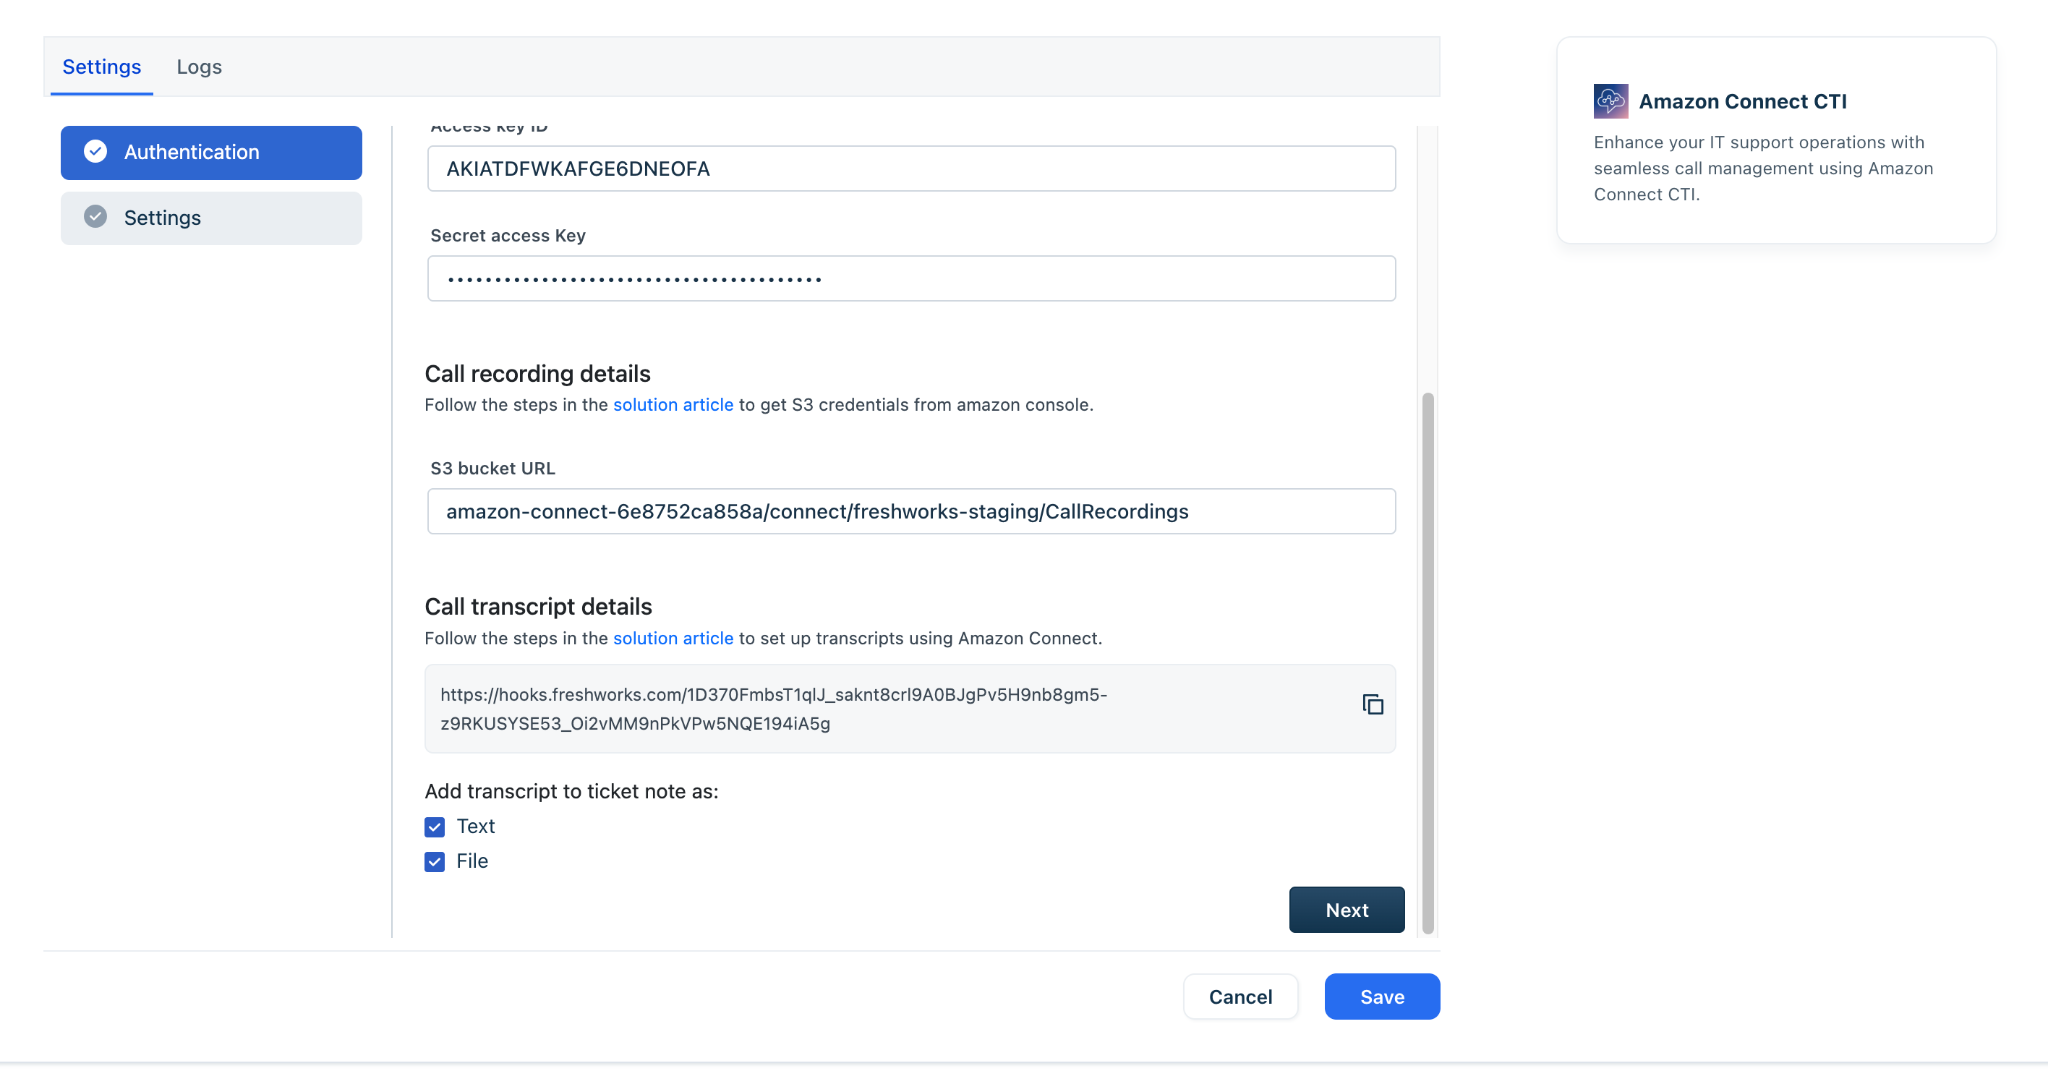
13\. Select the Add transcript options (Text, File, or both).
14\. Copy the webhook URL, and click Save.
Important note: See the ‘Amazon Connect Console configurations’ and ‘Amazon Connect Instance configurations’ sections below for information on the necessary configurations to be performed in Amazon Connect Console and Amazon Connect Instance respectively.
Amazon Connect Console configurations
Create SNS Topic
1\. Go to AWS Console > SNS.
2\. Click Topics > Create topic.
3\. Type:
Standard
4\. Name:
s3-file-upload-topic
5\. Create the topic.
Create HTTPS Subscription (Your Webhook)
1\. Open the topic you created.
2\. Click Create subscription.
3\. Fill:
Configure S3 Event Notification: SNS
1\. Go to:
S3 > Bucket url of call recording instance bucket name > Properties (for example, if call recording url is amazon-connect-73c9ca8d33dc/connect/instance-freshervice1/CallRecordings, then go to amazon-connect-73c9ca8d33dc).
2\. Scroll to:
:point\_right: Event notifications > Create event notification.
3\. Fill:
Event name
voice-upload-event
Event types
4\. Select:
:white\_check\_mark: PUT (Object Created)
Prefix filter (IMPORTANT for your case)
Analysis/Voice/
5\. Suffix
If only audio:
.json
6\. Destination
Select:
SNS Topic
Choose:
s3-file-upload-topic
7\. Click Save.
IAM Permissions (usually auto-handled, but verification is recommended)
Note: SNS must allow S3 to publish.
Go to SNS Topic > Access policy.
Ensure it includes similar code:
{
"Version": "2012-10-17",
"Statement": \[\ \ {\ \ "Sid": "AmazonConnectS3Access",\ \ "Effect": "Allow",\ \ "Action": \[\ \ "s3:GetObject",\ \ "s3:ListBucket"\ \ \],\ \ "Resource": \[\ \ "arn:aws:s3:::amazon-connect-73c9ca8d33dc",\ \ "arn:aws:s3:::amazon-connect-73c9ca8d33dc/\*"\ \ \]\ \ }\ \ \]
}
Then, follow these steps.
Step 1 — Open IAM
Go to:
AWS IAM Console
Step 2 — Open Your User
Click:
Users
Search and open:
testsamlamazonconnect
Step 3 — Add Permission
Go to:
Permissions tab
Click:
Add permissions
Choose:
Attach policies directly
Step 4 — Create Inline Policy
Click:
Create inline policy
Choose:
JSON
Delete the existing content, then paste the following:
{
"Version": "2012-10-17",
"Statement": \[\ \ {\ \ "Sid": "AmazonConnectS3Access",\ \ "Effect": "Allow",\ \ "Action": \[\ \ "s3:GetObject",\ \ "s3:ListBucket"\ \ \],\ \ "Resource": \[\ \ "arn:aws:s3:::amazon-connect-73c9ca8d33dc",\ \ "arn:aws:s3:::amazon-connect-73c9ca8d33dc/\*"\ \ \]\ \ }\ \ \]
}
Step 5 — Save Policy
Click:
Next
Policy name:
AmazonConnectS3ReadAccess
Click:
Create policy
Amazon Connect Instance configurations
1. In Amazon Connect Console > Amazon Connect > Overview, click Access URL, which will take you to Amazon Connect Instance.
2. In Routing > Flows, select the flow that is mapped to the contact number (for which you need a transcript to be enabled).
3. Look for Set recording, analytics, and processing behaviour (if present). Under Enable conversation analytics, select the Enable conversational analytics, Enable agent and customer interaction analytics, and Real-time and post-contact analytics options. Save the updates and publish.
4. If Set recording, analytics, and processing behaviour is not present, add it to the routing flows and follow step 3.
Activate the Amazon Connect widget
1. Click the app icon from the sidebar. This will appear below the settings icon.
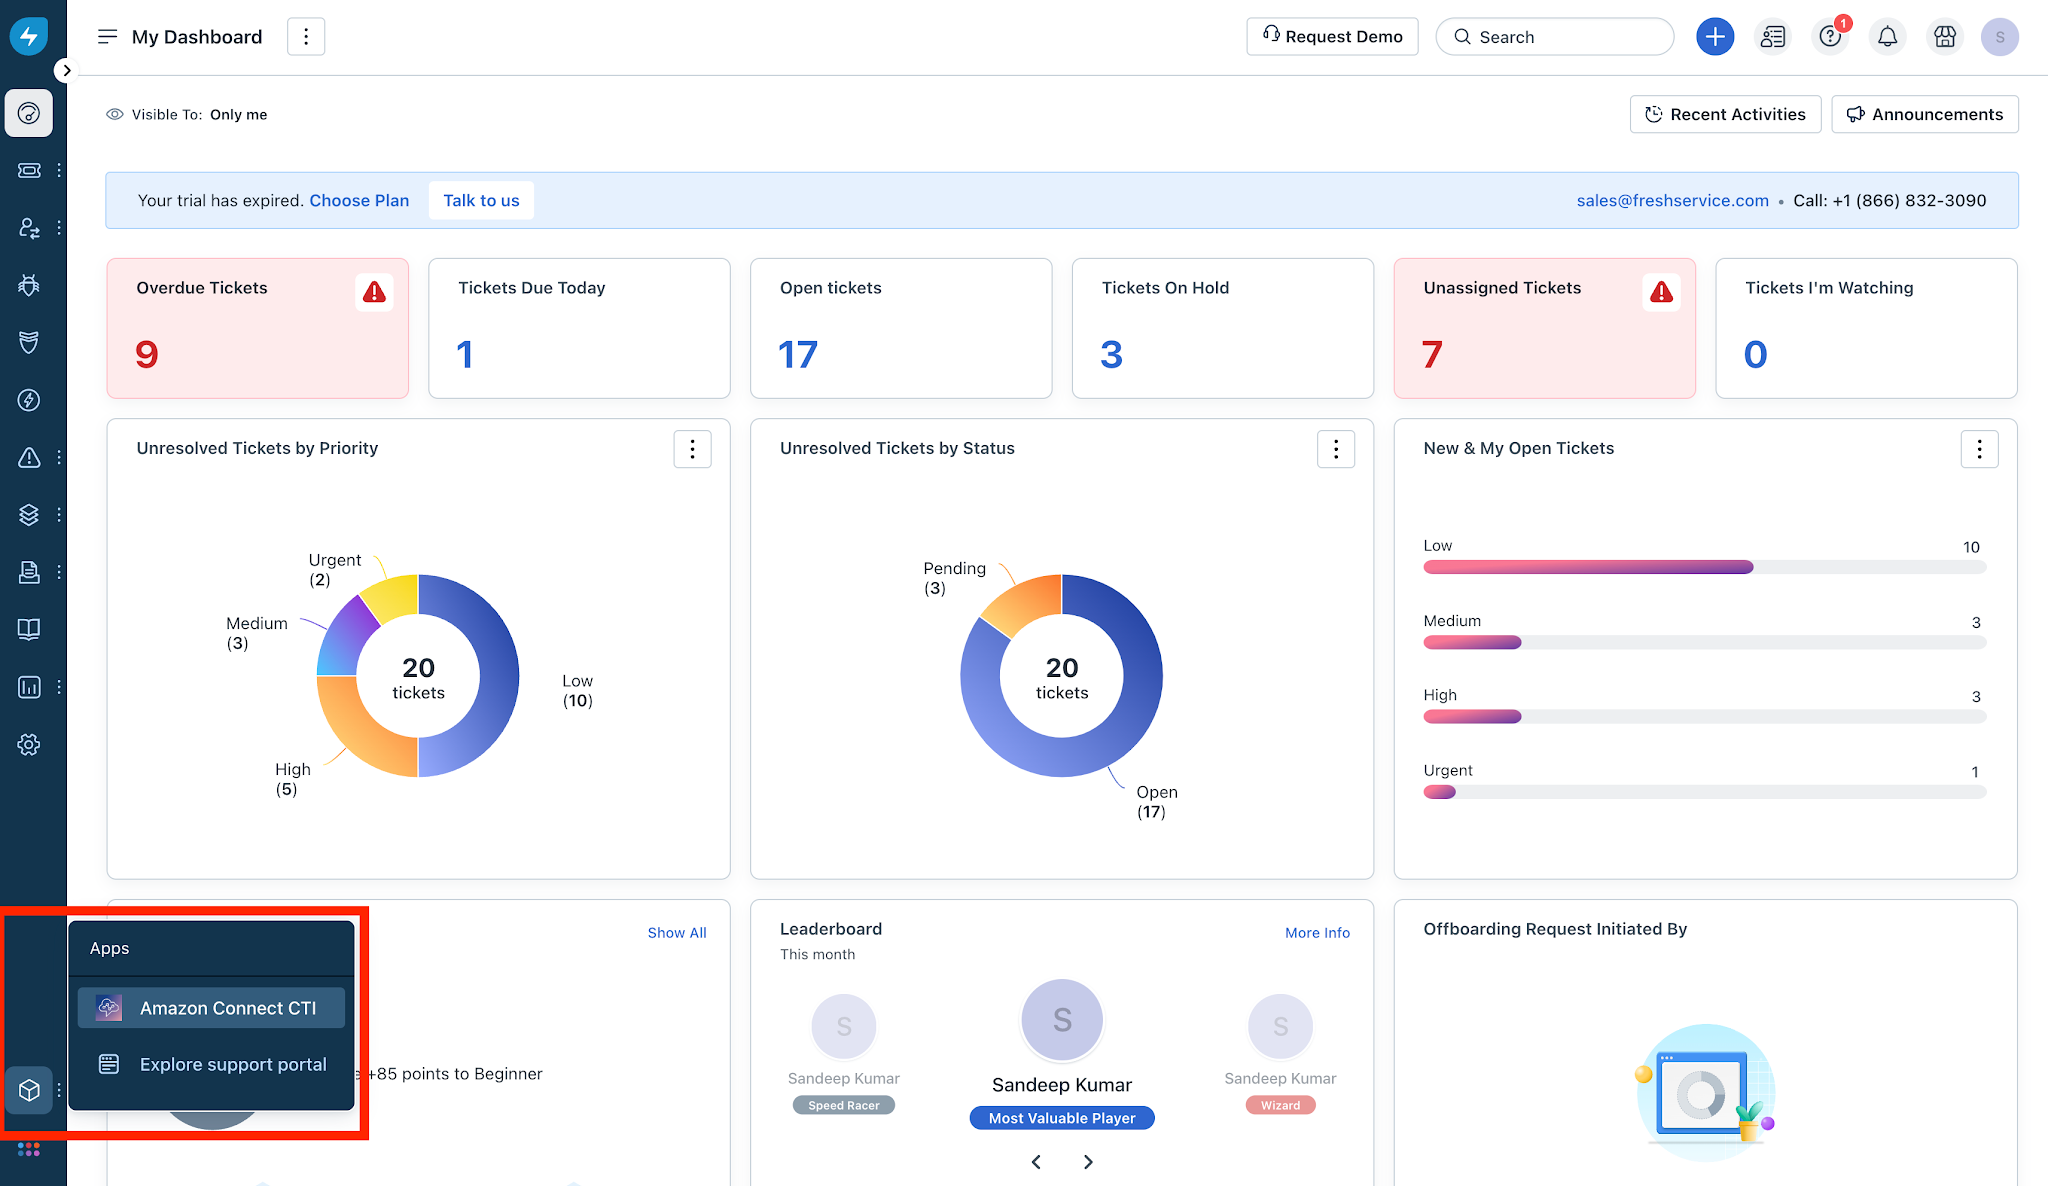
2. Once you click the Amazon Connect icon listed there, the app widget will appear. Ensure you are logged in, or click the link to connect.
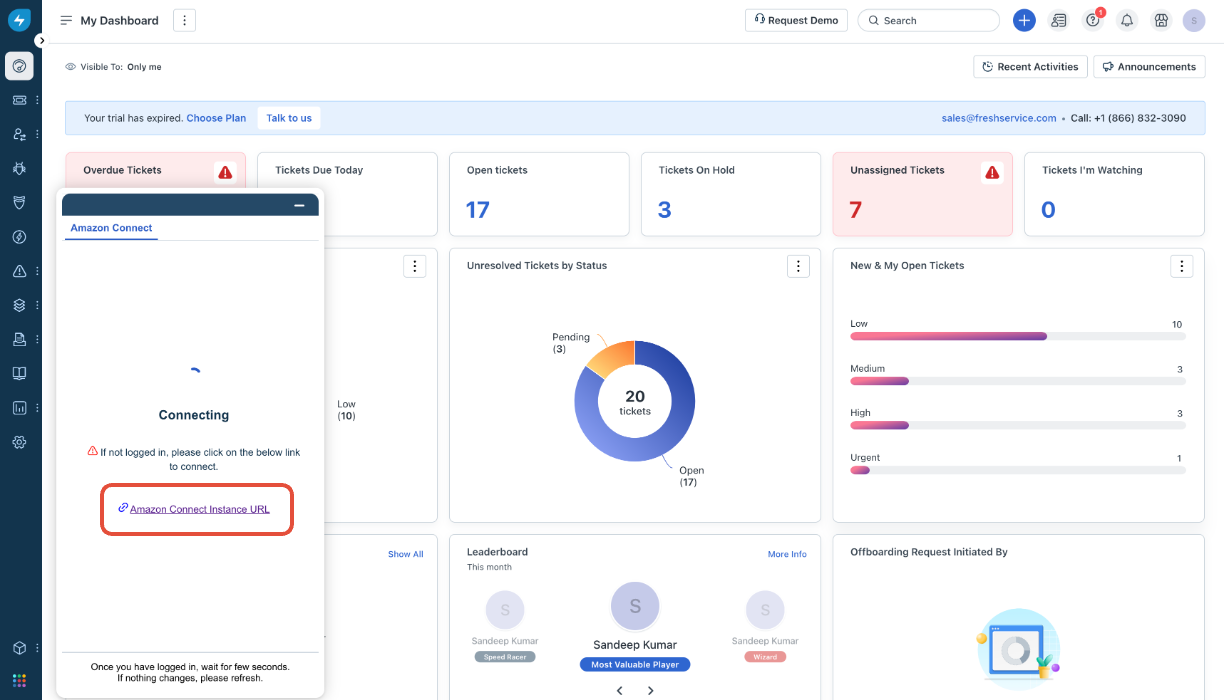
The login screen for Amazon Connect will appear as a separate window. Note that this will not appear within the widget on the dashboard.
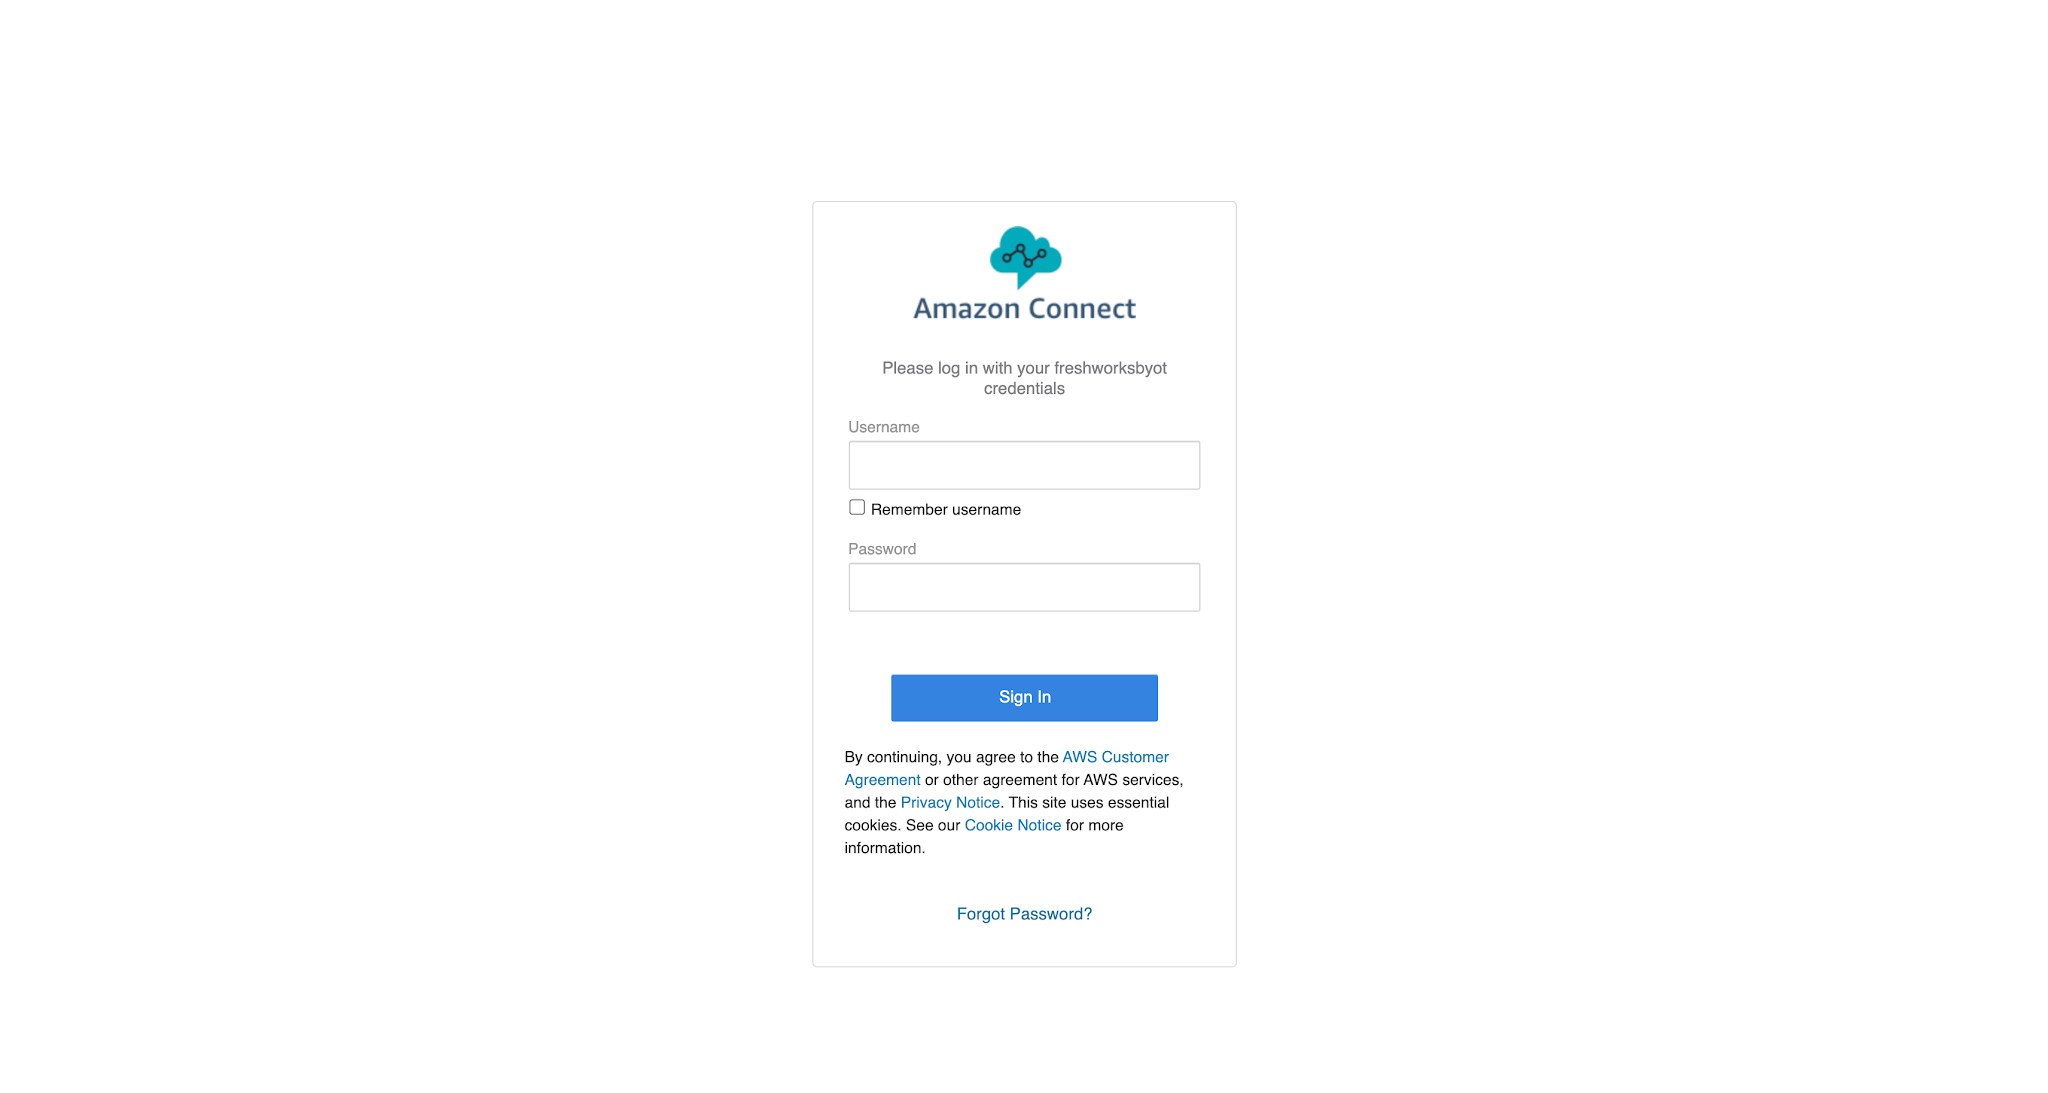
3. Enter your Amazon Connect Username and Password to login.
4. Once logged in, Amazon Connect will be activated and appear within the widget on your dashboard.
How to make an outbound call
1. To make an outbound call open the widget, from the available options, click Number Pad to dial a number or input any phone number. Click Call. You can also access saved contacts through the Quick Contacts option.
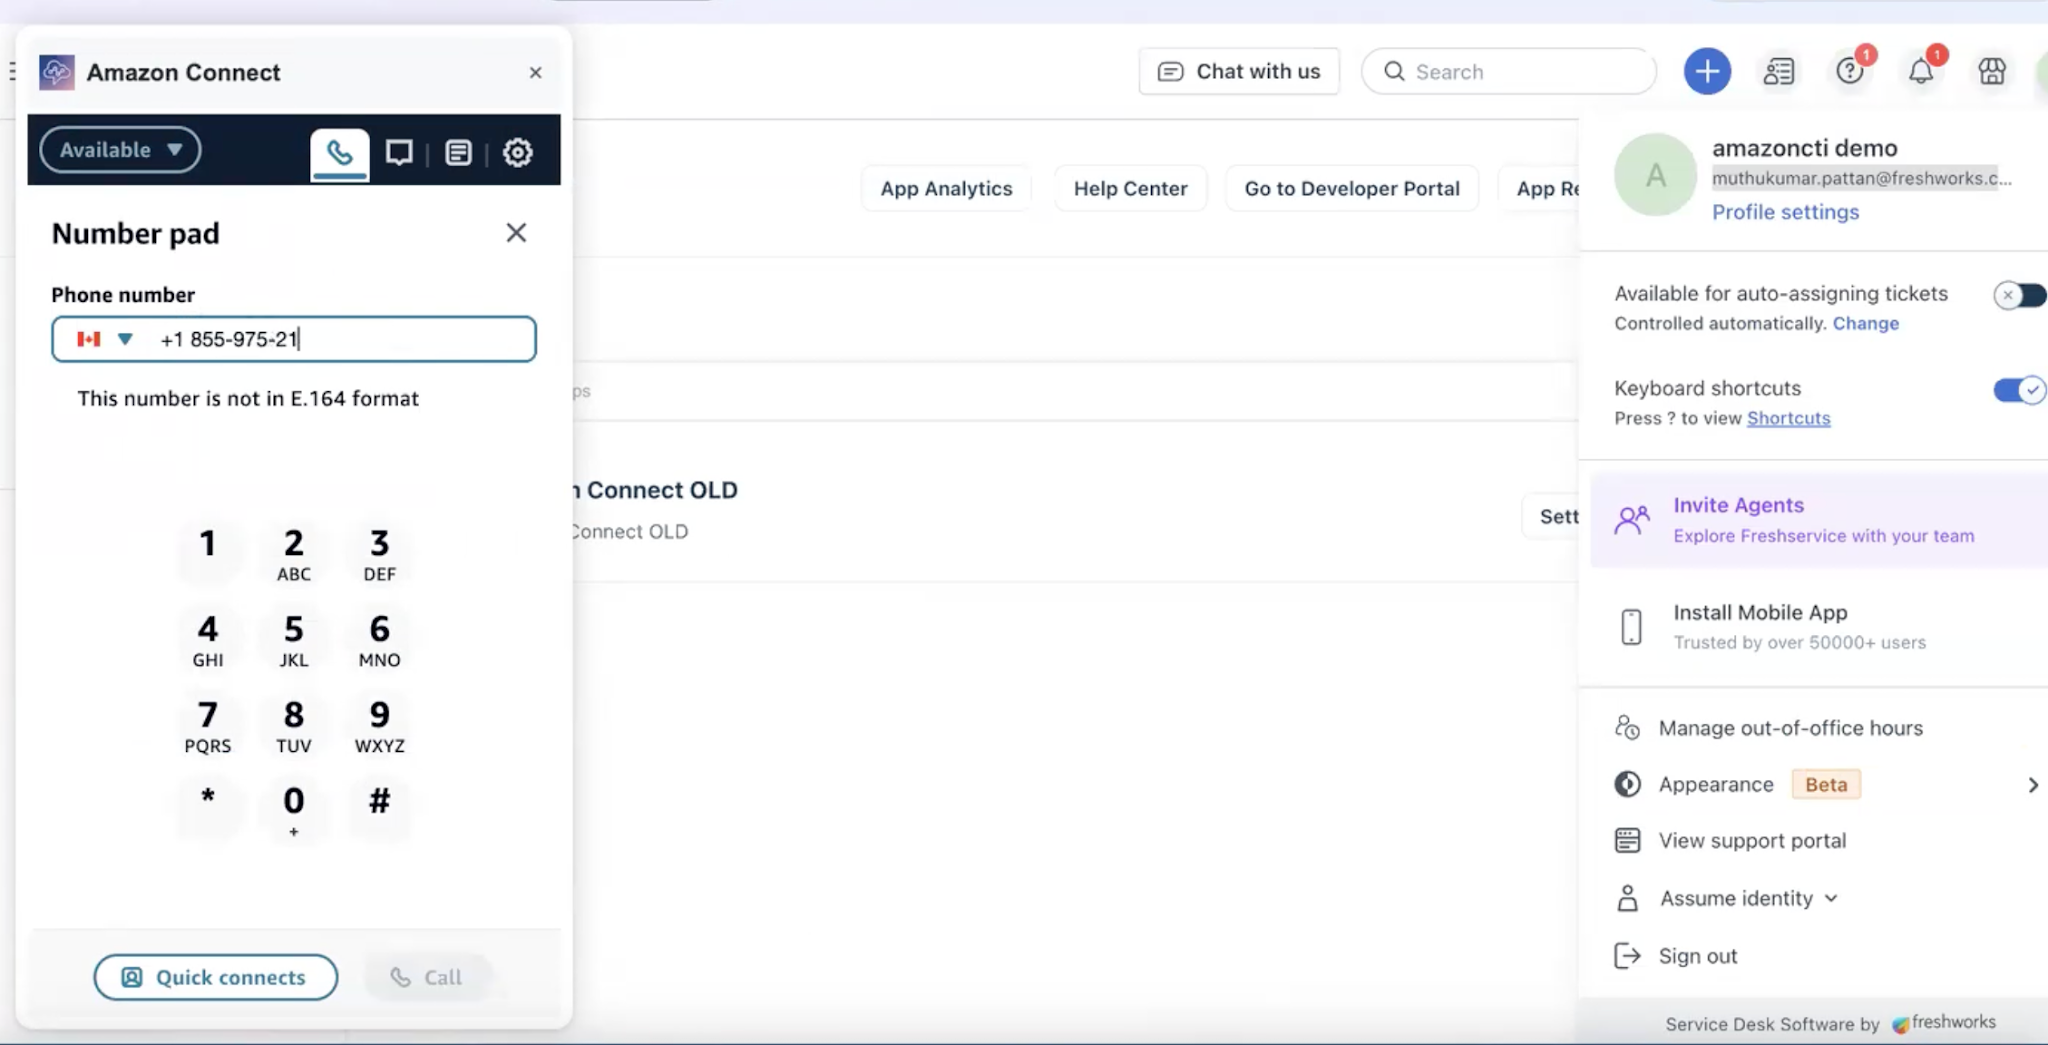 Once the call is connected, call options will appear on the screen.
How to attend an inbound call
Whenever there is an inbound call, the call will flash on the Amazon Connect widget within the dashboard. The agent can click on the call to attend it.
Call capabilities
The following are the call capabilities available for an agent when they are managing a call. An agent can:
How to create a ticket and associate it with a call
1. Once you are on a call, click the plus icon.
2. In the Associate ticket slider, select Create ticket or Link existing ticket.
3. Select the workspace in which the tickets need to be created.
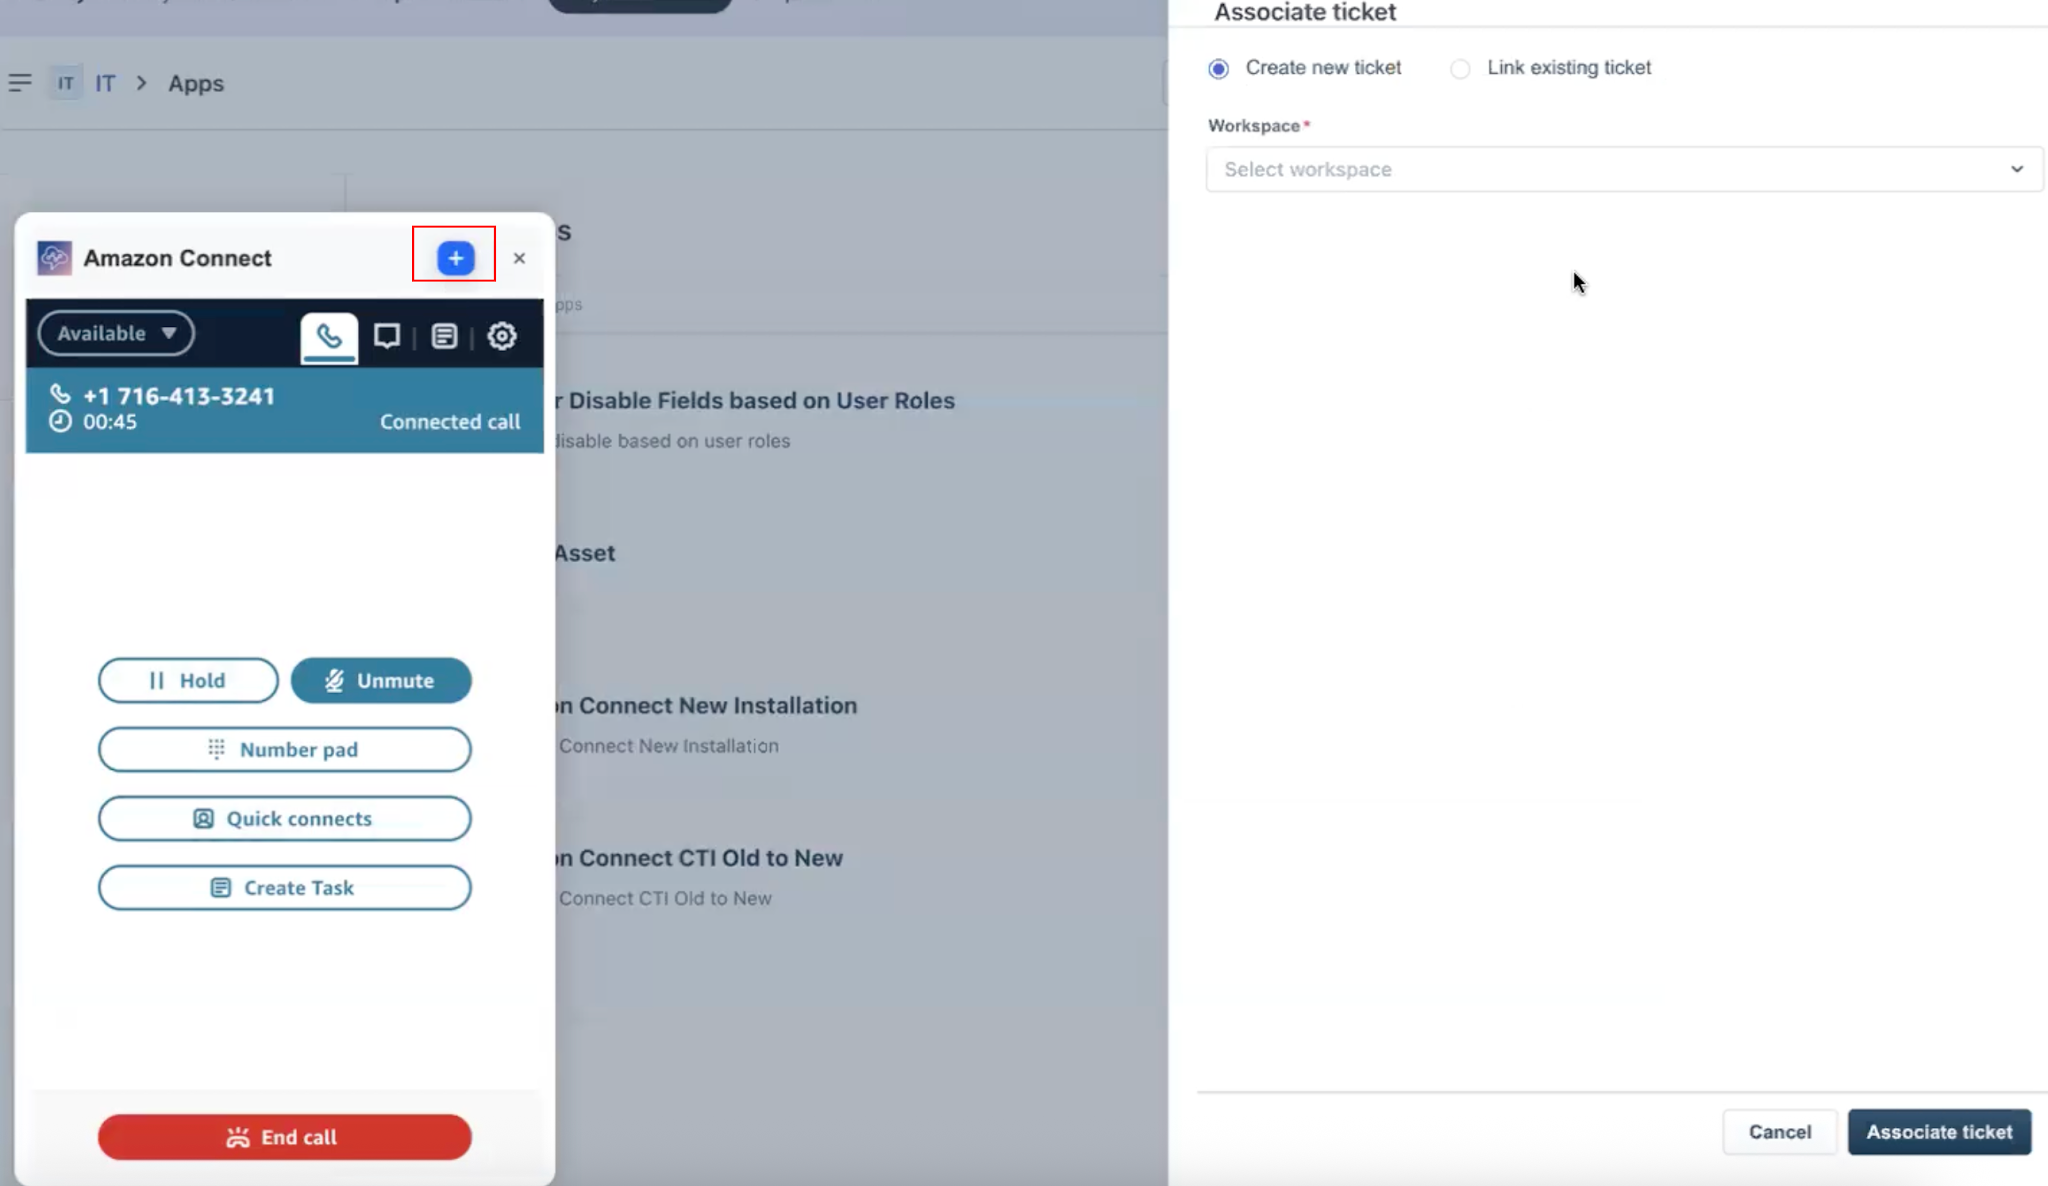
4. If you are creating a ticket, enter all the necessary details to create the ticket.
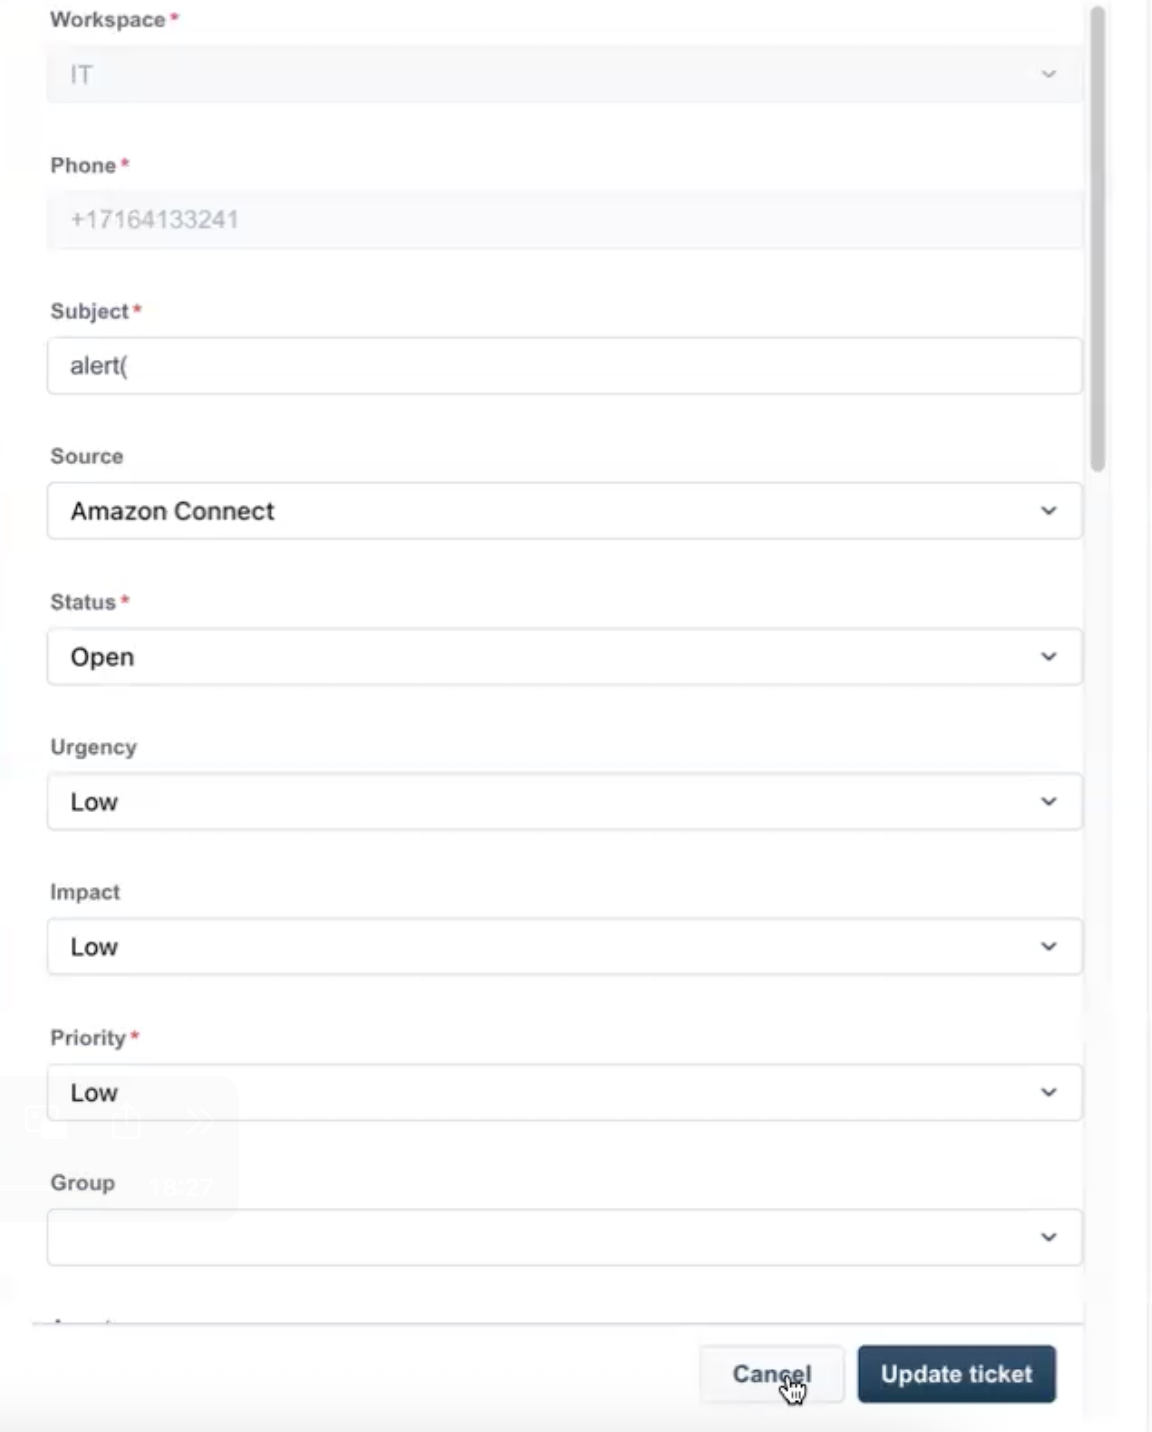
How to update an existing ticket based on the call
1. After ending the call, click Link existing tickets in the Associate ticket slider.
2. Search for the required ticket or select from the list of tickets displayed.
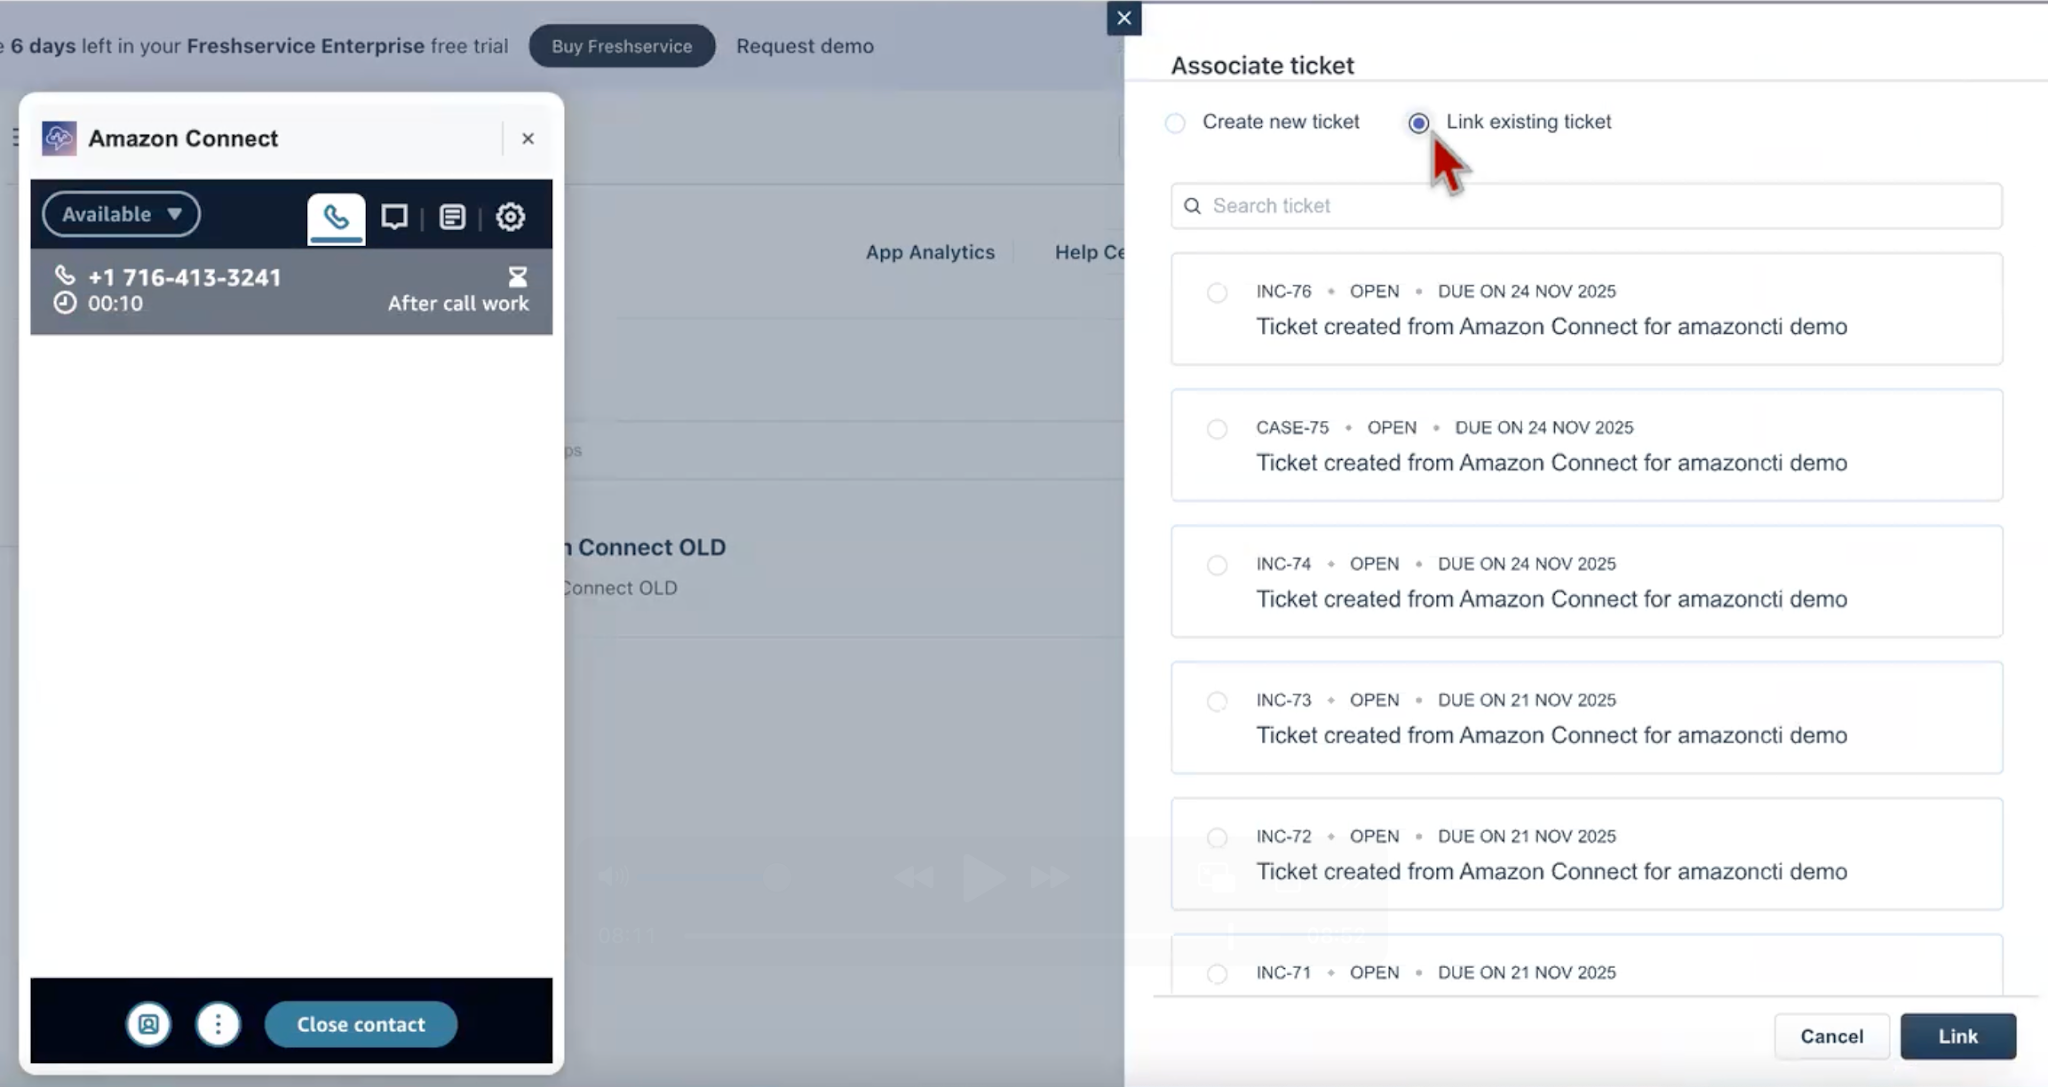
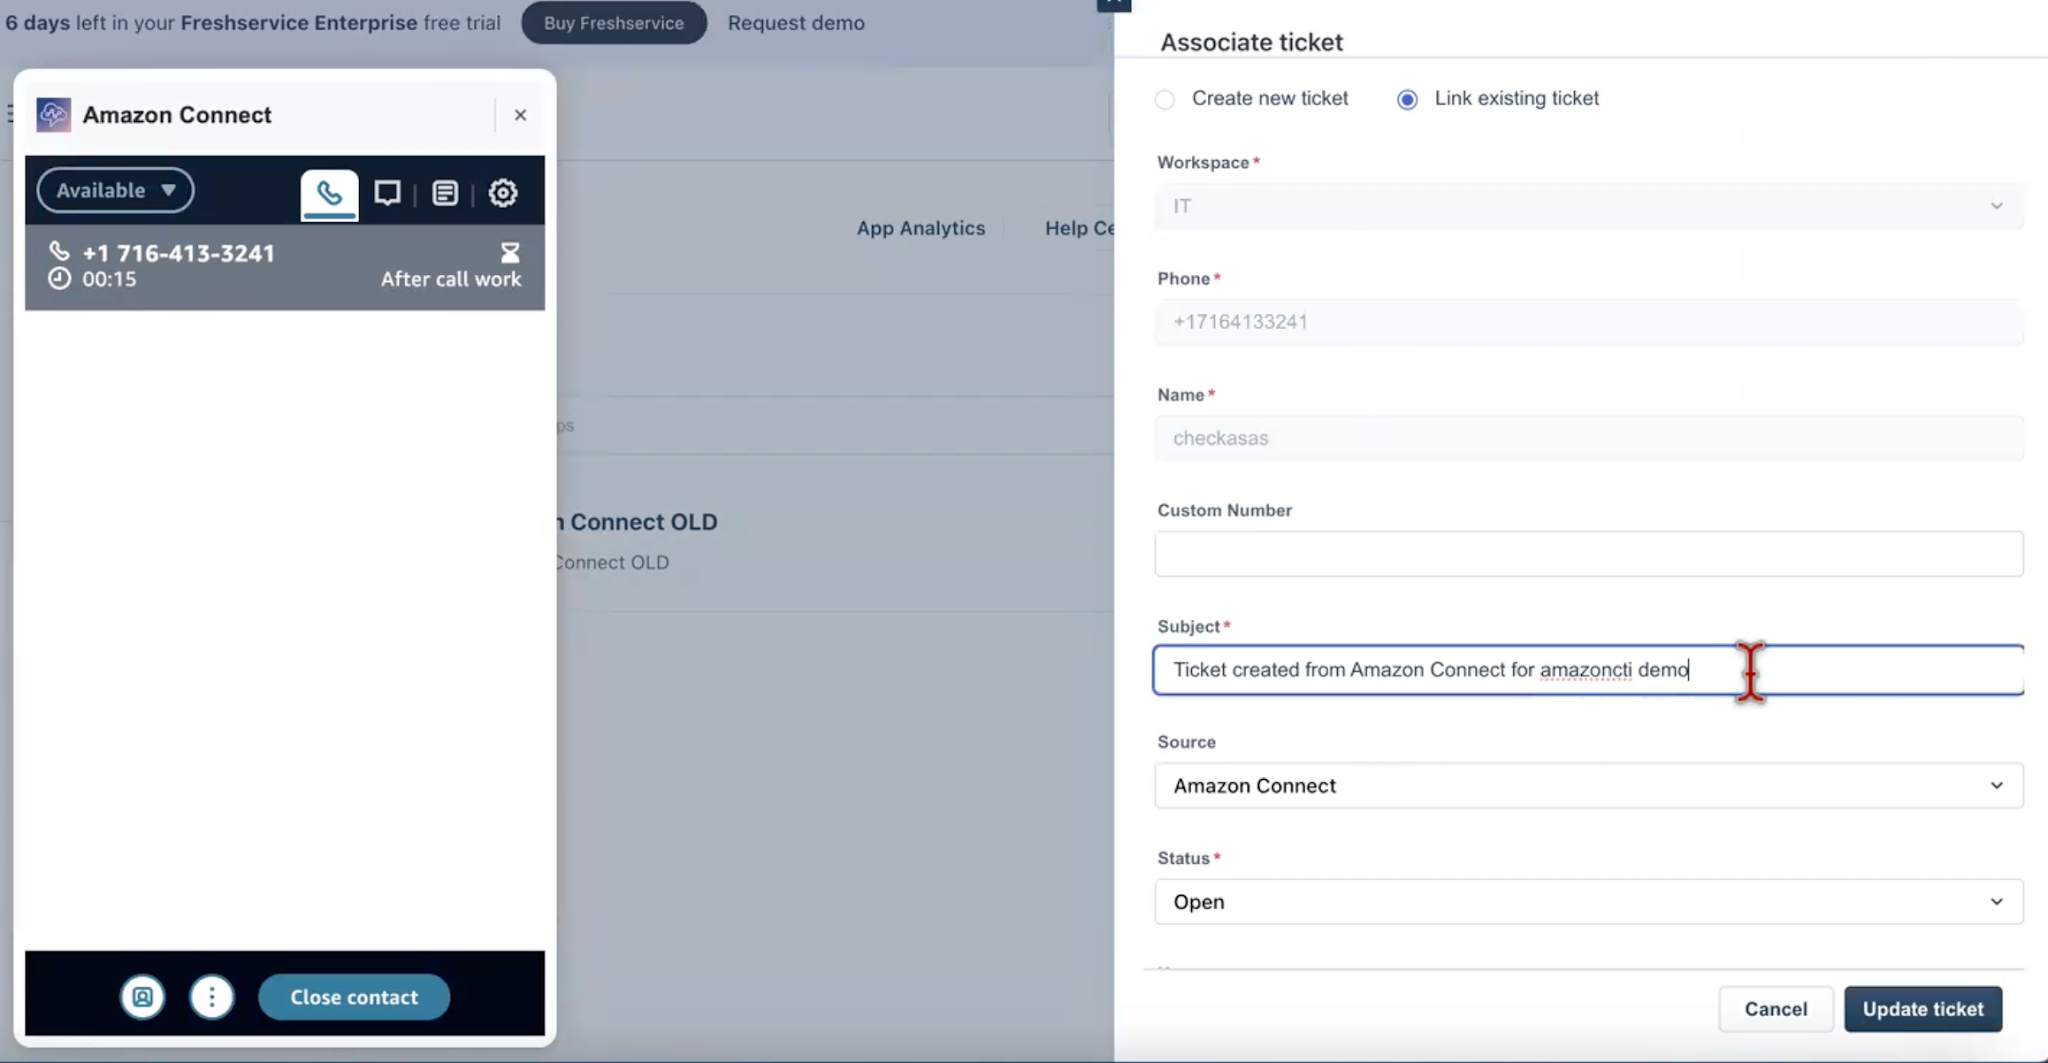
3. You can update the ticket details and click Update ticket to sync the changes.
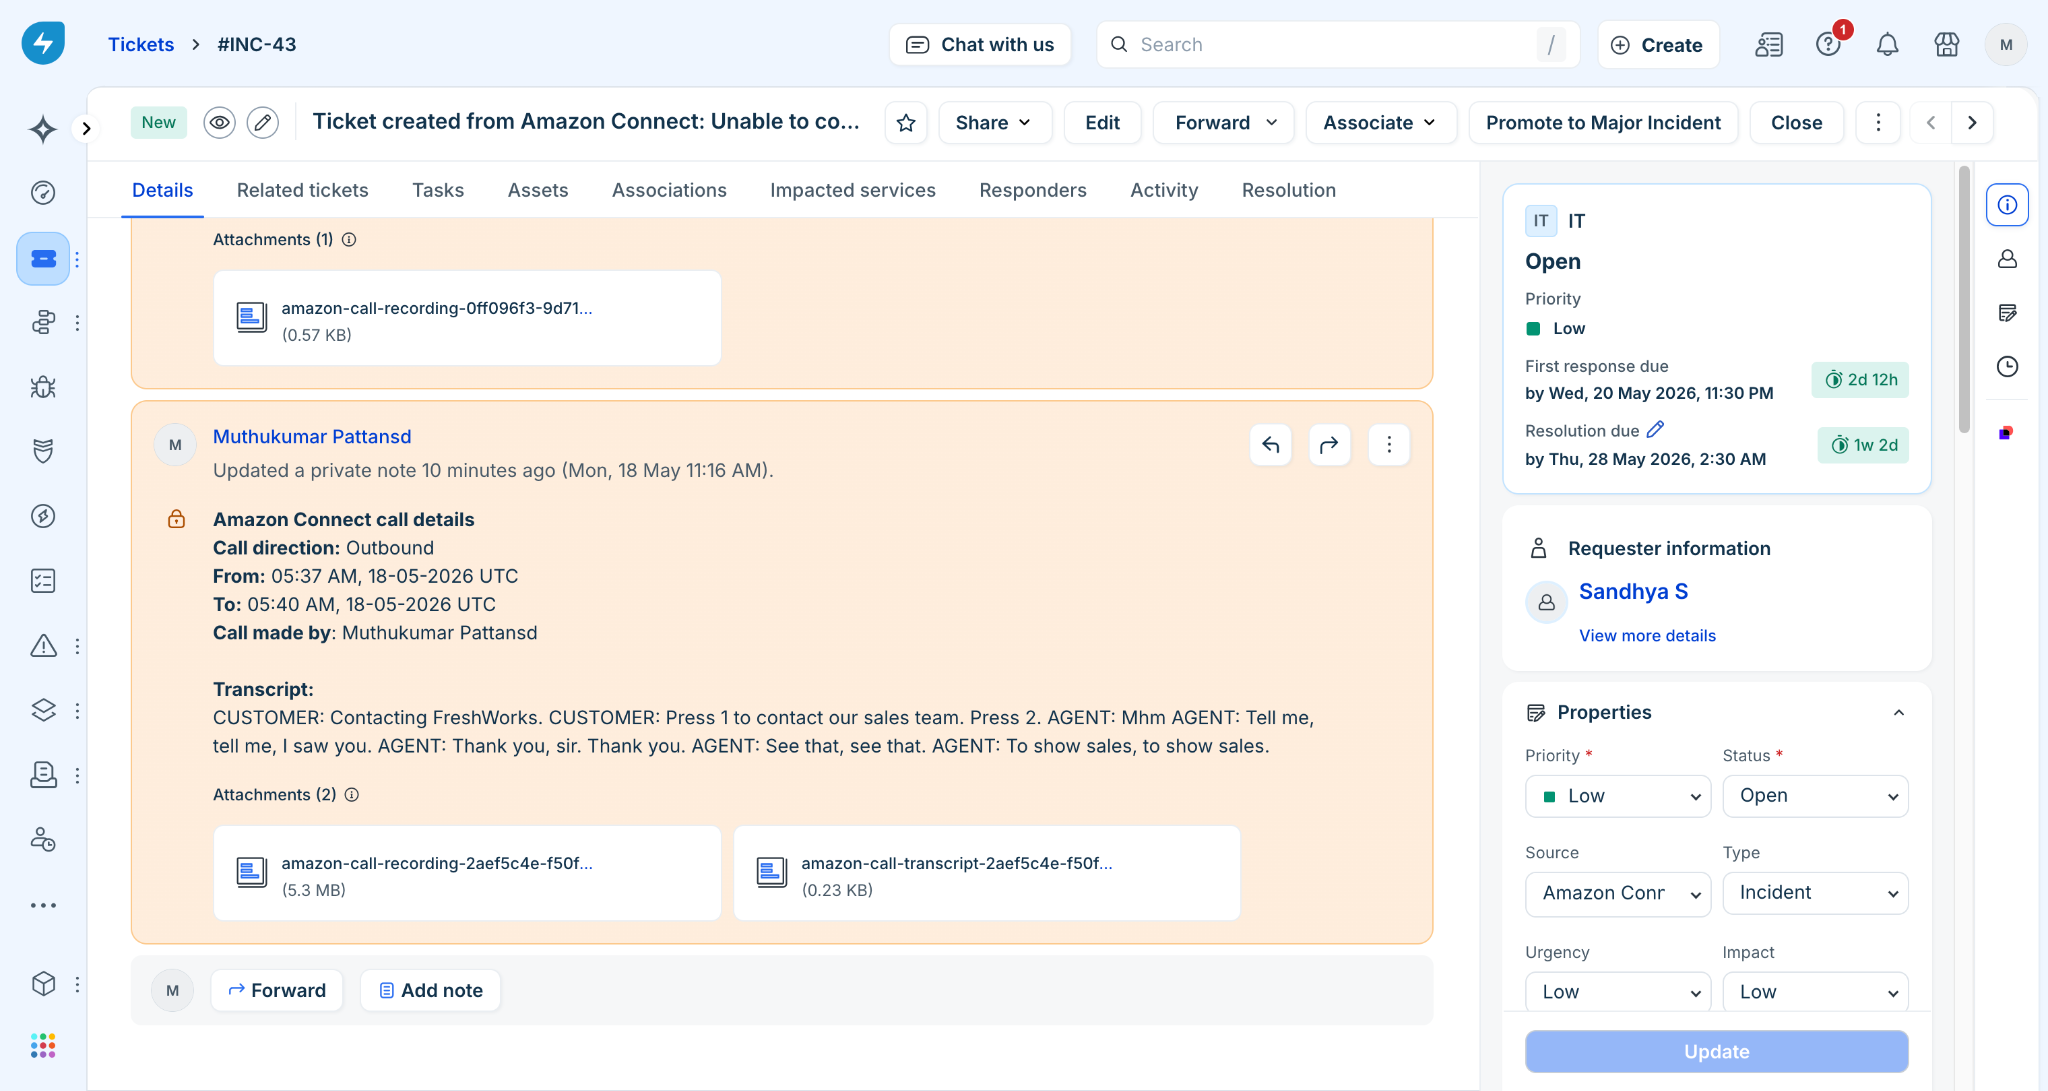
Conversation summary with call recording
Whenever a new ticket is created or an existing ticket is updated after a call, a conversation summary, recording, and transcript is added to the ticket. The conversation summary contains the call direction, from and to details, and the agent's name.