Last updated: 2025-07-03
Freshservice integration with the _Harvest for Freshservice_ app enables IT teams to monitor the time spent by agents on your Freshservice service desk tickets by syncing all the tickets’ time entries data to Harvest.
The Harvest for Freshservice app integration:
This article contains the following topics:
Prerequisites for integration
Ensure you have the following, as part of the prerequisites for integration:
Install and authorize the app
To install and authorize the app:
1. Log in to your Freshservice account.
2. Go to Admin > Automation & Productivity > Extensibility > Apps.
3. Or, click the Marketplace Apps icon on the top-right corner, and select Marketplace Apps.
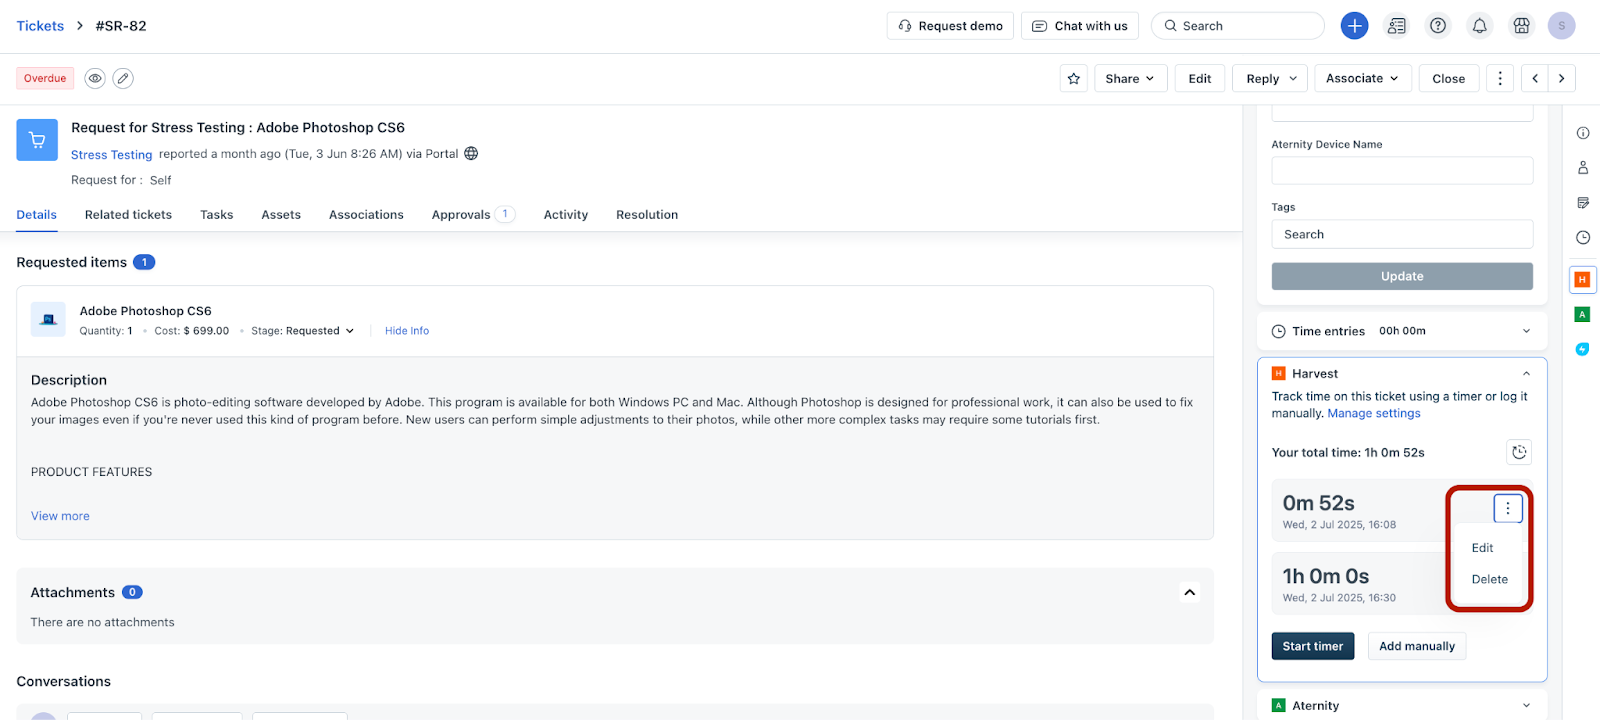
4. Search and select the Harvest for Freshservice app using the Search apps option.
5. Click Install on the installation page. The Harvest for Freshservice app will be installed.
6. (After the app is installed) Go to Tickets > List.
7. Click any ticket Subject to open the ticket Details page.
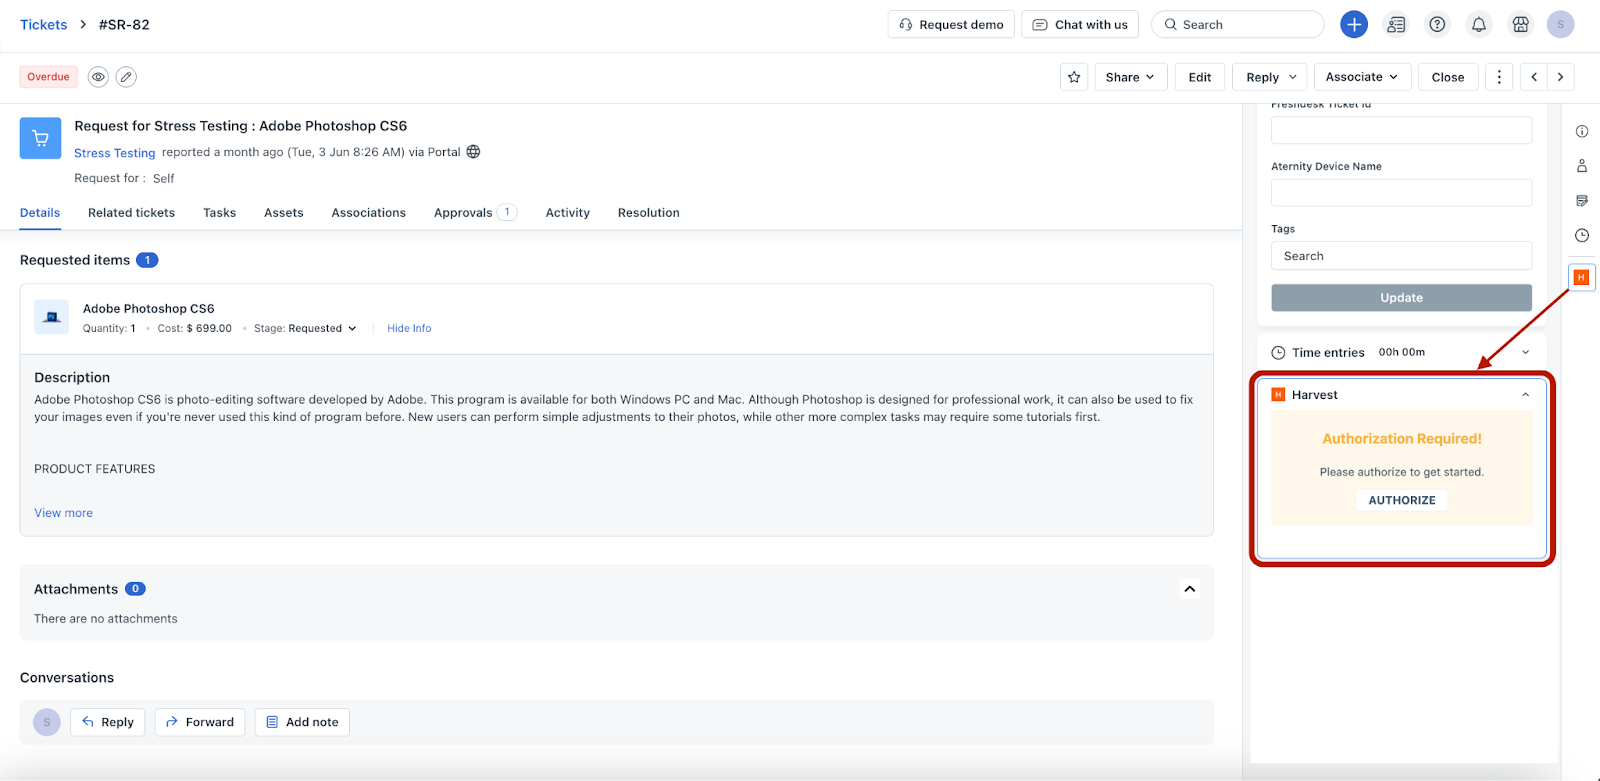
_Note:__The Harvest for Freshservice app is displayed as a widget on the right side of the ticket details page._
8. Click Authorize to authorize the app.
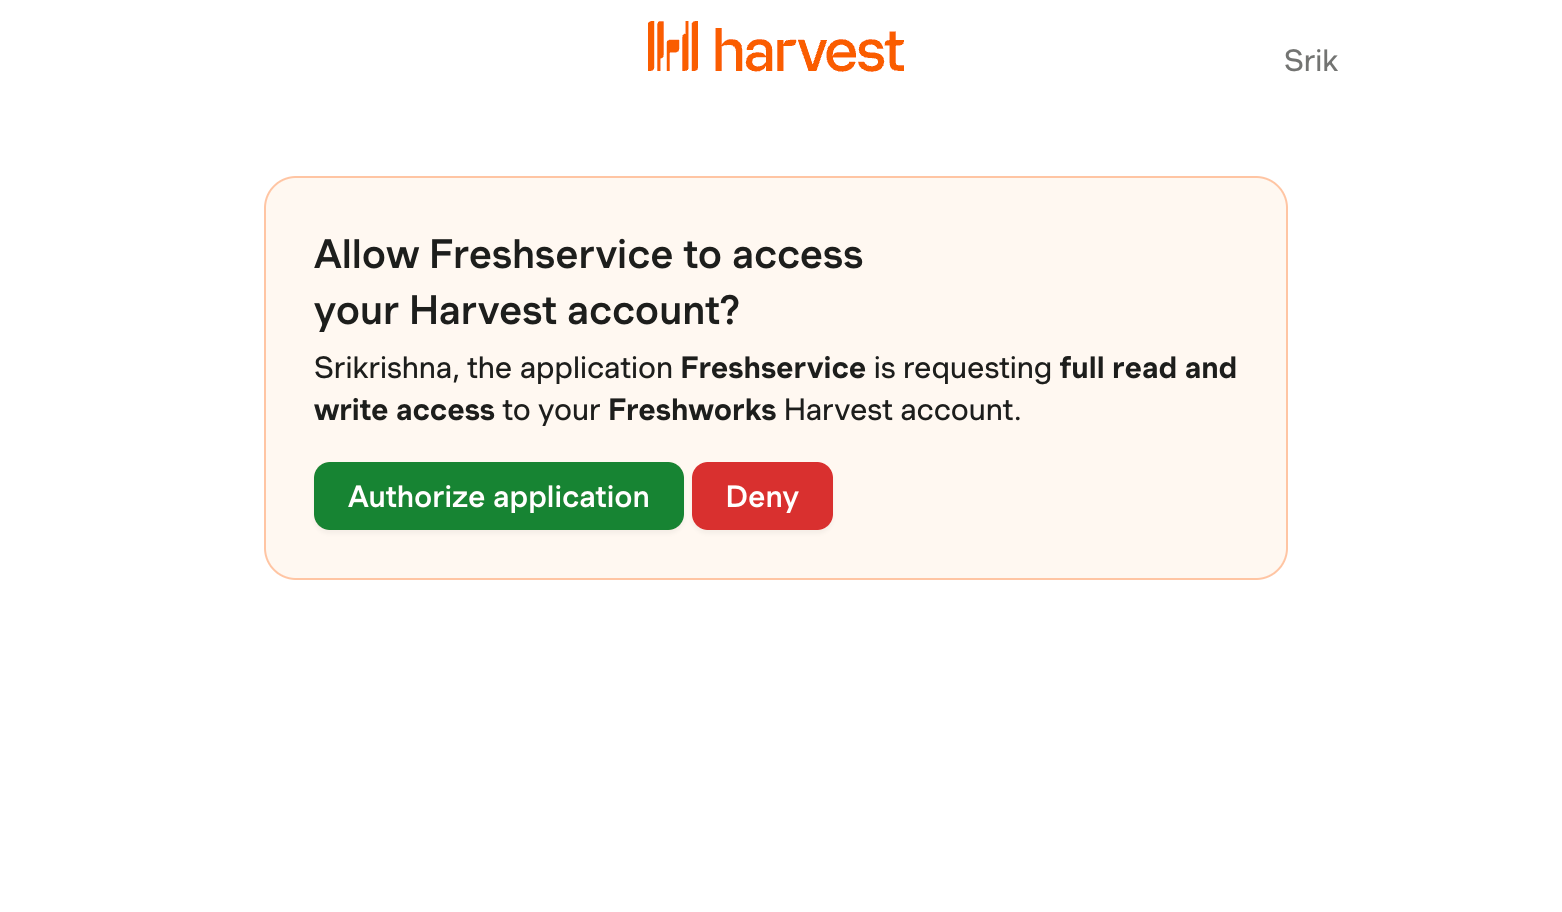
9. In the new tab/window that opens, authenticate your Harvest account credentials.
10. Then, click Authorize application.
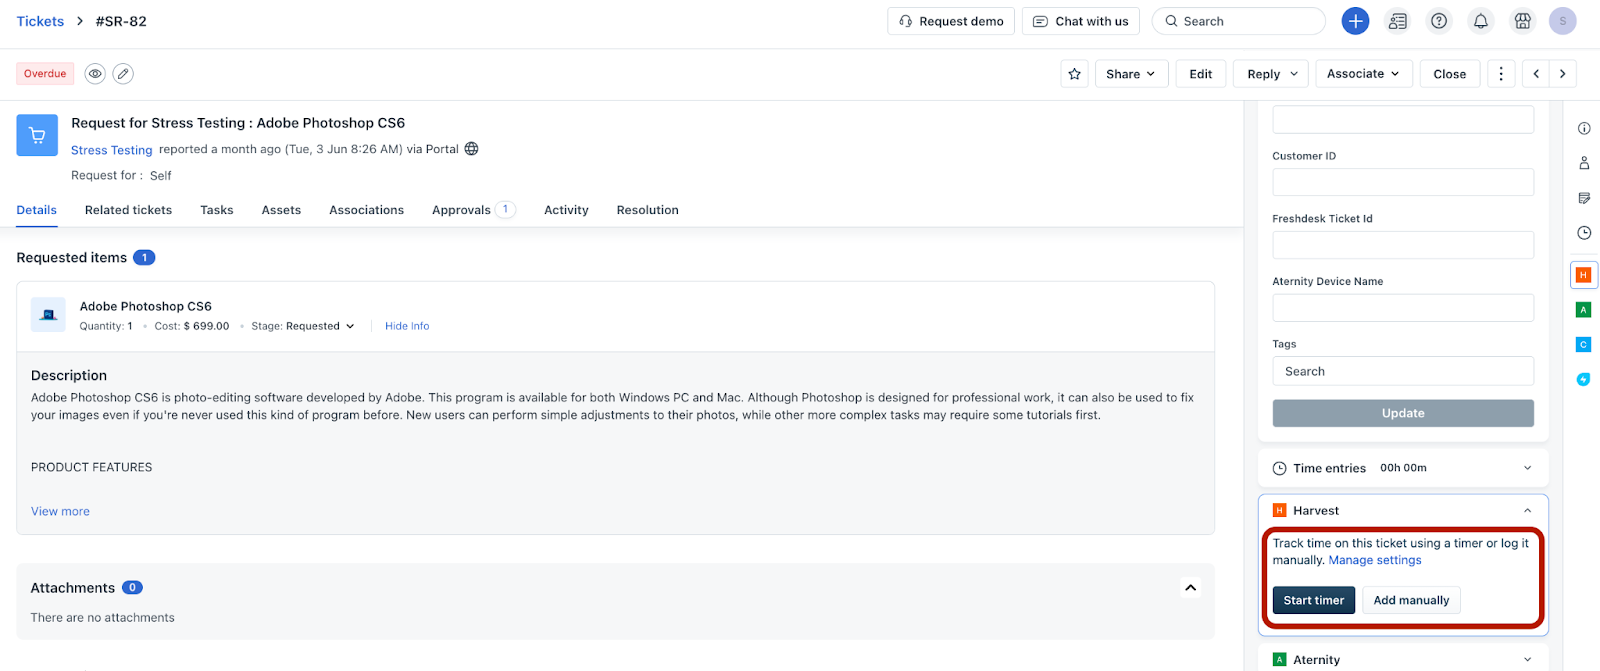
After the application is authorized, the Harvest widget displays various settings for tracking and managing the time spent on tickets.
Track time spent on ticket
To track the time spent on a ticket:
1. Log in to your Freshservice account.
2. Go to Tickets > List.
3. Click any ticket Subject to open the ticket Details page.
4. Click Manage settings in the Harvest widget. The Manage Harvest settings pane opens on the right side of the page.
5. Select a relevant project from the Select project dropdown. Then, click Update.
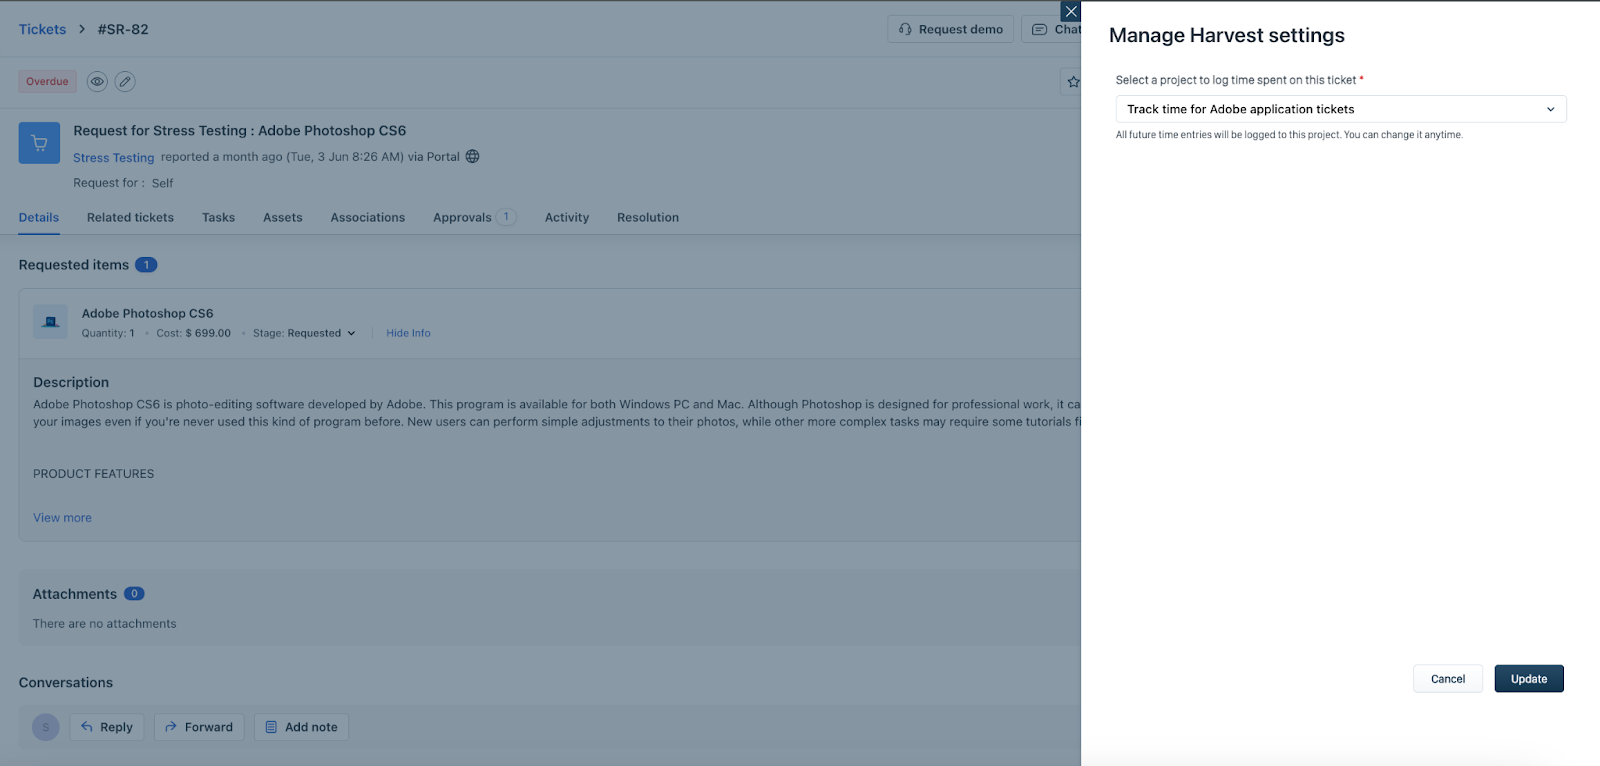
After adding a project, you can use the Start timer or Add manually options to track time.
6. Click Start timer in the Harvest widget to run a timer for tracking the time spent on a ticket. The timer will run until it is paused, stopped, or deleted.
_Note:_
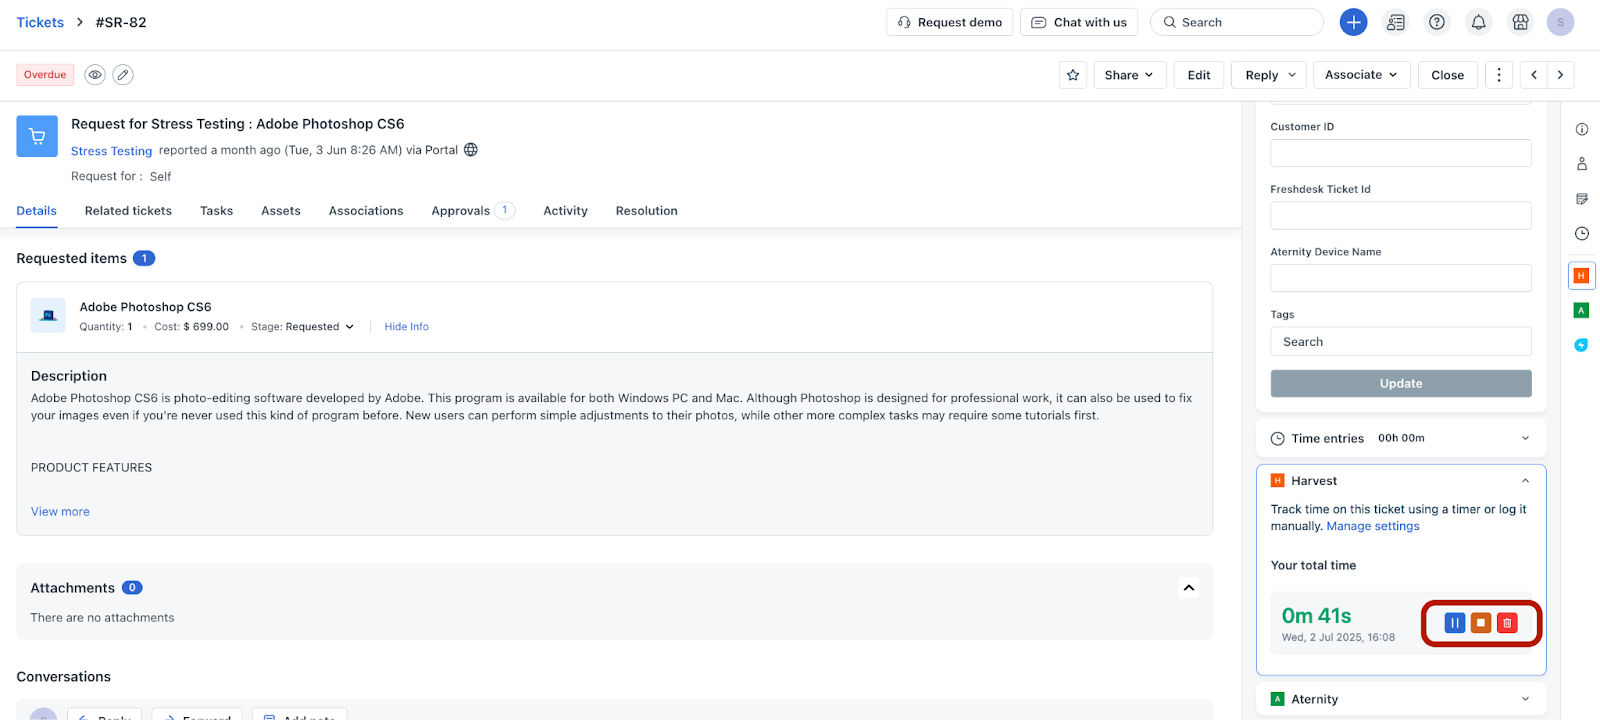
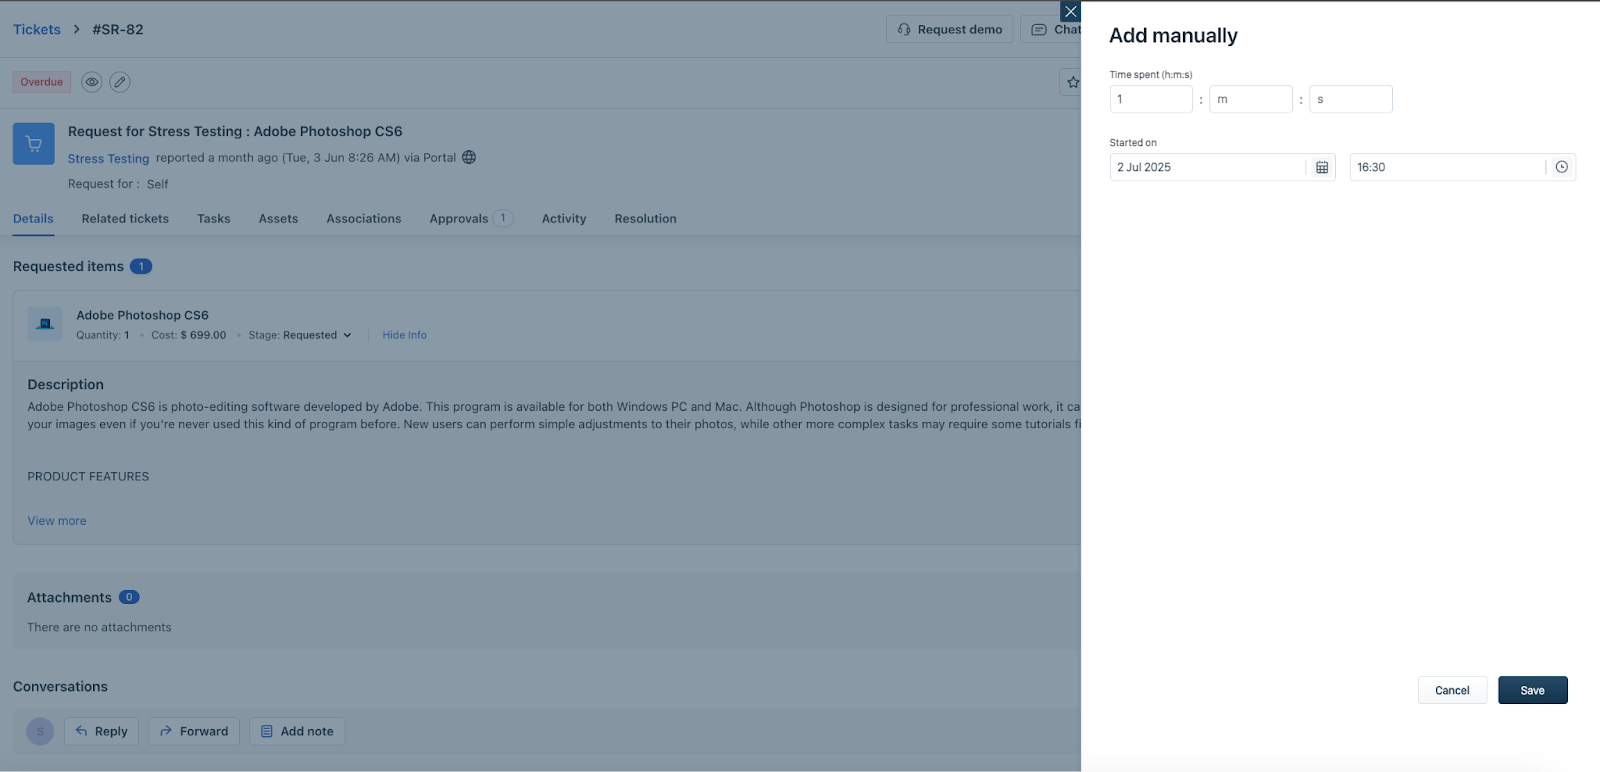
7. Click Add manually in the Harvest widget to manually schedule and track the time spent on a ticket. The Add manually pane opens on the right side of the page.
8. Enter the relevant time values in hour, minute, and second fields (for example, 1 hour).
9. Select a relevant date and time for scheduling the time entry. Then, click Save.
A manual time tracking entry is added to the Harvest widget, which will run for the specified time period on the selected date and time.
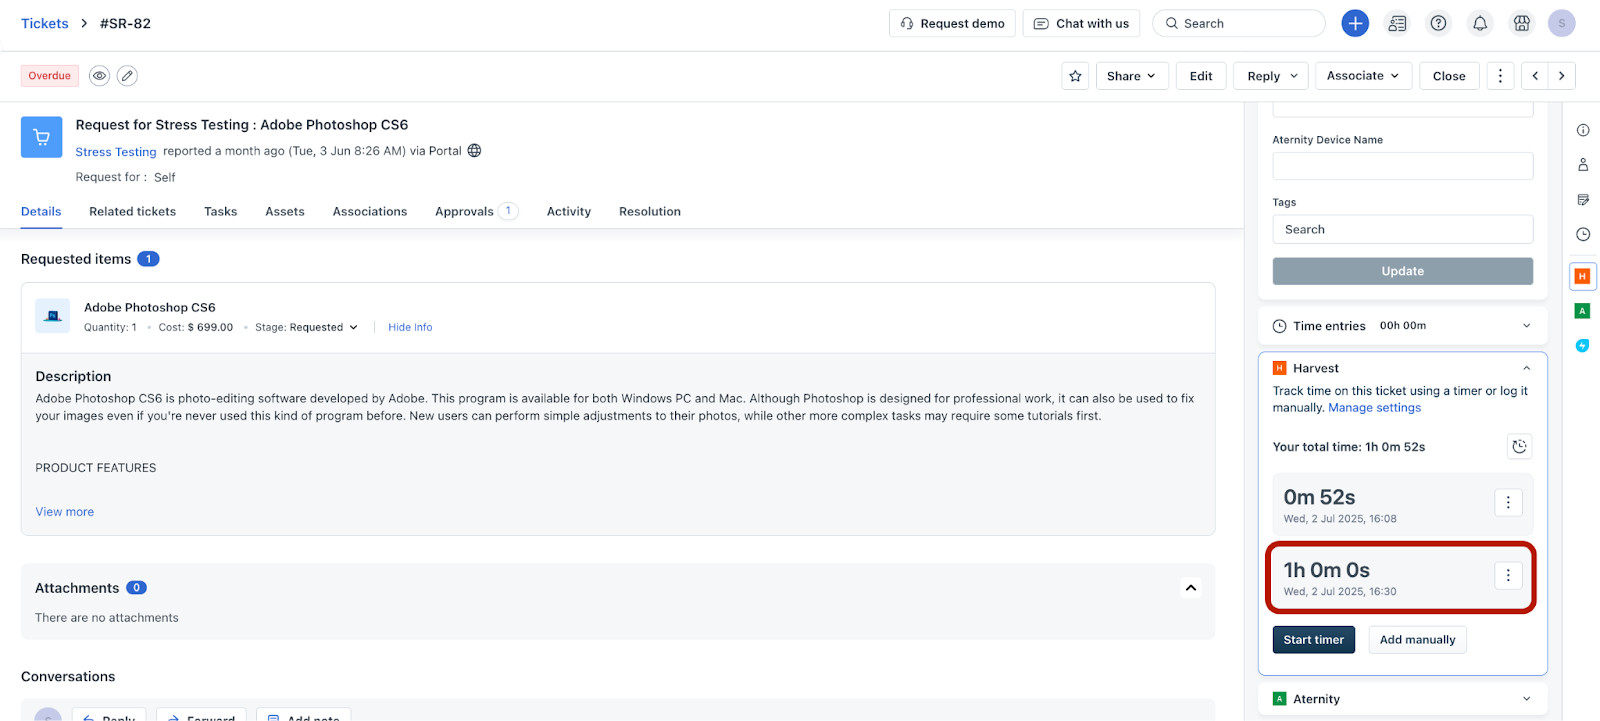
10. If you want to view all time entries, click the time entries icon.
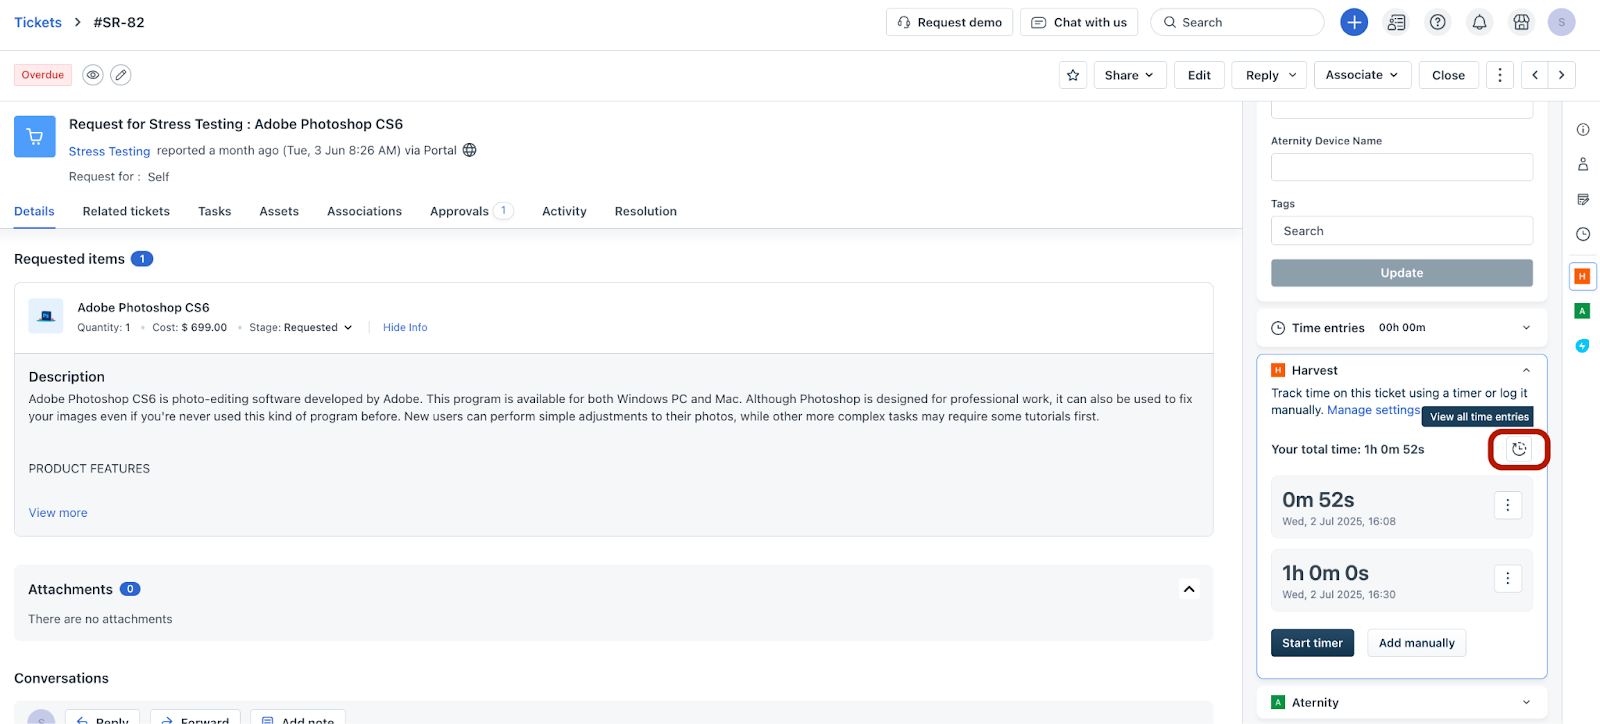
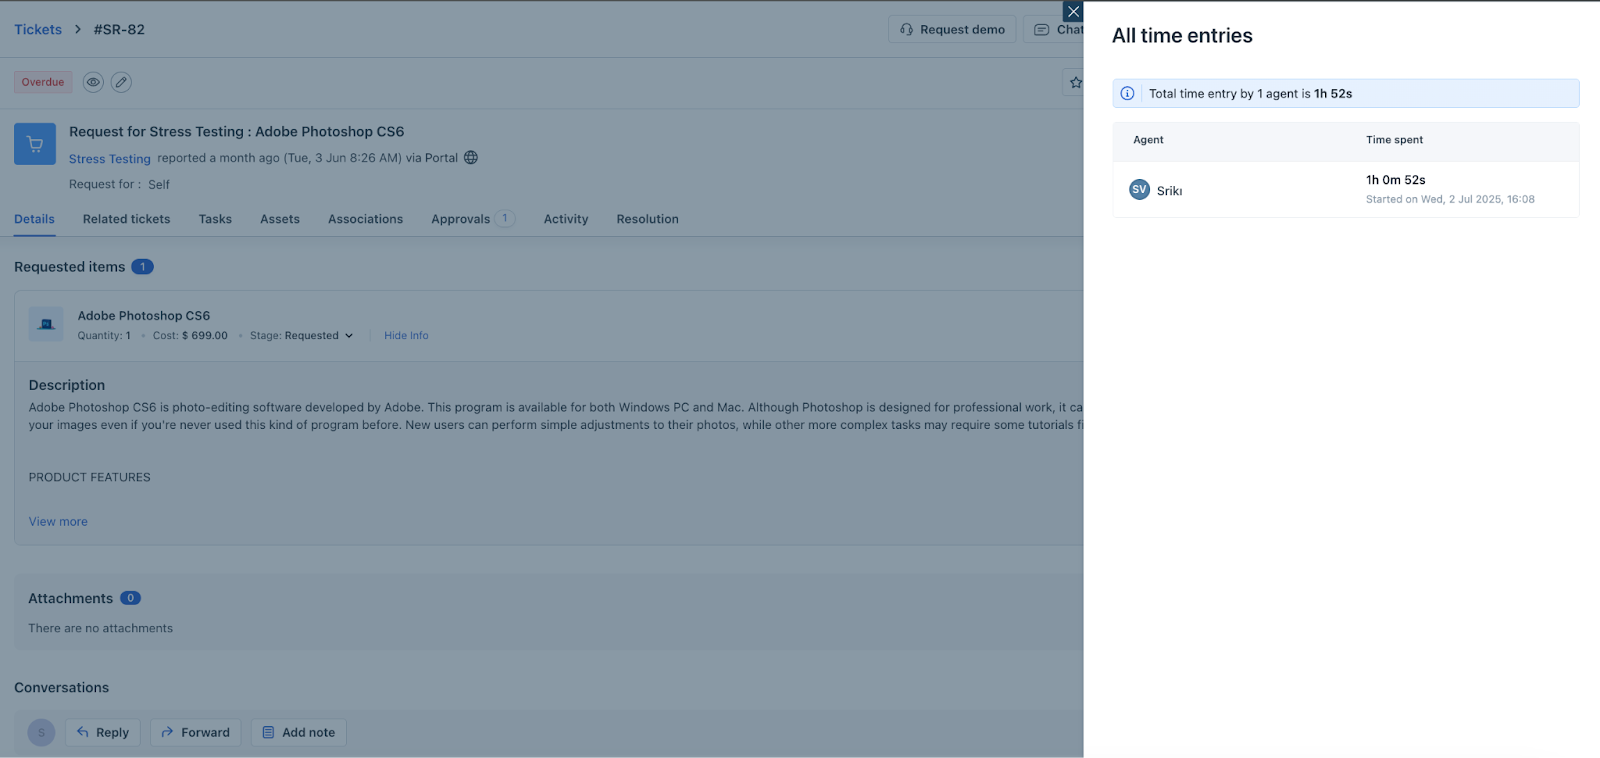
The All time entries pane opens on the right side of the page listing the consolidated time spent by one agent or multiple agents on a ticket.
11. If you want to edit or delete a timer entry or manual time entry, click the ellipsis icon next to the timer entry or manual time entry. Then, select the required action.