Last updated: 2026-01-31
Get started with change management
Change Management in Freshservice provides a structured process to plan, assess, approve, implement, and review changes in your IT environment. It helps your organization introduce updates such as application releases, configuration modifications, infrastructure upgrades, emergency fixes while minimizing service disruption, and operational risk. The following image shows the change form in Freshservice.
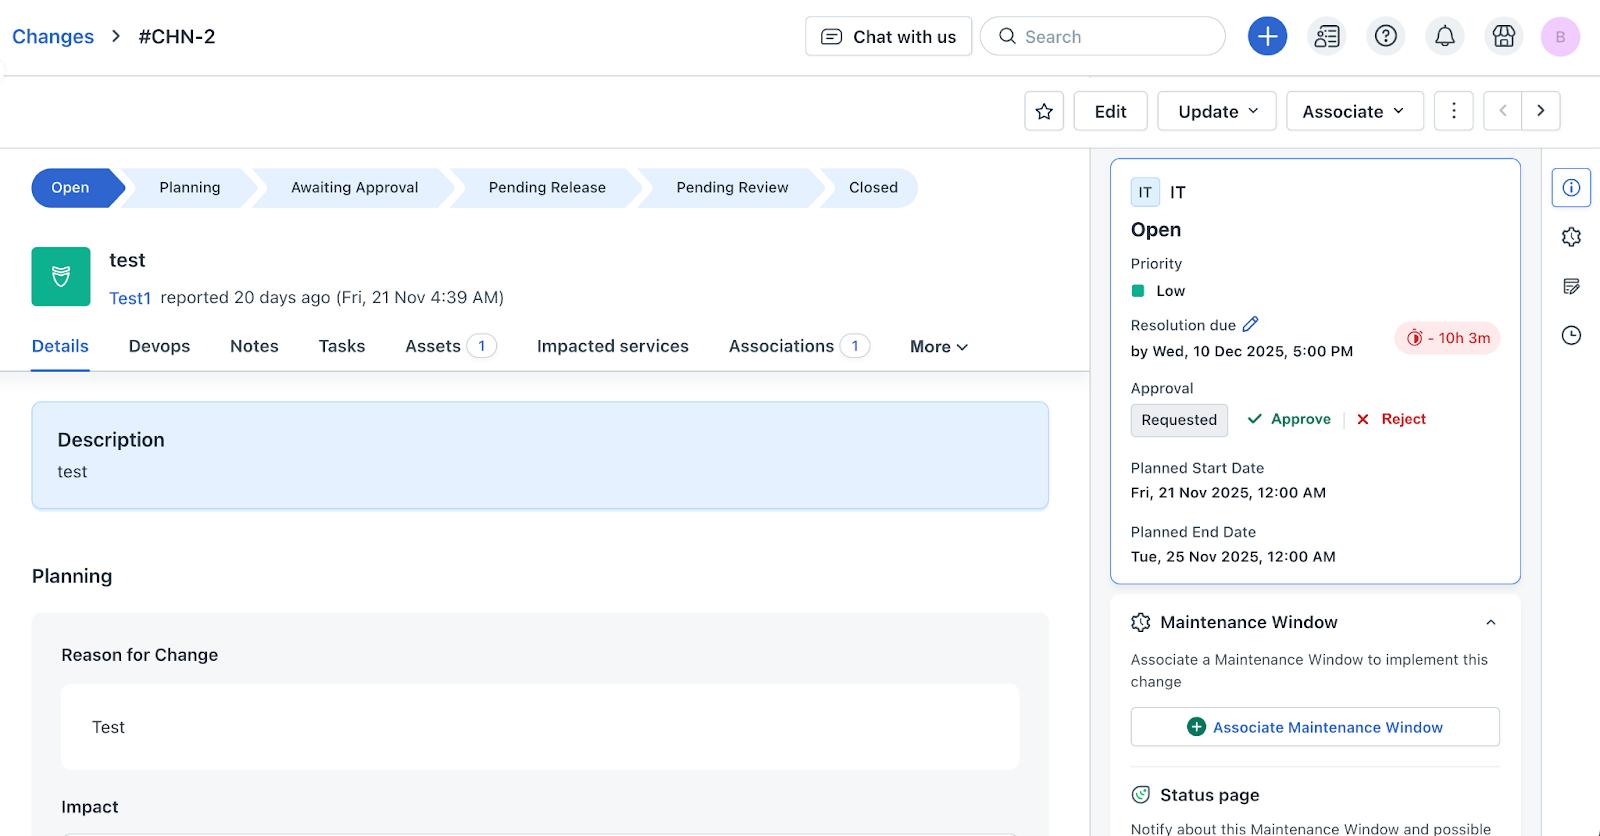
A change form in Freshservice includes the following sections that help teams capture complete context and coordinate implementation activities throughout the change lifecycle:
| Section | Description |
| Details | Captures planning information, rollout and backout plans, scheduling, and release information. |
| DevOps | Displays linked work items, pull requests, and pipeline runs to align development activities with IT change workflows. |
| Notes | Provides a way for teams to add internal notes and collaborate on change-related updates. |
| Tasks | Used to create and assign tasks required to implement the change. |
| Assets | Used to attach relevant assets that might be impacted or modified. |
| Impacted Services | Shows the business or IT services that might be affected by the change. |
| Associations | Links related tickets, incidents, problems, projects, or tasks that triggered or influenced the change. |
| Approvals | Provides an interface to review, approve, or reject changes, including CAB (Change Advisory Board) evaluations. |
| Activity | Shows a chronological view of actions and updates for traceability. |
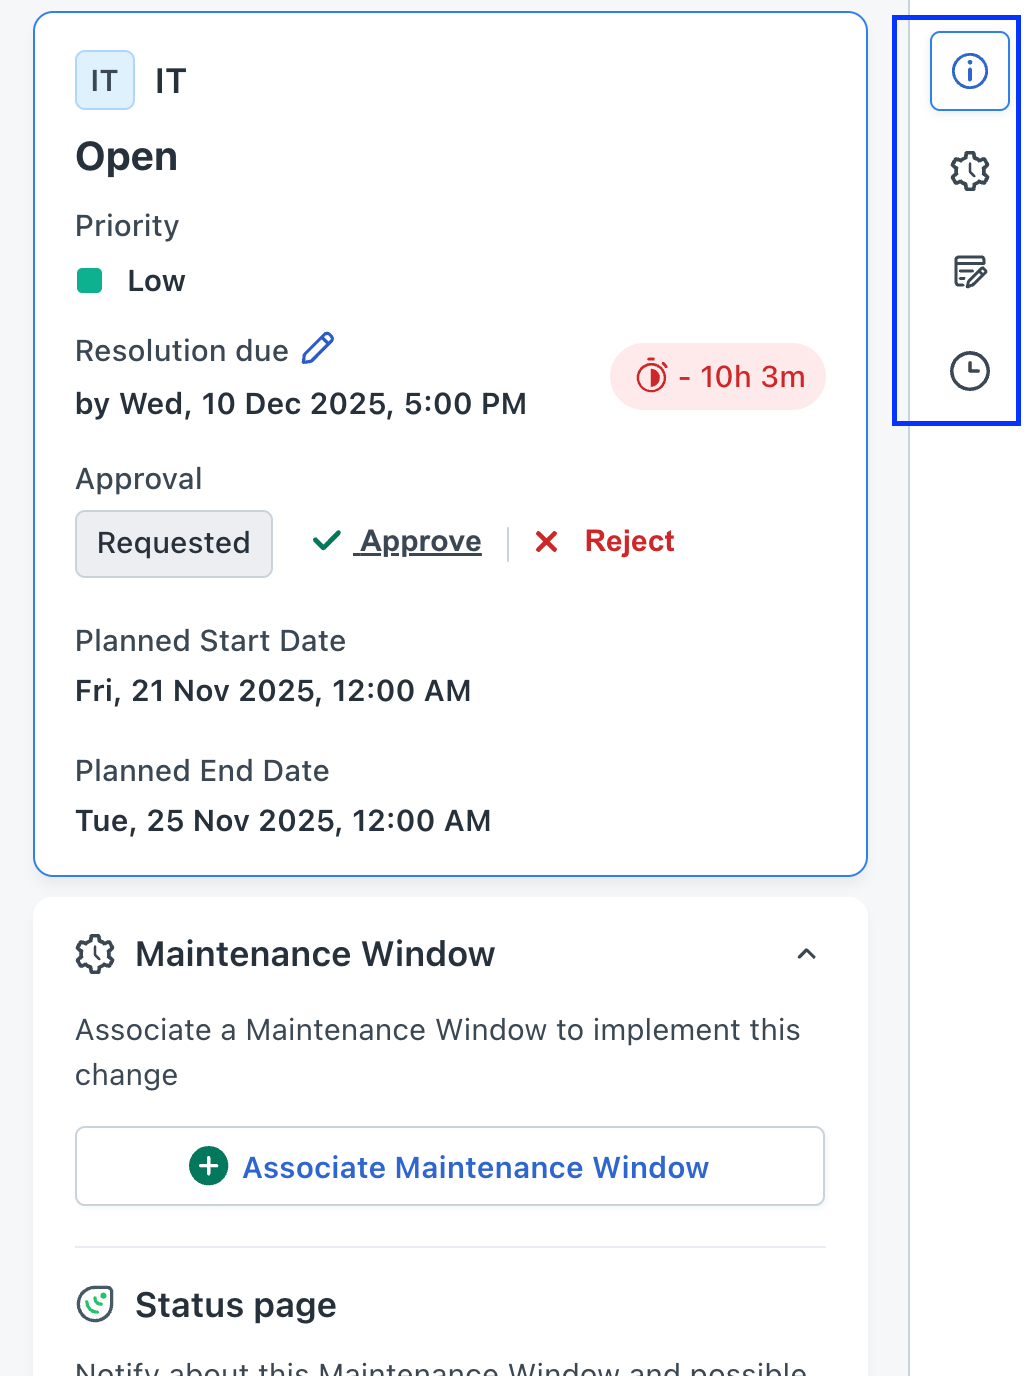
There are four key tools in the change form to help you manage and monitor the change more efficiently by showing important actions and insights in one place.
| Summary | Provides quick insights and key information about the change. |
| Maintenance Window | You can associate a maintenance window and publish it to the status page to notify users about planned downtime. |
| Properties | You can update classification fields such as Status, Type, Priority, Impact, Risk, Group, Agent, Department, Category, and Planned effort. |
| Time Entries | You can log and track the time spent on change-related activities. |
Create a change request in Freshservice
Create a new change request in Freshservice to plan, track, and manage modifications to your IT environment.
Prerequisites
You can create a change and then associate a ticket to it or create a change from a ticket that is initiating this change.
Follow these steps to create a Change in Freshservice. You can add planning details, associate DevOps items, link assets, and specify impacted services after creating the Change record.
Procedure
1. Log in to your Freshservice account.
2. On the top navigation bar, select Create icon, and then select Change.
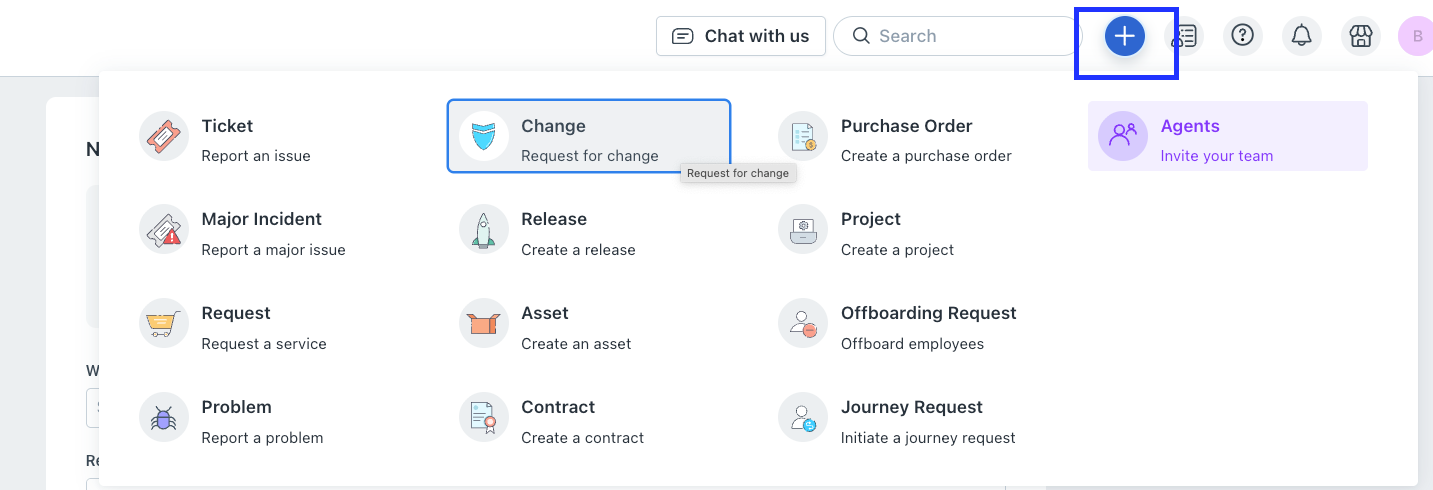
The New change form is displayed.
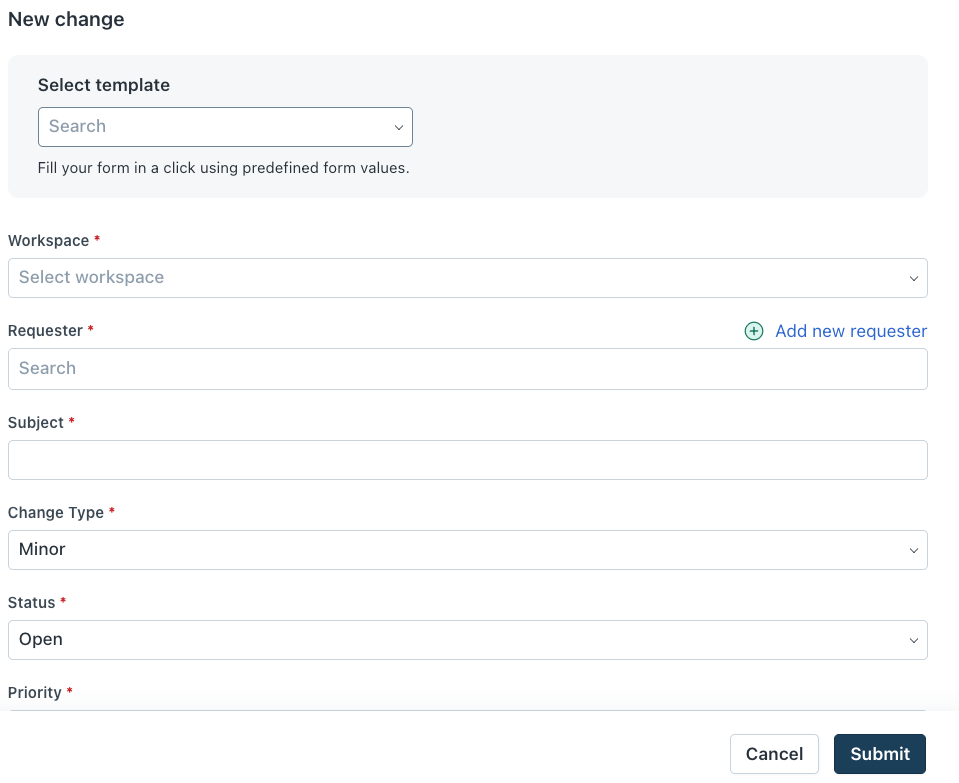
3. From the Select Template list, select an existing template.
If you don’t have a template, you can create a new template by clicking Create new template. To know details about template, see Creating Ticket and Change Template
4. Fill all the required fields such as Workspace, Requester, Subject, Change Type, Status, Priority, Impact, Risk, Group, Agent, Description, Planned Start Date, Planned End Date, Department, Category, Planned Effort, and Maintenance Window.
5. Click \+ Associate assets and select the assets that will be part of this change.
6. Click Attach files to upload any related documents under 40 MB.
7. Under Planning, update the required fields such as Reason for Change, Impact, Rollout Plan, and Backout Plan
8. Click Submit.
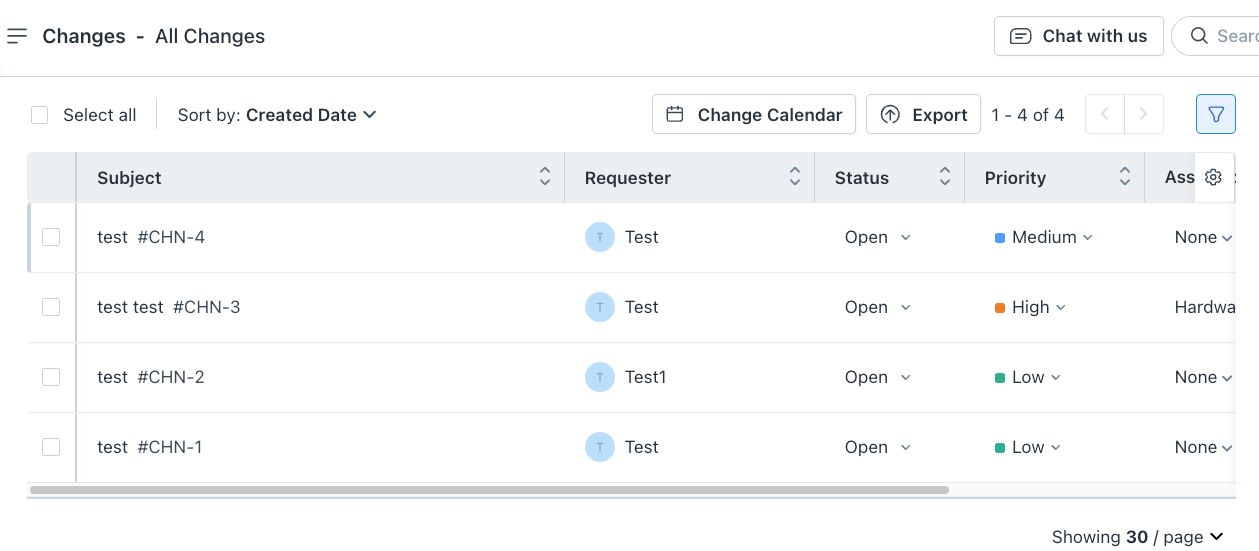
Your change ticket is created. You can see the ticket on the Changes page. You can also apply various basic and advanced filters to find a change ticket.